
Related Manuals for Mingda MD-400D


Summary of Contents for Mingda MD-400D
- Page 1 User Manual 【MD-400D 3D Printer】 *Please read this guide carefully before using this printer Shenzhen MINGDA TECHNOLOGY CO.,LTD V1.1...
-
Page 2: Table Of Contents
6 General Maintenance ...…..…...…..…...…..…...…..…...…..…...…..…...…..… Daily Preventive Maintenance ...…...…...…...…...…...…...…...…...…...…...…...…...…...…...…...…...…...…...…..…..….. 500 Hours Maintenance …...…...…...…...…...…...……...…...…...…...…...…...……...…...…...…...…...…...……...…..…..….. Replace the hot end ..…..…...…...…...…...…...…...............…....…..…...…... 7 Trouble Removal …...…...…...…...…...…...……...…...…...…...…...…...……...…...…..…...…....8 Support …...…...…...…...…...…...……...…...…...…...…...…...……...…...…...…...…...…..……...…...…... Customer Support …...…...…...…...…...…...……...…...…...…...…...…...……...…...…...…...…...…...……...…...…...…..…..Working Computer Specifications …...…...…...…...…...…...……...…...…...…...…...…...……...…...…..…...…...…...…..MINGDA Limited Warranty Statement …...…...…...…...…...…...……...…...…...…...…...…...……...…..…...…...…...…..9 Quality Assurance ..…..……....……....……....……......…... -
Page 3: Notice
Notice This machine is suitable for printing filaments within degrees. 1-10 Recommend High Temperature 11-14 Recommend Normal Filament Print Temperature Print Platform Temperature PET-CF 280-320°C 60-80°C PET-GF PA12-CF HtPA-GF 300-320°C 70-90°C HtPA-CF 280-320°C 70-80°C HtPA 250-270°C 90-110°C ABS-GF25 250-270°C 90-110°C 260-280°C 60-80°C S-Mulit... -
Page 4: Brief Introduction
1. Brief Introduction MD Series Industrial 3D Printers adhere to the design concept of the simple to the extreme. It can print product quickly and easily, even if you've never used a 3D Printer. The printer prints the model with PLA, so the products will be strong and durable. You can make drilling, tapping, grinding and painting on the PLA models. -
Page 5: Overview
Continue button on the screen to continue printing. (Note: This machine does not support the detection of transparent materials.) Below we will take MD-400D as an example to introduce the function and use of the printer:... -
Page 6: View Of 3D Printer
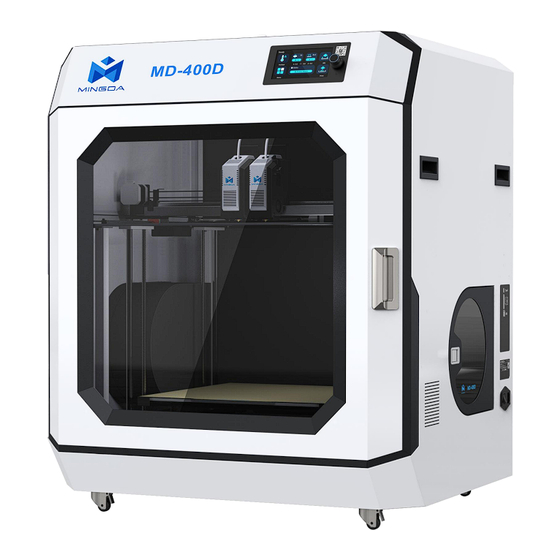
View of 3D Printer Touching screen Screen button Printing head Filament holder Platform Type-C SD card port USB disk port Socket In this 3D printer, the print head moves in the X-axis (left and right) and Y-axis (forward and backward) directions on the panel, and the entire panel moves in the Z-axis (up and down) direction. -
Page 7: Tool Box Accessories
Tool Box Accessories Diagonal pliers Power cable Sleeve SD card Card Reader Allen wrench Note: The picture is for reference only. When the real thing is inconsistent with the picture, the actual object shall prevail. -
Page 8: Installation
3. Installation In a good ventilation and dry environment Insert a power socket Please press and hold for 3 seconds to turn on the printer Click the shutdown button of the screen “MENU” interface to shut down... -
Page 9: Introduction To Machine Operation Page
Introduction to machine operation page Ready Primary interface Explain Preheat Pre-set nozzle & hotbed’s temperature Nozzle Pre-set nozzle’s temperature Pre-set hotbed’s temperature Leveling Autoleveling (No other operations shall be done during auto leveling) Menu Printer’s printing value adjustment Print Start print... -
Page 10: Duplicatio Mode / Mirrored Mode / Autopark Mode
Duplicatio Mode / Mirrored Mode / Autopark Mode Reminder: When starting the Duplicatio / Mirrored printing mode, the two extruders are printed at the same time at the left and right ends of the hot bed. Therefore, when slice, we need to put the model at the left end of the hot bed. - Page 11 Open the mirrored mode: select "Menu" , "Set nozzle" , "Mirrored " , at this time the extruder will have a return movement, and then return to the previous step, click "Move" , "X-" , The extruder 2 will move to the right to the lower right corner of the hot bed.
-
Page 12: Machine Calibration
4.Machine calibration 1. Prepare an A4 paper and place it between the left print head and the platform. Click the reset button to initiate the reset process. Once the reset is complete, click on the Z-axis movement option to raise the platform to its highest position. - Page 13 3. Adjust the Z-offset by ZAlign. First click Menu-Home-Home and wait for the machine to reset. Then take a piece of A4 paper and put it between the nozzle and the hot bed, and click Menu-Set Nozzle-Z Align on the screen. The default calibration is T0 extruder (left extruder) extruder heat bed starts to move until it stops. Move the A4 paper by hand, and adjust the Down and Up keys on the screen until the nozzle can scrape the A4 paper.
-
Page 14: Install The Filament (Take Pla Filament As An Example )
5.Calibrate the Z-axis offset for the left and right print heads. Click the Z-axis calibration button, and the left and right print heads will automatically move to the right front switch to touch the calibration limit switch one by one. Once completed, the machine will automatically save the data. - Page 15 3. Long press the screen button to turn on, first click the reset button , click the heating button, set the temperature of the left and right head to 200 ℃, and automatically heating the nozzle to 200 ℃. 4. When the temperature of the nozzle rises to 200 ℃, insert the filaments into the extruder, click "Menu"...
-
Page 16: Xy-Axis Offset Calibration For The Left And Right Print Heads
XY-axis offset calibration for the left and right print heads. First, insert the SD card, click calibration gcode folder and chose “calibration accuracy 0.1.gcode” to print. Rendering... - Page 17 After printing, compare the calibration lines again and note the value of the line that aligns with the baseline. Enter the machine parameter settings interface and input the corresponding offset value. Save the settings. Enter the machine parameter settings interface and input the corresponding offset value. Save the settings.
-
Page 18: Verify The Xy-Axis Offset For The Left And Right Print Heads
Verify the XY-axis offset for the left and right print heads: Print the verification file named "Calibration two-color square testing.gcode" from the SD card. When the printing is complete, please compare the printed two-color square with the sample graphic, and check whether there is an obvious gap between the color squares. 1. -
Page 19: Printing The Test Files
Printing the Test Files Click on the Print icon , choose a gcode file which you want to print. Tip: You can adjust the babystep according to the adhesion of the first layer of filament. After the adjustment is completed, click Save, then you can print directly next time without any adjustments. If the distance between the nozzle and the platform is too high, the filament will not easy to stick to the platform. -
Page 20: Printing Process
Printing Process 1. Insert the SD card. 2. If not leveled, run the auto-leveling procedure first. 3. Preheat the head and bed, check whether it feed smoothly. 4. Click "Print" icon on the display panel. 5. Choose the Gcode file to print. 6. -
Page 21: Software
MD series 3D printers work with a variety of slicing software, such as Cura, Simplify 3D, Repetier- Host and so on. Now we will introduce MINGDA-CURA_x.xx.xx in detail, you can learn how to set the printing parameters, which will help you to become more familiar with the slicing software and print the first sample successfully. - Page 22 MD-400D Select the printer model you want to use, such as MD-400D, and then click [Add]. The printer settings parameters have been set and do not need to be changed by the user. Click 'Next' to proceed.
-
Page 23: Import Model
Step 1 Import Model Click on the file icon in the upper left corner to open the sample model xxxx.stl. Adjust the angle through the rotation command. - Page 24 Adjust to the desired model size through the zoom command. Adjust to the desired position by moving the command...
-
Page 25: Start Slicing
Step 2 Start slicing The MD-400D is an independent dual nozzle 3D printer that can be switched between three modes on the machine. They are duplicate mode, mirror mode and free mode. During the process of using MINGDA CURA, users will have four different usages: duplicate mode, mirror mode, print support, and print dual color. - Page 26 Mirror Mode X * Y * Z: 170 * 400 * 400mm Printing size: Mirror mode printing process: Slice a single nozzle, select Mirror mode on the machine, and then print. Note 1: When selecting mirror mode, the sliced model can only be located on the left side of the red line, with a size of 170mm.
-
Page 27: Printing Support
3.Printing support 400 * 400 * 400mm Printing size: Enable print head 2 first Support mode printing process: slice, select free mode on the machine, and then print. Reminder: When performing support printing, Extruder 1 uses the materials required for the model, while Extruder 2 uses the supporting materials matched with the model materials. - Page 28 The type of support and platform attachment can be specified according to one's own needs, which print head to use. Select print head 2 here...
- Page 29 Click Slice, click Preview, select material color As can be seen, the wine red area is the main body of the model, which will be printed by Print Head 1, while the purple area is the support and bottom valve, which will be printed by Print Head 2. Print head 1 and print head 2 can set different printing parameters such as printing temperature and printing speed to achieve the application of water-soluble support and easily peelable support.
-
Page 30: Print Two Colors
4.Print two colors Printing size: 400 * 400 * 400mm Enable Print Head 2 Image mode printing process: slice, select free mode on the machine, and then print. Taking the dual color Earth as an example, the dual color Earth is composed of two models. First, specify print head 1 and print head 2 according to your own needs... - Page 31 Press and hold the Ctrl key to select these two models, or Ctrl+A can select all models, and then right-click to select the merged models to automatically align.
- Page 32 After alignment, if the result is not aligned, it can be manually moved or rotated to visually align it. The reason is that the model coordinate system was not aligned during model design. Unsupport, slice, preview.
-
Page 33: Tips For Printing Support And Dual Color Models
Tips for printing support and dual color models 1. Import the model to be printed, right-click on the model, select Extruder 1 to print the model, start the support, and select Extruder 2 to print the support. 2. Adjust the "standby temperature" in the "Material" interface. Standby temperature: The unprinted nozzle will drop to the set temperature during the printing process For example, suppose the left nozzle is in an idle state when printing, but due to the high... - Page 34 3.You can select the type of base plate attachment in the "Print Platform Attachment" tab. Additional types of base plates include Raft, Brim, and Skirt. Raft prints several layers of valve body similar to the base structure before printing the model. This function can enhance the adhesion between the model and the printing base plate, reducing the risk of model warping;...
- Page 35 4. Double extrusion: Start the filling tower Due to the fact that there is always a printer in standby mode during the printing process, it is easy to cause defects such as wire drawing and material leakage. After starting the loading tower, the extruder will print on the loading tower before each printing, printing any material leakage on the printing head on the tower, effectively avoiding the phenomenon of material leakage when replacing the extruder.
-
Page 36: General Maintenance
6. General Maintenance Daily Preventive Maintenance 1. Before printing, reset the Z-axis to check the distance between the nozzle and the platform to prevent the nozzle from scratching the platform. 2. Before printing, check the smoothness of the guide rails. Regular lubrication can ensure the printer runs efficiently and stably. -
Page 37: Replace The Hot End
Print misplacement Another possibly reason is rack affected by external force during transport ( At the moment you need to contact MINGDA after sales service) SD card damaged; SD card slot damaged; SD card inserted deep SD card read abnormally insufficient;... -
Page 38: Support
128 MB graphics card memory MINGDA Limited Warranty Statement Besides limited warranty, within the maximum range allowed by law. MINGDA or any authorized dealer have not made any other statements or implied guarantee, including marketability and special-purpose applicability of implied warranties. MINGDA has not... -
Page 39: Quality Assurance
9. Quality Assurance 1. We provide a 12-month warranty on 3D printers (excluding the nozzle assembly, PEI pad) purchased on or after June 1, 2019 and a 3-month warranty on the nozzle assembly. 2. The warranty period of each product starts from the date of production. Any product with renewed warranty period is subject to the renewed warranty terms. - Page 40 Shenzhen MINGDA Technology Co., Ltd Tel: 0086-13530306290 Email: support@3dmingda.com www.3dmingda.com Address: 3 / F, No. 20, Dahe Industrial Zone, Longhua District, Shenzhen, 518110, Guangdong Province, China.
Need help?
Do you have a question about the MD-400D and is the answer not in the manual?
Questions and answers