Table of Contents
Advertisement
Advertisement
Table of Contents

Related Manuals for Mingda MD Series


Summary of Contents for Mingda MD Series
- Page 1 User Guide MD Industrial 3D Printer MINGDA TECHNOLOGY CO.,LTD...
- Page 2 Shenzhen MINGDA Technology Co., Ltd, all rights reserved. It won't be informed if the information in this article was changed in the future. MINGDA doesn't made any type of guarantee about this information, including but not limited to marketability and special-purpose applicability of implied warranties.
-
Page 3: Table Of Contents
Daily Preventive Maintenance ..................... 14 500 hours maintenance ....................... 15 1000 hours maintenance ......................15 8 Trouble Removal ......................... 15 9 Support ..........................16 Customer Support ........................16 Working Computer Specifications ....................16 MINGDA Limited Warranty Statement ..................16 10 Quality Assurance........................16... -
Page 4: Brief Introduction
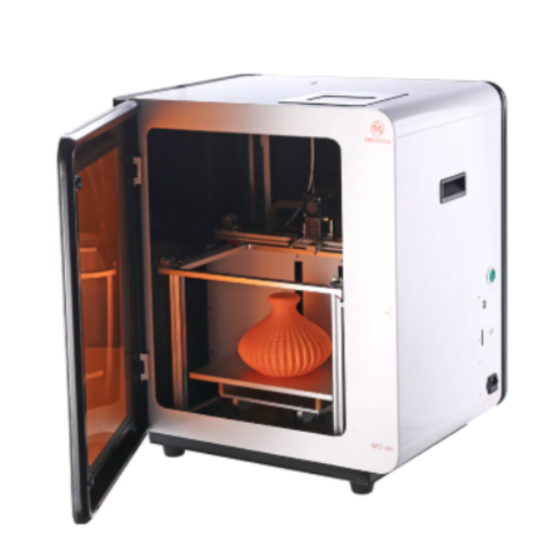
1 Brief Introduction MD Series Industrial 3D Printers adhere to the design concept of the simple to the extreme. It can print product quickly and easily, even if you've never used a 3D Printer. The printer prints the model with PLA or ABS, so the products will be strong and durable. You can make drilling, tapping, grinding and painting on the PLA or ABS models. -
Page 5: Overview
Cura is a slicing software that runs on Windows XP, Windows Vista, Windows 7, Windows 8, or Windows 10. The product size and print size of MD series 3D printer are as follows. Each filament holder can hold 1kg of printed filament, 1 kg filament can continue to print for about 120 hours, you can also add a second roll of filament for continuous printing. -
Page 6: Tool Box Accessories
Install the Material Shelf Plugged in Note: Shelf pole and screws are in the tool box Dismantle the Model Warm prompt : The MD series 3D printer display is a full touch resistance screen, click to enter the content - 3 -... -
Page 7: Paste The Masking Tape
MINGDA TECHNOLOGY CO.,LTD www.md-3d.com item. We recommend to use your fingernails and do not press hard on the screen. 1. Set down the Hot bed: choose "Z" axis , then click move button , fell the hot bed to a suitable height. -
Page 8: Manual Calibration
MINGDA TECHNOLOGY CO.,LTD www.md-3d.com 4 Manual Calibration Note: before calibration, you need to dismantle the model and put on new tapes. Enter the adjust platform interface 1. Choose "Z" axis , and click reset button to raise the hot bed to the highest degree. -
Page 9: Printing Operation
MINGDA TECHNOLOGY CO.,LTD www.md-3d.com 5 Printing Operation Display Panel ○ 1 XYZ axis coordinate values displayed in real time ○ 2 Head preheating: press the icon, input a number and click OK, it will begin to heat while the icon turns red. -
Page 10: Software
14 Shutdown: Click here to shut down 6 Software Download Slicing Software MD series 3D printers can support Cura, RepetierHost, Simplify 3D and other slicing software for printing. You can get the latest installation software in two ways: 1. Install from the included SD card 2. -
Page 11: Create Stl File
MINGDA TECHNOLOGY CO.,LTD www.md-3d.com Here we need to wait a few minutes to install the program. Create STL File The stl model can be searched online for download or modeled with 3D software modeling. Take the CAD software Solidworks, the... -
Page 12: Cura Overview
MINGDA TECHNOLOGY CO.,LTD www.md-3d.com Cura Overview Take the version Cura_15.02.1 and Windows 7 as an example to illustrate the Cura software settings. 1. Add new machine 1) Start Cura 2) Click on "machine" - "add new machine." 3) Take “MD-6H” as an example, set as follows. The "model name" can be arbitrarily set, for example, set to "MD-6H", the width is set to 400 mm, the depth is set to 300 mm, and the height is set to 500 mm. - Page 13 If the nozzle is 0.4mm, the recommended wall thickness is 1.2. 3) Enable Retraction: MINGDA recommended to select. 4) Bottom /Top Thickness: The wall thickness above and below the model is generally an integral multiple of the layer thickness.
-
Page 14: Open Stl File With Cura
MINGDA TECHNOLOGY CO.,LTD www.md-3d.com the model. Generally set to 5. 4) Initial Layer Thickness: refers to the thickness of the first layer printed. A slightly thicker first layer allows the model to stick more firmly to the bed. The recommended default setting is 0.3. -
Page 15: Model Rotation, Scaling, Mirroring With Cura
MINGDA TECHNOLOGY CO.,LTD www.md-3d.com Model rotation, scaling, mirroring with Cura 1. Model Rotation 1) Click on the model and the rotation, zoom, and mirror icons will appear in the lower left corner of the software window. 2) Click the rotation icon to drag the three axial control loops in the view to rotate around the X, Y, and Z axes. -
Page 16: Transfer Stl Model Into Gcode Document With Cura
MINGDA TECHNOLOGY CO.,LTD www.md-3d.com 4. Model preview 1) After the slicing is completed, the print time and the weight of the consumables will be displayed in the upper left corner. 2) After the slice is completed, click on the upper right corner to select Layers to preview the print. You can also check if the preview is consistent with the source document. -
Page 17: Printing Parts
MINGDA TECHNOLOGY CO.,LTD www.md-3d.com Printing Parts 1. Stick the tape to the printing platform. 2. Insert the SD card. 3. Reset the Z axis and move the printing head to check the distance between the nozzle and platform. 4.Preheat the head and bed, check whether it feed smoothly. -
Page 18: 500 Hours Maintenance
Print misplacement Another possibly reason is rack affected by external force during transport ( At the moment you need to contact MINGDA after sales service) SD card damaged; SD card slot damaged; SD card inserted deep SD card read abnormally insufficient;... -
Page 19: Support
Five years of free maintenance 1 years to 5 years from the delivery day, if the machine has non-human damage performance fault, MINGDA will provide free maintenance service. If you need to replace the parts, you can also purchased on our web shop to replace by yourself. - Page 20 3D Printer Leading Brand MINGDA TECHNOLOGY CO.,LTD Sales director: Doris Email: md-99@163.com Skype: mdantistatic Website: www.md-3d.com Address: 1st Floor; XinChao Industrial Zone; No. 597 DaHe Village; GuanHu Street ; LongHua District; Shenzhen; 518110; Guangdong Province; China...
Need help?
Do you have a question about the MD Series and is the answer not in the manual?
Questions and answers