Table of Contents
Advertisement
Quick Links
Advertisement
Table of Contents

Related Manuals for Mingda Goldfish X


Summary of Contents for Mingda Goldfish X
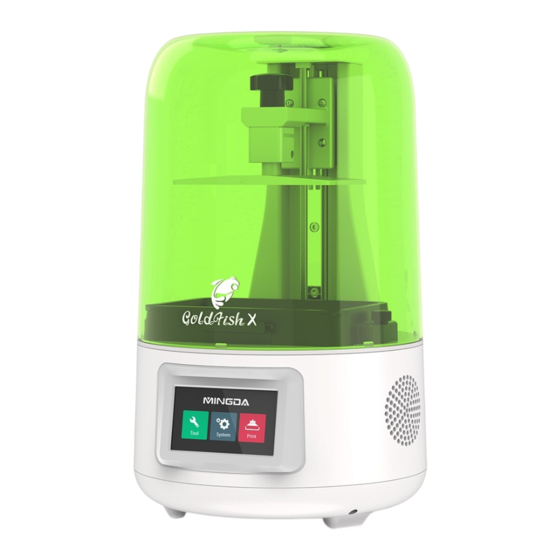
- Page 1 3D Printer User Manual Benutzerhandbuch des 3D-Druckers Goldfish X V1.0...
- Page 2 FAQ manual. In the process of using the machine, if you encounter any questions or problems not included in this manual, you can fill in the after-sales list on the official website of MINGDA, and we will try our best to solve the problems.
-
Page 3: Table Of Contents
Contents Inhalt 1. Equipment Information ------------ 02 6. Printing Preparation ----------- 10 1. Geräteeinführung ------------------ 02 6. Druckvorbereitung ------------ 10 2. Equipment Parameters ------------ 03 7. Model Processing --------------- 11 2. Geräteparameter ------------------- 03 7. Modellverarbeitung ------------ 11 3. Package Contents ------------------- 04 8. -
Page 4: Geräteeinführung
Equipment Introduction Geräteeinführung Platform fixing knob Z-axis screw USB port Plattform fester Knopf Z-Achsenschraube USB-Anschluss Resin tank Platform plate Power switch Harztank Plattformplatte Stromschalter Touch screen Thumb screw Power socket Touchscreen Rändelschraube Steckdose... -
Page 5: Equipment Parameters
Equipment Parameters Geräteparameter Model Number | Modellnummer Goldfish X | Goldfish X Technique | Technik LCD UV Photocuring | LCD UV Photocuring Print Accuracy | Druckgenauigket XY axis 0.051mm , Z axis 0.01mm | XY-Achse 0,051 mm, Z-Achse 0,01 mm... -
Page 6: Package Contents
Package Contents Packungsinhalt 3D Printer | 3D Drucker Build Plate | Platte Dauen ToolKit List | Toolkit-Liste Mask Gloves Knife Maske Handschuhe Messer Wrench Paper Funnel Adapter and Cable Schlüssel Papiertrichter Adapter und Kabel USB Memory Stick Usb Speicherstick... -
Page 7: User Interface Information
User Interface Information Inhalt der Benutzeroberfläche 01 1.Tools Down Home Back Stop 1.Werkzeuge Home Oben Nieder Zurück Halt... - Page 8 User Interface Information Inhalt der Benutzeroberfläche 02 2.System 2.System...
- Page 9 User Interface Information Inhalt der Benutzeroberfläche 03 3.Print Down Delete Print/Stop Back Back 3.Drucken Drucken / Oben Nieder Löschen Stoppen Zurück Zurück...
-
Page 10: Level Build Plate
Level Build Plate Level Bauplatte Remove Resin tank From Machine Connect the Power Supply Turn on Power Switch Entfernen Sie den Harztank von der Schließen Sie die Stromversorgung an Schalten Sie den Netzschalter ein Maschine Raise Z axis Install the Build Plate Loosen the Locking Screw Z-Achse anheben Installieren Sie die Build Plate... - Page 11 Level Build Plate Continued Weiter Level Build Plate Press "Tools", "Manual" and "Home" on the touch screen in turn Drücken Sie nacheinander "Werkzeuge", "handbuch" und "Home" auf dem Touchscreen Place a piece of A4 paper between the Build plate and the 2K screen, Home Z axis, lock the one screws with one hand, once completed, platform leveling is completed.
-
Page 12: Equipment Information
Printing Preparation Druckvorbereitung Raise the Build Plate to a suitable position, place the resin tank back into position, align the screw hole, and tighten the the 2 screws down to keep the Vat in place. Bringen Sie die Bauplatte in eine geeignete Position, setzen Sie den Harztank wieder in Position, richten Sie das Schraubenloch aus und ziehen Sie die 2 Schrauben fest, um die Wanne an Ort und Stelle zu halten. - Page 13 Model Processing Nach dem Druckencessing Remove the Build Plate Use Scraper to Remove Print From Clean Print with Alcohol Entfernen Sie die Bauplatte Build Plate Druck mit Alkohol reinigen Verwenden Sie den Schaber, um den Druck von der Bauplatte zu entfernen...
-
Page 14: Fep Film Replacement
FEP Film Replacement FEP Film Ersatz Remove all screws and FEP film need to be replaced Entfernen Sie alle Schrauben und die FEP-Folie muss ersetzt werden Spray alcohol to wipe and clean off any remaining resin. Sprühen Sie Alkohol, um das restliche Harz abzuwischen und zu entfernen. Put on the new FEP film, tighten the screw (it is recommended to screw in the four diagonal screws first, do not tighten first, and then the remaining screws in turn). - Page 15 Chitubox Slicer Software 01 Chitubox Slicer Software 01 1.Click the upper-left corner, open it and 2.If the model needs to be supported, click select the STL model to be printed. the support button on the right to set the 1.Klicken Sie auf die obere linke Ecke, öffnen support.
- Page 16 Chitubox Slicer Software 02 Chitubox Slicer Software 02 3.Open the slice settings, input machine setup shown in figure 1, Set print Parameters in Figure 2 3.Öffnen Sie die Slice-Einstellungen, geben Sie das Setup der Eingabemaschine ein (siehe Abbildung 1) und stellen Sie die Druckparameter in Abbildung 2 ein 4.You can also directly import the files that our company has configured.
- Page 17 Chitubox Slicer Software Continued Chitubox Slicer Software Fortsetzung As shown in the figure, click slice, wait for software slicing to complete, and then save the CTB format to USB Memory Stick www.3dmingda.com For more details, please refer to Klicken Sie wie in der Abbildung gezeigt auf Slice, warten Sie, bis das Software-Slicing abgeschlossen ist, und speichern Sie das CTB-Format auf dem USB Memory Stick Weitere Informationen finden Sie unter...
-
Page 18: Common Troubleshooting
Common Troubleshooting 1. The model was detached from the platform and adhered to the release membrane The leveling distance is too far. The support didn't work well. Bottom exposure time is short. Normal Exposure time is incorrect. The model is too small and the contact area is too small, so the bottom plate needs to be added Because the model is too large and heavy, the support with large area at the bottom needs to be added 2. -
Page 19: Allgemeine Fehlerbehebung
Allgemeine Fehlerbehebung 1. Das Modell wurde von der Plattform gelöst und an der Trennmembran befestigt Der Nivellierabstand ist zu weit. Der Support hat nicht gut funktioniert. Die Belichtungszeit unten ist kurz. Die normale Belichtungszeit ist falsch. Das Modell ist zu klein und die Kontaktfläche zu klein, daher muss die Bodenplatte hinzugefügt werden Da das Modell zu groß... - Page 20 Shenzhen MINGDA Technology Co.,LTD Email: info@3dmingda.com www.3dmingda.com Youtube Channel Facebook Page Official website Youtube Kanal Facebook Seite Offizielle Website...
Need help?
Do you have a question about the Goldfish X and is the answer not in the manual?
Questions and answers