Table of Contents
Advertisement
Artwork and Signature File for:
MAN-02098 "MNL, TRIDENT, USER GUIDE"
Artwork consists of:
REV AUTHORED BY
J. SHARP
12/31/14
REV DRAFTED BY
J. SHARP
12/31/14
PROPRIETARY INFORMATION:
The content of this document is the
exclusive property of Hologic and may
not, without prior written permission of
Hologic, be reproduced, copied or used
for any purpose whatsoever.
Seventy-Four (74) 8 ½ inch x 11 inch sheets attached.
DATE
DATE
AW, MNL, TRIDENT
USER GUIDE
ARTWORK
TITLE
DOCUMENT NUMBER
AW-05673
SIZE A
SHEET 1 OF 1
ENG-0034-T33, Rev. 002
REV
008
Advertisement
Table of Contents
Troubleshooting

Related Manuals for Hologic Trident


Summary of Contents for Hologic Trident
- Page 1 Artwork and Signature File for: MAN-02098 “MNL, TRIDENT, USER GUIDE” Artwork consists of: Seventy-Four (74) 8 ½ inch x 11 inch sheets attached. REV AUTHORED BY DATE J. SHARP 12/31/14 REV DRAFTED BY DATE J. SHARP 12/31/14 TITLE DOCUMENT NUMBER...
- Page 5 User Guide For Software Version 1.1 Part Number MAN-02098 Revision 008 December 2014...
-
Page 7: Table Of Contents
Intended Use for the User Guide .......................... 1 System Capabilities ..............................1 Product Complaints ..............................1 Technical Support ..............................1 Hologic Cybersecurity Statement ......................... 2 Installation Instructions ............................2 Users ..................................2 Terms and Definitions ............................2 1.10 International Symbols ............................3 1.11 Warnings, Cautions, and Notes .......................... - Page 8 Trident User Guide Table of Contents 3.8.1 Battery Alerts .............................. 18 3.8.2 How to Stop the Beep from the UPS ....................... 18 4: The User Interface ____________________________________________________________19 The Select Patient Screen ............................19 4.1.1 How to Open a Procedure ........................20 4.1.2...
- Page 9 Trident User Guide Table of Contents 7: System Administration Interface _______________________________________________43 How to Use the Admin Screen ..........................43 How to Use the System Tools ..........................45 7.2.1 The System Tools Screen ........................... 46 8: Maintenance, Cleaning, and Disinfecting _______________________________________47 General Information .............................
-
Page 11: List Of Figures
Trident User Guide Table of Contents List of Figures Figure 1: Trident System Components ........................... 5 Figure 2: Label Locations ..............................10 Figure 3: Cabinet Components ............................11 Figure 4: Workstation Components ..........................12 Figure 5: Cart Components ............................12 Figure 6: Cabinet Controls and Indicators ........................ -
Page 13: List Of Tables
Trident User Guide Table of Contents List of Tables Table 1: Removal of All Power from the System ......................17 Table 2: The Filter Tab Options ............................23 Table 3: The Taskbar Menus ............................30 Table 4: Admin Screen Functions ..........................44 Table 5: The System Tools .............................. -
Page 15: 1: Introduction
United States federal law restricts this device to use by, or on the order of, a physician. The Trident™ specimen radiography system is a cabinet x-ray system used to provide digital x-ray images of surgical and core biopsy specimens from various anatomical regions in order to allow rapid verification that the correct tissue has been excised during the biopsy procedure. -
Page 16: Hologic Cybersecurity Statement
Chapter 1: Introduction Hologic Cybersecurity Statement Hologic continuously tests the current state of computer and network security to examine possible security problems. When necessary, Hologic provides the updates to the product. For Cybersecurity Best Practices documents for Hologic products, refer to the Hologic Internet site. -
Page 17: International Symbols
"OFF" (power) "ON" (power) "OFF" for part of the equipment "ON" for part of the equipment Discard electrical and electronic equipment separately from standard waste. Send decommissioned material to Hologic or contact your service representative. Manufacturer Date of Manufacture Caution—Radiation 1.11... -
Page 19: 2: General Information
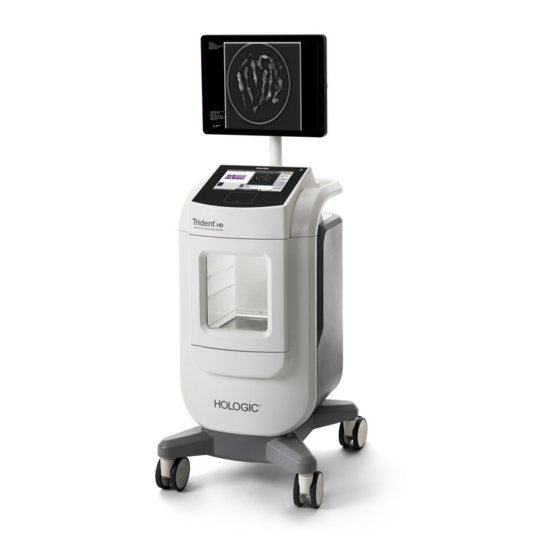
Cabinet. Figure Legend Work Surface (Slide-out) Cabinet Display Keyboard Mouse Cart UPS (Optional) Power Strip Computer Figure 1: Trident System Components MAN-02098 Revision 008 Page 5... -
Page 20: Safety Information
Read and understand this manual before you use the system. Keep the manual available during the operation of the unit. Always follow all the instructions in this manual. Hologic does not accept the responsibility for injury or damage from incorrect system operation. Hologic can prepare for training at your site. - Page 21 Trident User Guide Chapter 2: General Information This device contains dangerous material. Send Warning: decommissioned material to Hologic or contact your service representative. Control the access to the equipment according to Warning: local regulations for radiation protection. The disk drives installed in this system are a Class I Warning: Laser Product.
-
Page 22: Interlocks
To make another exposure: Select the OK button in the error message dialog box. Select the status icon (shaped like the Trident unit) in the taskbar at the bottom of the screen. Complete any action (such as "Close the door") that shows in the system message area of the screen. -
Page 23: Compliance
Changes or modifications not expressly approved by Caution: Hologic could void your authority to operate the equipment. 2.5.2 Compliance Statements The manufacturer states this device is made to meet the following requirements: •... -
Page 24: Label Locations
Trident User Guide Chapter 2: General Information Label Locations Figure 2: Label Locations Page 10 MAN-02098 Revision 008... -
Page 25: 3: Components, Controls, And Indicators
Trident User Guide Chapter 3: Components, Controls, and Indicators Chapter 3: Components, Controls, and Indicators Shielded Cabinet Components Figure Legend Specimen location for 2.0x magnification image Specimen location for 1.5x magnification image Specimen location for contact image Figure 3: Cabinet Components... -
Page 26: Workstation Components
Trident User Guide Chapter 3: Components, Controls, and Indicators Workstation Components Figure Legend Display Keyboard Mouse Figure 4: Workstation Components Cart Components Figure Legend Computer Work Surface (Slide-out) UPS (optional) Locking Casters (4) Figure 5: Cart Components Note The hooks (not shown) on the back of the Cart provide safe storage of the power cord during cart movement. -
Page 27: How To Lock A Caster
Trident User Guide Chapter 3: Components, Controls, and Indicators 3.3.1 How to Lock a Caster To lock a caster, step on the locking lever on the wheel until the lever locks. To unlock a caster, lift the locking lever to the up position. -
Page 28: Display Controls And Indicators
LED for Display Power Figure 7: Display Control and Indicator Cable Connections Put the Trident in a location where you can easily access connections for power and network connections. Connect the network cable to the network outlet in the wall. -
Page 29: How To Start The System
Trident User Guide Chapter 3: Components, Controls, and Indicators How to Start the System If the UPS is stopped, press the UPS On button. (The UPS is an optional component.) Press the power button on the Computer. When the Startup Screen displays, select the Log In button. -
Page 30: Log In
Trident User Guide Chapter 3: Components, Controls, and Indicators 3.6.1 Log In The screen displays user names or user group (such as the Service group.) If your user name or group is not shown, click the Show All button. Figure 9: Select an Operator Select your user name. -
Page 31: How To Shutdown The System
Trident User Guide Chapter 3: Components, Controls, and Indicators How to Shutdown the System Select the Close Patient button in the Procedure screen. From the Select Patient screen, select the Log Out button. From the Startup screen, select the Shutdown button. A prompt displays the option to continue with the system shutdown. -
Page 32: Battery Power Operation
When the battery reaches the critical low limit, the Trident shuts down then the UPS shuts down. If AC power is restored while the battery is on, the UPS returns silently to normal operation. -
Page 33: 4: The User Interface
Trident User Guide Chapter 4: The User Interface Chapter 4: The User Interface The Select Patient Screen Figure 10: The Select Patient Screen Figure Legend 1. Quick Search Search the local database for the Patient Name, Patient ID, or Accession Number. -
Page 34: How To Open A Procedure
Trident User Guide Chapter 4: The User Interface 4.1.1 How to Open a Procedure You can open a procedure in one of two ways: • Double-click the patient entry in the displayed list on the Select Patient Screen. • Select a patient from the displayed list, then select the Open button. -
Page 35: How To Edit The Patient Information
Trident User Guide Chapter 4: The User Interface 4.1.3 How to Edit the Patient Information In the Select Patient screen, select the patient name then select the Edit button. In the Edit Patient screen, make changes then select the Save button. -
Page 36: The Patient Filter Screen
Trident User Guide Chapter 4: The User Interface 4.1.5 The Patient Filter Screen When you select the Filter button in the Select Patient screen, the Patient Filter screen for the selected tab appears. Figure 13: The Filter Tab in the Patient Filter Screen 4.1.5.1... -
Page 37: How To Refresh The Worklist
Trident User Guide Chapter 4: The User Interface 4.1.5.2 Other Functions of the Filter Tab The Save, Save As, and Delete Tab buttons on the Filter tab allow Managers to add, change, or delete tabs in the Select Patient screen. -
Page 38: The Procedure Screen
Trident User Guide Chapter 4: The User Interface The Procedure Screen Figure 14: An Example Procedure Screen Figure Legend Procedure Selection Shows the accession number assigned to a procedure. Image Thumbnails Shows small icons of images related to the selected accession number. -
Page 39: How To Set The Exposure Techniques
Trident User Guide Chapter 4: The User Interface 4.2.2 How to Set the Exposure Techniques • Manual: The user selects the kV and mAs. • AEC: Auto-kV: The system selects the kV and mAs. To increase or decrease an Exposure Technique in one step increments, click then release the + or - button. -
Page 40: How To Add A Procedure
Trident User Guide Chapter 4: The User Interface 4.2.4 How to Add a Procedure To add another procedure for the active patient, select the Add Procedure button on the Procedure screen to display the Add Procedure dialog box. Figure 15: The Add Procedure Dialog Box Use the drop-down menu to select the type of procedure to add. -
Page 41: How To Add Or Edit An Output Group
Trident User Guide Chapter 4: The User Interface 4.4.2 How to Add or Edit an Output Group Note The configuration of Output Groups occurs during installation, but you can edit existing groups or add new groups. To add a new Output Group: Access the Admin screen. -
Page 42: How To Print
Trident User Guide Chapter 4: The User Interface 4.5.2 How to Print From the Procedure screen, select the Print button. The Print Screen displays. Refer to figure The Print Screen on page 28 to prepare your print information. Select the film format from the Options area of the page. -
Page 43: How To Export
Trident User Guide Chapter 4: The User Interface 4.5.3 How to Export Select the Export button. Select a device (target) from a drop-down menu. Select the START button to copy all images from the open procedure to the selected device. -
Page 44: About The Taskbar
Trident User Guide Chapter 4: The User Interface About the Taskbar The Taskbar at the bottom of the screen displays additional icons, which you can select to access information or perform system tasks. Figure 17: The Taskbar Table 3: The Taskbar Menus... -
Page 45: How To Set Up The Specimen Cabinet
Trident User Guide Chapter 4: The User Interface How to Set Up the Specimen Cabinet Open the Cabinet door. Place the specimen. • For a contact image, put the specimen on the contact surface of the Cabinet. • For a magnification image, put the specimen on the 1.5X Stage or the 2.0X Stage in the Cabinet. -
Page 46: How To Do The Gain Calibration
Trident User Guide Chapter 4: The User Interface How to Do the Gain Calibration Do the Gain Calibration monthly and when artifacts are seen. Note When the system shows the Gain Calibration message, do the procedure before you shut down the system. If you do the Gain Calibration at a different time, access the procedure through the Admin screen. -
Page 47: 5: The Images
Trident User Guide Chapter 5: The Images Chapter 5: The Images Introduction After you make an exposure, the acquired image displays and is accepted automatically. A thumbnail image appears in the left panel of the screen. Use the Image Tools (refer to The Tools Tab on page 36) to help with the review of the image and to add a comment. -
Page 48: Information On The Right Side Of The Image
Trident User Guide Chapter 5: The Images 5.1.2 Information on the Right Side of the Image • The Enhancement Level displays on the right side of the screen after the Enhanced Visualization tool is selected. The value changes with movement of the slider that appears on the Tools tab after the Enhanced Visualization tool is selected. - Page 49 Trident User Guide Chapter 5: The Images This page is intentionally blank. The content continues on the next page. MAN-02098 Revision 008 Page 35...
-
Page 50: Image Review Tools
Trident User Guide Chapter 5: The Images 5.2.1 Image Review Tools 5.2.1.1 The Tools Tab The Tools tab displays after an image is acquired. When you select the Tools tab, you have access to the image review tools. A checkmark appears on an active tool. - Page 51 Trident User Guide Chapter 5: The Images Figure Legend The Mag tool magnifies a section of the image. The Zoom tool magnifies the whole image. The Window/Level tool is used with the mouse to change the brightness and contrast. To reset the Window/Level to the original values, double-click the image.
-
Page 52: Figure 21: The Comments Tab
Trident User Guide Chapter 5: The Images 5.2.1.2 The Comments Tab This feature allows you to make notes or comments about image content. Figure 21: The Comments Tab Figure Legend Select the Comments tab. Select the Add button. In the Image Comments dialog box, select an option from the image list. -
Page 53: Figure 22: Annotations Tab
Trident User Guide Chapter 5: The Images 5.2.1.3 The Annotations Tab Figure Legend Draws an elliptical pattern in the image. You can change the size and move this pattern within the display area, and you can add the text to this pattern. -
Page 54: Send The Images To The Output Devices
Trident User Guide Chapter 5: The Images 5.2.1.4 The Specimen Tab The Specimen Tab shows if the Service Engineer changes the tab default value from Off to On. This tab allows you to enter information about the specimen. Figure 23: The Specimen Tab Select the Add button on the Specimen tab. -
Page 55: 6: Clinical Procedures
Trident User Guide Chapter 6: Clinical Procedures Chapter 6: Clinical Procedures System Startup Refer to How to Start the System on page 15 for complete information on the following steps. Lock the cart casters and then connect the system to power and the network. -
Page 56: System Shutdown
Trident User Guide Chapter 6: Clinical Procedures System Shutdown When you finish the image acquisition process, remove the specimen then select the Close Patient button. Select the Log Out button, then select the Shutdown button. A prompt displays the option to continue with the system shutdown. -
Page 57: 7: System Administration Interface
Select Admin from the pop-up menu to show the Admin screen. See the following figure. Note A Manager and a Hologic Service User have access to all functions on the Admin screen. A Primary Specimen User has access to some functions. -
Page 58: Figure 25: The Admin Screen
Trident User Guide Chapter 7: System Administration Interface Figure 25: The Admin Screen Table 4: Admin Screen Functions Section Screen Function System System Tools The Interface for Service for the configuration of and identification of problems. System Defaults: Set the default values. -
Page 59: How To Use The System Tools
Trident User Guide Chapter 7: System Administration Interface How to Use the System Tools The Managers (and Hologic Service) can access the System Tools function. This function contains the configuration information about the system. To access the System Tools function: Log on as the Manager or Hologic Service. -
Page 60: The System Tools Screen
Trident User Guide Chapter 7: System Administration Interface 7.2.1 The System Tools Screen Figure 27: The System Tools Screen Table 5: The System Tools Section Description About: Getting Started The introduction to the service tool. FAQ: List of common questions. -
Page 61: 8: Maintenance, Cleaning, And Disinfecting
Caution: fluids must not flow or run. 8.1.2 For Disinfecting To disinfect the system's components and surfaces, Hologic recommends the following disinfecting solutions: • 10% chlorine bleach and water with one part commercially available chlorine bleach (normally 5.25% chlorine and 94.75% water) and nine parts water. Mix this solution daily for best results. -
Page 62: To Prevent Possible Injury Or Equipment Damage
Trident User Guide Chapter 8: Maintenance, Cleaning, and Disinfecting 8.1.3 To Prevent Possible Injury or Equipment Damage Do not use a corrosive solvent, abrasive detergent, or polish. Select a cleaning/disinfecting agent that does not damage the plastics, aluminum, or carbon fiber. -
Page 63: How To Remove The Keyboard Cover (If Equipped)
Trident User Guide Chapter 8: Maintenance, Cleaning, and Disinfecting 8.2.2 How to Remove the Keyboard Cover (if Equipped) Note Remove the keyboard cover from the keyboard before cleaning the cover. Grasp the outer frame of the cover by one corner and lift the frame and cover sheath off in one piece (see the following figure). -
Page 64: How To Clean Keyboard Cover (If Equipped)
Clean the key surfaces with a clean cloth. If material falls between the keys, clean the keyboard with a vacuum. If liquids enter the keyboard, or fluids are spilled onto the keyboard, call the Hologic Technical Support for guidance or replacement. If the keyboard comes in contact with body fluids, the keyboard will require disinfecting. -
Page 65: Preventive Maintenance Schedule
Trident User Guide Chapter 8: Maintenance, Cleaning, and Disinfecting Preventive Maintenance Schedule Note The Preventive Maintenance Schedule for the Service Engineer is in the Service Manual. Table 6: User Preventive Maintenance Recommended Frequency Action Each Each Each As Required Week... -
Page 67: Appendix A: System Specifications
Trident User Guide Appendix A: System Specifications Appendix A: System Specifications App endix A Shielded Cabinet, Workstation, and Cart Figure 29: System Dimensions Height 170.2 cm (67.0 inches nominal) Width 95.3 cm (37.5 inches) Depth 67.3 cm (26.5 inches) Weight 124.9 kg (275 pounds without the UPS) -
Page 68: Workstation Technical Information
Trident User Guide Appendix A: System Specifications Workstation Technical Information A.3.1 General Information Operating System Windows 7 Hard Disk Drive Capacity 500 GB minimum Storage Device Disks DVD+/-RW Display 1920 x 1200 pixel resolution A.3.2 Network Environment Network Interface Integrated Gigabit Ethernet controller... -
Page 69: Imaging System Technical Information
Trident User Guide Appendix A: System Specifications Imaging System Technical Information A.6.1 Image Receptor Fluid Ingress The Image Receptor is protected from accidental spillage on the Cabinet floor. Active Imaging Area 12 cm by 14 cm nominal Dynamic Range and Linearity Detector Subsystem response is linear with linearity of 0.999 over a... -
Page 71: Appendix B: System Messages And Alerts
Some conditions require a system restart or indicate that more action is necessary (for example to call Hologic Technical Support.) This chapter describes the message categories and your actions to return the system to normal operation. If errors repeat, contact Hologic Technical Support. -
Page 72: System Messages
Trident User Guide Appendix B: System Messages and Alerts B.2.1.4 Critical Faults Critical fault designs: • Not released through the software or communications commands. • Cancel an exposure that is in progress. • Prevent the start of a new exposure. -
Page 73: Index
Trident User Guide Index Index faults • 57, 58 filter tab • 22 acquire images • 25, 41 gain calibration • 32 add patient • 20 generator tab • 24 add procedure • 26 glossary • 2 admin screen • 43 alerts •... - Page 74 Trident User Guide Index output devices select icons • 30 exposure techniques • 25 output set • 40 output sets • 26 taskbar icons • 30 patient • 19 output groups, manage • 40 send images to outputs • 40 output sets •...
- Page 75 Trident User Guide Index x-ray acquire images • 25, 41 cleaning solutions and methods • 47 indicators • 25 MAN-02098 Revision 008 Page 61...
Need help?
Do you have a question about the Trident and is the answer not in the manual?
Questions and answers