Table of Contents
Advertisement
Advertisement
Table of Contents

Related Manuals for DLab Liquid Handling HiPette


Summary of Contents for DLab Liquid Handling HiPette
- Page 1 Mechanical Pipette HiPette User Manual 12301725 Ver.20211213...
-
Page 2: Table Of Contents
CONTENTS 1.YOUR NEW PIPETTE ..................1 ................ 1 DJUSTABLE VOLUME PIPETTES ..................2 F ULLY AUTOCLAVABLE 2.UNPACKING...................... 2 3.INSTALLING THE PIPETTE HOLDER .............. 3 4.PIPETTE COMPONENTS ................. 4 5.PIPETTE OPERATION ..................5 .................... 5 V OLUME SETTING ....................5 R ANGE ................ - Page 3 9.PERFORMANCE TEST AND RECALIBRATION ..........9 ) ..........10 P ERFORMANCE TEST C HECKING CALIBRATION ................11 R ECALIBRATION PROCEDURE 10.MAINTENANCE ..................... 11 10.1 ................12 C LEANING YOUR PIPETTE 10.2 ................13 HOUSE MAINTENANCE 11.TROUBLE SHOOTING .................. 13 12.WARRANTY INFORMATION ................. 15 13.SPECIFICATIONS ..................
-
Page 4: Your New Pipette
1.YOUR NEW PIPETTE Your new mechanical pipette is a general purpose pipette for the accurate and precise sampling and dispensing of liquid volumes. The pipettes operate on the air displacement principle and disposable tips. The pipettes cover a volume range from 0.1µL to 10mL. All pipettes have been quality tested according to ISO8655/DIN12650. -
Page 5: Fully Autoclavable
20-200μL 0.2μL 200,300,350μL 30-300μL 0.2μL 200,300,350μL 100-1000μL 1μL 1000μL 1000-5000μL 5μL 2000-10000μL 10μL 10mL Fully autoclavable HiPette can be fully autoclavable under 121℃,1atm for 20 mins, Wrap the pipette by gauze before autoclave. It must be left for 12 hours to dry before use. Greasing both sealing ring and piston after every 10 times autoclaving. -
Page 6: Installing The Pipette Holder
⚫ Tips ⚫ Silicone Grease ⚫ Quality control certificate ⚫ Filter element(0.1ul-2.5ul、0.5ul-10ul volume pipette without filter) 3.INSTALLING THE PIPETTE HOLDER For convenience and safety always keep the pipette vertically on its own holder when not in use. When installing the holder, please follow the instruction below: 1. -
Page 7: Pipette Components
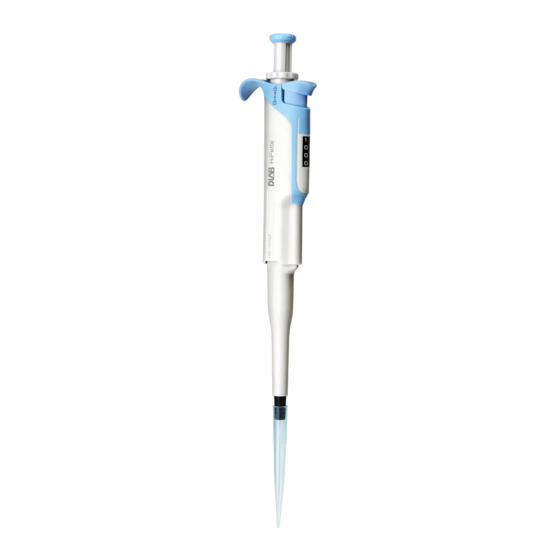
4.PIPETTE COMPONENTS... -
Page 8: Pipette Operation
5.PIPETTE OPERATION 5.1Volume setting The volume of the pipette is clearly shown through the handle grip window. The delivery volume (variable volume pipette only) is set by turning the thumb button clockwise is anticlockwise. When setting the volume, please make sure that: ⚫... -
Page 9: Sealing And Ejecting Tips
Locked Adjustable One Key Range Lock: Press down the range lock to lock the range; lift up the range lock to unlock the range. Prevent pipetting errors caused by touching the adjusting knob by mistake. 5.3Sealing and ejecting tips Before fitting a tip makes sure that the pipette tip cone is clean. Press the tip on the Fig.4 cone of the pipette firmly to ensure an airtight seal. -
Page 10: Forward Pipetting
Forward pipetting Make sure that the tip is firmly attached to the tip cone. For best results the thumb button should be operated slowly and smoothly at all times, particularly with viscous liquids. Hold the pipette vertically during aspiration. Make sure that the liquid and container vessel are clean and that the pipette, tips and the liquid are at the same temperature. -
Page 11: Pipetting Recommendations
foam or have a high viscosity. This technique is also used for dispensing very small volumes when it is recommended that the tip is first primed with the liquid before pipetting. This is achieved by filling and emptying the tip. 1. -
Page 12: Storage
millimeters into the liquid ⚫ Prerinse the tip before aspirating the liquid by filling and emptying the tip 5 times. This is important especially when dispensing liquids which have a viscosity and density different from water ⚫ Always control the push button movements with the thumb to ensure consistency ⚫... -
Page 13: P Erformance Test ( C Hecking Calibration )
manufacturer’s tips. Performance test ⚫ Weighting should take place at 20-25℃, constant to ±0.5℃. ⚫ Avoid drafts. 1. Set the desired testing volume of your pipette. 2. Carefully fit tip onto the tip cone. 3. Prerinse tip with distilled water by pipetting the selected volume 5 times. 4. -
Page 14: Recalibration Procedure
Recalibration procedure 1) Pull out the ejector button, use the calibration tool to push off the ejector button cover, and then install the ejector button back to the handle; 2) Insert the calibration tool into the button hole of the ejector, and press the calibration tool down and hold;... -
Page 15: Cleaning Your Pipette
To maintain the best results from your pipette each unit should be checked every day for cleanliness. Particular attention should be paid to the tip cone (s). The pipettes have been designed for easy in-house service. However, we also provide complete repair and calibration service including a service report and performance certificate(s). -
Page 16: I Nhouse Maintenance
10.2In-house maintenance 1) Pull down the ring tube; 2) Unscrew the nozzle connector directly counterclockwise; 3) Remove the piston and spring; 4) Wipe the piston and nozzle connector with alcohol and a lint-free cloth; 5) Before installing nozzle connector it is recommended to grease the Y-shaped sealing ring slightly using the silicone grease provided. - Page 17 Trouble Possible cause Solutions Droplets left inside Unsuitable tip Use original tips the tip Non-uniform wetting of the Attach new tip plastic Tip incorrectly attached Attach firmly Unsuitable tip Use original tips Foreign particles between tip Clean the tip cone, attach and tip cone new tip Leakage...
-
Page 18: Warranty Information
erratically the tip cone Penetration solvent Clean grease vapours shaped sealing ring, clean the tip cone Pipette blocked Liquid has penetrated tip cone Clean grease aspirated volume and dried shaped sealing ring, clean too small the tip cone Tip ejector jammed Tip cone and/or ejector collar Clean the tip cone or moves erratically... -
Page 19: Specifications
Each pipette is tested before shipping by the manufacturer. The Quality Assurance Procedure is your guarantee that the pipette you have purchased is ready for use. SPECIFICATIONS Single-channel Adjustable Volume Pipettes(10 models, covering 0.1μL~10mL.) Systematic Error Random Error VoLume Range Increment Test VoLume μL μL 2.5uL... - Page 20 50uL 0.9% 0.45 0.3% 0.15 5-50uL 0.05uL 25uL 1.4% 0.35 0.8% 3.0% 0.15 1.6% 0.08 100uL 0.8% 0.80 0.2% 0.20 10-100uL 0.1uL 50uL 1.0% 0.50 0.3% 0.15 10uL 3.0% 0.30 1.0% 0.10 200uL 0.6% 1.20 0.2% 0.40 20-200uL 0.2uL 100uL 1.0% 1.00 0.3%...
- Page 21 1000uL 1.2% 12.00 0.3% 3.00 10000uL 0.6% 60.00 0.2% 20.00 2000-10000uL 5000uL 0.8% 40.00 0.2% 10.00 10uL 2000uL 1.5% 30.00 0.3% 6.00...
Need help?
Do you have a question about the Liquid Handling HiPette and is the answer not in the manual?
Questions and answers