Summary of Contents for DLab Thermo Control H100-Pro
Page 1
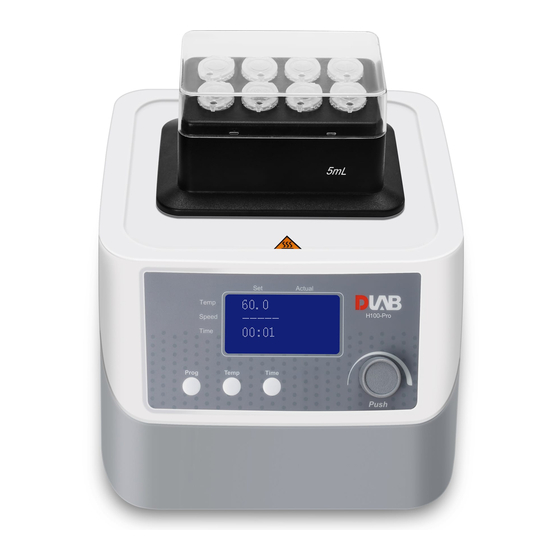
Thermo Control & Thermo Mix User Manual H100-Pro Thermo Control HC110-Pro HM100-Pro Thermo Mix HCM100-Pro Please read the User Manual carefully before use, and follow all operating and safety instructions! We cannot be responsible to inform at real-time if the outline and specifications are subject to change for improvement.
· Methods and procedures adopted to resolve the Preface problems Welcome to the T hermo Control & Thermo · Your contact information Mix User Manual. Users should read this Warranty Manual carefully, follow the instructions and procedures, and be aware of all the cautions when Changes or modifications not expressly approved using this instrument.
interference to radio communications. Operation 1 Safety Instructions of this equipment in a residential area is likely to Warning! cause harmful interference in which case the user • Read the operating instructions carefully will be required to correct the interference at his before use.
Page 5
clean, non-slip, dry and fireproof surface. Do not themselves. Always disconnect the plug before operate the instrument in explosive atmospheres, fitting accessories. •The instrument can only be disconnected from the with hazardous substances or under water. •Temperature must always be set at least 50℃ main power supply by pulling out the main or the lower than the fire point of the media used.
3 Inspection 2 Proper Use 3.1 Receiving Inspection The instrument is designed for heating liquids in schools, laboratories or factories. Unpack the equipment carefully and check for any damages which may have arisen during transport. • Observe the minimum distances between the Please contact manufacturer/supplier for technical devices, between the device and the wall and support.
4.2 Display Item Description Changeable unit, suit for Block different tubes Display the setting and actual LCD Screen parameters Function Switch the input parameters or Button programming At parameter setting state, rotate this knob can input values; After Adjustable setting, push it to start work. At Knob working state, short push to Items...
flashing this button, the time characters of the setting area are flashing . In B. Rotate parameter knob, input the target parameters. timed working mode, the time C. Wait 3s, the corresponding character will stop shows the countdown time. In blinking, complete parameter setting.
Actual Resume: In the pause state, push the adjustable knob, will resume to working state. And in the last 30.5 Temp. 30.5 line in the actual value area will display the 1500 Speed ---- characters “Run” again. 07:00 07:00 Timer 3.
Page 11
Speed, Time button respectively, the corresponding 5.3.2 Multiple Step work without Saving characters will flash. Rotate the Adjustable knob to A.The program set in the single step is the set the parameters. If time is set to 00:00, it means first step by default.
Page 12
Actual push the adjustable knob to start work. Refer to below figure. ---.- Temp. ----- Speed Actual --:-- Timer 30.5 30.5 Temp. Prog. 1500 Speed 07:00 Timer Note: Before the setting of the second 06:59 step complete, system consider there is only one Prog.
Page 13
5.3.3 Program with Saving mode number. Refer to the figure, there are 5 steps totally, now it’s the second step. Programming method is similar with Multiple Step without Saving mode. After the programming 5.3.4 Load Program complete, long push the adjustable knob, program In the power on state, long push the prog.
Page 14
At the time of temperature calibration, the ambient 5.4 Temperature calibration temperature must be 15 to 25℃. 1. The temperature of the instrument had been calibrated before delivery, but due to some other Caution: factors the temperature may vary from the actual The temperature of device has been calibrated temperature and the deviation can be corrected by before delivery, so please don’t use this...
Page 15
settings. 4. To ensure the calibration temperature adjustment set correctly, press the push knob and the instrument will enter the second calibration temperature, repeat step 3, after the third temperature calibration completed, the screen displays “Calibration Success" on interface and the 2.
restart automatically. Note: If the deviation between the actual temperature and the calibration temperature is within ±2℃ during calibration, a single point 6 Trial Run calibration can be performed. If the deviation • Make sure the required operating voltage and power supply voltage match. between the actual temperature and the calibration •...
7 Faults Isopropyl alcohol Dyes • Instruments can’t be power ON Construction Water containing tenside/ materials Isopropyl alcohol whether power line -Check Cosmetics Water containing tenside/ unplugged Isopropyl alcohol -Check whether the fuse is broken or loose Foodstuffs Water containing tenside •...
9 Associated Standards and Regulations Note: Construction in accordance with the following • Electronic device can not clean with safety standards: cleanser. EN 61010-1 • If you require maintenance service, must UL 3101-1 be cleaned the instrument in advance CAN/CSA C22.2(1010-1) avoid pollution of hazardous substances, EN 61010-2-10 and to send back into original packing.
Need help?
Do you have a question about the Thermo Control H100-Pro and is the answer not in the manual?
Questions and answers