Table of Contents
Advertisement
Quick Links
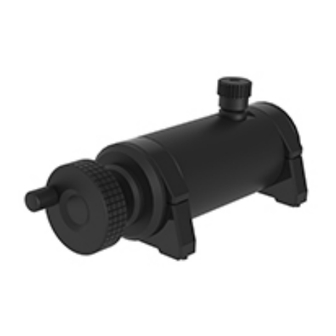
Calibration Pump (±400 mbar)
Dear User,
We have made every effort to ensure the accuracy of the contents of this User
Manual. Should any errors be detected, we would greatly appreciate to receive
suggestions to improve the quality of the contents of this User Manual.
For more detailed technical data about the Beamex PGL Calibration Pump
(±400 mbar), please contact the manufacturer.
PGL
© Beamex 2023
Beamex Oy Ab
Ristisuonraitti 10
FIN-68600 Pietarsaari
Finland
Tel:
E-mail:
Website:
8804300 / PGLuEng / Version 1.0
+358-10-5505000
sales@beamex.com
service@beamex.com
https://www.beamex.com
Advertisement
Table of Contents

Subscribe to Our Youtube Channel
Related Manuals for BEAMEX PGL


Summary of Contents for BEAMEX PGL
- Page 1 Manual. Should any errors be detected, we would greatly appreciate to receive suggestions to improve the quality of the contents of this User Manual. For more detailed technical data about the Beamex PGL Calibration Pump (±400 mbar), please contact the manufacturer.
-
Page 2: Table Of Contents
Table of Contents Prologue................... 3 Typographical Conventions................ 3 Unpacking and Inspection................4 Feedback....................5 Safety Precautions and Warnings..........6 Specifications.................. 7 About the PGL.................9 Operating Instructions..............11 Positive Pressure Calibration..............11 Negative Pressure (Vacuum) Calibration..........12 Important to Consider................13 Troubleshooting................14 Maintenance................... 15 Cleaning Instructions................ -
Page 3: Prologue
Prologue Thank you for buying the Beamex PGL Calibration Pump. The Beamex PGL Calibration Pump can be used to generate accurate and stable reference pressure for low pressure calibrations on range ±400 mbar / ±160 iwc. The innovative design and material choices minimize the impact of environmental temperature changes during calibration. -
Page 4: Unpacking And Inspection
Prologue - 4 Unpacking and Inspection At the factory, each new PGL Calibration Pump passes a careful inspection. The receiver should, however, inspect the unit for any damage that may have occurred during transportation. If there are signs of obvious mechanical damage and/or the package contents are incomplete, contact the purchasing sales office as soon as possible. -
Page 5: Feedback
We constantly want to improve our products and services. Therefore we’d like to know your opinion regarding the product you use. Please spend a moment of your valuable time to give us feedback about the product. Beamex Oy Ab Address: Quality Feedback... -
Page 6: Safety Precautions And Warnings
Safety Precautions and Warnings Warning: Read the User Manual carefully prior to setting up and using the pressure pump. Do not use the PGL in any other way than as described in this User Manual. Do not connect the pump to an external pressure source. -
Page 7: Specifications
Figure 1: Technical Drawing Weight ~1.8 kg / 4.0 lbs Pressure Port G1/8" (ISO228/1) female port with pressure fitting (Bx G1/8" male) for Beamex 40 bar pressure hose Pressure Media Storage Temperature -20 to 60°C / -4 to 140°F Operating Temperature 0 to 50°C / 32 to 122°F... - Page 8 Specifications - 8 Note: Please notice that the specifications are only valid with the Beamex 40 bar pressure T-hose. Note: If the device has been stored in a different environment, it should be stabilized to the new environment before use.
-
Page 9: About The Pgl
Cylinder Coarse Adjust Handwheel (clockwise to increase pressure) Pressure output fitting. Default: Bx G 1/8" male for the Beamex 40 bar pressure hose Support legs. (By loosening the screws of both legs, it is possible to... - Page 10 About the PGL - 10 Figure 3: Readjust the Cylinder to Achieve a More Ergonomic Way of Working Note: Vent the pump by turning the Fine Adjust Knob counterclockwise until the threads become visible and then rotate 1-3 rounds more.
-
Page 11: Operating Instructions
Connect the calibrator (pressure measurement module) and the instrument to be calibrated (device to be tested) to the pressure output fitting using the Beamex 40 bar pressure T-hose or similar. If needed, compensate the small pressure offset by turning the Fine Adjust Knob counterclockwise until the output pressure is 0 barg / 0 iwcg. -
Page 12: Negative Pressure (Vacuum) Calibration
Connect the calibrator (pressure module, reference) and the instrument to be calibrated (device to be tested) to the pressure output fitting using the Beamex low pressure hose (max 40 bar) or similar. If needed, compensate the small pressure offset by turning the Fine Adjust Knob counterclockwise until the output pressure is 0 barg / 0 iwcg. -
Page 13: Important To Consider
• For a system with a very large volume, the PGL can only make small pressure adjustments and you may not reach the maximum pressure specified for the PGL. -
Page 14: Troubleshooting
Troubleshooting - 14 Troubleshooting The System is not Holding the Set Pressure. Indication Solution The calibrator or the external pressure Check that all pressure connections measuring device indicates that there are tight and that they are not leaking. is a leak in the system. Difficulties Operating the Coarse Adjust Indication Solution... -
Page 15: Maintenance
Maintenance - 15 Maintenance Cleaning Instructions If any parts of the PGL require cleaning, use a cloth damped with an alcohol- based solvent. Alternatively, use a low concentration of hydrogen peroxide or a mild solution of soapy water. Never use strong detergents. -
Page 16: Service Related To Coarse Adjust
Replacing the Piston, Piston Seals or other Parts PGL Seal service kit (8003710) PGL Coarse Adjust service kit (8003720) Rotate the Coarse Adjust Handwheel counterclockwise to the maximum. It is important that the piston is located as close as possible to the body end cap of the Coarse Adjust not to damage the cylinder when removing the subassembly from the pump. - Page 17 Maintenance - 17 Rotate the body end cap outwards with your hand. When it is fully open, gently pull the Coarse Adjust subassembly out. Figure 6: Removal of the Coarse Adjust Subassembly Replace the seals only or replace all parts with new ones included in the service kit.
-
Page 18: Replacing The Coarse Adjust Handwheel
Tighten the body end cap with the opening tool. Replacing the Coarse Adjust Handwheel PGL Coarse Adjust Handwheel (8003715) Loosen the small hex screw located at the bottom of the handwheel. Replace the old handwheel with a new one and tighten the hex screw. -
Page 19: Service Related To Fine Adjust
Service Related to Fine Adjust PGL Seal service kit (8003710) PGL Fine Adjust service kit (8003725) Rotate the Fine Adjust Knob counterclockwise to the maximum. It is important that the piston is located as close as possible to the body end cap of the Fine Adjust not to damage the cylinder when removing the subassembly from the pump. - Page 20 Maintenance - 20 Rotate the body end cap outwards with your hand. When it is fully open, gently pull the Fine Adjust subassembly out. Figure 12: Removal of the Fine Adjust Subassembly Replace the seals only or replace all parts with new ones included in the service kit.
- Page 21 Maintenance - 21 When the new parts are assembled, turn the Fine Adjust Knob counterclockwise to the maximum until the piston is locked to the body end cap. Figure 14: Fine Adjust Subassembly Install the subassembly in its place on the threads at the end of the Fine Adjust cylinder.
-
Page 22: Replacing The Support Leg
PGL Support Leg (8003730) Please notice that this item only includes one installation collar, one support leg and mounting screws. You have to order two PGL support legs if you need to replace both legs. Unscrew the 4 mm hex screws located under the leg.
Need help?
Do you have a question about the PGL and is the answer not in the manual?
Questions and answers