Table of Contents
Advertisement
Quick Links
Advertisement
Table of Contents
Troubleshooting

Related Manuals for Thermo Scientific BF51842C


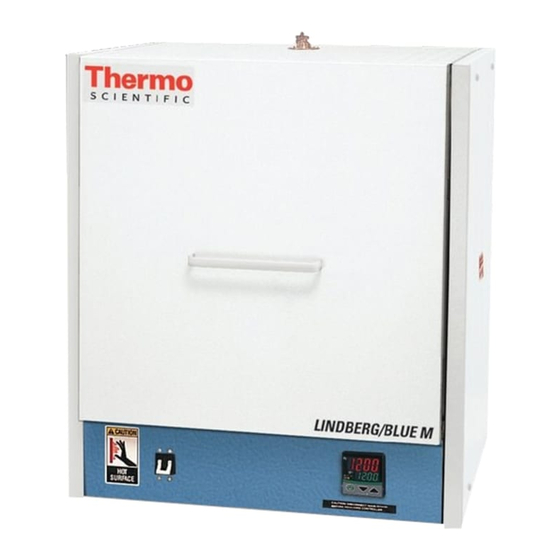
Summary of Contents for Thermo Scientific BF51842C
- Page 2 This document is not part of any sales contract between Thermo Fisher Scientific Inc. and a purchaser. This document shall in no way govern or modify any Terms and Conditions of Sale, which Terms and Conditions of Sale shall govern all conflicting information between the two documents. Thermo Scientific...
-
Page 3: Table Of Contents
Chapter 6 Operation - UT150 Controller UP150 Controller Overview....................6-2 Single Setpoint Operation....................6-4 Programming Operation:Entering a Program..............6-6 Using the Hold Function....................6-11 Using the Advance Function.................... 6-11 Auto Tuning the Controller....................6-12 Temperature Offset Procedure ..................6-13 Thermo Scientific... - Page 4 Right Hand Door Conversion................... 10-7 Chapter 11 Troubleshooting ......................11-1 Chapter 12 Replacement Parts....................... 12-1 Chapter 13 Pre-Installation......................13-1 Chapter 14 Spare Parts and Accessories ..................14-1 Chapter 15 Device Log ........................15-1 Chapter 16 Contact .......................... 16-1 Thermo Scientific...
- Page 5 Figure 11 Thermocouple ....................... 10-5 Figure 12 Door Insulation ......................10-6 Figure 13 Door Insulation Replacement ..................10-7 Figure 14 Door Hinge (Sheet 1/2) ....................10-8 Figure 15 Door Hinge (Sheet 2/2) ....................10-9 Figure 16 Wiring Diagram......................12-5 Thermo Scientific...
- Page 6 List of Figures Thermo Scientific...
-
Page 7: Chapter 1 Safety Notes
• Keep these operating instructions close to the incubator so that safety instruc- tions and important information are always accessible. • Should you encounter problems that are not detailed adequately in these operating instructions, please contact Thermo Fisher scientific immediately for your own safety. Thermo Scientific... -
Page 8: Safety Consideration
• May contain or form cristobalite (crystalline silica) with use at high temperature (above 871 °C) which can cause severe respiratory disease. • Possible cancer hazard based on tests with laboratory animals. Animal studies to date are inconclusive. No human exposure studies with this product have been reported. Thermo Scientific... -
Page 9: Warranty
• The Laboratory Box is not modified, • Only original spare parts and accessories that have been approved by Thermo Scientific are used (third-party spares without Thermo Scientific approval void the limited warranty), • Inspections and maintenance are performed at the specified intervals, •... - Page 10 Odor/Physical Description: White, odorless solid IV.FIRE AND EXPLOSION DATA Flash Point: NA NA Flammable Limits (LEL & UEL): NA Unusual Fire or Explosion Hazards: None None Extinguishing Media: NA Fire Fighting Procedures: Use extinguishing media suitable for surrounding fire. V. HEALTH HAZARDS Thermo Scientific...
- Page 11 Immediately rinse eyes with water. Remove any contact lenses, and continue flushing eyes with running water for at least 15 minutes. Do not rub eyes. Hold eyelids apart to ensure rinsing of the entire surface of eyes and lids with water. Get immediate medical attention. Thermo Scientific...
- Page 12 The above respirator recommendations are general guidelines only and may not be appropriate for certain applications. Please consult with your safety or industrial hygiene staff or consultants. VIII. REACTIVITY DATA Stability/Incompatibility: Stable under normal conditions of use. Soluble in hydrofluoric acid, phosphoric acid, and concentrated alkali. Thermo Scientific...
- Page 13 Handling/Storage: ® Endothermal Insulation should be handled with caution. Follow the personal protective equipment recommendations detailed in Section VII. Special precaution should be taken to avoid unnecessary cutting and tearing of the material to minimize generation airborne dust. Thermo Scientific...
-
Page 14: Explanation Of Safety Information And Symbols
Do not reuse product packaging because of possible product residue. Explanation of Safety Information and Symbols Safety Notes and Symbols Used Throughout These Operating Instructions Indicates a hazardous situation which, if not avoided, will result in death or serious injuries. Thermo Scientific... -
Page 15: Additional Symbols For Safety Information
Is used for useful hints and information regarding the application. Additional Symbols for Safety Information Wear safety gloves! Wear safety goggles! Harmful liquids! Electrical shock! Hot surfaces! Fire hazard! Explosion hazard! Suffocation hazard! Biological hazard! Contamination hazard! Thermo Scientific... -
Page 16: Standards And Directives
Safety Notes Standards and Directives The Box Furnaces complies with the following standards and guidelines: • Current/Approved Agency standards (Underwriters Laboratory/CSA/CE). 1-10 Thermo Scientific... -
Page 17: Chapter 2 Introduction
• Controlled heat-up rate eliminates thermal shock to materials. • Quick heat-up and cool-down rates. • Safety interlock switch automatically interrupts power to heating elements when door is opened. This feature protects heating elements and eliminates operator's exposure to electrical shock. Thermo Scientific... -
Page 18: Specifications
Model Dimension Maximu Watts Thermo Voltage Integral Shipping WXF-BXH in.(cm) couple Control Weight Operatin lbs(kg) g Temp Chamber Exterior BF51842C 15x15x15 29x28x33 1200 °C 6,400 Type R 208/240 VAC UP150 BF51842BC (38.1x38.1x3 (73.6x71.1x 50/60 Hz (127) 8.1) 83.8) single phase... -
Page 19: Chapter 3 Pre-Installation
The BF51842 Series furnaces are not designed for use with combustible or inert atmospheres requiring an air tight chamber. If an exhaust port is used, the furnace should not be located in an enclosed area without proper ventilation. Do not use combustible gases in this furnace. Thermo Scientific... - Page 20 Pre-Installation Atmosphere Systems Avoid combustible products which generate toxic or hazardous vapor or fumes. Work should only be done in a properly vented environment. Thermo Scientific...
-
Page 21: Chapter 4 Installation
3. The 7/8 inch diameter hole located on the lower rear panel may be used to mount a standard 1/2 inch electrical conduit connector. 4. Thread two properly sized power wires and one properly sized ground wire through the conduit hole. The wires should be marked L1, L2, and ground. Thermo Scientific... -
Page 22: Figure 2 Thermocouple
If mechanical adjustment is necessary, slight bending of the switch arm can be done. 7. Replace and secure the small cover on the Rear panel and right side panel of the furnace using the necessary screws. Figure 2. Thermocouple Thermo Scientific... -
Page 23: Gas Inlet Tube
4. Align the mounting holes in the rear housing panel with the holes in the gas inlet tube assembly and secure the assembly with the mounting screws. Figure 3. Gas Inlet Tube Assembly. Thermo Scientific... -
Page 24: Inert Gas Tubing
There is also some danger that the carbon residue will be absorbed through the surface of the Moldatherm insulation and affect the fully embedded heating elements. Thermo Scientific... -
Page 25: Hearth Plate Information
• Hearth plates are designed with a grooved surface. • The grooved surface must be positioned against the chamber floor. Most hearth plate materials made of ceramic fibre and can be broken if dropped. Figure 5. Hearth Plate Ripped Thermo Scientific... -
Page 26: Figure 6 Bf51731 And Bf51732 Chamber Showing Shelf Groove
3. Model series BF51841 and BF51842 are supplied with a pair of half-depth shelves. 4. One or both of these shelves can be installed into the chamber using any of the three groove sets near the mid-point on each side wall. Figure 7. BF51841 and BF51842 Chamber Showing Shelf Groove Thermo Scientific... -
Page 27: Chapter 5 Operation
(i.e. nitrogen, argon, and helium) can be safely run in the BF51842 box furnace. However, maximum temperatures may be derated depending on atmosphere. An initial burn in period in air is recommended. Please contact Thermo Fisher Scientific prior to using the furnace with an inert atmosphere. Thermo Scientific... -
Page 28: Flow Meter Option
RST indicator to illuminate. iii. If MAN (manual) indicator is illuminated, press and release the “MODE” button to display "MODE: AUT01" and with "changing!" flashing on the lower display. Press and release the “SET/ENT” button once. Thermo Scientific... - Page 29 If the "0" (zero) value is not displayed, select “0” with “UP and DOWN ARROW” button then press and release the “SET/ENT” button ONCE. 9. Press and release the “SET/ENT” button ONCE to s how the pattern and sequence numbers "01.01" in the upper display, and the lower display: Thermo Scientific...
- Page 30 1 that selected the target temperature and the time to reach this temperature. 15. Press and release the “SET/ENT” button ONCE to show the pattern and sequence numbers “0 1.02" in the upper display, and the lower display: Thermo Scientific...
- Page 31 2. If MAN (manual) indicator is illuminated, press and release the “MODE” button to display "MODE: AUT01" and with "changing!" flashing on the lower display. Press and release the “SET/ENT:” button once. 3. Review the lower display to identify the program pattern number. Thermo Scientific...
- Page 32 AJC value of "1" is entered t o initiate this hold. See programming example # 1. Repeating the program segments The program pattern can have a portion of the pattern repeated for a specific number of cycles before completing the program profile. Thermo Scientific...
- Page 33 The Hold Mode is established on the end of the second segment with JC = 1. The third segment is used only to end the program pattern creation. This pattern makes for a slower ramp rate than found on a single setpoint. Thermo Scientific...
- Page 34 In the following program pattern a simple ramp and dwell segment series is repeated to achieve a temperature variation several times within the same program, then ends in the Local Mode cooling the chamber temperature to the last local target set point. Review caution about ending with Local Mode. Thermo Scientific...
- Page 35 The Segment # 4 was used only to carry the instruction to end the segment in the Local Mode. Segment # 4 is not used in the program until the repeats are completed; thus moving Segment # 4 to the end of the program. Thermo Scientific...
- Page 36 Operation Programming the UP550 Controller 5-10 Thermo Scientific...
-
Page 37: Chapter 6 Operation - Ut150 Controller
Before reconfiguring the controller, read this chapter and the UT150 operation manual. Reconfiguring the controller can change the unit characteristics and design parameters, which can hamper performance and make the equipment dangerous to use. Thermo Scientific... -
Page 38: Up150 Controller Overview
(the PV or process value) and supplies the heat necessary to achieve the desired setpoint. The controller includes an LED display and a push button keypad. Refer “Table 2” “Table 3” for lists of displayed parameters and keypad functions. Thermo Scientific... - Page 39 Key lock Setup parameter (access by setting LoC = “-1”) Input type (K Thermocouple) 1500 High setpoint limit °C; °F =2732 Low setpoint limit °C; °F =32 Ramp Times Units,°Per minute ( 0=°Per Hour) Super Function Direct/Reverse action Thermo Scientific...
-
Page 40: Single Setpoint Operation
4. Press and release the "SET/ENT" button to select this new value and advance to the "SSP 25" display, the beginning of the program mode. 5. Press and release the "SET/ENT" button until the High Temperature Alarm Setpoint value is displayed as "A1". Thermo Scientific... -
Page 41: Programming Operation:entering A Program
4. This will change the display showing the measured the temperature in the upper display, with the lower display showing the Start Set Point (SSP) temperature setpoint of the program. Programming Operation: Entering a Program This section describes how to enter a simple program that is designed to: Thermo Scientific... - Page 42 The first display is the Start Set Point parameter, shown as "SSP" in the upper display. The value assigned to SSP is usually the current room temperature, 25 °C. On the next page is an illustration of the program profile and a table of the parameters entered. Thermo Scientific...
- Page 43 9. The next parameter, "SP4" is considered the dwell segment. Select the same target temperature as "SP3" with the arrow buttons, then press and release the "SET/ENT" buttons twice to enter this new value and to advance to next display. Thermo Scientific...
- Page 44 "arrow" buttons. Press and HOLD the "SET/ENT" button for 3 seconds to return to the Reset or standby display. This concludes the steps required to enter a typical ramp- and dwell program. On the next page is an illustration of program profil and a table of the parameters entered. Thermo Scientific...
-
Page 45: Figure 9 Ramp And Dwell Graph
Segment 2 Setpoint Line length for Segment 2 Segment 3 Setpoint Line length for Segment 3 Segment 4 Setpoint Time length for Segment 4 Event 1 Alarm 1 Hysteresis for alarm 1 Event 2 Alarm 2 Alarm 2 Thermo Scientific... -
Page 46: Using The Hold Function
1. Press and hold the SET/ENT key for 3 second, "noDE" will appear in the upper display. Press SET/OUT key to "Hold". 2. Press the "arrow up" key so that "on" with flashing decimal appears in the lower display. 6-10 Thermo Scientific... -
Page 47: Using The Advance Function
3. Press and release the “SET/ENT” button once to show "PrG" on the upper display. 4. Press the "UP" arrow to make the lower value "1". 5. Press and release "SET/ENT" button twice to display "SP1" Using the arrow buttons to revise the target setpoint. Thermo Scientific 6-11... -
Page 48: Auto Tuning The Controller
8. The auto tune is completed when the regular display of the measured temperature is shown without the "At" value flashing. The chamber should now 6-12 Thermo Scientific... -
Page 49: Temperature Offset Procedure
"+1" [(+3 needed offset) + (-2 current offset) = (+1 new offset)]. 7. Press and release the "SET/ENT" button once to register this new offset value. Press and hold the "SET/ENT” button for 3 seconds to exit this controller menu. Thermo Scientific 6-13... - Page 50 8. "SPH" is the next parameter displayed. Select and enter the new value, then press and release the “SET/ENT” button TWICE. 9. "SPL" is the next parameter displayed. Select and enter the new value, then press and release the “SET/ENT” button ONCE. 6-14 Thermo Scientific...
- Page 51 The following table shows the corresponding parameters value for 1100 °C for furnace in °C and °F. Parameter °C °F 1500 2732 The P, I, D parameters may be altered through auto tuning (refer to Section “Auto Tuning the UP150 Controller” Chapter UT150 Controller Operation). Thermo Scientific 6-15...
- Page 52 Operation - UT150 Controller Changing Temperature Scale Between °C and °F 6-16 Thermo Scientific...
-
Page 53: Chapter 7 Excess Temperature Option-Up550 ("P"Models)
Hold mode freezes the program clock. It is accessed through the Mode key. * LOC - Local Mode. This mode allows the controller to operate in a "steady-state" mode where a single setpoint is maintained continuously. Refer to Section “Local Mode Operation”. *MAN - Manual Mode. Thermo Scientific... -
Page 54: Program Mode Operation
“pattern entry” mode. 4. PTN = 1 will be displayed. This means “Pattern 1” is being is being configured. Note that pattern I has already been entered at the factory for test purposes. Thermo Scientific... -
Page 55: Local Mode Operation
2. in the lower display, you will see "LOC: ON" with the word "changing" flashing. Press the SET/ENT key. The LOC light is now illuminated indicating you are in the LOCAL mode. 3. Use the up and down arrow keys to enter a setpoint. Press the SET/ENT key to register the setpoint. Thermo Scientific... - Page 56 Press the SET/ENT key once then enter the alarm value using the up/down arrow keys. Press the SET/ENT key to register the alarm value. To shut off the control's output, place the unit in RESET mode by holding down the RESET key for 2 seconds. Thermo Scientific...
-
Page 57: Chapter 8 Excess Temperature Option ("B" Models)
This time indicates when the chamber temperature exceeded the Excess Temperature setpoint. 2. Peak Exceeded Temperature The Peak Exceeded Temperature is the highest temperature measured by the Excess Temperature Controller. Thermo Scientific... -
Page 58: Operating Parameters
SET/ENT button is pressed and released, with the "tIn" or "HI" in the top display. These values will be erased from the display and memory when the "up arrow/reset" button is pressed during their respective display (add the "EXCEEDED" indicator is off). Thermo Scientific... - Page 59 A source failure (indicated with "0.0" in the upper display) will cause "OUT" illuminated. A power failure, in some instances causes "OUT" to be illuminated. As lost as the "EXCEEDED" indicator is extinguished, the UT150L can be reset with press and hold of "UP ARROW/RESET" button. Thermo Scientific...
- Page 60 Excess Temperature Option (“B” Models) Excess Temperature Controller Operation Thermo Scientific...
-
Page 61: Chapter 9 Communication Option
Assure lower value at “ø”. Press the down arrow to show “-1” in the lower display and press SET/ENT to acknowledge and enter the Setup Parameter menu. 2. Press and release the SET/ENT button to access the six parameters specific to communication option. Thermo Scientific... -
Page 62: Software Installation
“Start Scan” button. 8. The SpecView program scans all 99 possible controller addresses and places a representative “Instrument View” of the temperature controller on the PC Screen for each controller found connected to PC. The factory-set addresses Thermo Scientific... -
Page 63: Communications Test
Select the “Close” button. Make no changes at this time. This concludes the initial software diagnostics. ??? Unit must havefactor installed countour containing assitionnal board for communication operation, fild upgrade required of new countour with comm board, hairless, almost with exterior cable and specieview. Thermo Scientific... -
Page 64: Troubleshooting
SET/ENT for 3 seconds. 3. Press and release SET/ENT repeatedly until the upper display reads LoC. 4. Press until the displayed value of LoC is - 1, then press SET/ENT to access the Setup Parameters menu. Thermo Scientific... - Page 65 6. Press and hold SET/ENT for 3 seconds to exit the Setup Parameters Menu. Loss of power to the Excess Temperature Controller will not change the setpoint or hysteresis value. However, the last recorded Exceeded Temperature Duration Time and peak Exceeded Temperature will be lost. Thermo Scientific...
- Page 66 Communication Option Addresses for Multiple Controllers Thermo Scientific...
-
Page 67: Chapter 10 Maintenance
Maintenance should only be performed by trained personnel. Disconnect console from main power before attempting any maintenance to console or its controls. Before maintaining this equipment, read the applicable MSDS (Material Safety Data Sheets) in the safety notes. Thermo Scientific 10-1... -
Page 68: Heating Elements
After prolonged use, hairline cracks may develop in the insulating materials. Minor cracks will not affect furnace performance. Care should be taken when working with or handling the heating units, as the ceramic fibers and dust particles are a possible eye/skin/lung irritant. Refer Section “Safety Notes”. 10-2 Thermo Scientific... -
Page 69: Heating Unit Replacement
5. A gasket made of ceramic fiber blanket is located between the two heating units. This material should be retained and used with the replacement heating units. 6. Install the replacement heating units in the frame and reverse the above procedure to reassemble the furnace. Thermo Scientific 10-3... -
Page 70: Thermocouple (T/C) Repalcement
2. Remove the back panel of the furnace by removing the appropriate eight hex- head screws. 3. The thermocouple is located in the upper left hand corner of the rear of the furnace. Note location and color of the thermocouple and lead wires. Remove 10-4 Thermo Scientific... -
Page 71: Solid State Relay (Ssr) Replacement
3. Note positions of the wires on the SSR. Disconnect the wires and remove outer screws. Remove the heatsink and SSR from the furnace. 4. Remove the SSR from the heat sink. Replace with the new SSR and reverse the above procedure for reassembly. Thermo Scientific 10-5... -
Page 72: Door Insulation Replacemen
3. Loosen the screws holding the upper and lower door insulation brackets in place. The screws do not need to be removed. 4. Pull the door insulation out of the support brackets. Insert new insulation and reassemble the support brackets. Figure 12. Door Insulation 10-6 Thermo Scientific... -
Page 73: Figure 13 Door Insulation Replacement
Maintenance Door Insulation Replacement Figure 13. Door Insulation Replacement Thermo Scientific 10-7... -
Page 74: Right Hand Door Conversion
4. Check alignment of the door insulation with the chamber. Sideways adjustment can be made by loosening the door insulation supports and moving the insulation plug. Vertical adjustment can be made by placing or removing spacers on the door hinge. Figure 14. Door Hinge (Sheet 1/2) 10-8 Thermo Scientific... -
Page 75: Figure 15 Door Hinge (Sheet 2/2)
Maintenance Right Hand Door Conversion Figure 15. Door Hinge (Sheet 2/2) Thermo Scientific 10-9... - Page 76 Maintenance Right Hand Door Conversion 10-10 Thermo Scientific...
-
Page 77: Chapter 11 Troubleshooting
The controller displays do The furnace Is not con- Check furnace connection to power not illuminate. nected to the power source Main switch is defective Replace power switch or controller Fuse(s) Blown Replace fuse(s) and verify power connections Thermo Scientific 11-1... - Page 78 Allow load ample time to reach equi- time librium Intermittent failure of Verify wiring connection switch, controller, limit switch, or wiring Temperature Offset. Controller degradation Offset or bias the controller and/ or and/or sensor degradation replace the sensor 11-2 Thermo Scientific...
- Page 79 Replacement Parts All quantities are one each unless noted. Model-BF51842C, Box Furnace, 1200 °C Description Item BF51842C-1 BF51842BC-1 Heater-Chamber, top or bottom 300880H01 Hearth Plate 300807H01 Shelf, Half-depth 7221-2067-001 Exhaust Port Cover 7221-2063-00A Gas Inlet Assembly 300253G02 S Thermocouple, Single...
- Page 80 6 feet 12 feet Wire Harness 38850G31 Main Circuit Breaker 302795H05 Control circuit breaker 21642H01 Heater fuse 32657-004 Contactor 300088H01 Solid State Relay 102460 Red Pilot Light 33002-01 Main Controller 303115H19 Over-temp Controller 303115H05 Door Insulation Assem- 7221-2048-00A 12-2 Thermo Scientific...
- Page 81 T/C Leadwire 33940-006 6 feet 12 feet Wire Harness 38850G31 Main Circuit Breaker 302795H05 Control circuit breaker 21642H01 Heater fuse 32657-004 Contactor 300088H01 Solid State Relay 102460 Red Pilot Light 33002-01 Main Controller 303115H19 Over-temp Controller 303115H05 Thermo Scientific 12-3...
- Page 82 38280H01 Door Trailing Arm 301667H01 Cab.Bracket, Trailing Arm 301665G02 for optional right hand door swing Operational Manual 305432H01 Supplemental Manual 311831H01 Wiring Diagram 304258I01 On the following page is a wiring diagram for BF51842PC and PBC models. 12-4 Thermo Scientific...
-
Page 83: Figure 16 Wiring Diagram
Replacement Parts Figure 16. Wiring Diagram Thermo Scientific 12-5... - Page 84 Replacement Parts 12-6 Thermo Scientific...
- Page 85 Ce pmduit doit &re conforme 1 la directive europtenne (2002/96EC) des Dkchets d'Equipements Electriques et Electroniques (DEEE). I1 est merqui par le symbole suivant. Thermo Scientific s'est associi avec une ou plusieurs compagnies de recyclage dans chaque ttat membre de l'union europtenne et ce produit devrait &re collect6 ou recyclt par celles-ci.
- Page 86 WEEE Compliance 13-2 Thermo Scientific...
-
Page 87: Chapter 14 Spare Parts And Accessories
Spare Parts and Accessories This chapter is not applicable. Thermo Scientific 14-1... - Page 88 Spare Parts and Accessories 14-2 Thermo Scientific...
-
Page 89: Chapter 15 Device Log
Device Log Laboratory Box Part number: Furnaces Serial number: Service number: Location Operator’s note: Work carried out Notes Date Signed: Thermo Scientific 15-1... - Page 90 Device Log 15-2 Thermo Scientific...
-
Page 91: Chapter 16 Contact
Enquiries from Europe, Middle East and Africa: Phone. + 49 (0) 6184 / 90-6940 + 49 (0) 6184 / 90-6772 E-Mail info.labequipment.de@thermofisher.com Postal address USA: Thermo Scientific 275 Aiken Road Asheville, NC 28804 Enquiries from North America: Phone +1 800-879 7767 +1 828-658 0363 E-Maili info.l abequipment@thermofisher.com... - Page 92 Contact Enquiries from Asia Pacific: Phone +852-2711 3910 +852-2711 3858 E-Mail info.labequipment@thermofisher.com 16-2 Thermo Scientific...
Need help?
Do you have a question about the BF51842C and is the answer not in the manual?
Questions and answers