
Subscribe to Our Youtube Channel
Related Manuals for Fisher & Paykel HC90BCX1


Summary of Contents for Fisher & Paykel HC90BCX1
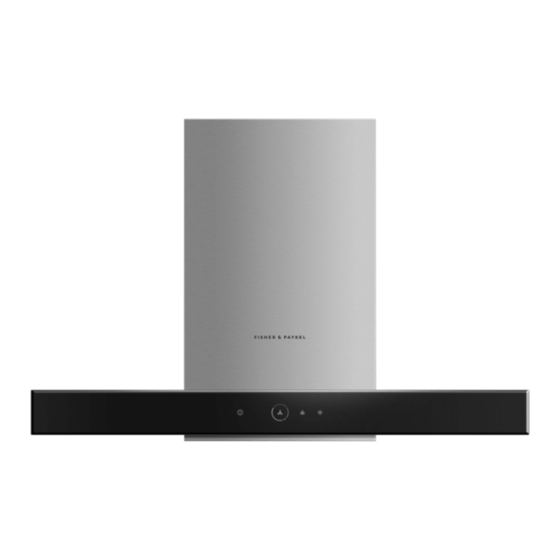
- Page 1 WALL RANGEHOOD, 90CM, BOX CHIMNEY MINIMAL / CONTEMPORARY HC90BCX1 USER GUIDE / INSTALLATION GUIDE CN HK SG...
- Page 3 WALL RANGEHOOD, 90CM, BOX CHIMNEY MINIMAL / CONTEMPORARY HC90BCX1 USER GUIDE CN HK SG...
-
Page 5: Table Of Contents
CONTENTS Safety and warnings Using your rangehood Control panel Care and cleaning Troubleshooting Manufacturer’s Warranty Customer care This product complies with mandatory national energy efficiency standard: GB 29539-2013, scan the QR code on the energy label to obtain information on product energy registration. Registration To register your product visit our website: fisherpaykel.com/register... -
Page 6: Safety And Warnings
SAFETY AND WARNINGS WARNING! Electric Shock Hazard Failure to follow this advice may result in electric shock or death. • Always disconnect the appliance from the mains power supply before carrying out any maintenance or repairs. Failure to do so can result in death, electric shock, fire or injury to persons. - Page 7 SAFETY AND WARNINGS READ AND SAVE THESE INSTRUCTIONS WARNING! When using this appliance always exercise basic safety precautions including the following: Disconnect the power supply when cleaning or inspecting the product. Do not damage or place heavy objects on the power cord. The room must have adequate ventilation when the rangehood is used at the same time as appliances burning gas or other fuels.
-
Page 8: Using Your Rangehood
USING YOUR RANGEHOOD This rangehood should be turned on for a few minutes before cooking in order to establish air currents upward through the rangehood. This will also enable hot air removal from your kitchen and keep the rangehood surface cool. When heat, smoke, moisture, grease and cooking odours are produced, they will be carried outside instead of drifting into other rooms. -
Page 9: Control Panel
CONTROL PANEL 1 Power on/off Press to turn the rangehood on/off. The fan automatically turns on to operate at speed 2. When turning the rangehood off, the fan will continue to operate for 3 minutes. Press a second time to turn the fan off immediately. -
Page 10: Care And Cleaning
CARE AND CLEANING This rangehood should be cleaned regularly using a mild, liquid detergent and a clean soft cloth to avoid a build-up of grease occurring. Avoid the use of corrosive chemicals, abrasive cleaning products, hard brushes and steel wool pads. Grease deposits are corrosive which can cause damage. - Page 11 CARE AND CLEANING Oil filter Clean the filter and the filter recess at least once a month. It may need to be cleaned more frequently depending on the cooking methods used and frequency of use. The filter should be removed and left to soak in hot soapy water. After soaking, wipe clean with a rag and rinse with clean water.
- Page 12 CARE AND CLEANING Clean the fan every 3 months. It may need to be cleaned more frequently depending on the cooking methods used and frequency of use. Cleaning the fan will require two people to disassemble and reassemble the rangehood. The fan should be removed and cleaned with hot soapy water.
- Page 13 CARE AND CLEANING Loosen the screws securing the chimney cover. Remove both the outer and inner chimney covers. Loosen the screws securing the main housing cover plate and remove it. Loosen the screws securing the intake ring and remove it. Twist the nut in a clockwise direction to remove the fan.
- Page 14 CARE AND CLEANING Replacing the fan Replace the fan and twist the nut anti- clockwise to secure. Replace the intake ring and tighten the screws to secure. Replace the main housing cover plate and tighten the screws to secure. Replace the inner and outer chimney covers and tighten the screws to secure.
- Page 15 CARE AND CLEANING Attach the rangehood back on the wall bracket and tighten the stopper screw to secure. Attach the ducting to the check valve assembly and tighten the screws to secure. Slide the upper chimney extension back up and attach to the chimney bracket (if using). Replace the oil receptacle.
-
Page 16: Troubleshooting
TROUBLESHOOTING If there is a problem with your rangehood, please check the following points before contacting your local Fisher & Paykel trained and supported service technician or the Customer Care Centre. PROBLEM POSSIBLE CAUSES WHAT TO DO No power. Power supply plug is not plugged Check the power plug is properly in or not properly connected. - Page 17 TROUBLESHOOTING PROBLEM POSSIBLE CAUSES WHAT TO DO Rangehood is loud. Main unit is not securely fastened to Check that the main unit is fastened the wall. securely. Fan is not well fitted. Fit the fan properly. Fan is damaged. Replace the fan (contact Customer Care).
-
Page 18: Manufacturer's Warranty
MANUFACTURER’S WARRANTY You automatically receive a 2 year Manufacturer’s Warranty with the purchase of this Rangehood covering parts and labour for servicing within the country of purchase. Fisher & Paykel undertakes to: Repair or, at its option, replace without cost to the owner either for material or labour any part of the product, the serial number of which appears on the product, which is found to be defective within TWO YEARS of the date of purchase. -
Page 19: Customer Care
CUSTOMER CARE Before you call for service or assistance Check the things you can do yourself. Refer to your user guide and check that: 1 Your product is correctly installed. 2 You are familiar with its normal operation. If after checking these points you still need assistance or parts, please refer to your nearest Fisher &... - Page 20 CUSTOMER CARE *If you call, write or contact our website please provide: your name and address, model number, serial number, date of purchase and a complete description of the problem. This information is needed in order to better respond to your request for assistance.
- Page 22 FISHERPAYKEL.COM © Fisher & Paykel Appliances 2022. All rights reserved. The models shown in this guide may not be available in all markets and are subject to change at any time. The product specifications in this guide apply to the specific products and models described at the date of issue.
- Page 23 WALL RANGEHOOD, 90CM, BOX CHIMNEY MINIMAL / CONTEMPORARY HC90BCX1 INSTALLATION GUIDE CN HK SG...
- Page 25 CONTENTS Safety and warnings Parts supplied Product components Prior to installation Product dimensions Installation height Electricial requirements Attach brackets and mounting screws Prepare rangehood Hang rangehood Connect ducting Attach accessories About your rangehood Final checklist...
-
Page 26: Safety And Warnings
SAFETY AND WARNINGS WARNING! Electric Shock Hazard Failure to follow this advice may result in electric shock or death. • Always disconnect the appliance from the mains power supply before carrying out any maintenance or repairs. Failure to do so can result in death, electric shock, fire or injury to persons. - Page 27 SAFETY AND WARNINGS READ AND SAVE THESE INSTRUCTIONS WARNING! When using this appliance always exercise basic safety precautions including the following: Please read the entire set of instructions before installing or using this appliance. Please make this information available to the person installing the appliance – doing so could reduce your installation costs.
-
Page 28: Parts Supplied
PARTS SUPPLIED WALL RANGEHOOD, INCLINE CONTEMPORARY HT90GCX1 USER GUIDE / INSTALLATION GUIDE Rangehood User guide and Wall bracket (1) Installation guide Upper chimney Check valve gasket Check valve bracket (1) assembly (1) Universal ducting Oil receptacle hose 175 (1) - Page 29 PARTS SUPPLIED Cross recessed Mounting screw* Expansion plug* pan head screw 4 x 48 (7) 10 x 48 (7) M4 x 20 (8) Self-tapping screw Support (2) Self-tapping ST3 x 8 (2) screw ST4 x 8 (2) * The screws and plugs are to be used in concrete or brick walls only. Different fixings will be required for other types of wall construction.
-
Page 30: Product Components
PRODUCT COMPONENTS Rangehood Chimney Upper chimney main housing extension Main housing Volute cover plate Hand-tightened Intake ring Check valve assembly Oil filter OIl receptacle... -
Page 31: Prior To Installation
PRIOR TO INSTALLATION Fisher & Paykel is not liable for any damage caused by not following these instructions. Please read the instructions carefully before installing the rangehood. Unpack the rangehood. Ensure the voltage (V) and the frequency (Hz) indicated on the rating plate match the voltage and frequency of the installation site. -
Page 32: Product Dimensions
PRODUCT DIMENSIONS PLAN PROFILE FRONT BOTTOM VIEW... - Page 33 PRODUCT DIMENSIONS HC90BCX1 PRODUCT DIMENSIONS A Maximum overall height of product B Minimum overall height of product C Overall width of product D Overall depth of product* E Height of rangehood control panel F Width of chimney G Depth of chimney*...
-
Page 34: Installation Height
INSTALLATION HEIGHT HEIGHT DIMENSIONS A Ducted installation Minimum height Maximum height B Height top of cooktop to base of product Electric cooktop min 650 – max 700 Gas cooktop min 650 – max 700 This rangehood must be installed no lower than the minimum height indicated in the table above. - Page 35 INSTALLATION HEIGHT Induction cooktop considerations Induction cooktops use energy efficient technology that only heats the contents of a cooking pot. Unlike gas or traditional electric cooktops, the surrounding air does not get heated when using an induction cooktop. As a result, rangehood filters, splashbacks and surrounding cabinetry do not get warmed up, increasing the likelihood of condensation on these cooler surfaces.
-
Page 36: Electricial Requirements
ELECTRICIAL REQUIREMENTS Rating plate location Before connecting the rangehood to the power supply, ensure the voltage and frequency indicated on the rating plate match that of the installation location: MODEL FREQUENCY VOLTAGE HC90BCX1 50 Hz 220 V... -
Page 37: Attach Brackets And Mounting Screws
ATTACH BRACKETS AND MOUNTING SCREWS Use the supplied mounting screws and expansion plugs if attaching to concrete or brick walls. Different fixings will be required for other types of wall construction. 280mm Decorative cover mounting holes (If required) Mark the locations for the wall bracket, Stopper screw stopper screw and upper chimney 32mm... -
Page 38: Prepare Rangehood
PREPARE RANGEHOOD Warning: Failure to install the screws or fixing device in accordance with these instructions may result in an electrical hazards. Place the check valve gasket and check valve assembly onto the air outlet at the top of the rangehood. Attach using the supplied cross recessed pan head screws. -
Page 39: Hang Rangehood
HANG RANGEHOOD The rangehood is heavy and requires two people to attach to the wall. Attach the rangehood to the wall bracket. Ensure the rangehood and wall bracket are firmly locked together. Insert the stopper screw at the top of the rangehood. Ensure the screw is tightly secured against the ranghood. -
Page 40: Connect Ducting
CONNECT DUCTING Ensure the ducting hose is stretched tight and trimmed to suit the installation space. For best performance, the ducting hose should not exceed 3m and should have minimal bends. Insert the unmarked end of the ducting hose into the check valve. Attach with the supplied self-tapping screws. -
Page 41: Attach Accessories
ATTACH ACCESSORIES Extend the upper chimney extension (if using) and attach onto the upper chimney bracket. Fit the oil receptacle onto the rangehood. Position it between the tabs on the oil filter and push into place. Remove all protective wrappings. -
Page 42: About Your Rangehood
ABOUT YOUR RANGEHOOD TECHNICAL DATA Light bulbs 3W x 1 Rated voltage: 220 V Type of power Rated frequency: 50 Hz Motor input power 219 W Rated input power 222 W Maximum air flow 14m³ / min Maximum: 650 Pa Air pressure At air flow of 8m³/min: 400 Pa Noise... -
Page 43: Final Checklist
FINAL CHECKLIST TO BE COMPLETED BY THE INSTALLER … Rangehood is correctly installed … All connections are secure … Connections have not pierced any electrical or water lines within the wall … Ducting has not been crushed or bent in any areas …... - Page 44 FISHERPAYKEL.COM © Fisher & Paykel Appliances 2022. All rights reserved. The models shown in this guide may not be available in all markets and are subject to change at any time. The product specifications in this guide apply to the specific products and models described at the date of issue.
Need help?
Do you have a question about the HC90BCX1 and is the answer not in the manual?
Questions and answers