
Related Manuals for APlusLift HW-8S


Summary of Contents for APlusLift HW-8S
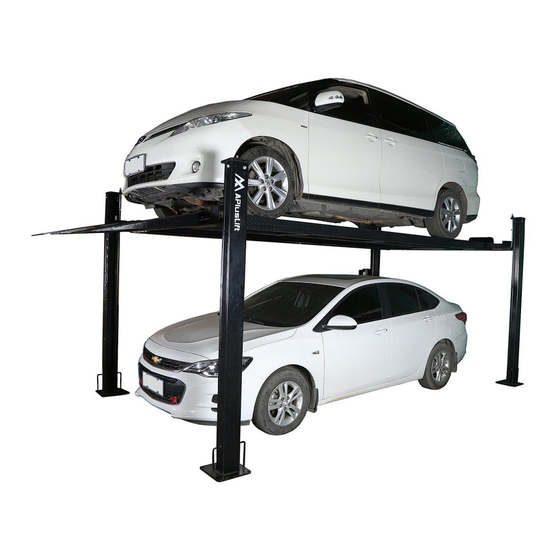
- Page 1 INSTALLATION & OPERATION MANUAL APlusLift HW-8S, HW-8SXLT 4-Post Portable Storage Car Lift 8,000LB Capacity...
- Page 2 SONGA ENTERPRISES INC. 8512 122ND AVE NE UNIT 25, KIRKLAND, WA 98033 Phone: 800-616-9618 Text: 425-300-2600 http://www.apluslift.com help@apluslift.com...
-
Page 3: Specification And Features
Specification and Features • Dimensions:HW-8S (HW-8SXLT) Overall Length: 175" (190”) ◦ Overall Height: 84" (94”) ◦ Overall Width: 106" (112”) ◦ Lifting Height: 72" (82”) ◦ Clearance Under Runway: 69" (79”) ◦ Width between Posts: 99" (105”) ◦ Drive Through Width: 93" (99”) ◦... -
Page 4: Recommended Tools
Important Information READ THIS BEFORE INSTALLING THE LIFT! Improper installation can cause injury or damage! • Read this installation and operation manual in its entirety before attempting to install the lift. Manufacturer or distributor assumes no responsibility for loss or damage of any kind, expressed or implied, resulting from improper installation or use of this lift. -
Page 5: Installation Requirements
Installation Requirements • Use proper lifting techniques when lifting individual pieces. Use plenty of help when moving lift pieces. Please wear work gloves to protect your hands. • The lift should be installed on a leveled floor with a slope of less than 3 degrees. •... -
Page 6: Installation Instructions
◦ Remove the power unit box. • Compare the parts with the part list (at the end of the manual) and contact APlusLift if there are any parts missing. • Please read the installation requirements in previous pages for concrete requirement and layout. - Page 7 Step 2 (Setting up Columns and Rails) • Lay out the columns (x4), tracks (x2), and cross rails (x2). • Place the cross rails into the column, aligning the locks and the steps on the same side. • Slide the cross rail to the lowest position. Release the lock rod to do so. Repeat these steps for each of the other columns.
- Page 8 Step 3 (Installing Cables) • The cables come pre-installed in the runway along with the cylinder. Route the cables in a manner in such that the two rear cables are in the front of the terminal block and the front two corners are in the back of the terminal. •...
- Page 10 Step 5 (Installing Power Unit) • Hang the power unit mounting bracket. • Install the hydraulic hose from the cylinder through the appropriate spot located on the runway. • Connect the hydraulic hose to the power unit. • Connect straight end into the runway fitting. •...
- Page 11 Step 6 (Electrical Connection to Power Unit) • Warning: T he wiring must comply with local code. Please find a certified electrician to connect the power unit to a 110V power outlet. Please protect each circuit with a time delay fuse or circuit breaker. •...
- Page 12 This procedure pumps all the air from the system. • Lifting speed will be faster (be normal speed) after air is bled out. Please Check https://www.apluslift.com/pages/faq for Troubleshooting. Please Check Operation, Safety, and Maintenance Before Use.
-
Page 13: Operation
Operation Only authorized personnel can operate the lift. Please read operating and safety procedures carefully before operating the lift. • Maintain and inspect lift in accordance with the owner’s manual. Never exceed the capacity. • Do not operate a lift that is damaged or in need of repair. •... - Page 14 Safety NEVER WORK UNDER OR NEAR THIS LIFT WITHOUT THE LOCKS BEING ENGAGED. THE POWER UNIT IS NOT DESIGNED TO BE A LOADING-HOLDING DEVICE. NOT USING THE LOCKS WILL RESULT IN A PREMATURE FAILURE TO THE CYLINDERS, PUMP, AND/OR CABLES AND CAN CAUSE SERIOUS PROPERTY DAMAGE OR PERSONAL INJURY! FAILURE TO HEED THIS WARNING WILL RESULT IN IMMEDIATE TERMINATION OF YOUR WARRANTY! FAILURE TO PERFORM THE DAILY PRE-OPERATIONAL CHECK CAN RESULT IN...
-
Page 15: Maintenance
◦ Prior to lowering the vehicle, walk around the lift and check for any objects that might interfere with the operation of the lift and safety latches; tools, air hoses, shop equipment, etc. ◦ Always lower the lift to the lock position before going under the vehicle. ◦... - Page 16 2. Change the hydraulic fluid. It is an important maintenance procedure to keep the hydraulic fluid clean. No hard fast rules though. Operating temperature, type of service, contamination levels, filtration, and chemical composition of the fluid should be considered. If operating in a dusty environment a shorter interval may be required. Special Maintenance Tasks (performed by a trained maintenance expert only) •...
- Page 17 Part List...
-
Page 18: Limited Warranty
There is no other express warranty on the APlusLift lifts and this warranty is exclusive of and in lieu of all other warranties, expressed or implied, including all warranties of merchantability and fitness for a particular purpose.
Need help?
Do you have a question about the HW-8S and is the answer not in the manual?
Questions and answers