Table of Contents
Advertisement
Quick Links
Advertisement
Table of Contents

Summary of Contents for Draper 19392
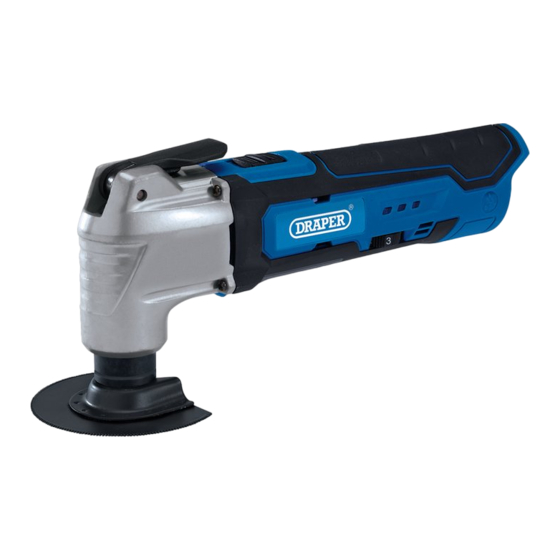
- Page 1 Original Instructions Version 1 OSCILLATING MULTI-TOOL 19392...
-
Page 2: Preface
All photographs and drawings within this manual are document is part of the product; retain it for the life supplied by Draper Tools to help illustrate correct of the product, passing it on to subsequent holders. operation of the product. -
Page 3: Table Of Contents
2. Contents 1. Preface 1.1 Product Reference 1.2 Revisions 1.3 Understanding the Safety Content 1.4 Copyright © Notice 2. Contents 3. Warranty 4. Product Introduction 4.1 Scope 4.2 Specification 5. Health and Safety Information 5.1 General Power Tool Safety Warnings 5.2 Additional Health and Safety Warnings for this Multi-Tool 5.3 Safety Information for Mains-Powered Chargers and Battery Packs... -
Page 4: Warranty
This warranty period covers parts and labour for 24 months from the date of purchase. Your Draper Tools guarantee is not effective until you can Where tools have been hired out, the warranty period produce, upon request, a dated receipt or invoice to covers 90 days from the date of purchase. -
Page 5: Product Introduction
This product is designed for sawing and cutting various Any other application beyond the conditions established unhardened materials, including wood, plastic, gypsum, for use will be considered misuse. Draper Tools accepts non-ferrous metals and fastening elements, such as no responsibility for improper use of this product. - Page 6 4. Product Introduction Important: The declared vibration total values and noise emissions values have been measured in accordance with a standard test method and may be used for comparing one tool with another. These values may also be used in a preliminary assessment of exposure.
-
Page 7: Health And Safety Information
5. Health and Safety Information 5.1 General Power Tool Safety Warnings • If operating a power tool in a damp location is unavoidable, use a residual current device (RCD) WARNING! Read all safety warnings, instructions, protected supply. illustrations and specifications provided with this −... -
Page 8: Additional Health And Safety Warnings For This Multi-Tool
− Many accidents are caused by poorly maintained Chargers and Battery Packs power tools. Important: Use ONLY the Draper Tools 12V range • Keep cutting tools sharp and clean. battery pack and charger supplied with this product. DO − Properly maintained cutting tools with sharp ... -
Page 9: Connection To The Power Supply (Charger)
5. Health and Safety Information • ALWAYS disconnect the charger from the power This is a Class II appliance and is designed for † supply before removing the battery. connection to a power supply matching that detailed on the rating label and compatible with the plug fitted. • Charge the battery in a dry and well-ventilated environment in ambient temperatures between 5 and CAUTION! Use ONLY the power supply provided. -
Page 10: Identification And Unpacking
6. Identification and Unpacking 6.1 Product Overview Tool flange Battery release buttons Lock lever 12V battery pack LED lamp On/off switch Variable speed dial Battery level indicators Soft grip handle – 10 –... -
Page 11: What's In The Box
If any part is occurred during shipment. damaged or missing, do not attempt to use the product. Please contact the Draper Helpline; contact details can be found at the back of this manual. 1 x Oscillating multi-tool... -
Page 12: Preparing The Multi-Tool
7.1 Installing and Removing the Battery to the power supply. Pack Important: ONLY use this tool with battery packs and chargers from the Draper Tools 12V range. Read all of the safety and operation instructions provided with these parts before use. (I.1) (I.2) -
Page 13: Fitting Accessories To The Tool Flange
7. Preparing the Multi-tool 7.3 Fitting Accessories to the Tool Flange Important: ONLY use accessories intended for this tool as supplied by Draper Tools. Other accessories may not fit correctly and may damage the tool or cause injury. Fig. 5 The LED lamp (3) illuminates automatically when the tool is switched on and goes out when the tool is switched off. -
Page 14: Operating Instructions
• DO NOT force the tool in the direction of the accessory’s non-cutting edge. • DO NOT exert excessive pressure on the tool. • For cutting operations, Draper Tools recommends speeds 3–5. Fig. 7 8.4 Notes on Sanding Operations The speed of the tool’s oscillation can be controlled... -
Page 15: Maintenance And Troubleshooting
Important: Only the accessories included with this 9.2 Storing the Multi-tool product are replaceable by the user. Any other repair or servicing should be carried out by an authorised Draper • Store the product in a clean and dry location, out of Tools repair agent. -
Page 16: Disposal
10. Disposal At the end of its working life, or when it can no longer be repaired, dispose of the product according to local regulations. Contact your local authority for details of collection schemes in your area. In all circumstances: • DO NOT dispose of power tools with domestic waste. -
Page 17: Explanation Of Symbols
11. Explanation of Symbols Read the instruction manual Direction of rotation Warning! Oscillation range Risk of electric shock, do not open Product weight (bare) Wear suitable eye and protection and a For indoor use only dust mask Do not expose to rain WEEE –... - Page 18 Notes – 18 –...
- Page 19 Notes – 19 –...
- Page 20 General Enquiries: +44 (0) 23 8026 6355 General Fax: +44 (0) 23 8026 0784 Service / Warranty Repair Agents For aftersales servicing or warranty repairs, please contact the Draper Tools Product Helpline for details of an agent in your area. © Published by Draper Tools Limited...


Need help?
Do you have a question about the 19392 and is the answer not in the manual?
Questions and answers