Advertisement
- 1 GENERAL SPECIFICATIONS
- 2 EQUIPMENTS
- 3 TECHNICAL DATA
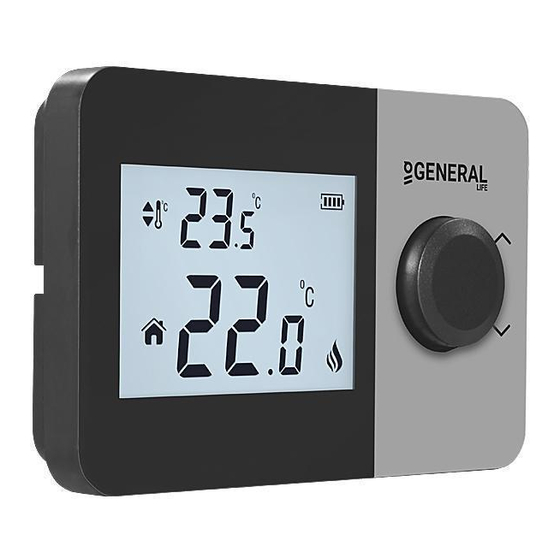
- 4 ROOM THERMOSTAT
- 5 ROOM THERMOSTAT PLACEMENT
- 6 BATTERY PLACEMENT
- 7 ROOM THERMOSTAT WIRING DIAGRAM
- 8 ROOM THERMOSTAT TEMPERATURE CALIBRATION
- 9 ROOM THERMOSTAT HEATING / COOLING MODES
- 10 ROOM THERMOSTAT HYSTERESIS POSITIVE MENU
- 11 ROOM THERMOSTAT HYSTERESIS NEGATIVE MENU
- 12 FACTORY SETTINGS RESET
- 13 ROOM THERMOSTAT WORKING LOGIC
- 14 FREQUENTLY ASKED QUESTIONS
- 15 Documents / Resources
GENERAL SPECIFICATIONS
HT260S is a wired room thermostat. The user can adjust the room temperature with the required temperature and get more comfortable and economic heating/cooling.
- Precise Temperature Measurement
- Heating calibration
- Heating/Cooling Modes
- ON/OFF Control
- Wired Connection
- Hysteresis Settings
EQUIPMENTS

HT260S Room Thermostat

Wall Hanger

Alkaline Battery

Dowels and Screws
TECHNICAL DATA
| Dimensions | 88mm / 136mm / 31mm |
| Operating Current | 3V DC (2 x AAA alkaline battery) |
| Relay NO Switching Current | 2A (30VDC – Resistive load) 0.5A (125VAC – Resistive load) |
| Temperature Measurement Accuracy | 0.1oC |
| Operating Sensitivity | (-2.0oC) – (+2.0oC) |
| Operating Temperature Range | (5oC) – (30oC) |
| Battery Life | 1 Year (2 x AAA) |
| Operating Temperature | (-10oC) – (+50oC) |
| Storage Temperature | (-20oC) – (+60oC) |
ROOM THERMOSTAT

ROOM THERMOSTAT PLACEMENT
Room Thermostat needs to be placed in the room which is used most frequently. For instance; living room or lounge. Placing the Room Thermostat in a spot that have air circulation like entrance of a room or side of window should be avoided. Also anywhere close to heating/cooling units such as radiator, stove and spots which get direct sun lights would not be suitable. Room Thermostat needs to be located above the floor 150 cm height. Few trials may be made to find the most convenient spot.


BATTERY PLACEMENT
Detach your Room Thermostat from Wall Hanger. Then remove the battery housing from the back of room thermostat. Put 2 alkaline batteries into battery housing. Please make sure you placed the batteries in correct directions. Place your room thermostat on the Wall Hanger after assembling battery housing back. Change the both batteries together.

Low Battery Warning: When the "  " icon appears on the screen, it means "low battery warning". It is recommended to replace the batteries when this warning appears.

When the product is not used for a long period (more than 15 days), remove the batteries. Otherwise, malfunctions that may occur would be out of warranty.
Please throw your dead batteries into the waste bin for batteries.
ROOM THERMOSTAT WIRING DIAGRAM

Operations within the heating / cooling unit or the electrical installation must be carried out by professionally qualified persons.
ROOM THERMOSTAT TEMPERATURE CALIBRATION
Temperature sensors which are used in Room Thermostats are highly sensitive. You may need to calibrate your Room Thermostat if you would like to get the same temperature values with other thermometers in your living space.
- While your device is turned off, press and hold the button for 3 seconds.
- Press the button until the "
![]() " menu appers. In order to see the desired temperature, set the temperature difference by turning the button to right or left. This value can be set between -8oC and +8oC.
" menu appers. In order to see the desired temperature, set the temperature difference by turning the button to right or left. This value can be set between -8oC and +8oC. - To save the settings and exit, press the button until the device turns off.
 " menu appers. In order to see the desired temperature, set the temperature difference by turning the button to right or left. This value can be set between -8oC and +8oC.
Note: Recommended tempreture calibration is "0.0oC".
ROOM THERMOSTAT HEATING / COOLING MODES
Your Room Thermostat has heating and cooling modes. In order to switch easily between heating and cooling modes:
- While your device is turned off, press and hold the button for 3 seconds.
- Press the button until the "
![]() " menu appears.
" menu appears. - You can switch between "
![]() " (heating) and "
" (heating) and " ![]() " (cooling) modes by turning the button to right or left in the "
" (cooling) modes by turning the button to right or left in the " ![]() " menu.
" menu. - To save the settings and exit, press the button until the device turns off.
- The settings you have made have been saved. Once you turned on your device, it will operate with the changed settings.
 " menu appears.
 " (heating) and "
  " (cooling) modes by turning the button to right or left in the "
  " menu.
ROOM THERMOSTAT HYSTERESIS POSITIVE MENU
Hysteresis positive factory setting of your room thermostat is 0.5°C. This value may be adjusted between "0.1°C" and "2.0°C". While hysteresis positive value is 0.5°C, if the room temperature goes above 0.5°C of set temperature, your room thermostat will send a signal to your heating/cooling unit.
For instance, when you set your room thermostat to 22.0°C, if the room temperature goes above 22.5°C, on heating mode your heating unit will stop working; on cooling mode your cooling unit will start working. In order to change the hysteresis positive setting:
- Press the button for 3 seconds while your device is off.
- Press the button until "
![]() " menu appears.
" menu appears. - Adjust the operating sensitivity by turning the button to the left or right in the "
![]() " hysteresis positive menu.
" hysteresis positive menu. - Press the button until device turns off to save the changes and exit.
- Changes have been saved. Your room thermostat will be working with set operating sensitivity when you open your device.
 " menu appears.
 " hysteresis positive menu.
ROOM THERMOSTAT HYSTERESIS NEGATIVE MENU
Hysteresis negative factory setting of your room thermostat is -0.5°C. This value may be adjusted between "-0.1°C" and "-2.0°C". While hysteresis negative value is -0.5°C, if the room temperature goes below 0.5°C of set temperature, your room thermostat will send a signal to your heating/cooling unit.
For instance, when you set your room thermostat to 22°C, if the room temperature goes below 21.5°C, on heating mode your heating unit will start working; on cooling mode your cooling unit will stop working. In order to change the hysteresis negative setting:
- Press the button for 3 seconds while your device is off.
- Press the button until "
![]() " menu appears.
" menu appears. - Adjust the operating sensitivity by turning the button to the left or right in the "
![]() " hysteresis negative menu.
" hysteresis negative menu. - Press the button until device turns off to save the changes and exit.
- Changes have been saved. Your room thermostat will be working with the set operating sensitivity when you open your device.
 " menu appears.
 " hysteresis negative menu.
FACTORY SETTINGS RESET
You can reset your Room Thermostat to its default factory settings. This operation resets the calibration setting, heating/coling modes and hysteresis settings to factory setting. To reset your Room Thermostat to factory setting:
- While your device is turned off, press and hold the button for 3 seconds.
- Press the button until the "
![]() " menu appears.
" menu appears. - While in the "
![]() " menu, turn the button to right or left in order to select "
" menu, turn the button to right or left in order to select " ![]() " option and press the button.
" option and press the button. - Your device will be turned off and reset to factory settings.
 " menu appears.
 " menu, turn the button to right or left in order to select "
  " option and press the button.
ROOM THERMOSTAT WORKING LOGIC
Heating Mode
Your room thermostat takes the average room temperature of last 40 seconds as basis. If the room temperature goes above the hysteresis positive temperature value you set, your Room Thermostat will stop the heating unit. If it goes below the hysteresis negative temperature value, your Room Thermostat will start the heating unit. Thus, it ensures that the room temperature remains within a certain range.

Cooling Mode
Your Room Thermostat takes the average room temperature of last 40 seconds as basis. If the room temperature goes above the hysteresis positive temperature value you set, your Room Thermostat will start the cooling unit. If it goes below the hysteresis negative temperature value, your Room Thermostat will stop the cooling unit. Thus, it ensures that the room temperature remains within a certain range.

FREQUENTLY ASKED QUESTIONS
- Is my Room Thermostat compatible with my heating/cooling unit?
If your heating / cooling unit has on-off connections, your Room Thermostat is compatible. You can find information about your heating / cooling unit from your heating / cooling unit operating manual or from your heating / cooling unit service. - How will I connect my Room Thermostat to the heating/cooling unit?
We recommend that the connection between your Room Thermostat and the Heating/Cooling unit should be made by professionally qualified persons.
2x0.75 mm cable is sufficient for the Room Thermostat – heating/cooling unit connection.
Connect one end of the cable pair to the room thermostat connection terminals stated in the user manual of the heating/cooling unit.
Connect the other end of the cable pair to COM and NO inputs of the terminal inside the Wall Hanger of Room Thermostat as shown in the "ROOM THERMOSTAT WIRING DIAGRAM" section.
The direction of the cable ends does not matter.

Documents / ResourcesDownload manual
Here you can download full pdf version of manual, it may contain additional safety instructions, warranty information, FCC rules, etc.
Download GENERAL LIFE isipark HT260S - Digital Room Thermostat Manual
Advertisement


Need help?
Do you have a question about the isipark HT260S and is the answer not in the manual?
Questions and answers