Table of Contents

Advertisement

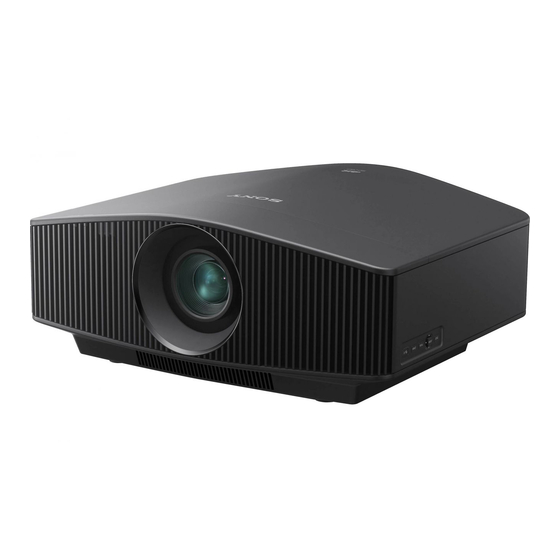
VIDEO PROJECTOR
VPL-VW760ES
VPL-VW885ES
VPL-VW745
VPL-VW768
REMOTE COMMANDER
RM-PJ24
SERVICE MANUAL
1st Edition

Advertisement

Table of Contents
loading

Summary of Contents for Sony VPL-VW760ES

  • Page 1 VIDEO PROJECTOR VPL-VW760ES VPL-VW885ES VPL-VW745 VPL-VW768 REMOTE COMMANDER RM-PJ24 SERVICE MANUAL 1st Edition...
  • Page 2 WARNUNG VPL-VW760ES only Beim Einbau des Geräts ist daher im Festkabel For kundene i Norge ein leicht zugänglicher Unterbrecher einzufügen, oder das Netzkabel muß...
  • Page 3 Bei Betatigung von Bedien- und Einstellteilen of procedures other than those specified herein oder Ausfuhrung von Bedienvorgangen, die nicht ausdrucklich in may result in hazardous radiation exposure. dieser Bedienungsanleitung aufgefuhrt sind, droht u.U. die Einwirkung gefahrlicher Laserstrahlung. 注意 ここで指定した以外の手順で管理や調整,ある いは操作を行うと,危険なレーザ放射に晒され る場合があります。 1 (P) VPL-VW760ES...
  • Page 4 Batterien nur durch den vom Hersteller empfohlenen Kasser batteriet i henhold til gjeldende avfallsregler. oder einen gleichwertigen Typ ersetzen. Wenn Sie die Batterie entsorgen, müssen Sie die Gesetze der jeweiligen Region und des jeweiligen Landes befolgen. 注意 注意 如果更换的电池不正确,就会有爆炸的危险。 只更换同一类型或制造商推荐的电池型号。 处理电池时,必须遵守相关地区或国家的法律。 2 (P) VPL-VW760ES...
  • Page 5: Table Of Contents

    Sensor Board ..........1-42 (E) Related manuals ..............3 (E) 1-9-4. Power Supply Board ........1-42 (E) Trademarks ................3 (E) 1-10. Power Cord (VPL-VW760ES Only).......1-42 (E) 1-11. Lead-free Solder ............1-43 (E) 1. Service Overview 2. Electrical Adjustments 1-1. Precautions for Service Personnel ......1-1 (E) 1-2.
  • Page 6 Bottom Cover Block-1 ............ 4-8 Bottom Cover Block-2 ............ 4-9 CA, CB Block ............... 4-10 Optical Block..............4-11 4-3. Packing Materials & Supplied Accessories ....4-12 5. Block Diagrams Overall ................5-1 6. Frame Wiring Frame Wiring..............6-2 Revision History 2 (E) VPL-VW760ES...
  • Page 7: Manual Structure

    Manual Structure Purpose of this manual This manual is the Service Manual of the Video Projector VPL-VW760ES/ VW885ES/VW745/VW768. This manual contains the service overview, electrical adjustments, software update, spare parts, block diagrams, and frame wiring. The service of this unit is basically performed by the replacement of board.
  • Page 9: Service Overview

    . The Class2 laser light is emitted from the light source when opening the cover and pressing the Limit switch. The laser light may cause damage to eyes or skin. Therefore, be careful not to view the laser beam directly. 1-2. Appearance Figure RM-PJ24 1-1 (E) VPL-VW760ES...
  • Page 10: Locations

    DC fan (for wheel intake) DC fans (for panels) DC fan (for wheel exhaust) DC fan (for LD intake) DC fan (for PSC) DC fan (for power supply exhaust) DC fan (for QE board) DC fan (for LD power supply exhaust) 1-2 (E) VPL-VW760ES...
  • Page 11: Tightening Torque

    0.80 ?0.12 N.m . Connector screw (SP 4-4O UNC): 0.53 ?0.12 N.m . Shift fix shaft: 0.40 ?0.02 N.m When using the torque driver with the notation of cN.m, interpret it as follows. Example: 0.8 N.m = 80 cN.m 1-3 (E) VPL-VW760ES...
  • Page 12: Disassembly

    Manufacturer: ICOM Product name: Fine tip nozzle TYPE (B): for fine portion Model number: KK-17B Quantity: 52 pcs/bag . RTV rubber (part number: 7-322-065-48) Manufacturer: Shin-Etsu Chemical Product name: Shin-Etsu silicone Model number: KE-3490 Capacity: 200 g 1-4 (E) VPL-VW760ES...
  • Page 13: Lens Cover Assembly

    1-5-1. Lens Cover Assembly 2 Two hooks 3 Lens cover assembly 1 Two screws (PSW3 1-5 (E) VPL-VW760ES...
  • Page 14: Top Cover Assembly/Ha Board/Nr Board

    9 Harness 0 NR board !- Screw (BVTP3 CN061 CN061 != HA board CN060 9 Harness 7 Harness != HA board CN035 3 Twelve screws (BVTP3 3 Twelve screws (BVTP3 1 Two hooks 2 Filter cover Bottom side 1-6 (E) VPL-VW760ES...
  • Page 15: Side Panel (R) Assembly/Side Panel (L) Assembly/Rear Cabinet Assembly

    1-5-3. Side Panel (R) Assembly/Side Panel (L) Assembly/Rear Cabinet Assembly 1. Remove the lens cover assembly. (Refer to Section 1-5-1.) 2. Remove the top cover assembly. (Refer to Section 1-5-2.) Top cover assembly VPL-VW760ES 5 Label 4 Side panel (R) assembly 2 Side panel (L) assembly...
  • Page 16: Front Panel (R)/Hb Board/Nf Board

    (BVTP3 CN050 5 Shift cover (R) CN040 9 HB board 7 Harness !- NF board 4 Front panel (R) 3 Two screws (BVTP3 7 Harness NF board HB board 6 Harness Hang the harnesses on the hooks. 1-8 (E) VPL-VW760ES...
  • Page 17: Front Panel (L)/M Board

    !/ Shift cover (L) Black tube of 2 Clamper the harness Harness 7 Three screws (BVTP3 !- M board 8 Two screws CN307 (BVTP3 CN304 CN303 3 Harness CN308 4 Harness 1 Harness 5 Harness 9 Front panel (L) 1-9 (E) VPL-VW760ES...
  • Page 18: Dc Fan (For Power Supply Exhaust)

    After connecting the relay connector, route the harness with the flat surface of the relay connector facing down. 5 Cushions (PFL) 3 Fan holder GT 6 Cushions (PFL) 4 DC fan 7 Two screws (PSW3 8 Fan holder GB 1-10 (E) VPL-VW760ES...
  • Page 19: Dc Fan (For Wheel Exhaust)

    3. Remove the DC fan (for power supply exhaust). (Refer to Section 1-5-6.) 1 Two screws (PSW3 7 DC fan 2 Screw (PSW3 4 Three screws 8 Fan holder (WF) (BVTP3 3 Relay connector 6 Two screws (PSW3 5 Fan holder (WB) 1-11 (E) VPL-VW760ES...
  • Page 20: Light Source Block Assembly/Dc Fan (For Ld Intake)/Ll Board

    When removing and installing the light source block assembly, be careful not to touch the wheel portion and lens portion. 4 DC fan 6 Two screws (BVTP3 7 PS converter shading cover !. Cushions (LS HS) 5 Cushions (LD FAN) 1-12 (E) VPL-VW760ES...
  • Page 21: Dc Fan (For Panel)

    7 DC fan != DC fan 3 Relay connector 6 Two screws (BVTP3 1 Relay connector 2 Relay connector ![ Three screws (PSW3 !/ Panel holder C !] Panel holder B 9 DC fan 8 Two screws (BVTP3 1-13 (E) VPL-VW760ES...
  • Page 22: Dc Fan (For Wheel Intake)

    3 Wheel heat sink 5 Two screws (PSW3 7 Sealing silicone tube 8 Wheel fan holder View on arrow A Apply RTV rubber and fill the hole. Apply RTV rubber and fill the hole. 1-14 (E) VPL-VW760ES...
  • Page 23: Dc Fan (For Ld Exhaust)

    5. Remove the DC fan (for wheel intake). (Refer to Section 1-5-10.) 1 Relay connector White tape 2 Two screws (PSW3 3 LD fan bracket T 5 Cushion (LD fan) 4 DC fan 6 Cushion (LD fan) 7 Three screws (PSW3 8 LD fan bracket B 1-15 (E) VPL-VW760ES...
  • Page 24: Dc Fan (For Psc And Qe Board)

    After connecting the relay connectors, wind the tape around the connector portion. ![ Relay connector (Blue) 3 Tape !\ DC fan (for QE board) 4 Relay connector !] Two screws (BVTP3 25 mm 8 Tape 120 mm 3 Tape 7 Tape 1-16 (E) VPL-VW760ES...
  • Page 25: Switching Regulator/Dc Fan (For Ld Power Supply Exhaust)/Bt Module

    9 Four screws (PSW3 8 Cover (LTD) 2 Harness ![ BT module CN202 !- Two screws (PSW3 1 Harness 7 Three screws (PSW3 315 ±3 mm 40 ±3 mm To LA board To switching regulator 2 Harness Binding bands 1-17 (E) VPL-VW760ES...
  • Page 26: G Board

    CN305 CN302 CN303 Notes on installation G board block CN304 6 Harness 7 Three clampers 8 Three clampers Pull the harness fixed with the clampers in the direction of the arrow, and tuck excess harness around here. 1-18 (E) VPL-VW760ES...
  • Page 27 !- Six screws (PSW3 !, G chassis ![ Six screws (PSW3 !' Insulating sheet (G) !] Four Binding band side hooks != Harness !\ Duct (WG) CN201 !; G board 1-19 (E) VPL-VW760ES...
  • Page 28: Optical Block Assembly

    10. Remove the switching regulator. (Refer to Section 1-5-13.) 11. Remove the G board. (Refer to Section 1-5-14.) 3 Seven screws (PSW4 5 Lens cover 4 Optical block assembly 1 Two screws (PSW3 2 Panel duct B 1-20 (E) VPL-VW760ES...
  • Page 29 9. Remove the DC fan (for wheel intake). (Refer to Section 1-5-10.) 10. Remove the switching regulator. (Refer to Section 1-5-13.) 11. Remove the G board. (Refer to Section 1-5-14.) 12. Remove the optical block assembly. (Refer to Section 1-5-15.) 1-21 (E) VPL-VW760ES...
  • Page 30 @/ Earth plate (CA) CN0001 4 Flexible wiring board Red tape 3 Flexible wiring board 5 Fine-wire coaxial cable 2 Flexible wiring boards 1 Flat clamps (FCR-60) 7 Two screws (PSW3 E sheets (16) CN341 CL board 1-22 (E) VPL-VW760ES...
  • Page 31: Board

    1-5-17. V Board 1. Remove the lens cover assembly. (Refer to Section 1-5-1.) 2. Remove the top cover assembly. (Refer to Section 1-5-2.) 2 Screw (BVTP3 CN020 3 V board 1 Harness 1-23 (E) VPL-VW760ES...
  • Page 32: Qe Board

    4 Harness !] QE board 7 Three screws (PSW3 !/ Two screws (PSW3 5 Seven harnesses !\ Three radiation !- Two connector screws sheets (Q) != Two screws (SP 4-4O UNC) (PSW3 ![ Q bracket (HM) Cushion 1-24 (E) VPL-VW760ES...
  • Page 33: Ps Converter

    6 Four screws (PSW3 1 Screw (PSW4 2 Unit cover (FE) 2 Shift shade sheet 7 Spring (FE-V) 4 FE unit assembly 8 PS converter 3 Three screws Unit base (FE) (PSW3 5 FE LS rubber Optical block assembly 1-25 (E) VPL-VW760ES...
  • Page 34: Prism Core Assembly

    ![ Shift unit !] Prism core assembly 9 Four screws Notes on installation (PSW3 After temporarily tightening the shift fixing shafts, fully tighten them in the order from a to d. 8 Base unit !/ Illumination unit assembly 1-26 (E) VPL-VW760ES...
  • Page 35: Lens Assembly

    5 Lens shade sheet 4 Two shift fix shafts 6 Lens assembly Notes on installation 3 Two shift fix shafts After temporarily tightening the shift fixing shafts, fully tighten them in the order from a to d. 1-27 (E) VPL-VW760ES...
  • Page 36: Maintenance

    . Be sure the tape put on the limit switch is removed after the maintenance. Light dimming adjustment Required equipment/tools . VG (programmable video signal generator): ASTRODESIGN VG-876 or equivalent . Connection cable: HDMI cable Connection diagram (programmable video signal generator) HDMI cable 1-28 (E) VPL-VW760ES...
  • Page 37 6 Keep pressing the [&] button to set the value to “Min”. Adjust: Set: Min 1 ....99 Max 4. Turn off the power of this unit. 5. Remove the signal generator from this unit and disconnect the power cord. 1-29 (E) VPL-VW760ES...
  • Page 38 . When using this unit, leave it for at least 24 hours in order to fully cure the RTV rubber. * When you felt something unusual in your eyes, interrupt operation to turn off the power and follow the instructions from a safety and health supervisor. 1-30 (E) VPL-VW760ES...
  • Page 39 12. Remove the G board block. (Refer to Section 1-5-14.) 13. Remove the optical block assembly. (Refer to Section 1-5-15.) 14. Remove the CA board and CB board. (Refer to Section 1-5-16.) 15. Remove the prism core assembly. (Refer to Section 1-5-20.) 1-31 (E) VPL-VW760ES...
  • Page 40 . In order to adjust the angle in step 34 in this section, return the adjusting knob portion of the optical compensator holder to the position where it was secured. Remove the adhesive or RTV rubber. Optical compensator Remove the adhesive or RTV rubber. Optical compensator Prism core assembly Optical compensator 1-32 (E) VPL-VW760ES...
  • Page 41 22. Connect the flexible wiring board of the panel to the CB board using the projector tool FPC kit. Projector tool FPC kits Patterns Patterns (thick) (thick) Flexible wiring board of panel C holder Projector tool FPC kits CA board CB board Flexible wiring board of panel Projector tool FPC kits 1-33 (E) VPL-VW760ES...
  • Page 42 Shade plate assembly (Reta Ajst) Bosses Relay connector Blue tape Red tape Green tape Boss holes CN1000 (CB board) CN1000 (CA board) Blue tape Red tape Green tape 1: Fine-wire coaxial relay board (FX board) 2: Fine-wire coaxial cable 1-34 (E) VPL-VW760ES...
  • Page 43 Shift cover (L) Tape Limit switch 30. Attach the shift cover (L). (Refer to step 28.) 31. Turn on the power and perform the aging for 20 minutes or more. 32. Input the full black signal in this unit. 1-35 (E) VPL-VW760ES...
  • Page 44 34. Turn off the power of this unit. 35. Remove the tape of the limit switch. 36. Remove the projector tool FPC kit, fine-wire coaxial cables, fine-wire coaxial relay board, and shade plate assembly (Reta Ajst). (Refer to steps 20 to 27.) 1-36 (E) VPL-VW760ES...
  • Page 45 Apply the RTV rubber. Optical compensator Apply the silicone RTV rubber. Optical compensator rubber Prism core assembly Adjusting knob portion Optical compensator RTV rubber 42. Attach the prism core assembly, then assemble this unit. (Refer to steps 2 to 15.) 1-37 (E) VPL-VW760ES...
  • Page 46: Location Information Of The Labels

    3.75 W laser diodes Wavelength: 450 460 nm Beam divergence angle from lens of this unit Laser emission port IEC 60825-1:2014 CLASS 1 LASER PRODUCT As with any bright light source, do not stare into the beam, RG2 IEC 62471-5:2015. 1-38 (E) VPL-VW760ES...
  • Page 47 CN model 標籤(適用於維修人員) 光圈標籤 3R類 1類標籤 光源規格 3.75 W雷射二極體 波長:450 460 nm 雷射發射埠 來自本機鏡頭的光束發散角 最大變焦:α = 42.5 最小變焦:α = 21.3 1-39 (E) VPL-VW760ES...
  • Page 48: Indicator Display

    Fan error Any of fan inside of the unit does not operate WARNING normally. Blink in red Wheel error The wheel rotation exceeds the allowable range. Brightness error The brightness exceeds the allowable range. Installation location of indicators 1-40 (E) VPL-VW760ES...
  • Page 49: Circuit Description

    This board relays the harnesses between the fuse and boards. NF board This mounts a remote controller’s infrared light receiving section (front) and free-fall detection sensor. NR board Infrared light receiving block board from remote control (rear). 1-41 (E) VPL-VW760ES...
  • Page 50: Sensor Board

    This board mounts CPU and controls laser diode driving. 1-10. Power Cord (VPL-VW760ES Only) To get a power cord, please contact your local Sony Sales Office/Service Center. . Use the approved Power Cord (3-core mains lead)/Appliance Connector/Plug with earthing-contacts that conforms to the safety regulations of each country if applicable.
  • Page 51: Lead-Free Solder

    . The ordinary soldering iron can be used but the iron tip has to be applied to the solder joint for a slightly longer time. The printed pattern (copper foil) may peel away if the heated tip is applied for too long, so be careful. 1-43 (E) VPL-VW760ES...
  • Page 53: Electrical Adjustments

    . PC is not used in “2-3-4. When Replacing the QE Board”. . HDMI cable (for PC connection) The HDMI cable is used for the adjustment in Section 2-3-4. . VG (Programmable video signal generator) . Chrominance difference gauge (CL500 or equivalent) 2-1 (E) VPL-VW760ES...
  • Page 54: How To Enter The Service Mode

    6 seconds since the last key is pressed, and perform the key operations again. 5. Select “Model Name Display”. To exit the Model Name Display mode, perform step 4. “Demonstration mode screen” is displayed. Select “Off”. 2-2 (E) VPL-VW760ES...
  • Page 55: Servicing Precautions

    Check the distance between the lens edge of this unit and the aperture end (50.9 mm) at the two or more points. 4. Set so that the light output from the lens is vertical to the sensor surface of the laser power sensor. 2-3 (E) VPL-VW760ES...
  • Page 56 1. Measure the laser power. 2. Check that the laser power is within the range of “Output limit value”. Output limit value = 50 to 145.3 mW 3. Consider the value of laser power at that time as “POWER_MAX”. 2-4 (E) VPL-VW760ES...
  • Page 57 DAC_VAL_MAX = 85 DAC_VAL_LIMIT-1 = (DAC_VAL_MAX _ DAC_VAL_30-1) x (Electric power threshold limit value _ POWER_MAX)/(POWER_MAX _ POWER_30-2) + DAC_VAL_MAX DAC_VAL_LIMIT-2 = (DAC_VAL_MAX _ DAC_VAL_30-2) x (Electric power threshold limit value _ POWER_MAX)/(POWER_MAX _ POWER_30-2) + DAC_VAL_MAX 2-5 (E) VPL-VW760ES...
  • Page 58: When Replacing The Projection Lens

    7. Set Other:83 DigiPote 1 of DeviceMenu to the value written down in step 2. 8. Set Other:84 DigiPote 2 of DeviceMenu to the value written down in step 3. 9. Set the Display Engine:2 UF SW of DeviceMenu to 1. 10. Perform “Save to memory”. 2-6 (E) VPL-VW760ES...
  • Page 59: When Replacing The Board Other Than The Above

    (CSC)/OptUnit (panel chiral/lens shift/lens zoom/panel alignment/uniformity)/LaserUnit/serial) via server. Regarding how to obtain the server data, contact your local Sony Sales Office/Service Center. 2. Write down the values of Other:83 DigiPote 1 of DeviceMenu. 3. Write down the values of Other:84 DigiPote 2 of DeviceMenu.
  • Page 60: White Balance Adjustment

    B and G until the chromaticity (x80, y80) satisfies the specification. Specification: (x80, y80) = (0.296 ?0.005, 0.311 ?0.005) 4. Repeat the adjustments at 80 IRE and 20 IRE until the each specification is satisfied. 5. Perform “Save to memory”. 2-8 (E) VPL-VW760ES...
  • Page 61: D65 Mode

    2. Enter the service mode. 3. Change the value of Other:72 Calib/Sensor Save En of Device Menu from “0” to “1”. When the input signal is displayed after waiting for a while, the calibration “save enable” is completed. 2-9 (E) VPL-VW760ES...
  • Page 62: Device Adjustment Item Initialize Data

    36 AREG/ZONE RV MR Adjust 37 AREG/ZONE RV DL Adjust 38 AREG/ZONE RV DC Adjust 39 AREG/ZONE RV DR Adjust 40 AREG/ZONE BH UL Adjust 41 AREG/ZONE BH UC Adjust *1: In this unit, only B is displayed. 2-10 (E) VPL-VW760ES...
  • Page 63 47 FPGA/Test Pattern Level B 1023 48 FPGA/Test Pattern Mute R 49 FPGA/Test Pattern Mute G 50 FPGA/Test Pattern Mute B 56 Other/Lens Pattern Color 57 Calib/Sensor Mode 58 Calib/Sensor Read En 59 Calib/Sensor x 60 Calib/Sensor y 61 Calib/CSC En 2-11 (E) VPL-VW760ES...
  • Page 64 210 Wheel/B RPM SW 211 Wheel/RG RPM Lower Limit 212 Wheel/RG RPM Upper Limit 213 Wheel/RG RPM Target 214 Wheel/B RPM Lower Limit 215 Wheel/B RPM Upper Limit 216 Wheel/B RPM Target High Gain Bias Middle Gain Bias 2-12 (E) VPL-VW760ES...
  • Page 65 Memory Name Set Memory Low(1) Gain R Bias R Low3 Gain R Bias R Custom 1 Custom 1 Gain R Bias R Custom 2 Custom 2 Gain R Bias R Custom 3 Custom 3 Gain R Bias R 2-13 (E) VPL-VW760ES...
  • Page 66 Memory Name Set Memory Custom 4 Custom 4 Gain R Bias R Custom 5 Custom 5 Gain R Bias R 2-14 (E) VPL-VW760ES...
  • Page 67: Software Update

    3. The update proceeds automatically. The ON/STANDBY indicator blinks in green. Then, it blinks in amber. (During update: approx. 3 minutes max) 4. After the update is completed, the ON/STANDBY indicator lights up in red and this unit enters standby state. 3-1 (E) VPL-VW760ES...
  • Page 68: Writing Of Adjustment Data

    6. Change the value of Display Engine 17 DE/Flash Put of Device Menu to “1”. 7. Return to the list of Device Menu, and check the value of Display Engine 17 DE/Flash Put. Repeat until the value becomes “0”. 8. Perform “Save to memory”. 3-2 (E) VPL-VW760ES...
  • Page 69: Reading Of Adjustment Data

    6. Pull out the USB memory from this unit. 7. Check that the following files are created in the USB memory. ColorSensorMatrix2Table.csv WBMatrixTable.csv UFGainMatrixTable.csv OptUnit.csv OptUnit2.csv OT.csv LT.csv pd_slc.csv pd_uf.csv pd_gamma.csv pd_ugm.csv pd_bpc.csv pd_clk.csv pd_dwec.csv pd_dwec_ratio.csv pd_pwm.csv pd_regi_lens_adj.csv pd_uf_std.csv pd_gamma_std.csv LaserUnit.csv SetSerial.csv 3-3 (E) VPL-VW760ES...
  • Page 70: Error Log Acquisition Method

    2. Insert the USB memory into this unit. 3. Connect the power cord. 4. Wait for 1 minute. 5. Disconnect the power cord. 6. Pull out the USB memory from this unit. 7. Check that the “log.yml” file is created in the USB memory. 3-4 (E) VPL-VW760ES...
  • Page 71: Spare Parts

    Therefore, specified parts should be used in the case of な部品です。したがって,交換する時は必ず指定 replacement. の部品を使ってください。 2. Standardization of Parts 2.  部品の共通化 Some repair parts supplied by Sony differ from those   ソニーから供給する補修用部品は,セットに使われて used for the unit. These are because of parts common- いるものと異なることがあります。 ality and improvement.
  • Page 72: Exploded Views

    Cover Block 4-2. Exploded Views BVTP BVTP BVTP BVTP To QE board BVTP BVTP BVTP BVTP BVTP BVTP BVTP BVTP BVTP BVTP To QE board To Lens BVTP VPL-VW760ES...
  • Page 73 X-2595-247-1 s COVER ASSY, LENS X-2595-248-1 s CABINET ASSY, REAR 1-971-884-11 s CONNECTOR ASSY, NR 3P 4-478-644-01 s CAP, LENS 4-479-501-01 s VOID SEAL (For VPL-VW760ES/VW885ES/VW745) 4-429-739-01 s VOID SEAL (For VPL-VW768) 4-589-182-01 s LABEL (LS UAE) , CAUTION (For VPL-VW760ES)
  • Page 74: Dc Fan Block-1

    DC Fan Block-1 BVTP BVTP To Sensor To QE board To QE board To QE board To Optical block To QE board To DC fan To G board To SB board BVTP VPL-VW760ES...
  • Page 75 4-723-527-01 s CUSHION (WH DUCT IN) 4-723-528-01 s CUSHION (WH DUCT OUT) 4-723-529-01 s CUSHION (LS HS) 4-723-554-01 s SEALING SILICONE TUBE 7-628-000-05 s +PSW 2X6 7-682-948-01 s SCREW +PSW 3X8 7-682-956-01 s SCREW +PSW 3X35 7-685-648-79 s SCREW +BVTP 3X12 TYPE2 IT-3 VPL-VW760ES...
  • Page 76: Dc Fan Block-2

    7-685-648-79 s SCREW +BVTP 3X12 TYPE2 IT-3 1-971-879-11 s CONNECTOR ASSY, FAN 12P 7-685-650-71 s SCREW +BVTP 3X16 TYPE2 IT-3 2-580-602-01 s SCREW, +PSW M4X12 4-574-625-01 s CUSHION (LD FAN) 4-723-523-01 s CUSHION (LD L) 4-723-524-01 s CUSHION (LD S) VPL-VW760ES...
  • Page 77: Power Block

    1-971-889-11 s CONNECTOR ASSY, 4P 7-682-948-01 s SCREW +PSW 3X8 7-682-956-01 s SCREW +PSW 3X35 1-971-893-11 s CONNECTOR ASSY, LD-LA 4P 7-685-648-79 s SCREW +BVTP 3X12 TYPE2 IT-3 2-650-770-11 s SLIDE, CLAMP 7-685-650-71 s SCREW +BVTP 3X16 TYPE2 IT-3 2-650-770-21 s SLIDE, CLAMP VPL-VW760ES...
  • Page 78: Bottom Cover Block-1

    Part No. SP Description Part No. SP Description A-2203-380-A s QE COMPL (SVC) (For VPL-VW760ES) 1-971-891-11 s CONNECTOR ASSY, CL 7P A-2203-381-A s QE COMPL (SVC) (For VPL-VW885ES) 1-971-892-11 s CONNECTOR ASSY, LD 6P A-2203-382-A s QE COMPL (SVC) (For VPL-VW745)
  • Page 79: Bottom Cover Block-2

    1-971-890-11 s CONNECTOR ASSY, VH 3P 2-580-602-01 s SCREW, +PSW M4X12 7-682-248-04 s SCREW +K 3X8 2-580-606-01 s SCREW, +PSW M5X8 7-685-648-79 s SCREW +BVTP 3X12 TYPE2 IT-3 2-650-770-11 s SLIDE, CLAMP 4-723-475-01 s CABINET, BOTTOM 4-723-480-01 s FOOT, REAR 4-726-175-01 s CUSHION (BOTTOM-A) VPL-VW760ES...
  • Page 80: Ca, Cb Block

    CA, CB Block To QE board To G board To QE board Part No. SP Description A-2187-319-A s CA MOUNT A-2187-320-A s CB MOUNT 3-064-084-01 s CLAMP (FCR-60), FLAT 7-682-948-01 s SCREW +PSW 3X8 4-10 VPL-VW760ES...
  • Page 81: Optical Block

    1-971-878-11 s CONNECTOR ASSY, CL 5P 2-580-602-01 s SCREW, +PSW M4X12 2-580-603-01 s SCREW, +PSW M4X16 4-382-854-11 s SCREW (M3X10), P, SW (+) 4-475-764-01 s PS CONVERTER 4-489-326-01 s SHEET (UNIT CVR) 4-489-493-01 s SHAFT, SHIFT FIX 4-725-564-01 s SHADE SHEET, SHIFT 4-11 VPL-VW760ES...
  • Page 82: Packing Materials & Supplied Accessories

    1-534-827-61 s CORD, POWER (For UC) 1pc *3 1-833-005-12 s AC POWER-SUPPLY CORD 1pc *1 1-839-054-12 s POWER-SUPPLY CORD SET (For J) 4-732-478-01 s PACK, CD-ROM (JAPANESE, ENGLISH, FRENCH, SPANISH, GERMAN, ITALIAN, RUSSIAN, SIMPLIFIED CHINESE, TRADITIONAL CHINESE, ARABIC) 4-12 VPL-VW760ES...
  • Page 83: Block Diagrams

    FAN1 LD INTAKE FAN6 PANEL (B) FAN9 WHEEL EXHAUST Photo Sensor1 FAN8 WHEEL INTAKE FAN3 POWER EXHAUST Photo Sensor2 FAN2 LD EXHAUST FAN Driver FAN11 LD POWER RGB Sensor SWITCHING LD CTRL AC IN REGULATOR Overall LASER SOURCE UNIT VPL-VW760ES...
  • Page 85: Frame Wiring

    Section 6 Frame Wiring VPL-VW760ES...
  • Page 86 PANEL_CTRL_02 LD POWER FANPROT SB_DET CN020 CN1409 SENSOR_OUT_1 LASER_COVER LASER_COVER SENSOR_OUT_IO_1 EXT_TEMP EXT_TEMP SENSOR_OUT_2 SENSOR_OUT_IO_2 CN1400 LA_TEMP ECO3.3V TW_TEMP SIRCS_NF CN040 SHOCK_PROT ECO3.3V SIRCS_NF D3.3V SHOCK_PROT ECO3.3V LAMP_LED F12V_1 POWER_LED F12V_2 STBY_LED F12V_1 CN50 F12V_2 ECO3.3V LAMP_LED POWER_LED STBY_LED VPL-VW760ES...
  • Page 87 SENSOR_OUT_1 SENSOR_OUT_IO_1 FAN5 PWM_A SENSOR_OUT_2 PANEL (G) FG_A SENSOR_OUT_IO_2 LA_TEMP TW_TEMP PWM_B FAN4 PANEL (R) FG_B D3.3V PWM_C FAN6 FG_C PANEL (B) F12V_1 CN501 F12V_2 F12V_1 FAN8 PWM_D F12V_2 WHEEL INTAKE FG_D PWM_E FAN2 FG_E LD EXHAUST Frame Wiring VPL-VW760ES...
  • Page 89: Revision History

    Revision History Date History Contents 2017. 10 1st Edition ― 9-932-583-01 VPL-VW760ES...
  • Page 92 VPL-VW760ES (SY) VPL-VW885ES (UC) VPL-VW745 (J) Printed in Japan Sony Corporation VPL-VW768 (CN) J, E 2017. 10 32 9-932-583-01 ©2017...

This manual is also suitable for:

Vpl-vw885esVpl-vw745Vpl-vw768Rm-pj24

Table of Contents