Sony VPL-VW675ES Manual
Hide thumbs
Also See for VPL-VW675ES:
- Operating instructions manual (74 pages) ,
- Quick reference manual (39 pages) ,
- Quick reference manual (39 pages)
Advertisement
Quick Links
Advertisement

Related Manuals for Sony VPL-VW675ES


Summary of Contents for Sony VPL-VW675ES
- Page 1 4-687-786-01 (1) Video Projector VPL-VW365/VW675ES...
-
Page 2: Table Of Contents
About the Quick Reference Manual This Quick Reference Manual explains the installation and basic operations for projecting pictures. It also describes important notes and cautions to which you have to pay attention when handling and using this unit. Refer to “Warning Indicators” and “Replacing the Lamp,” as necessary. For details on the operations, refer to the Operating Instructions contained in the supplied CD- ROM. - Page 3 Before operating the unit, please read this CAUTION manual thoroughly and retain it for future Danger of explosion if battery is incorrectly reference. replaced. Replace only with the same or equivalent type recommended by the manufacturer. When you dispose of the battery, you must WARNING obey the law in the relative area or country.
- Page 4 Caution on replacement/disposal of If you have any questions about this product, the battery for the 3D glasses you may call; Sony Customer Information Service Center Danger of explosion if battery is incorrectly 1-800-222-7669 or http://www.sony.com/ replaced. Replace only with the same or equivalent type recommended by the manufacturer.
- Page 5 SONY LIMITED WARRANTY - Please visit http://www.sony.com/psa/warranty for important information and complete On safety terms and conditions of Sony’s limited • Check that the operating voltage of your warranty applicable to this product. unit is identical with the voltage of your For the customers in Canada local power supply.
- Page 6 If condensation occurs, leave the projector turned on for about two hours before use. Notes on security • SONY WILL NOT BE LIABLE FOR DAMAGES OF ANY KIND RESULTING FROM A FAILURE TO IMPLEMENT PROPER SECURITY...
- Page 7 Hot and humid Notes on Installation and Usage Unsuitable installation Do not place the unit in the following situations, which may cause malfunction or damage to the unit. Locations subject to direct cool or Near walls warm air from an air-conditioner To maintain the performance and reliability Installing the unit in such a location may of the unit, leave space between walls and...
- Page 8 15° or more installer. For dealers • When the projector is mounted on the ceiling, a Sony bracket or recommended equivalent must be used for installation. 15° or • Be sure to secure the cabinet cover firmly more when installing to the ceiling firmly.
-
Page 9: Preparing
Note Inserting the Batteries into If you have lost or damaged the CD-ROM, you the Remote Control can purchase a new one from your Sony dealer or Sony service counter. Push and slide to open. Insert the batteries E side first. -
Page 10: Installing The Unit
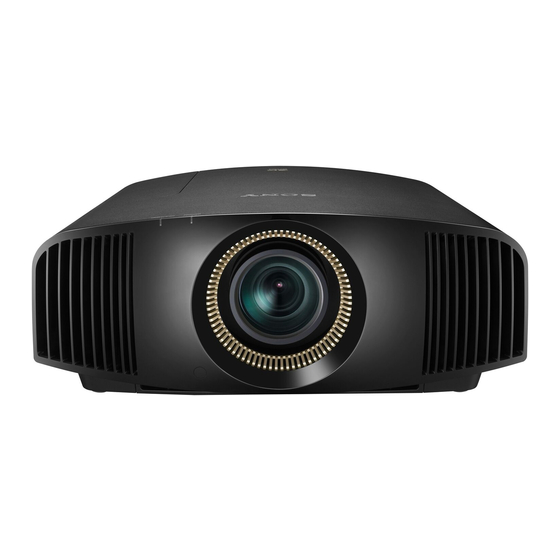
Rear of the unit Project an image on the screen, then adjust the focus, size, and position. VPL-VW675ES Front of the unit a Adjust the focus. Press the LENS ADJUSTMENT (FOCUS) button to display the Lens Lights in red. - Page 11 VPL-VW365 Lens adjustment window (test pattern) 1.78:1 (16:9) 1.33:1 (4:3) 2.35:1 a Adjust the focus. Press the PATTERN button repeatedly to display the Lens Focus adjustment window (test pattern). Then adjust the focus of the picture by pressing the M/m/ 1.85:1 </, buttons.
-
Page 12: Connecting The Unit
Step 3 Connecting the Unit When making connections, be sure to do the following: • Turn off all equipment before making any connections. • Use the proper cables for each connection. • Insert the cable plugs properly; poor connection at the plugs may cause a malfunction or poor picture quality. -
Page 13: Selecting The Menu Language
Step 4 Selecting the Menu Language You can select the language for displaying the menu and other on-screen displays. The factory default setting is English. To change the current menu language, set the desired language with the menu screen. Press MENU. Press M/m/</, to select a language, and press The menu appears. -
Page 14: Projecting
Step 5 Projecting Note Projecting the Picture Never disconnect the AC power cord while the indicator is flashing. Turn on both the unit and the equipment connected to the unit. You can turn off the unit by holding the ?/1 Press INPUT to display the input (ON/STANDBY) button for about 1 second, palette on the screen. - Page 15 Selecting the Picture Viewing Mode Press one of the CALIBRATED PRESET buttons. CALIBRATED PRESET buttons Setting items Description CINEMA FILM 1 Picture quality suited to reproducing the highly dynamic and clear images typical of master positive film. CINEMA FILM 2 Picture quality suited to reproducing the rich tone and color typical of a movie theater, based on the Cinema Film 1.
-
Page 16: Warning Indicators
Note When a warning indicator other than the above starts flashing, and the symptom persists even after carrying out the above methods, consult with qualified Sony personnel. If there is any problem or an error message appears on the screen, refer to “Error Handling” in the Operating... -
Page 17: Replacing The Lamp
Tools you need to get started: scratched. Place the unit on the cloth. • Projector Lamp (Optional) VPL-VW675ES: LMP-H280 Note VPL-VW365: LMP-H220 Be sure that the unit is placed on a stable • Standard Phillips screwdriver surface. - Page 18 Push in the new lamp by the handle securely until it reaches the end, and then tighten the 3 screws. Note Be careful not to touch the optical block inside the unit. Close the lamp door (inner cover), and then tighten the screw. Loosen the 3 screws on the lamp with the Phillips screwdriver.
- Page 19 For additional information, Notes • The unit will not turn on unless the lamp is see www.sony.com/ securely installed in place. mercury...
Need help?
Do you have a question about the VPL-VW675ES and is the answer not in the manual?
Questions and answers