
Related Manuals for Amano OPU Series


Summary of Contents for Amano OPU Series
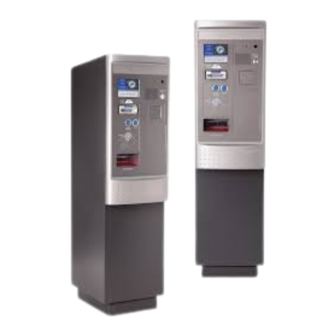
- Page 1 OPUSeries OPUS-4000 Series Exit Terminal Installation Manual OPUS4000_Installation_10102014...
- Page 2 Roseville, Minnesota 55113 Notice of Liability: Amano makes no representations or warranties with respect to the accuracy or completeness of the contents of this work and specifically disclaim all warranties, including without limitation, warranties of fitness for a particular purpose. Amano reserves the right to make equipment changes and improvements that may not be reflected in this document.
-
Page 3: Table Of Contents
5.4 Updating REPM Firmware..................5.5 Updating the REPM Imager..................5.6 Updating Device Binaries..................34 DEVICE SETUP........................REVENUE MANAGEMENT CONFIGURATION..............WIRING DIAGRAMS......................36 8.1 1700 Gate........................36 8.2 1703........................... 37 8.3 Wiring Schematics..................... 38 © Copyright 2014 Amano McGann, Inc. OPUS4000_Installation_10102014... -
Page 4: Introduction
The ticket is then cancelled and vaulted and a receipt is issued to the patron. The OPUS-4700 can also be configured to accept magnetically encoded contract or monthly passcards to enter the lot. The patron inserts the passcard into the © Copyright 2014 Amano McGann, Inc. OPUS4000_Installation_10102014... -
Page 5: Before You Begin
Support your claim with copies of the bill of lading, freight bill, invoice, and photographs, if available. Amano McGann, Inc. is not responsible for collection of claims or replacement of lost or damaged goods. -
Page 6: Inspecting The Equipment
• CC-084400: 1 roll of receipt paper Notify Amano McGann if any of these items are missing. Check the carton for shipping damage. If anything is damaged, notify the transportation company and file a claim. The transportation company is responsible for the shipment after it leaves the Factory. -
Page 7: Cut Sheet
OPUS-4000 Installation Manual 1.5 Cut Sheet [inches] © Copyright 2014 Amano McGann, Inc. OPUS4000_Installation_10102014... - Page 8 OPUS-4000 Installation Manual [inches] © Copyright 2014 Amano McGann, Inc. OPUS4000_Installation_10102014...
-
Page 9: External Drawing
OPUS-4000 Installation Manual 1.6 External Drawing © Copyright 2014 Amano McGann, Inc. OPUS4000_Installation_10102014... -
Page 10: Internal Drawing (Front)
OPUS-4000 Installation Manual 1.7 Internal Drawing (Front) © Copyright 2014 Amano McGann, Inc. OPUS4000_Installation_10102014... -
Page 11: Internal Drawing (Side)
OPUS-4000 Installation Manual 1.8 Internal Drawing (Side) © Copyright 2014 Amano McGann, Inc. OPUS4000_Installation_10102014... -
Page 12: Mounting The Exit Terminal
4. Verify the Main Power circuit breaker in the unit is powered OFF. 5. Proceed to make wiring connections. Refer to the Wiring Diagrams section of this manual for connections. © Copyright 2014 Amano McGann, Inc. OPUS4000_Installation_10102014... -
Page 13: Architectural Map
OPUS-4000 Installation Manual 1.10 Architectural Map © Copyright 2014 Amano McGann, Inc. OPUS4000_Installation_10102014... -
Page 14: Wiring Conduit
OPUS-4000 Installation Manual 1.11 Wiring Conduit © Copyright 2014 Amano McGann, Inc. OPUS4000_Installation_10102014... -
Page 15: Tickets
20:23: Entry Time 00028: Ticket Number 27: Device Number A: Rate Code/Letter 20: Lot Number 3.3558 +.000 -.012 2.126 Back of Ticket Any type of preprint acceptable on back side +.000 R 3.5 [.138] © Copyright 2014 Amano McGann, Inc. OPUS4000_Installation_10102014... -
Page 16: Specifications
Ambient Light: Total darkness to 9000 ft. candles (96,900 LUX) Options Magstripe and proximity access card models optional TCP/IP security camera optional Chip and Pin optional Intercom Aiphone™ LEF series intercom system standard, additional options aviailable Standard voice announcement © Copyright 2014 Amano McGann, Inc. OPUS4000_Installation_10102014... - Page 17 Input (closed/not closed), Remove issue input Outputs Open gate, close gate, ticket in throat, ticket in count Note: The above I/O configurations are only those for the most typical applications. Additional and/or different I/O configurations are available. © Copyright 2014 Amano McGann, Inc. OPUS4000_Installation_10102014...
-
Page 18: Opus-4000 Procedures
Terminal. Push the key inwards, and simultaneously rotate the key 90° clockwise so it is in an upright position. [Fig. 2.1A] Push the key inwards and rotate the key clockwise to an upright position Pull the door to open. © Copyright 2014 Amano McGann, Inc. OPUS4000_Installation_10102014... -
Page 19: Opening The Front Terminal Door
Exit Terminal. • A 120VAC model must not drop below 90VAC with a 7 ampere load. • A 220/240VAC model must not drop below 180VAC with a 3.5 ampere load. © Copyright 2014 Amano McGann, Inc. OPUS4000_Installation_10102014... -
Page 20: Powering The Terminal On
The iCore and IO100 boards need a network connection for server communication. Route the iCore and IO100 Ethernet cables through the proper cable channels into the OPUS-2000 RocketLinx switch. [Fig. 2.5A] Connect the IO100 and iCore © Copyright 2014 Amano McGann, Inc. OPUS4000_Installation_10102014... -
Page 21: Entering The Management Menus
When the door panel is opened, the switch automatically extends to the out position and the Door Open alarm is activated. [Fig. 2.7A] The pictured door switch is extended. The Door alarm is activated. © Copyright 2014 Amano McGann, Inc. OPUS4000_Installation_10102014... -
Page 22: Initializing To Defaults
[Fig. 2.9A] Bin alarm active [Fig. 2.9B] Bin alarm inactive 3. Insert the vault bin into the Exit Terminal after the bin has been emptied of its contents. © Copyright 2014 Amano McGann, Inc. OPUS4000_Installation_10102014... -
Page 23: Loading The Receipt Paper
The receipt printer automatically grabs the receipt after the proper sensor is triggered. 8. Screw the receipt drawer chain to the end of the receipt roller to secure the paper to the drawer. © Copyright 2014 Amano McGann, Inc. OPUS4000_Installation_10102014... -
Page 24: Exit Types
1. QR Barcode is given to the parker to use as a mobile pass. 2. Patron enters and exits the facility using the barcode at the FlexScan readers. Note: A QR Barcode may be used as a validation with the Amano McGann eParcSuite feature. © Copyright 2014 Amano McGann, Inc. -
Page 25: Version Verification
4. After the device has booted into Windows, plug in a keyboard/mouse to the iCore USB port. 5. Double click on the icon labeled Version Display. 6. The Build Information section contains the version numbers for the SmartCash hardware/software and Windows CE Image. © Copyright 2014 Amano McGann, Inc. OPUS4000_Installation_10102014... -
Page 26: Device Binaries
2. Start the Initial menu by pressing Chan Up on the remote In the Initial menu, the Application Version is displayed. This is the device’s binary version. 3. Please see section 5.6 Updating Device Binaries for updating instructions. © Copyright 2014 Amano McGann, Inc. OPUS4000_Installation_10102014... -
Page 27: Updating Software & Firmware
1. Insert a new SD Card into the laptop and paste the latest Windows CE image on the root of the drive. The latest Windows CE image is located on Amano McGann University. Remove the SD card from the laptop when finished. -
Page 28: Updating The Smartcash/Clm Firmware
13. Follow the on-screen instructions. Please wait for the stop beeps. 14. Once the on-screen instructions have finished, click OK on the CLMUpdate window. 15. Open Version Display to verify the SmartCash firmware was updated. © Copyright 2014 Amano McGann, Inc. OPUS4000_Installation_10102014... -
Page 29: Updating The Io100 Firmware
OPUS-4000 Installation Manual 5.3 Updating the IO100 Firmware Download the latest OPUS IO100 firmware from Amano McGann University. IMPORTANT: Please do not use this firmware on any non-OPUS IO100 boards in the field as this firmware only works on OPUS devices. -
Page 30: Updating Repm Firmware
5.4 Updating REPM Firmware Note: Only for devices with current REPM firmware 1.31 and above. 1. Download the REPM update tool from Amano McGann University. 2. Extract the .zip and open the REPM update tool folder. 3. Run the CDM v2.08.30 WHQL Certified.exe driver installation package if the FTDI driver has not yet been installed. - Page 31 The cable is assigned a COM port on the laptop. [Fig. 5.4A] REPM J1 Terminal 6. Run the REPM Upgrade tool by opening the REPM Firmware Upgrade Tool folder and double clicking Amano McGann Firmware Download.exe. [Fig. 5.4B] REPM Firmware Upgrade utility 7. Click Device Manager.
-
Page 32: Updating The Repm Imager
REPM firmware. 17. Exit the Firmware Upgrade application. 5.5 Updating the REPM Imager 1. Run the USB Drivers Installer EGFP0607 located on Amano McGann University. 2. Run the UniversalMenuTool2DVersion _English installer to install the Universal MenuTool 2D. - Page 33 Please allow 2-3 minutes for the update process to complete. 20. Once completed, type Z1 in the Command field and press Send. The BA01J23p_rev5483_AMANO firmware version should be returned from the scanner © Copyright 2014 Amano McGann, Inc. OPUS4000_Installation_10102014...
-
Page 34: Updating Device Binaries
010=Second octet of iParcPro virtual machine IP 50-0004 010=Third octet of iParcPro virtual machine IP 50-0005 011=Fourth octet of iParcPro virtual machine IP 11. Return the device back to its idle state when finished adjusting parameters. © Copyright 2014 Amano McGann, Inc. OPUS4000_Installation_10102014... -
Page 35: Revenue Management Configuration
10. Delete the Unassigned site by right-clicking the site and selecting Remove (site name). Press Yes on the deletion confirmation window. The site and its ports are removed. 11. Expand the device and its properties. Change the device’s properties if necessary. © Copyright 2014 Amano McGann, Inc. OPUS4000_Installation_10102014... -
Page 36: Wiring Diagrams
OPUS-4000 Installation Manual IRING IAGRAMS 8.1 1700 Gate © Copyright 2014 Amano McGann, Inc. OPUS4000_Installation_10102014... - Page 37 OPUS-4000 Installation Manual 8.2 1703 © Copyright 2014 Amano McGann, Inc. OPUS4000_Installation_10102014...
-
Page 38: Wiring Schematics
OPUS-4000 Installation Manual 8.3 Wiring Schematics © Copyright 2014 Amano McGann, Inc. OPUS4000_Installation_10102014... - Page 39 OPUS-4000 Installation Manual © Copyright 2014 Amano McGann, Inc. OPUS4000_Installation_10102014...
- Page 40 OPUS-4000 Installation Manual © Copyright 2014 Amano McGann, Inc. OPUS4000_Installation_10102014...
- Page 41 OPUS-4000 Installation Manual © Copyright 2014 Amano McGann, Inc. OPUS4000_Installation_10102014...
- Page 42 OPUS-4000 Installation Manual © Copyright 2014 Amano McGann, Inc. OPUS4000_Installation_10102014...
Need help?
Do you have a question about the OPU Series and is the answer not in the manual?
Questions and answers