Table of Contents
Advertisement
Advertisement
Table of Contents

Subscribe to Our Youtube Channel
Related Manuals for Amano AFR-200


Summary of Contents for Amano AFR-200
- Page 1 AFR-200 INSTALLATION & OPERATION GUIDE...
- Page 2 Proprietary Notice This document contains proprietary information and such information may not be reproduced in whole or part without the written permission from Amano Cincinnati, Inc. 140 Harrison Ave., Roseland, New Jersey 07068. Amano Cincinnati, Inc. reserves the right to make equipment changes and improvements, which may not be reflected in this document.
-
Page 3: Table Of Contents
CONTENTS AFR-200 INTRODUCTION……………………………………………………….6 Unpacking Your AFR-200 Terminal What’s In the Box BASIC INSTALLATION FOR TIME GUARDIAN AFR-200………………7 - 9 Wall Mounting Installation Understanding the AFR-200 Front Panel STARTUP……………………………………………………………….…..10 AFR-200 Startup AMANO Screen (Power On) Normal Punch IN/OUT Display OPERATION…………………………………………………………………...11 Punching with a Face Scan... - Page 4 Backup Data Restore Data MORE OPTIONS…………………………………………………………..21 AUTOTEST…………………………………………………………………..22 - 25 All Test Test LCD Test Voice Test Keyboard Test Fingerprint Sensor Test Face Test Clock RTC SYSTEM INFORMATION…………………………………………………….26 - 27 Device Capacity Device Info Firmware Info SPECIFICATIONS…………………………………………………………..28 AFR-200 Installation & Operation Guide...
- Page 5 About This Operation Guide This Operation Guide covers the following AFR-200 Face and Fingerprint Scan terminal with Amano Part Numbers for use with Amano Time Guardian: AFR-200/A976 Time Guardian AFR-200 complete package, includes terminal, software, 6’ network cable and manual. Real-time communication via WiFi or ethernet.
-
Page 6: Afr-200 Introduction
AFR-200 Introduction The AFR-200 is a sophisticated facial recognition data collection terminal for use exclusively with Amano Time Guardian software to provide a complete PC-based time and attendance solution for small business. Employees can have the option of punching using face, fingerprint, Prox card or pin. -
Page 7: Basic Installation For Time Guardian Afr-200
If using Ethernet, close proximity to an Ethernet connection (6 ft.) or if connecting via WiFi check the location for a good signal. Amano recommends the following wall mounting procedure: 1. Set the AFR-200 terminal face up on a flat surface to avoid scratches on display. Mounting Guide Mounting Bracket AFR-200 Installation &... - Page 8 Software Installation 1. Wall Mount the AFR-200 (see page 7-8). Connect the AFR-200 terminal using the Ethernet cable for network connection or configure WiFi network.. 2. Install the Time Guardian Software on the host PC. The installation should start automatically, but if it stalls, browse on the USB to Disk1\InstData\Windows\VM\install.exe...
-
Page 9: Understanding The Afr-200 Front Panel
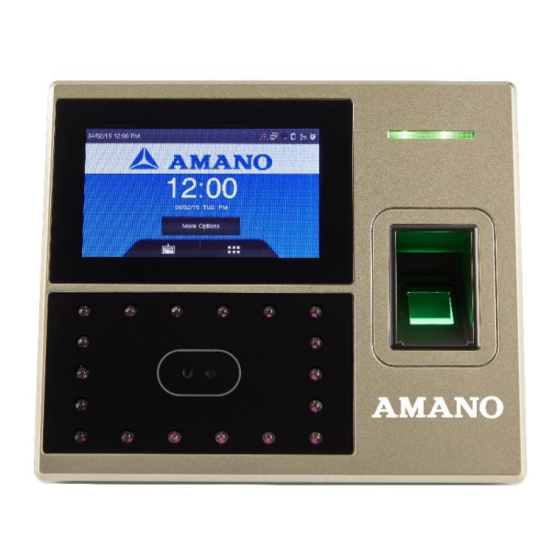
Understanding the AFR-200 Terminal Front Panel The front panel of the AFR-200 terminal contains the following controls: • LED Indicator: During normal standby operation (power on), the Green LED will flash once per second, and stay on momentarily when a user is successfully verified. If a user fails to verify, the Red LED will stay on momentarily. -
Page 10: Startup
AMANO screen. Normal Punch IN/OUT Display The system is ready to use after the AFR-200 terminal and the host PC with Time Guardian software are connected and setup. Upon user recognition at the terminal, the terminal will first briefly display his/her photo. -
Page 11: Operation
Face and the confirmation "Verified" with the voice prompt "Thank you“. Punching with a Password From the AMANO screen click on the keypad icon on the bottom left corner of the display. Once the keypad comes up, enter your User ID and press OK to confirm. -
Page 12: Enrolling Users
However, if there are any users with privileges already setup in the system, you will have to be enrolled by a user with privileges. The AFR-200 face and fingerprint scan reader provides the following four methods for enrollment: •... -
Page 13: User Management
AMANO screen. From the AMANO screen, face forward and look directly at the screen. At the top of the screen it will say “Face Detection Start”. Hold still in front of the screen as it counts down on the screen from >4<... - Page 14 Confirmation of Fingerprint To confirm that you have successfully enrolled your fingerprint use the back arrow to revert back to the AMANO screen. From the AMANO screen, place the selected finger on the scanner. The screen will show “verifying”.
-
Page 15: User Role
3. If desired, enable the defined role for the user by turning it ON. 4. Select Define User Role From here you can select rights from the following options: • User Mgt. • Comm. • System • Personalize • Data Mgt. • USB Manager AFR-200 Installation & Operation Guide Page 15... -
Page 16: Communication
2. When you select the wireless network option the following window will appear in which as a default Wi-Fi would be OFF. 3. You can turn the wireless network to “ON” to connect to your own network. AFR-200 Installation & Operation Guide Page 16... - Page 17 IP address or the server address for Internet access. NOTE: The new file name for uploading Wi-Fi password or URL Webserver: updataoptions2.cfg Inside this file you can either use: WirelessKey= [for uploading Wi-Fi password] AFR-200 Installation & Operation Guide Page 17...
-
Page 18: Personalize
AFR terminal or not. Select ON to enable the voice prompt, and select OFF to mute. Touch prompt: This parameter defines whether to generate a beep sound in response to every keyboard touch or not. Select ON to enable the beep sound, and select OFF to mute. AFR-200 Installation & Operation Guide Page 18... -
Page 19: Data Management
Delete All Data - This will delete all data when selected. Delete Admin Role - This will delete the admin role if selected. Delete Access Control Delete User Photo Delete Wallpaper AFR-200 Installation & Operation Guide Page 19... -
Page 20: Backup Data
“Restore from Device”. If the USB is not properly inserted the screen will read “Error – Failed to Read USB Disk”. If this happens change the USB or try to reinsert it properly. AFR-200 Installation & Operation Guide Page 20... -
Page 21: More Options
3. Enter Badge Number, scan proximity card, or scan face Note: Labor Transfer needs to be configured and downloaded to the clock from Time Guardian using communication – set time. This is an optional module sold separately. AFR-200 Installation & Operation Guide Page 21... -
Page 22: Autotest
Autotest From the main menu select Autotest All Test Click on Test All The terminal automatically tests the LCD, voice, keyboard, fingerprint sensor, and clock. AFR-200 Installation & Operation Guide Page 22... -
Page 23: Test Lcd
[ESC] The terminal automatically tests the display effect of the color TFT display by pure black. Test Voice Click on Test Voice Here you can test the different voice wav files. AFR-200 Installation & Operation Guide Page 23... -
Page 24: Test Keyboard
When the user places his/her finger in the fingered guide, the collected fingerprint image is displayed on the screen in real-time. Press [ESC] to exit the test. AFR-200 Installation & Operation Guide Page 23... -
Page 25: Test Face
Touch the screen to start counting, and touch it again to stop to check whether the counting is accurate. Press [ESC] to exit the test. AFR-200 Installation & Operation Guide Page 24... -
Page 26: System Information
Number of Users that are enrolled • Number of Admin Users • Number of Passwords • Total face storage capacity/occupied capacity • Number of Badges/ID cards • Attendance capacity • Number of User Photos AFR-200 Installation & Operation Guide Page 25... -
Page 27: Device Info
Firmware Info Click on Firmware Info. Here the Firmware version, Bio Service, Push Service, Standalone Service, Dev Service and System Version are displayed. AFR-200 Installation & Operation Guide Page 26... -
Page 28: Specifications
*Time Guardian provides a wide range of standard reports. Consult with your Time Solutions Dealer for details. Time Guardian integrates with numerous payroll systems including: ADP, Quickbooks, Paychex, PeachTree, and more. Specifications and/or operational characteristics are subject to change without notice. AFR-200 Installation & Operation Guide Page 27... - Page 29 AFR-200 ● Copyright © 2019 Amano Cincinnati, Inc. ● Printed in U.S.A. ● 11/10/2019...
Need help?
Do you have a question about the AFR-200 and is the answer not in the manual?
Questions and answers