
Related Manuals for Advaning PN Series


Summary of Contents for Advaning PN Series
- Page 1 PN SERIES : Polycarbonate Awning Owner’s Manual For your safety and the safety of others, please read all of the instructions and warnings in this manual carefully before proceeding with assembly and usage.
-
Page 2: Table Of Contents
B: Work gloves C: Safety goggles Fig.1 DO NOT ATTEMPT to assemble or install if: D: Rain is in the forecast E: Wind is in the forecast F: You are tired or under the influence of drugs, medication or alcohol Fig.2 www.advaning.com... -
Page 3: Safety Instructions And Warnings
Ascertain that assistance is available to lift and secure in position. • Make certain that the installation substrate is adequate (the PN Series awning MUST be mounted to the main structural supports) studs, header board, or solid masonry 3-inch in thickness or greater. -
Page 4: Package Contents And Parts
Long Rubber Strip Gasket (Front/Back) Short Rubber Strip Gasket (Sides) Wall Rubber Strip Gasket Phillips Head Securing Screw Lag Screw Set for Wood Installs (Lag & Washer) Mounting Hardware Cap Masonry Expansion Bolt, Part#: ZDA-WEB-R2 NOT INCLUDED / SOLD SEPARATELY Fig.3 www.advaning.com... -
Page 5: Tool Requirements
½” Wrench or Socket SILICONE Wrench Level Small Wood Block Slow Curing Outdoor Silicone 15/64” or 1/4” Drill W.S.A. Bit/s for Wood Installs Drill Ladder/s Fig.4 OPTIONAL: Weather Stripping Adhesive *A ratchet tie down set for connecting multiple units (not pictured). www.advaning.com... -
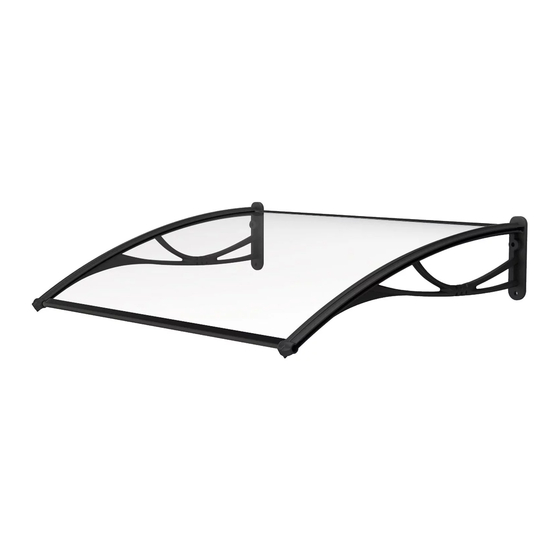
Page 6: Awning Terminology
AWNING TERMINOLOGY AND LOCATION Fig.5 Awning Polycarbonate Sheet Awning Bracket Awning Front Bar Awning Back Bar Front/Back Long Rubber Gasket Short Rubber Gasket Wall Rubber Gasket Bracket Securing Screw Mounting Hardware (Lag or Expansion) Mounting Hardware Cap www.advaning.com... -
Page 7: Pre-Installation Guide
Run length should be free & clear of any ob- structions along the en- tirety of planned awning length. Side view Advaning highly recom- Roof, eave or overhang mends consulting with a professional installer/ Minimum 2 inch contractor who can best... -
Page 8: Awning Assembly
Ensure follow W.S.A. instructions & have a rag to wipe off any excess. Fig 9 Ensure the Rubber Strip Gaskets smoothly connected to the sheet and with scissors trim off the excess Rubber Strip Gasket. www.advaning.com... - Page 9 Dry fit the gaskets to polycarbonate sides or (OPTIONAL) ap- ply a small bead of Weather Stripping Adhesive (W.S.A) to the gasket inner side before connecting. Ensure follow W.S.A. instructions & Fig 12 have a rag to wipe off any excess. www.advaning.com...
- Page 10 Dry fit the Wall Rub- ber Gasket to Back Bar or (OPTIONAL) apply a small bead of Weather Stripping Adhesive (W.S.A) to the gasket inner side before connecting. Ensure follow W.S.A. instructions & have a rag to wipe off any excess. Fig 15 www.advaning.com...
- Page 11 COMPLETING ASSEMBLY Carefully peel away the protective film from both the top and bottom of the polycarbonate sheet. Fig 16 www.advaning.com...
-
Page 12: Awning Installation
Using a power drill drill bit, drill through your wall sur- face ensuring your pi- lot holes go through main structural sup- ports. CAUTION: DO NOT drill where electrical, gas, or water supply lines may exist. Fig 18 2.5” 3” Wall www.advaning.com... - Page 13 Wall NOTE: solid masonry instructions, please visit www. advaning.com or re- Fig 21 quest from service@ advaning.com Securely tighten the lag screw with wrench/socket wrench. Apply slow curing out- door silicone around the lag screw.
- Page 14 FINISHING & WEATHER PROOFING Wall Cap each lag screw with Mounting Hardware gently tapping place with a rubber mallet. Fig 24 Apply a bead of slow curing outdoor sili- cone to the wall and Back Bar connection. Fig 25 www.advaning.com...
-
Page 15: Connecting Multiple Awnings
Fig 27 gether. CAUTION: The ratch- et tie down can cause irreparable damage if overtightened. Using second awnings bracket as guide, drill pilot holes. Follow all installation steps from page 12, Step 4 ~ 9 to com- plete. Fig 28 www.advaning.com... -
Page 16: Maintenance And Care
Tighten and replace parts or reapply silicone as needed. All parts can MAINTENANCE be easily obtained from Advaning should there ever be a need for replacement. SNOW LOADS Although the awning is made to handle significant loads, we recommend clearing accumulated and packed snow whenever possible. -
Page 17: Warranty And Service
Should the original owner/purchaser submit a claim within the warranty period from the date of the purchase and after being deemed defective by Advaning, will the warranty claim be resolved by either of the following: A. Defective components are replaced (shipping charges may apply). - Page 18 3-days of signing for the delivery in order to make a claim. Likewise, there is a 7-day window from the time of delivery to report missing parts to Advaning. Failure to report shipping damage and missing parts in a timely manner and in accordance with the shipper/ carrier guidelines may result in the owner incurring all costs.
- Page 20 CONTACT Product Questions? Please contact Advaning via email at service@advaning.com, INFORMATION by phone at 714-622-2600, or by chat on our website; www.advaning.com Advaning Customer Service is available Monday through Friday from 8:30 a.m. to 4:00 p.m. PST www.advaning.com PN.OM.V04.2211...
Need help?
Do you have a question about the PN Series and is the answer not in the manual?
Questions and answers