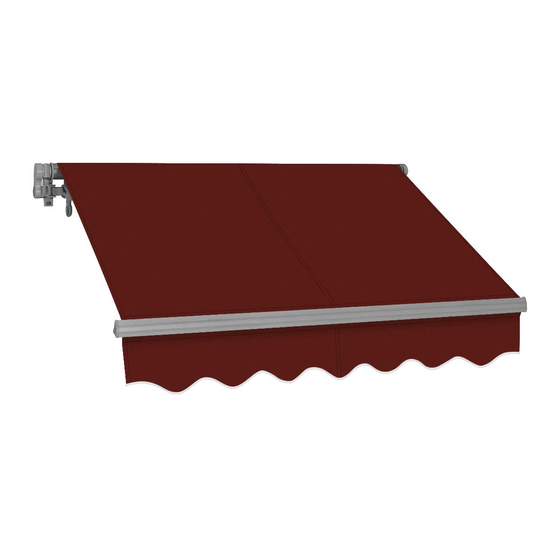
Summary of Contents for Advaning SG Series
- Page 1 SG SERIES (Certified Reconditioned) Retractable Awning Owner’s Manual For safety reasons, please read the instructions and warnings in this manual carefully before installing the awning.
-
Page 2: Table Of Contents
The awning arms contain tensioned cables. Always use caution, securely tie the awnings arms to the awning when performing installation, adjustments, or repairs. Sudden movement of tension arms can result in serious personal injury, product and/or property damage. www.advaning.com Toll Free (US): (855) 574-0158... -
Page 3: Safety Instructions And Warnings
Please keep unsupervised children away from playing with the awning or its parts. • The product should be used only as described in this Advaning Owner’s manual. Do not carry out any main- tenance other than what is shown in this manual. For any issues that are not covered in this manual, please seek support from Advaning Customer Service. -
Page 4: Package Contents And Parts
Expansion bolt set Washer Hex bolt OPTIONAL Awning Size (Width) 8’~10’ 12’~16’ CEILING MOUNT PARTS Parts name Quantity (Additional parts purchase needed.) Wall/ceiling bracket Wall/ceiling dual bracket set Retaining hex bolt Retaining nut 3/8” washer Fig.3 www.advaning.com Toll Free (US): (855) 574-0158... -
Page 5: Tool Requirements
Masonry drill bit Drill with bits Fig.4 Ladders (2) PRODUCT FEATURES Arm shoulder Valance Crank loop Retractable arms Fig.5 Torsion bar Easy Pitch loop Roller tube Wall bracket Awning fabric Lag screw Front bar Retaining bolt Toll Free (US): (855) 574-0158 www.advaning.com... -
Page 6: Installation
ALL brackets must be placed Left awning shoulder and mounted onto wall studs or other major support structure. Right awning shoulder 8 ~ 10 feet awning 12 ~ 16 feet awning Fig.6 www.advaning.com Toll Free (US): (855) 574-0158... -
Page 7: Determine Where To Install Your Awning
Side view Minimum feet Roof, eave or overhang width. Minimum 1 inch Minimum 12 inch clear space Recommended 11 feet projection 8~10 feet Fig 8 Ground, floor or deck Toll Free (US): (855) 574-0158 www.advaning.com... -
Page 8: Install Wall Brackets
Use a level to make 3.5” sure the bracket is straight mark the center of the Wall mounting holes. Drill mounting holes using a drill bit. Fig 11 Fig 12 www.advaning.com Toll Free (US): (855) 574-0158... -
Page 9: Masonry Installation
Washer surface for mounting. Siding Fig 15 Masonry installation For installing Advaning awning onto brick or solid concrete wall/surface. CAUTION: Always install brackets securely to the brick or concrete and not in the grout to avoid... - Page 10 Mark the center of the bracket mounting holes. Drill mounting holes using a masonry drill bit. Bracket Center Fig 18 Fig 19 3.5” Wall Fig 20 www.advaning.com Toll Free (US): (855) 574-0158...
- Page 11 Fig 23 Fig 24 Re-insert bolts into the holes through wall bracket. Tighten the hex bolts Tighten to secure wall bracket to surface. Wall Bracket Wall Bracket Hex bolt Fig 25 Fig 26 Toll Free (US): (855) 574-0158 www.advaning.com...
-
Page 12: Install Ceiling Brackets
Place the brackets appropriate locations. Use a level Level to make sure the bracket straight and mark the center mounting holes. Drill mounting holes using a drill bit. Ceiling bracket Fig 29 Fig 30 www.advaning.com Toll Free (US): (855) 574-0158... -
Page 13: Install Awning Onto Brackets
Place the retaining bolt into the bracket and use the nut and Fig 34 washer to secure the bolt into place. Torsion bar Tighten the bolt with a socket wrench. Socket wrench Fig 35 Toll Free (US): (855) 574-0158 www.advaning.com... -
Page 14: Ready Your Awning
NOTE: The arms are Fig 37 designed completely straight in the fully extended position. Side view FABRIC ROLLING DIRECTION Fig 38 Fig 39 Fabric Fabric CORRECT INCORRECT www.advaning.com Toll Free (US): (855) 574-0158... -
Page 15: Adjust Awning Pitch
Turn the hand crank to adjust the awning pitch up and down. Repeat the step on all Easy Pitch loops. Use a level to check that the front bar is straight and leveled. Level Fig 42 Toll Free (US): (855) 574-0158 www.advaning.com... -
Page 16: Maintenance
Retract the awning to prevent damage AWNING FROM from accumulated water, snow or from strong gusts of wind. HARSH WEATHER The fabric is water repellent and is not intended to protect against the water elements. www.advaning.com Toll Free (US): (855) 574-0158... -
Page 17: Warranty
ACCIDENTAL MISUSED FOR PURPOSES FOR WHICH THE PRODUCT WAS NOT DESIGNED FOR. WARRANTY LIMITATION AND EXCLUSION The warranty will be in effect once the awning is fully paid for. Advaning is not responsible for damages due to faulty modifications, installation, carrier damage, or re-installation. - Page 18 • All work on an RMA product will be carried out by Advaning or its authorized agents and will not extend the warranty coverage period beyond the thirty (30) days from the original date of purchase. Any work done by a third party or non-authorized Advaning agent will void this warranty.
- Page 19 Toll Free (US): (855) 574-0158 www.advaning.com...
- Page 20 CONTACT Service Questions: service@advaning.com Toll Free (US): 855–574-0158 INFORMATION Fax: 877-310-3832 West Coast: 12282 Knott Street, Garden Grove, CA 92841 East Coast: 151 Airport Drive, Westminster, MD 21157 www.advaning.com OM_CR_S-G Series_V01_R02.2020.02.13...


Need help?
Do you have a question about the SG Series and is the answer not in the manual?
Questions and answers