
Related Manuals for 3Com VCX V6000


Summary of Contents for 3Com VCX V6000
- Page 1 3Com VCX V6000/V6100 ® ™ VoIP Media Gateway BRI Module Addendum System Release 5.2 http://www.3com.com/ Part Number 900-0513-01 Rev AA Published June 2008...
- Page 2 01752-3064 3Com Corporation reserves the right to revise this documentation and to make changes in content from time to time without obligation on the part of 3Com Corporation to provide notification of such revision or change. 3Com Corporation provides this documentation without warranty of any kind, either implied or expressed, including, but not limited to, the implied warranties of merchantability and fitness for a particular purpose.
-
Page 3: Table Of Contents
ONTENTS BOUT UIDE How to Use This Guide Conventions Documentation Comments Notices WEEE EU Directive Abbreviations and Terminology UICK TART BRI M VERVIEW OF THE ODULE Features Additional Functions Additional Views V6000/V6100 M ABLING THE EDIA ATEWAYS V6000/V6100 ONFIGURING THE Assigning the IP Address Assigning an IP Address Using HTTP Accessing the Embedded Web Server... -
Page 5: About This Guide
Information contained in this document is believed to be accurate and reliable at the time of printing. However, because of on-going product improvements and revisions, 3Com cannot guarantee the accuracy of printed material after the publication date nor can it accept responsibility for errors or omissions. -
Page 6: Conventions
Comments documentation more useful to you. Please send e-mail comments about this guide or any of the V6000/V6100 gateway documentation and Help systems to: VOICE_TECHCOMM_COMMENTS@3com.com Please include the following information with your comments: Document title ■ Document part number (usually found on the front page) ■... - Page 7 Notices FXO (Foreign Exchange Office) is the interface replacing the analog telephone and connects to a Public Switched Telephone Network (PSTN) line from the Central Office (CO) or to a Private Branch Exchange (PBX). The FXO is designed to receive line voltage and ringing current, supplied from the CO or the PBX (just like an analog telephone).
- Page 8 BOUT UIDE...
-
Page 9: Quick Start
UICK TART This guide provides you with step-by-step procedures on how to quickly setup the 3Com V6000/V6100 VoIP Gateways with one or more BRI modules. Prior knowledge of IP networks is recommended. The following steps provide a quick setup flow. - Page 10 1: Q HAPTER UICK TART...
-
Page 11: Overview Of The Bri Module
BRI M VERVIEW OF THE ODULE This section provides information on the features and functions of the BRI module. Features The V6000/V6100 supports various ISDN BRI protocols such as ETSI, 5ESS, and QSIG over BRI. The BRI module supports 4 BRI ports used for connecting the PSTN to the IP network. -
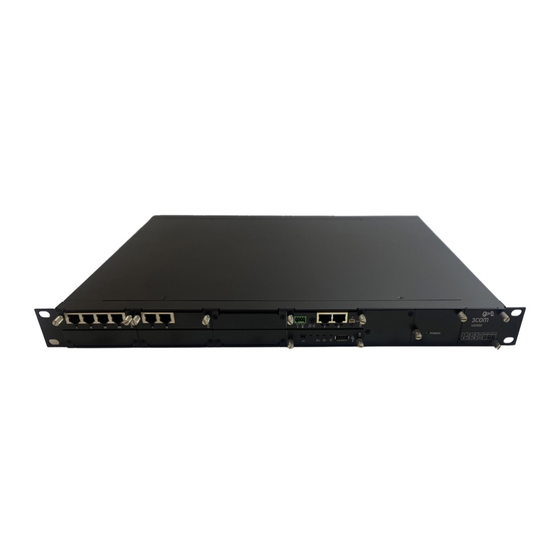
Page 12: Additional Views
2: O BRI M HAPTER VERVIEW OF THE ODULE To stop the voltage and the INFO1 signal on the line, the user can STOP the trunk via the board's Web interface or via the SNMP tool. Additional Views Figure 1 for the location and detailed view of the BRI module when it is mounted in the V6000/V6100. - Page 13 V6000/V6100 ABLING THE EDIA ATEWAYS CAUTION: The V6000/V6100 equipment is classified as Class 1 EN60950 and UL60950 and must be grounded at all times. Units providing power sockets with three pins must be connected by service personnel to a socket outlet with a protective grounding connection. To cable the V6000 or V6100, perform these steps: 1 The equipment must be permanently grounded using an equipment-grounding conductor.
- Page 14 2 - Tx- 3 - Rx+ connected 6 - Rx- For redundancy, 3Com recommends that you connect each of the Ethernet connectors to a different switch. When assigning an IP address to the V6000/V6100 using HTTP (see “Assigning an IP Address Using HTTP”), you may need to disconnect this...
-
Page 15: C V6000/V6100
Web browser (such as Microsoft ™ Internet Explorer). Assigning the IP 3Com recommends that users assign an IP address to a V6000/V6100 Address using the HTTP method described next. Assigning an IP To assign an IP address using HTTP, perform these steps:... -
Page 16: Accessing The Embedded Web Server
4: C V6000/V6100 HAPTER ONFIGURING THE Address fields under IP Configuration to correspond with your network IP settings. Record and retain the IP address and subnet mask you assign the V6000/V6100. Do the same when defining a new username or password. 5 Click Reset Device, and then at the prompt, click OK;... - Page 17 Accessing the Embedded Web Server Figure 4 Enter Network Password Screen 3 Enter the username (default: Admin), and password (default: Admin). Note that the User Name and Password fields are case-sensitive. 4 Click OK; the Home page appears.
-
Page 18: Configuring Bri Trunks
4: C V6000/V6100 HAPTER ONFIGURING THE Configuring BRI To configure the BRI trunks, perform these steps: Trunks 1 Enter the Home Page screen shown in Figure 5 and click the Home icon. Figure 5 Home Page Numbering System All Modules are numbered consecutively from the left as a Module ID #. All the digital devices are numbered consecutively from the left as a Trunk Within each module, digital devices are numbered consecutively from the left as a Trunk ID #. - Page 19 Configuring BRI Trunks Table 3 shows a combination of 2 E1/T1 Digital Trunks as Trunks # 1 and 2; 4 BRI ports as Trunks # 3, 4, 5 & 6; and an analog FXS module without a Trunk ID or Trunk #. The BRI is in Module ID #2 and the 1st BRI port on the left is Trunk ID #1, as shown in Figure...
- Page 20 4: C V6000/V6100 HAPTER ONFIGURING THE Figure 6 Trunk Settings Initial Screen 3 Click the appropriate BRI module. It is Module ID = 2, Trunk ID = 1 in the diagrams. 4 From the Protocol Type drop-down list (green arrow in the above screen), select the required protocol, in this case BRI EURO ISDN.
- Page 21 Configuring BRI Trunks Figure 7 Trunk Settings BRI Screen The drop-down menu of the above screen extends beyond the size of the display, and includes the data shown in Figure...
- Page 22 4: C V6000/V6100 HAPTER ONFIGURING THE Figure 8 Continuation of Trunk Settings BRI 6 From the Clock Master drop-down list, select the trunk clock source. Choose either Recovered (the clock is recovered from the trunk = default) or Generated (the trunk's clock source is provided by the internal TDM bus clock source, according to the parameter TDM Bus Clock Source).
-
Page 23: Enabling The Bri B-Channels
Configuring BRI Trunks The screen is refreshed and parameters become read-only (indicated by being grayed). The Stop Trunk button appears at the bottom of the screen. Enabling the BRI To enable the BRI port’s B-channels, perform these steps: B-Channels 1 Open the Trunk Group Table screen (Protocol Management > Trunk Group). -
Page 24: Save Changes To Flash
4: C V6000/V6100 HAPTER ONFIGURING THE Table 4 BRI ini File Parameters ini File Field Name Web Parameter Name Valid Range and Description Protocol Type Sets the PSTN protocol to be used for this trunk. [ProtocolType] [50] BRI EURO ISDN ■...
Need help?
Do you have a question about the VCX V6000 and is the answer not in the manual?
Questions and answers