
Related Manuals for Cannondale Compact Neo


Summary of Contents for Cannondale Compact Neo
- Page 1 English Compact Neo Owner’s Manual Supplement READ THIS SUPPLEMENT AND YOUR CANNONDALE BICYCLE OWNER’S MANUAL. Both contain important safety information. Keep both for future reference.
- Page 2 Symbols: Symbol Name Description Medium-strength removable thread Apply Loctite® 242 (blue) or equivalent. lock N·m Tightening torque in Newton meters. Cannondale Help Center Our online Help Center contains helpful resources to consult about our bikes. https://cannondale.zendesk.com/hc/en-us...
-
Page 3: Table Of Contents
E-Bike Maintenance ....36- 38 your bike; obtain and read all of them. Notes ..........40 Please contact your Authorized Cannondale Dealer immediately if you need a manual or supplement or have a question about your bike. You may also contact us using the appropriate country/region/location information. -
Page 4: Identification
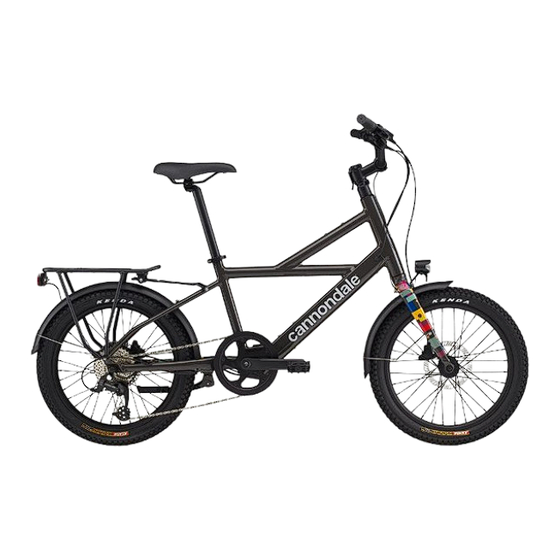
Identification Drive System Parts of Your E-Bike Compact Neo OMS Identification Drive System Parts of Your E-Bike Identification A Handlebar control unit D Sensors (BB) G Rear light B Internal battery E Charge port H Battery Door C Hub motor... - Page 5 3. Handlebar control unit Serial Number Bike Registration The serial number is located on the bottom To register your bike: bracket. It is a 7-character barcode. See Go to the Product Registration section of inset. our website at www.cannondale.com _____________________________________ Frame Serial Number...
-
Page 6: Safety Information
Authorized Cannondale handlebar control unit. At anytime, if you Dealer. stop pedaling, the drive-assist will dis- engage. - Page 7 OBSERVE MINIMUM OPERATOR AGE - Follow any national, state, or local laws for any minimum age restrictions for the operator of the E-Bike. Ask your local Authorized Cannondale Dealer for more information about operating an electrically-assisted pedal bicycle in your area.
- Page 8 General Safety Information Operation Compact Neo OMS Operation Always wear an approved bicycle helmet and all other protective gear (e.g., gloves, pads, and cycling shoes). Importance of practice & rider training - before you ride this bike, practice riding in a safe area free from hazards.
- Page 9 General Safety Information Operation continued from previous page... Wired system control: If the drive system control device is detached from the mount or if the cables are disconnected or damaged, the drive system will automatically shut off. If this happens, you will have to stop the bike, turn the system off , re-attach the computer to the base, and then turn the system back on to resume operation.
- Page 10 General Safety Information Operation Compact Neo OMS Batteries & Chargers REPLACEMENT - Only use the battery pack and charger indicated in the Specifications section of this supplement. Do not use other batteries or chargers. Do not use the charger to charge other batteries.
- Page 11 E-Bikes are certainly not speed of the bike are dangerous to the designed to protect you in a crash. Do not rider. Use only specified Cannondale and/ assume the bike or its drive capability will or manufacturer drive-assist service and protect you or keep you from being replacement parts.
-
Page 12: Technical Information
Technical Information Frame Specifications Compact Neo OMS Technical Information Frame Specifications Item Specification Compact Neo Collection 2022 Drive System Hyena Battery Hyena BP-B250 Intube Battery 36V/250Wh Drive-Assist Owner’s Manuals https://www.hyena-ebike.com/ Head Tube UPR: 1-1/8in, LWR: 1-1/8in Headset Semi-Integrated 1-1/8in-1-1/8in FSA No.10... - Page 13 Technical Information Geometry Geometry Dimensions = centimeters 75 mm Size Wheel Size 20 in Seat Tube Length 35.3 Top Tube Horizontal 55.5 Top Tube Actual 53.2 Head Tube Angle 68.0° Seat Tube Angle Effective 73.0° Standover 59.0 Head Tube Length 26.6 Wheelbase 108.5...
- Page 14 Drive System Handlebar Control Unit Compact Neo OMS Drive System Handlebar Control Unit The Hyena LED Multi (HMI - Human machine interface) features compact size, 3 multi-color LED indicators, and a flexible mounting position on the handlebars (both left and right-hand side). The control unit supports app and service tool connection via Bluetooth.
- Page 15 Drive System Handlebar Control Unit Operation Instructions Turn on/off light Caution - The e-Bike system can only be To turn on: press and hold the power button for activated when the following requirements are half a second. met: -A sufficiently charged battery is attached. To turn off: press and hold the power button for -The e-system is connected properly.
- Page 16 Drive System Handlebar Control Unit Compact Neo OMS Changing the level of drive assistance To adjust the assistance level, press the up or down buttons while pedaling. Press the up button to increase, press the down button to decrease. The system defaults to the OFF mode.
- Page 17 Drive System Handlebar Control Unit Walk assistance mode Bluetooth connection To activate the walk assist mode, press and hold “The blue LED indicator will flash 3 times when the down button for 2+ seconds. Bluetooth is connected or disconnected. Once walk mode is on, hold the up button to engage the drive system.
- Page 18 Drive System Drive Motor Compact Neo OMS Drive Motor The Hyena MRC-A250 rear hub motor provides power for the e-bike. It is not user servicable. 30 Nm 30 Nm See also: www.hyena-ebike.com Identification 1. Left dropout of bike End cap, left side H Cable connector 2.
- Page 19 Drive System Drive Motor Hub Motor Specifications Function Rated power 250 W Rated voltage 36 V Wheel size 26~28 inch Max. speed 25 km/hr Max. torque 40 Nm Max. RPM 230 ± 5% RPM w/o loading Max. current @ max. RPM ≤...
- Page 20 Drive System Battery BP-B250 Compact Neo OMS Battery BP-B250 BP-B250 is an internally-mounted downtube battery. The battery is not user-servicable. Parts Description See also: www.hyena-ebike.com Identification A HMI connector D Sensor connector G Charging port adapter B Battery pack E Charger connector...
- Page 21 Drive System Battery BP-B250 Identification 1. Battery 2. Bottom bracket cover 3. Cover bolt 4. LED multi-cable 5. Charge port connector 6. Charge port screws 7. Battery mounting washer 5 N·m 8. Battery mounting screw 9. Cable tie 10. Battery-to-rear hub cable 5 N·m 5 N·m M5 X 12 Max.
- Page 22 Drive System Battery BP-B250 Compact Neo OMS Battery Removal Replacement Battery Installation Affix the adhesive tape (6) to the new battery at the mounting points on the To prevent injury or damage to the unit, lower surface of the battery. Affix the...
- Page 23 Drive System Charger 2A Charger 2A Please read the instructions and the warning labels on the charger carefully before using the battery charger. Part Dimension See also: www.hyena-ebike.com Functional light instructions The functional light shows charging status while using the charger to ensure safety.
- Page 24 Drive System Charger 2A Compact Neo OMS Charging the internal downtube battery • Plug the charger into an outlet (100-240V), using the appropriate plug for the country’s standards. • Uncover the charging socket on the battery, then connect the charging plug with the charging socket on the battery.
- Page 25 Drive System Charger 2A Important Warnings & Cautions • If the following symptoms are observed, stop Regarding Using the Charger using the device and contact the place of purchase. A fire or electric shock may be caused: - If heat or acrid-smelling smoke is coming out from the power plug.
- Page 26 Drive System Charger 2A Compact Neo OMS • Check your battery pack before using it for the first time. First, you must turn on the battery pack; if the charging LED did not light up, it means that this battery pack might be •...
- Page 27 Drive System Folding Stem Folding Stem Apply Loctite 242 (blue) to bolt threads Safety Release Bu ton Tighten evenly in cross pa tern to 5 Nm with a torque wrench. Slide Handlebar then Lift Clamp Bolts Stop Stem Clamp Bolt Lever (shown closed) Single-bolt version (shown) = 17-18 Nm...
- Page 28 Drive System Folding Stem Compact Neo OMS Changing Handlebar Position 2. Rotate the handlebar 90 degrees into riding or storage position. Using your thumb, slide the safety release button (1) forward and lift the lever up (2). Riding position - The handlebar is perpendicular to the frame and locked in place with the lever down.
- Page 29 Drive System Folding Stem 3. Close the lever (2). Push it down until the lever arm touches the stem stop (a). The stem lever is closed correctly when: • A strong resistance is felt to the force of your hand when closing the lever. •...
- Page 30 Drive System Folding Stem Compact Neo OMS Adjusting Folding Stem Lever Tension The stem’s tension adjust ring changes stem lever tension and stem play. It must be tensioned correctly. Some wear will occur normally over time as the stem lever is used. We suggest that stem tension be inspected frequently, more so if you use change position of your stem often.
- Page 31 Drive System Folding Stem Safety Release Bu ton (Handlebar not shown for clarity) Lever (open) 2-3 Nm Set Screw - Tension Hole in Adjust Ring + Tension Tension Adjust Ring Stop Lever closed correctly Never ride with an open or loose lever. Make sure the lever is closed. If you ride with an open or loose lever you may lose steering control of the bicycle.
- Page 32 Bottom Bracket Torque Sensor Stop mark Drive side The Hyena ST-SQ-1A Cannondale Part number: K77011 bottom bracket/torque sensor is located inside the frame bottom bracket shell. This part like other drive system components should only be serviced by a professional bicycle mechanic.
- Page 33 Drive System Bottom Bracket Torque Sensor Torque Sensor Installation Drive-side Drive-side Insert the right drive side side bottom bracket Tighten the bottom bracket bearing cup coun- bearing cup. Park Tool BBT-22 (20 spline). terclockwise. Drive-side Drive-side Tighten the bottom bracket bearing cup with Maximum tightening torque 35 Nm.
- Page 34 Drive System Bottom Bracket Torque Sensor Compact Neo OMS Torque Sensor Installation Non-drive Non-drive Push the sensor until it if fully inserted. Insert the bottom bracket bearing cup from left side. Non-drive Non-drive Tighten the bottom bracket bearing cup clock- Tighten the bottom bracket bearing cup with wise.
- Page 35 Drive System Bottom Bracket Torque Sensor...
-
Page 36: Replacement Parts
K76040 X35 Battery/Charge Mounting Hardware K32048 Shift And Brake Grommets K13092 Compact Neo Rear Rack K11052 Compact Neo Fender 20in. FT+RR K14040 Herrmans H-Trace E-Bike Rear Light K14010 Herrmans FL-14 H-Black MR4 Front Light K76121 Herrmans Stem Bracket Light Mount... - Page 37 Replacement Parts Service Kits 2 N·m 3 N·m 5 N·m...
-
Page 38: E-Bike Maintenance
Before and After Each Ride: • Clean and visually inspect the entire bike for cracks or damage. See “Inspect for Safety” in your Cannondale Bicycle Owner’s Manual. • Make sure the battery is fully charged. Follow the drive system charging instructions. - Page 39 E-Bike Maintenance Cleaning Your Bike Cleaning Your Bike When cleaning your bike: USE ONLY A MILD SOAP AND WATER SOLUTION. Clean water and a common dish washing liquid will work best. COVER SENSITIVE AREAS WITH A CLEAN PLASTIC BAG. Secured temporarily with a rubber band or masking tape, a bag can prevent water damage to various bike components (bearings, electrical controls, connections and sensors, seals, fork / shock adjustment features).
- Page 40 Drive-assist system components must Consult with your Authorized only be serviced at an authorized service Cannondale Dealer to create a complete center. This will ensure the quality and maintenance program for your riding safety of the drive-assist system.
- Page 41 E-Bike Maintenance About Racks & Bags About Racks & Bags LOADING LIMIT (TOTAL): Loading limit for a front or rear rack is marked on the rack. Do not overload the rack. Do not carry a passenger. A rack is not a seat. UNDERSTAND THAT ADDING RACKS WILL AFFECT HOW YOUR BIKE HANDLES;...
-
Page 42: Notes
Notes About Racks & Bags Compact Neo OMS Notes 151990 Rev0 (09/22) - Page 44 © Cycling Sports Group 2023 Compact Neo OMS 151990 Rev0 (09/22) CANNONDALE USA CANNONDALE EUROPE CANNONDALE UK Cycling Sports Group, Inc. Cycling Sports Group Europe B.V. Cycling Sports Group 1 Cannondale Way, Geeresteinselaan 57 Vantage Way, The Fulcrum, Wilton CT, 06897, USA...
Need help?
Do you have a question about the Compact Neo and is the answer not in the manual?
Questions and answers