
Related Manuals for Cannondale Mavaro Neo


Summary of Contents for Cannondale Mavaro Neo
- Page 1 English Mavaro Neo Owner’s Manual Supplement WARNING READ THIS SUPPLEMENT AND YOUR CANNONDALE BICYCLE OWNER’S MANUAL. Both contain important safety information. Keep both for future reference.
- Page 2 Safety Messages In this supplement, particularly important information is presented in the following ways: WARNING Indicates a hazardous situation which, if not avoided, may result in death or serious injury. NOTICE Indicates special precautions that must be taken to avoid damage. The following symbols are used in this manual: Symbol Name...
-
Page 3: Table Of Contents
Technical Information ....10-21 your bike; obtain and read all of them. Replacement Parts ...... 22-25 Please contact your Authorized Cannondale Dealer immediately if you need a manual or E-Bike Maintenance ....26-28 supplement, or have a question about your bike. -
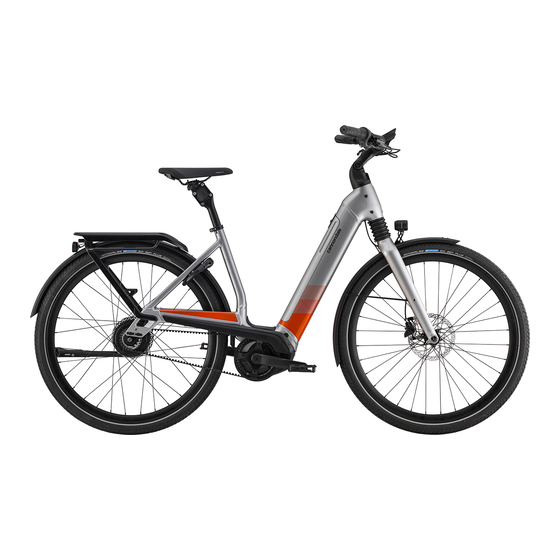
Page 4: Identification
IDENTIFICATION Parts of Your E-Bike Mavaro Neo OMS IDENTIFICATION Parts of Your E-Bike Actual bike appearance will differ. Identification 1. Drive Display 6. Frame Serial Number 11. Adjustable Stem 2. Drive Unit 7. Wheel Sensor 12. Kickstand 3. Battery Cover 8. -
Page 5: Safety Information
To minimize risk we strongly recommend It is important to know that when the that owners always have mechanical drive-assist system is turned ON, the drive work done by an Authorized Cannondale unit engages to provide power only while you Dealer. are pedaling. - Page 6 OBSERVE MINIMUM OPERATOR AGE - Follow any national, state, or local laws for any minimum age restrictions for the operator of the E-Bike. Ask your local Authorized Cannondale Dealer for more information about operating an electrically assisted pedal bicycle in your area.
- Page 7 Safety Information Operation Operation WARNING Always wear an approved bicycle helmet and all other protective gear (e.g., gloves, pads, and cycling shoes). Importance of practice & rider training - Before you ride this bike, practice riding in a safe area free from hazards.
- Page 8 Safety Information Operation Mavaro Neo OMS continued from previous page... Wired system control - If the drive system control device is detached from the mount or if the cables are disconnected or damaged, the drive system will automatically shut off. If this happens, you will have to stop the bike, turn the system off , re-attach the computer to the base, and then turn the system back on to resume operation.
- Page 9 Safety Information Operation Batteries & Chargers WARNING REPLACEMENT - Only use the battery pack and charger indicated in the Specifications section of this supplement. Do not use other batteries or chargers. Do not use the charger to charge other batteries. PREVENT DAMAGE - Do not drop the battery or charger.
- Page 10 Do not speed of the bike are dangerous to the rider. assume the bike or its drive capability will Use only specified Cannondale and/or protect you or keep you from being manufacturer drive-assist service and involved in a serious accident.
-
Page 11: Key
Using the Key Please Note: After multiple rides and bike-washes, the battery lock can become dry and difficult to use. To maintain, whenever you lubricate your bike chain, place a few drops of chain oil on the key, insert the key and operate the lock, then remove and wipe the key clean. -
Page 12: Technical Information
Technical Information Specifications Mavaro Neo OMS TECHNICAL INFORMATION Specifications Item Specification Bosch Performance Line CX Drive System Bosch Performance Line Bosch Active Line Plus Bosch Powertube 625Wh Battery Bosch Powertube 500Wh Drive-Assist Owner’s Manual https://www.bosch-ebike.com/ Head Tube Cannondale Si Headset Integrated, Cannondale HeadShok 1.56”... - Page 13 Technical Information Geometry Geometry 75 mm Dimensions = centimeter Item Size Seat Tube Length Top Tube Horizontal 60.5 63.8 Head Tube Angle 69° 69° 69° Seat Tube Angle Effective 72° 72° 72° Standover Head Tube Length 13.4 13.4 Wheelbase 111.8 114.3 117.7 Front Center...
- Page 14 Technical Information Adjustable Stem Mavaro Neo OMS Adjustable Stem Stem Angle Adjustment CAPS Raised Stem (shown disengaged 2-3mm) MIN marking 15-18 N·m CAP BOLT (shown loosened) Lowered Stem teeth MAX marking Using a 6mm Allen wrench, turn the M8 cap bolt counter-clockwise. Carefully check if both side caps are released, leaving a 2-3mm gap to the stem body.
- Page 15 Technical Information Adjustable Stem Handlebar Adjustment > 1 mm HANDLEBAR STEM Rotate Up Rotate Down > 1 mm M5 FACE PLATE BOLTS 7-8 N·m Evenly tighten in stages Using a 4mm Allen wrench, turn the M5 face plate bolts counter-clockwise, releasing the bolts until the bar is adjustable.
- Page 16 Technical Information Adjustable Stem Mavaro Neo OMS Kiox Display Holder Adjustment DISPLAY UNIT UPPER HOLDER LOWER HOLDER M5 BOLTS Rotate Up 2-3 N·m FIXING BOLT Rotate Down (Handlebar not shown for clarity) Using a 4mm Allen wrench, turn the M4 bolts on the bottom of the lower holder counter-clock- wise until the KIOX display holder can be adjusted.
- Page 17 Technical Information Adjustable Stem Cable Connect To Kiox Display (Service Centers Only) Tilted away M5 BOLTS from faceplate USB PORT Inside on upper step raised on lower step FIXING BOLT feature FIXING BOLT touching 2-3 N·m (loosened) faceplate (Handlebar not shown for clarity) Interface with the KIOX display is limited to authorized drive system service professionals.
- Page 18 • It is independent of the ON/OFF state of Please read your Cannondale Bicycle Owner’s any other lights on the bicycle. Manual for information about different types of bicycle lighting.
- Page 19 Do not attempt to work on the cable routing yourself. Due to the complex nature of the parts and the level of disassembly required to gain access, have any repairs or replacements of the battery, cables or hose parts identified performed by an authorized Cannondale e-bike service center.
- Page 20 Technical Information Cable Routing Overview Mavaro Neo OMS 138225 Rev 1 (07/20)
- Page 21 Technical Information Battery Charging Port Battery Charging Port The battery charging port is located on the left side of the bicycle at the headtube. The charging port enables the battery to be charged while installed in the bicycle. To connect the charger cable to the port WARNING connector: Follow the drive system manufacturer’s...
- Page 22 If damage is found, do not ride the bike. lower frame connector (4). Have any damaged part replaced with a new one. Contact your Cannondale 3. Turn the clockwise to re-engage the upper Dealer. locking mechanism (6).
- Page 23 Technical Information Powertube Battery Remove battery cover before turning the key. Cover is independent from battery Top view Bottom view Identification 1. Battery Cover 7. Battery Release Tab 2. Battery 8. Charge Port 3. Battery Connector 9. Cover Handle 4. Frame Battery 10.
-
Page 24: Replacement Parts
K32048 Shift And Brake Grommets Mavaro Neo Battery Rail K34041 Mounting Kit Mavaro Neo Battery Rail K34041 Mounting Kit Mavaro Neo Gen 4 DU Mounting K76011 Hardware Mavaro Neo HT Bottle Cage K76021 Spacer Kit Mavaro Neo Frame Cable K32061... - Page 25 Mavaro Neo Headshok Steerer K33021 Derailleur Hanger QR ST DS 079 K32071 Cable Guide K33031 Derailleur Hanger QR SS DS 080 Mavaro Neo 1.5” Steerer Cable Mavaro Neo Gen 4 DU Mounting K32081 K76011 Guide Hardware K25011 Mavaro Neo Steerer Stop K28021...
- Page 26 Charge Port Cover V2 K3410160 Battery Cover Top Exit BPL K34140 Key Hole Cover w/ Leash K34081 Mavaro Neo Gen 3 Motor Cover K34111 Gen 3 Battery Gap Cover K34091 Mavaro Neo Gen 4 Motor Cover 138225 Rev 1 (07/20)
- Page 27 K14011 K14021 K11031 K11041 Rear Rack/ Lighting/Fenders (Mud Guards) Part Number Description K13011 Mavaro Neo Rear Rack Mavaro Neo Light and Radar K14011 Mount K11031 Mavaro Neo Fender Set Mavaro Neo Front Fender Mount K11041 Hardware K14021 Mavaro Neo Headtube Light...
-
Page 28: E-Bike Maintenance
Before and After Each Ride: • Clean and visually inspect the entire bike for cracks or damage. See “Inspect for Safety” in your Cannondale Bicycle Owner’s Manual. • Make sure the battery is fully charged and mounted securely. Follow the drive system charging instructions. - Page 29 Authorized bring your bike to your Authorized Cannondale Dealer. Cannondale Dealer for an initial check-up. It should include checks of the drive-as- Replacement parts must be identical to sist system, drive chain condition, proper...
- Page 30 E-Bike Maintenance Cleaning Mavaro Neo OMS Cleaning When cleaning your bike, use a damp sponge or a soft brush with only a mild soap and water solution. Rinse the sponge often. Do not spray water directly on controls or on drive system components.
-
Page 31: Notes
Record NOTES Record NOTES Use NOTES pages to write /record important information about your bike : (e.g. maintenance history, dealer contact information, settings, etc.) - Page 32 NOTES Record Mavaro Neo OMS 138225 Rev 1 (07/20)
- Page 34 © 2020 Cycling Sports Group Mavaro Neo Owner’s Manual Supplement 138225 CANNONDALE USA Cannondale Europe Cannondale UK Cycling Sports Group, Inc. Mail: Postbus 5100 Cycling Sports Group 1 Cannondale Way, Visits: Hanzepoort 27 Vantage Way, The Fulcrum, Wilton CT, 06897, USA...
Need help?
Do you have a question about the Mavaro Neo and is the answer not in the manual?
Questions and answers