Table of Contents
Advertisement
Quick Links
Advertisement
Table of Contents

Subscribe to Our Youtube Channel
Related Manuals for MUNBYN 130


Summary of Contents for MUNBYN 130
- Page 1 MUNBYN More Choice For Your Growing Business...
- Page 2 Contents Product Introduction 1.1 What’s in the package? 01 Product Introduction 1.1 What’s in the package? 1.2 Printer features 02 Set Up The Printer 2.1 Quick printer connection 2.2 Label setup 2.3 Driver installation 2.3.1 Windows Driver Installation 2.3.2 Mac Driver Installation 03 Pro Tips 04 FAQ 05 LED Status...
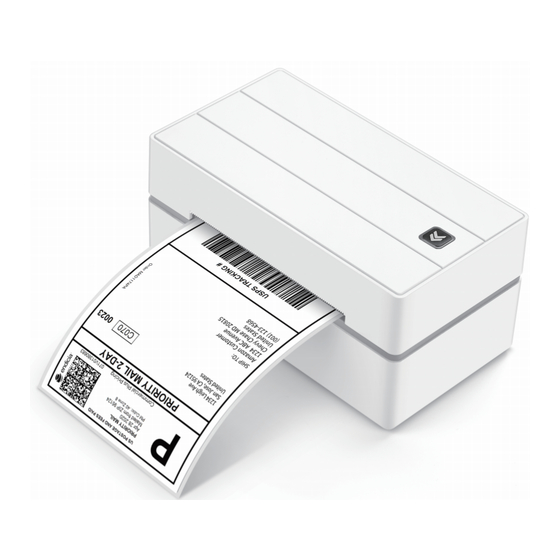
- Page 3 1.2 Printer Overview 2.1 Quick printer connection Feeder button and status light Cover button Cover button Power Please follow the sequence of the above picture to switch operate. 2.2 Label setup connector DC power connector Automatic label identification: Load no less than 4 consecutive labels into the Set Up The Printer printer.
- Page 4 To run a self-test, press and hold the feeder button 2.3.1 Windows Driver Installation until you hear two short beeps. To ensure your printing quality, please use MUNBYN labels. If you use other brands' label paper, please run "automatic label identification" before printing.
- Page 5 LED Status Specification Light Description Troubleshoot Method Direct Thermal 203 dpi Blue Resolution Normal operation 150 mm/s Max Printing Speed Flashing Red Label paper is Run automatic label not identified identification (every 2 seconds) 40-110 mm (1.57-4.3inches) Paper Width 0.06-0.25 mm Paper Thickness Flashing Red Check that the cover...
- Page 6 Do not use the printer if you find any irregularities as these could result in fire or electrocution. Keep the printer out of reach of children. MUNBYN provides 18 months warranty and lifetime free service. Use only approved accessories and do not try to If you encounter any issues with the product, please disassemble, repair the unit by yourself.
Need help?
Do you have a question about the 130 and is the answer not in the manual?
Questions and answers