Digi WR21 Installation, Operation And Maintenance Manual
Trane firewall router solution
Hide thumbs
Also See for WR21:
- Handbook (26 pages) ,
- Installation manual (24 pages) ,
- Quick start manual (2 pages)
Table of Contents
Advertisement
Quick Links
Installation, Operation, and Maintenance
® ®
Trane
Only qualified personnel should install and service the equipment. The installation, starting up, and servicing of heating, ventilating, and air-conditioning
equipment can be hazardous and requires specific knowledge and training. Improperly installed, adjusted or altered equipment by an unqualified person
could result in death or serious injury. When working on the equipment, observe all precautions in the literature and on the tags, stickers, and labels that
are attached to the equipment.
July 2020
Firewall Router Solution
S S A A F F E E T T Y Y W W A A R R N N I I N N G G
B B A A S S - - S S V V X X 0 0 6 6 9 9 F F - - E E N N
Advertisement
Table of Contents

Related Manuals for Digi WR21


Summary of Contents for Digi WR21
- Page 1 Installation, Operation, and Maintenance ® ® Trane Firewall Router Solution S S A A F F E E T T Y Y W W A A R R N N I I N N G G Only qualified personnel should install and service the equipment. The installation, starting up, and servicing of heating, ventilating, and air-conditioning equipment can be hazardous and requires specific knowledge and training.
- Page 2 Introduction Read this manual thoroughly before operating or servicing this unit. Warnings, Cautions, and Notices Safety advisories appear throughout this manual as required. Your personal safety and the proper operation of this machine depend upon the strict observance of these precautions. The three types of advisories are defined as follows: Indicates a potentially hazardous situation which, if not avoided, could result in WARNING...
- Page 3 I I n n t t r r o o d d u u c c t t i i o o n n W W A A R R N N I I N N G G F F o o l l l l o o w w E E H H S S P P o o l l i i c c i i e e s s ! ! F F a a i i l l u u r r e e t t o o f f o o l l l l o o w w i i n n s s t t r r u u c c t t i i o o n n s s b b e e l l o o w w c c o o u u l l d d r r e e s s u u l l t t i i n n d d e e a a t t h h o o r r s s e e r r i i o o u u s s i i n n j j u u r r y y .
-
Page 4: Table Of Contents
Connecting to the WR21 ..........12 Configuring the WAN Interface of the WR21 ....... 13 Configuring the LAN Interface of the WR21 . - Page 5 T T a a b b l l e e o o f f C C o o n n t t e e n n t t s s Pre-shared Key and Account Creation ........25 VPN Client Configuration for iPhone/iPad Connection .
-
Page 6: Overview
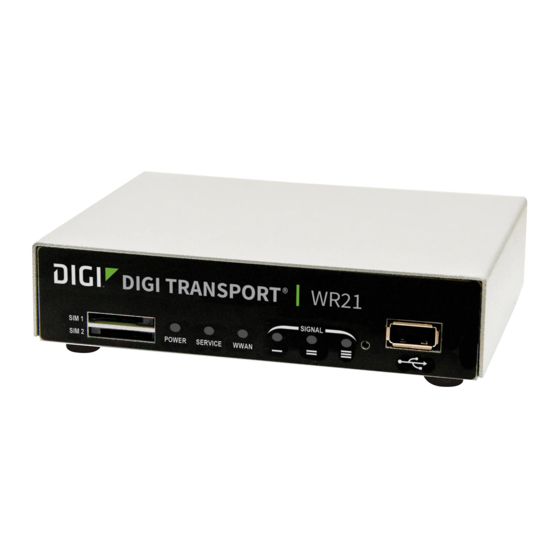
(LAN/WAN), ideally with the assistance of the customer’s IT staff. In some scenarios, a firewall already exists but is misconfigured; in other cases there is no firewall. A Digi Transport WR21 firewall, installed into the BAS network. provides an additional layer of security when other scenarios exist outside of the recommended best practices. - Page 7 O O v v e e r r v v i i e e w w Place a Digi Transport WR21 firewall in front of Tracer BAS controller. This solution can provide an additional layer of security when installed between the customer's network equipment and a Tracer BAS controller.
-
Page 8: Project Planning
Project Planning Choosing the Appropriate Firewall Router Kit Internal Mount Kit (Part# WR21-NOCELL-TRANEKIT-INTERNAL) If there is room within the Tracer BAS enclosure, order the Internal Mount Kit. The firewall router must be installed inside the Trane enclosure or in close proximity to the enclosure. - Page 9 P P r r o o j j e e c c t t P P l l a a n n n n i i n n g g Figure 3. Trane Estimator Assemblies for contracting projects BAS-SVX069F-EN...
- Page 10 P P r r o o j j e e c c t t P P l l a a n n n n i i n n g g Figure 4. Trane Estimator Assemblies for service projects Figure 5. Firewall router assembly estimate (Internal Mount Kit) Figure 6.
-
Page 11: Qualifying Your Customer Site
Trane Connect Remote Access is the preferred method for remote access for both Trane employees and customers. If needed, the Digi WR21 can be configured to allow customer remote access through VPN (L2TP/IPSEC). Some configuration changes may be required on the existing network equipment in order to facilitate this remote access. -
Page 12: Configuration Requirements
Configuration Requirements Because every environment is different, the Digi WR21 will likely require some small changes to the configuration. This section will cover the initial setup of the router and the IP address changes necessary for the Digi WR21 and the Tracer BAS controller to match your installation. -
Page 13: Configuring The Wan Interface Of The Wr21
E E T T H H 0 0 should instead be set to G G e e t t a a n n I I P P a a d d d d r r e e s s s s a a u u t t o o m m a a t t i i c c a a l l l l y y u u s s i i n n g g D D H H C C P P . N N o o t t e e : : ETH 0 and ETH 1 must have addresses on separate IP networks. The DIGI WR21 ships with E E T T H H 1 1 –... -
Page 14: Configuring The Lan Interface Of The Wr21
C C o o n n f f i i g g u u r r a a t t i i o o n n d d i i a a l l o o g g . 10. Click S S a a v v e e A A l l l l . After the save operation is complete, reboot the WR21. -
Page 15: Configuring The Firewall
C C o o n n f f i i g g u u r r a a t t i i o o n n d d i i a a l l o o g g . 8. Click S S a a v v e e A A l l l l . After the save operation is complete, reboot the WR21. -
Page 16: Configure A Tracer Bas Controller With A New Ip Address
2. Enter the new IP address, Subnet Mask and Default Gateway of the Tracer BAS controller. N N o o t t e e : : For the IP address, choose an IP not already in use on the LAN side of the WR21 (E E T T H H 1 1 ) ) . -
Page 17: Physical Connections
LAN 0 port on the Digi WR21. 2. Connect a second Ethernet cable to the LAN1 port on the Digi WR21 to the Tracer BAS controller. Use the same port on the Tracer BAS controller that you removed the Ethernet cable from. -
Page 18: Configuring Trane Connect Remote Access
Trane Connect for your Tracer BAS controller. Test the Connectivity to the Trane Cloud After the Digi WR21 has been installed, it is necessary to test the Trane Connect Remote Access connection. 1. Log into the Tracer BAS controller and navigate to I I n n s s t t a a l l l l a a t t i i o o n n > > I I d d e e n n t t i i f f i i c c a a t t i i o o n n a a n n d d C C o o m m m m u u n n i i c c a a t t i i o o n n s s , and then select the I I n n t t e e l l l l i i g g e e n n t t S S e e r r v v i i c c e e s s Tab. -
Page 19: Firewall Router Order Process
Firewall Router Order Process The Firewall Router solution ordering process consists of the following tasks: • Register with INS (Industrial Networking) web site at www.industrialnetworking.com/Trane. • Log in using new ID and password to access the INS online store with Trane pricing. •... -
Page 20: Individual Components
F F i i r r e e w w a a l l l l R R o o u u t t e e r r O O r r d d e e r r P P r r o o c c e e s s s s Table 2. Firewall router kit (Internal) packaged contents Internal Mount Kit PN# WR21-NOCELL-TRANEKIT-INTERNAL (contents) • Digi Firewall Router •... -
Page 21: Submitting An Order
F F i i r r e e w w a a l l l l R R o o u u t t e e r r O O r r d d e e r r P P r r o o c c e e s s s s Submitting an Order Add the firewall router items to the INS shopping cart and submit your order. -
Page 22: Installing The Firewall Router
Installation procedures will vary depending on whether adequate space is available to mount the firewall router inside the Trane enclosure. Internal Kit Installation If adequate space is available within the Trane enclosure, use the Internal Mount Kit (Part# WR21- NOCELL-TRANEKIT-INTERNAL). 1. Attach the provided DIN rail to the Digi firewall router. -
Page 23: Customer Remote Access Configuration
UDP/1701, UDP/4500, and UDP/500. N N o o t t e e : : If the customer is using Windows 7, and the WR21 does not have a public IP address, the customer must apply a registry fix. Navigate to the... - Page 24 5. Repeat these steps for P P P P P P 6 6 – – L L 2 2 T T P P 1 1 and P P P P P P 7 7 – – L L 2 2 T T P P 2 2 . Figure 19. Digi WR21 PPP setup I I f f t t h h e e L L A A N N I I P P a a d d d d r r e e s s s s h h a a s s b b e e e e n n m m o o d d i i f f i i e e d d t t o o r r e e f f l l e e c c t t t t h h e e B B A A S S n n e e t t w w o o r r k k ( ( 1 1 9 9 2 2 .
-
Page 25: Firewall Configuration
C C u u s s t t o o m m e e r r R R e e m m o o t t e e A A c c c c e e s s s s C C o o n n f f i i g g u u r r a a t t i i o o n n –... -
Page 26: Vpn Client Configuration For Iphone/Ipad Connection
C C u u s s t t o o m m e e r r R R e e m m o o t t e e A A c c c c e e s s s s C C o o n n f f i i g g u u r r a a t t i i o o n n Figure 22. -
Page 27: Vpn Configuration For Microsoft Windows 7 Operating Systems
4. Tap T T y y p p e e and select L L 2 2 T T P P . Tap B B a a c c k k . 5. In the D D e e s s c c r r i i p p t t i i o o n n field, enter a name for the connection. For example, VPN to Digi. - Page 28 C C u u s s t t o o m m e e r r R R e e m m o o t t e e A A c c c c e e s s s s C C o o n n f f i i g g u u r r a a t t i i o o n n Figure 26.
- Page 29 C C u u s s t t o o m m e e r r R R e e m m o o t t e e A A c c c c e e s s s s C C o o n n f f i i g g u u r r a a t t i i o o n n Figure 28.
- Page 30 C C u u s s t t o o m m e e r r R R e e m m o o t t e e A A c c c c e e s s s s C C o o n n f f i i g g u u r r a a t t i i o o n n Figure 30.
-
Page 31: Vpn Configuration For Android Operating Systems
C C u u s s t t o o m m e e r r R R e e m m o o t t e e A A c c c c e e s s s s C C o o n n f f i i g g u u r r a a t t i i o o n n Figure 31. - Page 32 C C u u s s t t o o m m e e r r R R e e m m o o t t e e A A c c c c e e s s s s C C o o n n f f i i g g u u r r a a t t i i o o n n Figure 32.
- Page 33 C C u u s s t t o o m m e e r r R R e e m m o o t t e e A A c c c c e e s s s s C C o o n n f f i i g g u u r r a a t t i i o o n n a.
- Page 34 C C u u s s t t o o m m e e r r R R e e m m o o t t e e A A c c c c e e s s s s C C o o n n f f i i g g u u r r a a t t i i o o n n Figure 35.
-
Page 35: Setting Up Remote Access For Customers
Setting Up Remote Access For Customers When customers require remote access to their facilities through the cellular router solution, utilizing Trane Connect is easy to use and built into Tracer BAS controllers, including Tracer SC/ SC+ and Concierge. The following procedure describes how to set up Trane Connect Remote Access for your customer. -
Page 36: Modifying A Previously Registered Tracer Bas Controller
S S e e t t t t i i n n g g U U p p R R e e m m o o t t e e A A c c c c e e s s s s F F o o r r C C u u s s t t o o m m e e r r s s individual who will serve as the Trane Connect customer administrator for the facility. - Page 37 S S e e t t t t i i n n g g U U p p R R e e m m o o t t e e A A c c c c e e s s s s F F o o r r C C u u s s t t o o m m e e r r s s Figure 39.
-
Page 38: Customer Admin Initial Account Creation
S S e e t t t t i i n n g g U U p p R R e e m m o o t t e e A A c c c c e e s s s s F F o o r r C C u u s s t t o o m m e e r r s s Figure 40. - Page 39 S S e e t t t t i i n n g g U U p p R R e e m m o o t t e e A A c c c c e e s s s s F F o o r r C C u u s s t t o o m m e e r r s s 2.
- Page 40 S S e e t t t t i i n n g g U U p p R R e e m m o o t t e e A A c c c c e e s s s s F F o o r r C C u u s s t t o o m m e e r r s s Upon successful account creation and login, the customer activation screen appears (see the following figure).
-
Page 41: Logging In To Trane Connect
S S e e t t t t i i n n g g U U p p R R e e m m o o t t e e A A c c c c e e s s s s F F o o r r C C u u s s t t o o m m e e r r s s Logging in to Trane Connect After customer administrators have activated their accounts from the Welcome to Trane Connect e-mail, they are now able to access Trane Connect. - Page 42 S S e e t t t t i i n n g g U U p p R R e e m m o o t t e e A A c c c c e e s s s s F F o o r r C C u u s s t t o o m m e e r r s s 2.
- Page 43 S S e e t t t t i i n n g g U U p p R R e e m m o o t t e e A A c c c c e e s s s s F F o o r r C C u u s s t t o o m m e e r r s s •...
-
Page 44: Configure The Lan Ip Address On A Pc
Configure the LAN IP Address on a PC When configuring the Digi WR21 router, it is often necessary to connect to different IP addresses and often DHCP will be disabled. Therefore, you must manually configure your IP address to connect to a specific IP. - Page 45 C C o o n n f f i i g g u u r r e e t t h h e e L L A A N N I I P P A A d d d d r r e e s s s s o o n n a a P P C C Figure 43.
- Page 46 C C o o n n f f i i g g u u r r e e t t h h e e L L A A N N I I P P A A d d d d r r e e s s s s o o n n a a P P C C Figure 44.
- Page 47 N N o o t t e e s s BAS-SVX069F-EN...
- Page 48 Trane - by Trane Technologies (NYSE: TT), a global innovator - creates comfortable, energy efficient indoor environments for commercial and residential applications. For more information, please visit trane.com or tranetechnologies.com. Trane has a policy of continuous product and product data improvements and reserves the right to change design and specifications without notice.
Need help?
Do you have a question about the WR21 and is the answer not in the manual?
Questions and answers