Table of Contents
Advertisement
Quick Links
Advertisement
Table of Contents
Troubleshooting

Related Manuals for NetComm NB1200


Summary of Contents for NetComm NB1200
-
Page 2: Table Of Contents
Step 3 - Connecting to the internet ... 11 Windows Me ... 12 Step 1 - Loading the drivers and connecting your modem ... 12 Step 2 - Restarting Windows ... 13 Step 3 - Connecting to the internet ... 13 Windows 98 ... -
Page 3: Introduction
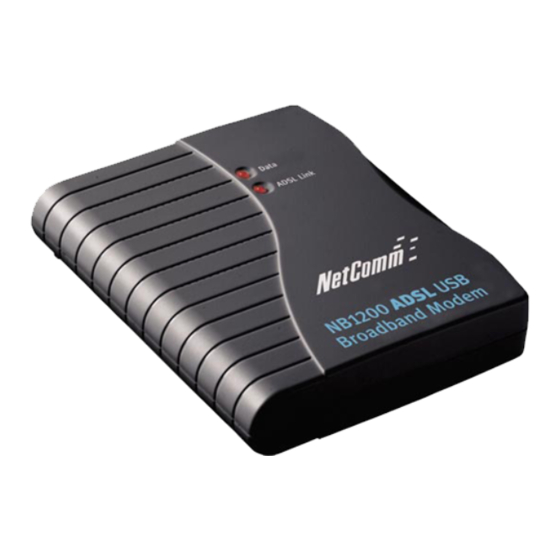
Introduction This Quick installation guide is designed to assist in the installation of the NetComm NB1200 ADSL modem to quickly connect to the internet. For more detailed information on the ADSL modem please consult the User Guide contained in Adobe Acrobat format on the CD-ROM provided. -
Page 4: Contents Of Your Package
Contents of your Package Included in your Netcomm NB1200 ADSL Modem package are: a NetComm NB1200 ADSL modem an Installation CD ROM a Double-Adaptor an ‘Old Style’ Telephone Adaptor a Microfilter a ADSL Line Cable a USB Cable Note: An ‘Old Style’ telephone adaptor is supplied with your ADSL Modem. If you have an ‘Old Style’... -
Page 5: Isp Information
In order to simplify connection to the internet through your ADSL service, the most common settings used by Australian Internet Service Providers (ISPs) have been preconfigured. If your ISP uses settings other than the standard settings you should install the modem using the Advanced installation - see page 17. -
Page 6: What Is A Micro Filter For
ADSL service. If your ADSL enabled phone line is being used with any other equipment other than your ADSL modem then you will need to use one micro filter for each phone device. -
Page 7: Installing The Modem Driver
Have your modem and cables ready, but do not connect them until prompted. Start Windows and log-in as Administrator. Insert your NetComm CD-ROM. The driver software will autolaunch and the installation will begin. When the licence screen appears, click Yes to continue with the installation. -
Page 8: Step 2 - Connecting Your Modem
Step 2 - Connecting your modem After Windows has restarted, connect your ADSL line to the line socket of the modem. Connect the USB cable to your computer’s USB port and then to the USB socket at the rear of the modem. -
Page 9: Step 3 - Connecting To The Internet
Shortcut to NetComm ADSL. Step 3 - Connecting to the internet To connect to the internet double-click the Shortcut to NetComm ADSL icon. The Dial-up networking window will appear. Enter your User Name and Password as supplied by your ISP. Click Dial. -
Page 10: Windows 2000
Have your modem and cables ready, but do not connect them until prompted. Start Windows and log-in as Administrator. Insert your NetComm CD-ROM. The driver software will autolaunch and the installation will begin. When the licence screen appears click Yes to continue with the installation. -
Page 11: Step 3 - Connecting To The Internet
Shortcut to NetComm ADSL. Step 3 - Connecting to the internet To connect to the internet double-click the Shortcut to NetComm ADSL icon. The Dial-up networking windows will appear. Enter your User Name and Password as supplied by your ISP. Click Dial. -
Page 12: Windows Me
When the Process is going on screen appears, connect the USB cable into your computer’s USB port and then into the USB socket at the rear of the modem. Windows will detect your modem and launch the new hardware wizard. -
Page 13: Step 2 - Restarting Windows
Connect your ADSL line to the line socket of the modem. Step 3 - Connecting to the internet To connect to the internet double-click the Shortcut to NetComm ADSL icon, the Dial-up networking window will appear. Enter your User Name and Password as supplied by your ISP. Click Connect. -
Page 14: Windows 98
When the Process is going on screen appears connect your USB cable from the computer to the modem. Windows will detect your modem and you may need to insert your original Windows 98 CD-ROM (as supplied by Microsoft) and click OK. -
Page 15: Step 2 - Restarting Windows
Once Windows has restarted you may be prompted to set your country specific settings. Connect your ADSL line to the line socket of the modem - refer to page 6 for details. Step 3 - Connecting to the internet To connect to the internet double-click the Shortcut to NetComm ADSL icon. The Dial-up networking windows will appear. - Page 16 Note: Do not delete the phone number (P8,35) Your connection will be confirmed by a Connection Complete window. You are now connected to the internet and can launch internet applications such as a web browser. www.netcomm.com.au Page 16 Rev.1 - YML626 NB1200 ADSL USB Modem...
-
Page 17: Advanced Setup
Open My Computer, right-click on the CD-ROM drive and choose Open as shown below: 2. Double-click the Advanced icon, which will launch the Advanced setup software. 3. The Software will launch and prompt you to agree to the License Agreement. Click Yes. Rev.1 - YML626 NB1200 ADSL USB Modem Choices 0-255 0-65535... - Page 18 4. Enter your Protocol, VCI and VPI choices as supplied by your ISP. Click Next. 5. Choose your Framing Type as supplied by your ISP. Click Next www.netcomm.com.au Page 18 Rev.1 - YML626 NB1200 ADSL USB Modem...
- Page 19 6. The software will now install and, if prompted, you should connect your ADSL USB modem to your computer via the supplied USB cable. Note: Windows 98 and Windows Me users will need to connect the modem when the “Process is going on” box appears, before the restart process. Windows XP and Windows 2000 users will need to wait until after the computer has restarted.
-
Page 20: Un-Installation
Un-installation To uninstall your ADSL Modem drivers you can either choose the uninstall option from the start menu (Figure a) or run the driver installation file (setup.exe) on the CD-ROM again and choose Uninstall (Figure b). Note: If you experience difficulties removing your Drivers, run the cleanup.exe program included on your CD ROM. -
Page 21: System Tray Icon
DSL icon colour Black Blue Yellow Green Rev.1 - YML626 NB1200 ADSL USB Modem in your system tray (near the clock) indicates the status Status Modem disconnected or not detected. Modem detected and ADSL line detected but not initialised. Initialising the ADSL line. -
Page 22: Trouble Shooting - Diagnostics
Trouble Shooting - Diagnostics If you are having trouble connecting to the Internet after installing your ADSL USB modem the DSL test tool can be very helpful in determining where the problem lies. Before using the DSL test tool, attempt to connect to the Internet and then double-click the DSL Test icon on your desktop. -
Page 23: Result: One Pass
Possible Problems: Your USB cable is not connected to your computer or to your modem . Check your cables. Your computer’s USB port is not functioning properly. Try restarting your computer. Rev.1 - YML626 NB1200 ADSL USB Modem www.netcomm.com.au Page 23... -
Page 24: Trouble Shooting - Frequently Asked Questions
Trouble Shooting - Frequently asked questions. Where is my NetComm ADSL icon? If your NetComm ADSL icon shortcut was not created on your desktop (or you deleted it) you can access still access or create a new icon. Depending on which operating system you use... -
Page 25: Registering Your Netcomm Product
Registering your NetComm Product To ensure that the conditions of your warranty are complied with, please go to the NetComm web site for quick and easy registration of your product at Alternatively, you can print out a copy of the Warranty Registration Form and mail it to NetComm Limited, PO Box 1200, Lane Cove NSW 2066. -
Page 26: Warranty
2. This warranty shall not apply to software programs, batteries power supplies, cables or other accessories supplied in or with the product; 3. The customer complies with all of the terms of any relevant agreement with NetComm and any other reasonable requirements of NetComm including producing such evidence of purchase as NetComm may require;... - Page 27 All NetComm ACN 002 490 486 products have a standard 12 months warranty from date of purchase. However some products have an extended warranty option (refer to packaging). To be eligible for the extended warranty you must supply the requested warranty information to NetComm within 30 days of the original purchase by registering on-line via the NetComm web site at www.netcomm.com.au.
Need help?
Do you have a question about the NB1200 and is the answer not in the manual?
Questions and answers