Table of Contents
Advertisement
Quick Links
Advertisement
Table of Contents

Summary of Contents for Hypex Electronics DIYclassD PreAmplifier Basic kit
- Page 1 User Manual Basic kit...
-
Page 2: Table Of Contents
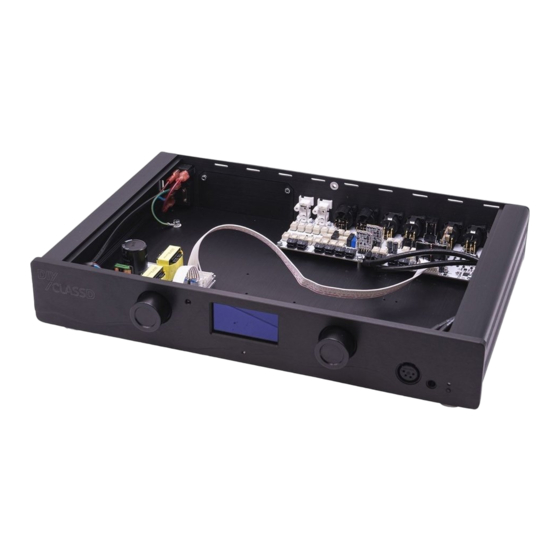
Amplifier kit, a brief introduction Thank you for purchasing the DIYclassD Included in the kit PreAmplifier kit, designed by Hypex Electronics. 1x DIY PreAmplifier case 1x Main board We have designed a DIY PreAmplifier with great 1x Front board performance, careful installation and correct use will 1x Headphones board help ensure that their full potential is achieved. -
Page 3: Safety Precautions
Gebruik voor dit apparaat een geaard stopcontact. Changes or modifications not expressly approved by Hypex Electronics will void compliance and therefore the user's authority to operate the equipment. Read these instructions. Service or modifications by any person or persons other Keep these instructions. -
Page 4: Connections & Control
1. Connections & Control Front Control Control Knob A Receiver Display Knob B Headphones Headphones Power Activate Indicator Control knob 'A' Control knob 'B' Rotate: - Input Select Press: - Menu Rotate: Volume Up/Down - Menu Navigation - Select Press: - Power On - Volume Mute/Unmute Long Press: Standby... -
Page 5: Remote
Input 1 & 2 Output 1 & 2 2x RCA Unbalanced Analogue In 2x Male XLR Stereo Balanced Analogue Out Input 2 Input 1 Left Left 1. Signal Gnd 2. Signal + Right Right 3. Signal - (inverting) Trigger 1 & 2 Input 3 +12Vdc 2x dual 3.5mm (1/8") TS... -
Page 6: Function
2. Function On/Off/Standby/Idle Power On Standby Use the power switch Device: Press and hold Control Knob 'B' at the back to turn on for at least 2 seconds. the mains power. Remote: Press the power button. Activate Device: Press Control Knob 'B'. The display will show 'Power off...' for 2 sec. -
Page 7: Input Select
Input Select Input adjustments Previous/Next Change the input by Device: Turn Control Knob 'A' selecting between left or right. Input '1' up to '3'. Remote: Press ◄ or ►. Headphones Output select HP Activate/De-activate Select the output by Device: Press the button to switching between set the output signal to HP and XLR. -
Page 8: Inputs
Inputs Customize Inputs Select the desired Input channel to customize SOURCE Change the name of the input corresponding to the connected source. ROUTING Change the path of LINE: Signal-in via volume control to output. the input signal (default setting) through the pre-amp. DIRECT: signal-in = signal-out (volume 0dB) Note: Activating headphones will temporarily reroute the signal through... -
Page 9: Gain Offset
GAIN OFFSET Scope Adjust the input signal level to match the Centre: 0dB (default). output volume at different input signals. Range: -8dB (left) -> +8dB (Right). Steps: 60 x 0.25dB. TRIGGER ON/OFF Which trigger will go ON when the regarding TRIGGER TRIGGER input is active.*... -
Page 10: System
System SYSTEM OPTIONS Customise various settings for audio and visual setup. BALANCE Alter the output signal to set the acoustic centre point to the desired offset. Scope Centre: Left & Right = -0dB Gain (default). 1 step Right: -1dB Left signal output. preamp 1 step Left: -1dB Right signal output. -
Page 11: Led
Adjust the brightness of the 2 indicator lights. FACTORY RESET WARNING! Restore all settings to factory defaults. It is highly recommended to turn off any connected devices before executing the factory defaults to prevent any unintended effects due to unpredictable behaviour of external sources and amplifiers. -
Page 12: Setup Example
4. Setup Example CD player Tuner DIYclassD Interconnect DIY preAmplifier DIYclassD Interconnect Stereo-kit Mono-kit Mono-kit... -
Page 13: System Information
5. System information Audio performance data All audio measurements are done with AES17 20kHz filter. Item Symbol Unit Notes Input level 14.45 (4 V Output level 14.45 (4 V Output level (7 V Headphones Input impedance 100k Ω Output Impedance Ω... -
Page 14: Troubleshooting
What kind of quality can I expect from this Use balanced connections for best system Ÿ DIY PreAmplifier kit? performance. Hypex Electronics is known for her outstanding Use grounded wall sockets. Ÿ sound quality, this DIY PreAmplifier kit represents that quality for DIYclassD.com as Heat well. -
Page 15: Warranty
Limited Warranty Revisions Hypex Electronics warrants this device for a period of Revision Comment Date two years after the original date of purchase against Doc. HW. defects due to faulty workmanship or materials arising from Normal Use of the device. The warranty... -
Page 16: Contact
DIYClassD.com Kattegat 8 9723 JP Groningen, The Netherlands +31 50 526 4993 sales@diyclassd.com www.diyclassd.com...


Need help?
Do you have a question about the DIYclassD PreAmplifier Basic kit and is the answer not in the manual?
Questions and answers