Advertisement
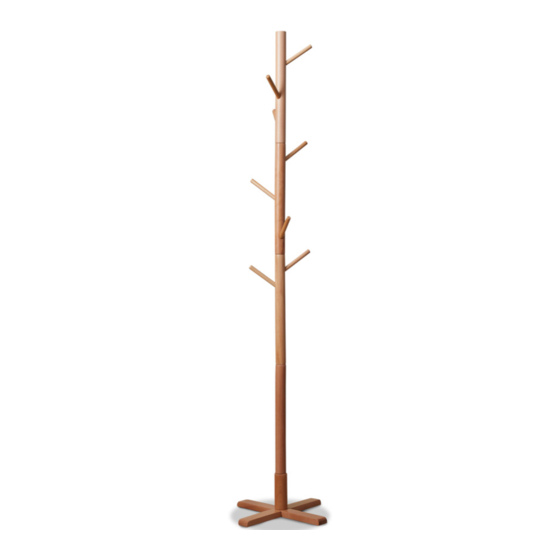
Mocka Freestanding Coat and Hat Stand
Thank you for purchasing Mocka Freestanding Coat and Hat Stand. Please follow the
manufacturer's assembly instructions in detail.
A
B
x1
x1
stand
stand
(top)
(bottom)
E
F
x2
x1
pole
pole
J
K
x1
x4
allen key
foot cushions
HARDWARE SUPPLIED
mocka.co.nz I mocka.com.au I PO BOX 18, Pinkenba QLD 4008
C
D
x1
x1
pole
pole
G
H
x8
x1
pegs
bolt
Advertisement
Table of Contents

Related Manuals for Mocka Freestanding Coat and Hat Stand


Summary of Contents for Mocka Freestanding Coat and Hat Stand
- Page 1 Mocka Freestanding Coat and Hat Stand Thank you for purchasing Mocka Freestanding Coat and Hat Stand. Please follow the manufacturer’s assembly instructions in detail. stand stand pole pole (top) (bottom) pole pole pegs bolt allen key foot cushions HARDWARE SUPPLIED...
- Page 2 Slide together 1 x stand (A) and 1 x stand (B) as shown. Attach 1 x pole (C) to assembled frame and secure with 1 x bolt (H). Tighten with an Allen Key (J). mocka.co.nz I mocka.com.au I PO BOX 18, Pinkenba QLD 4008...
- Page 3 Please clean the wood before you paste the plastic pieces onto the base. Attach Screw 1 x pole (D) into assembled frame as shown. 4 x feet cushions (K) to assembled frame as shown. mocka.co.nz I mocka.com.au I PO BOX 18, Pinkenba QLD 4008...
- Page 4 Mocka Freestanding Coat and Hat Stand Screw 2 x poles (E) into assembled frame as shown. Screw 1 x pole (F) into assembled frame as shown. mocka.co.nz I mocka.com.au I PO BOX 18, Pinkenba QLD 4008...
- Page 5 Attach 8 x pegs (G) into assembled frame as shown. Once assembled lift furniture into place, do not drag. Ensure unit is balanced and steady before use. You’re done, enjoy! mocka.co.nz I mocka.com.au I PO BOX 18, Pinkenba QLD 4008...
Need help?
Do you have a question about the Freestanding Coat and Hat Stand and is the answer not in the manual?
Questions and answers