
Related Manuals for Hills Premium Rotary 6


Summary of Contents for Hills Premium Rotary 6
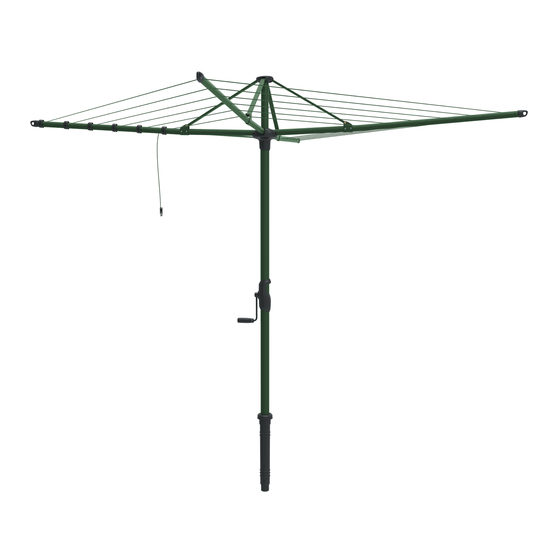
- Page 1 Premium Rotary Folding Head Hoists Product Manual TO SUIT MODELS: Rotary 6 Rotary 7 Rotary 8...
-
Page 2: Carton Contents
Introduction Congratulations Congratulations on the purchase of your new Hills Premium Rotary Folding Head Hoist, which will bring you many years of trouble free and efficient outdoor drying. It is important that you read this Product Manual thoroughly before installation and use. -
Page 3: Installation
Installation Step 1 Fig. 1 500mm (1'7") Select a Suitable Location 3.0m (9'8") 1.1 Select a suitable area for installation. Rotary 6 3.6m (11' 9") 1.2 Allow a minimum of (1'7") clearance Rotary 7 around your Rotary Hoist (Fig. 1). 4m (13') Step 2 Rotary 8 Install the Ground Socket 500mm (1'7") 2.1 Dig a hole 250mm (10") diameter by approximately 650mm (26") deep (Fig. - Page 4 Assembly Step 3 Assemble the Hoist 3.3 To engage, raise the head assembly 3.1 Place the main standard in the by approximately 100mm (4") and ground socket. lower until a ‘click’ is heard. 3.2 Place the bottom of the head 3.4 Check the head assembly is locked in assembly into the top of the position by lifting upwards (it should main standard and lower it...
-
Page 5: Operation
To free the arms, pull the line(s) that are tight through the other three non-tensioning Locking collar arms to even-out the circuit's line tension. Your hoist will then open as intended. Refer to our website www.hills.com.au for Spacers a video demonstration. Ground socket Cover... - Page 6 Operation Step 4 Operating the Hoist (continued) 4.3 To Fold: 2. Wrap retainer around the hoist to 1. Pull down the latch gently to release capture all 4 arms (Fig. 6a). (Fig. 5). 3. Clip the blue retainer back onto the 2. Lower the arm and cross assembly retaining line to secure hoist (Fig. 6b). until closed. 4.5 To Remove from the ground socket: 4.4 Wrap the line retainer around Unlock the locking collar by rotating...
- Page 7 It is highlighted by an arrow pointing to it on the bottom of the lower cross (Fig. 7). Note: A video describing this operation can be viewed on the Hills website at www.hills.com.au Fig. 7 Pull line out of arm. Step 3 Tensioning arm Remove line from under locking lip.
- Page 8 Line Tensioning Step 5 (continued) Step 5 Step 6 Starting at the furthest arm from the tensioning Keeping the tension on the line, feed it back through arm, pull the line tight and move from arm to arm to the tensioner. Pull to retain tension. generate desired line tension. Step 7 Step 8 Swing the line back under the tensioner lip to secure. Feed line back into arm through central hole. Cut off TIP: Keep pressure on bottom left edge to stop excessive line if required prior to putting into arm.
-
Page 9: Handy Hints
If there is any damage, parts up drying time. should be replaced with original Hills spares or the Hoist repaired before using again. Raise your hoist for maximum drying efficiency and to ensure clearance for The hoist should be periodically wiped clean longer items. -
Page 10: Warranty
Hills in order to manufacture the Products. 3. Hills warrants that for the duration of the Warranty Period, all Products will be free of faults arising from defects in Workmanship or Materials, on the terms and conditions set out in this warranty. - Page 11 6. Subject to the requirements of any applicable Act or legislation and to the extent permitted by law, no liability (whether expressed or implied) of any nature whatsoever, is accepted by Hills for any consequential loss, damage or injury arising as a result of any fault in the Products. 7. This warranty does not extend to damage to Products which occurs during transit or transportation, or which is caused by any abuse, accident or improper installation, connection, use, adjustment or repair or use of goods otherwise than in accordance with instructions issued by Hills.
- Page 12 Hills Holdings Limited A.B.N. 35 007 573 417 Issue September 2011 PD3067c...
Need help?
Do you have a question about the Premium Rotary 6 and is the answer not in the manual?
Questions and answers