
Related Manuals for Grundfos SE 12-42 hp


Summary of Contents for Grundfos SE 12-42 hp
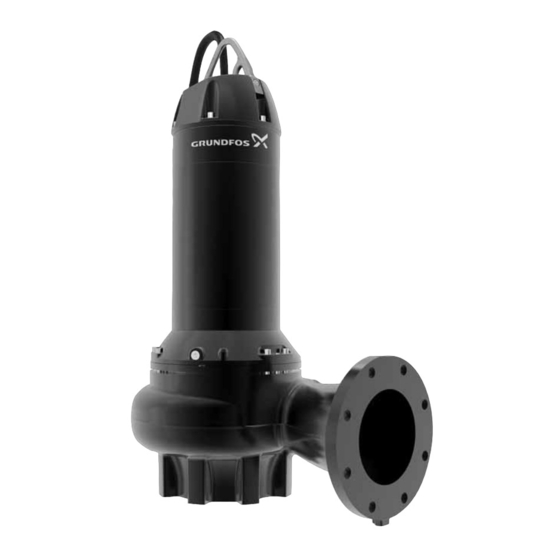
- Page 1 GRUNDFOS INSTRUCTIONS SE/SL 12-42 hp Service instructions Installation and operating instructions in English and other languages for 50/60 Hz Service animation video, YouTube http://net.grundfos.com/qr/i/98142268...
-
Page 2: Table Of Contents
- Action to avoid the hazard. Motor protection 1.2 Notes Starting up the product General startup procedure The symbols and notes below may appear in Grundfos Direction of rotation installation and operating instructions, safety instructions and service instructions. Additional information... -
Page 3: Safety
Therefore, all persons involved must wear This work must be carried out by Grundfos or an authorized appropriate personal protective equipment and clothing, and all service centre. -
Page 4: Checking The Motor Liquid
2.1 Checking the motor liquid 2.3 Changing the motor liquid You can check the ingress level of the media in the motor liquid. When the pump is new or after replacement of the shaft seal, check the motor liquid level and water content after one week of By use of a refractometer, the refractive index will show the operation. - Page 5 Filling with motor liquid, vertical installation Filling with motor liquid, vertical installation 1. Place the pump in vertical position. 1. Remove plug A and B on both sides. This makes it possible to get the trapped air out while filling. See fig. 5. 2.
-
Page 6: Inspecting And Adjusting The Impeller Clearance
2.4 Inspecting and adjusting the impeller clearance 3. Preparing the dismantling of the product DANGER 3.1 Transporting the product Electric shock You can transport the pump in vertical or horizontal position. Death or serious personal injury Make sure that the pump cannot roll or fall over. - Before inspection, make sure that the motor is See the installation and operating instructions for SE, SL 12-42 switched off and that the main switch is locked in... - Page 7 Installation types S, C and D 3.2.3 Raising the pump to upright position 1. Fasten the lifting equipment as shown in the figure below. Always handle the pump by means of the correct lifting points. When lifting the pump, use the right lifting points to keep the pump balanced.
-
Page 8: Dismantling And Assembling The Product
Grundfos or a FM-approved service centre. Maintenance and service work on explosion-proof products must be carried out by Grundfos or a service workshop authorized by Grundfos. Only FM-approved service centres are allowed to intervene in the flameproof enclosure of the product. - Page 9 4.3.1 Removing the cable 198a Maintenance and service work on explosion-proof products must be carried out by Grundfos or a service workshop authorized by Grundfos. 198b 1. Remove the screw (181a) in the cable entry (168). 198c 2. Slightly lift the cable entry (168).
- Page 10 1. Remove the outer screws (26). Maintenance and service work on explosion-proof 2. Lift the pump including the impeller (49) out of the pump products must be carried out by Grundfos or a housing (50). service workshop authorized by Grundfos.
-
Page 11: Assembling The Pump
7. Pull off the lower bearing bracket (155) and the ball bearing (153) with a puller. Maintenance and service work on explosion-proof products must be carried out by Grundfos or a 8. Knock out the bearing (153) of the lower bearing bracket (155) service workshop authorized by Grundfos. - Page 12 4.4.3 Fitting the shaft with bearings and rotor Maintenance and service work on explosion-proof Marks products must be carried out by Grundfos or a service workshop authorized by Grundfos. 1. Lubricate the O-ring (72) with Rocol Sapphire Aqua-Sil and fit it into the stator housing (55).
- Page 13 4.4.15 Fitting the motor top cover Maintenance and service work on explosion-proof Maintenance and service work on explosion-proof products must be carried out by Grundfos or a products must be carried out by Grundfos or a service workshop authorized by Grundfos.
-
Page 14: Electrical Connection
5. Electrical connection The inner diameter of the washer (198b) needs to fit with the outer diameter of the cable to avoid 5.1 Motor protection deformation of the rubber seal (198). See fig. 19. Galvanic separation Double-insulated sensors for all measurements of high voltages ensure the electrical safety. - Page 15 Maintenance and service work on explosion-proof that are hard wired from the pump to the IO 113 unit will open if products must be carried out by Grundfos or a the stator windings become too hot. The thermal switches are of service workshop authorized by Grundfos.
- Page 16 The PVS3 sensor is intended for use in medium- and large-sized IO 113 provides the interface between the pump equipped with Grundfos wastewater products. sensors and the pump controller(s). The most important sensor status information is indicated on the front panel.
-
Page 17: Starting Up The Product
6. Starting up the product In case of abnormal noise or vibrations from the pump, other pump failure, power supply failure or water supply failure, stop the pump immediately. Do Do not start the pump if the liquid start level is lower not attempt to restart the pump until the cause of the than the stop level or if the atmosphere in the pit is fault has been found and the fault corrected. -
Page 18: Additional Information
SE 6 pole RM5418 RM0350 ingress in % index 4.7 qt (4.5 l) 5.7 qt (5.4 l) 13.5 qt (12.8 l) 14.8 qt (14.1 l) Grundfos HTF Demineralised transfer fluid water Amount of Amount of Amount of Amount of Percentage... -
Page 19: Tightening Torques And Lubricants
7.4 Tightening torques and lubricants Dimension Torque Lubricant Pos. Designation Quantity ANSI [lbf-ft] [Nm] O-ring Rocol Plug 3/8" 29.5 ± 1.5 40 ± 2 Screw 1/2" 51.6 ± 3.0 70 ± 4 Castrol Screw 5/8" 125.4 ± 3.0 170 ± 4 Optimol 150d Screw... -
Page 20: Wiring Diagrams
7.6 Wiring diagrams Optional Fig. 24 Wiring diagram, 8-wire EMC cable DELTA STAR Optional Fig. 25 Wiring diagram, 12-wire standard cable... -
Page 21: Sensor Connections
7.7 Sensor connections 7.7.1 Sensor overview Sensor Sensor Sensor Sensor Standard Standard Ex. version 1 version 2 version 1 Ex. version 2 Ex. Fig. Fig. Fig. Fig. Fig. Fig. Thermal switches (Klixon/PTC) ● ● ● ● ● ● Moisture switch, top ●... - Page 22 7.7.2 Internal sensor wiring Non-explosion-proof versions Standard Sensor version 1 Sensor version 2 Pos. Description Thermal switch wiring (Klixon or PTC) Moisture sensor top Leakage switch Pt1000 stator winding Pt1000 upper bearing Pt1000 lower bearing PVS3 vibration sensor SM 113 sensor module Wiring harness (leakage switch) Wiring harness (Pt1000 sensor)
- Page 23 Explosion-proof versions Standard Ex. Sensor version 1 Ex. Sensor version 2 Ex. Pos. Description Thermal switch wiring (Klixon or PTC) Moisture sensor top Leakage switch Pt1000 stator winding Pt1000 upper bearing Pt1000 lower bearing PVS3 vibration sensor SM 113 sensor module Wiring harness (leakage switch) Wiring harness (Pt1000 sensor)
- Page 24 T1 T2 G1 A1 G2 A2 K1 K2 R1 R2 A Y B D1 D2 D3 D4 D5 D6 D7 D8 SM 113 1 2 3 4 5 6 7 8 9 10 11 12 I1 I2 I3 P1 P2 P3 P4 P5 Fig.
-
Page 25: Exploded Drawings
7.8 Exploded drawings 190b 181a 157d 176c 164a 157b 105a 157c 184b 187a 150c 150b 173e 173f 150d 182d 182c 182b Fig. 30 Exploded view, SE pump, 2- and 4-poles... - Page 26 190b 181a 157d 176c 173g 164a 157b 105a 157c 184b 187a 150c 150b 173e 173f 150d 182d 182c 182b Fig. 31 Exploded view, SE pump, explosion-proof version, 2- and 4-poles...
- Page 27 190b 181a 157d 176c 184b 164a 157b 105a 157c 187a 150c 150b 150d 182d 182c 182b Fig. 32 Exploded view, SE pump, 6 poles...
- Page 28 190b 181a 157d 176c 184b 173g 164a 157b 105a 157c 187a 150c 150b 173e 173f 150d 182d 182c 182b Fig. 33 Exploded view, SE pump, explosion-proof version, 6-poles...
- Page 29 190b 181a 157d 176c 105a 164a 184b 173e 173f 187a 193a 182d 182c 182b Fig. 34 Exploded view, SL pump, 2-4 poles...
- Page 30 190b 181a 157d 176c 105a 173g 164a 184b 173e 173f 187a 193a 182d 182c 182b Fig. 35 Exploded view, SL pump, explosion-proof version, 2- and 4-poles...
- Page 31 190b 181a 105a 157d 176c 164a 173e 173f 187a 184b 193a 182d 182c 182b Fig. 36 Exploded view, SL pump, 6 poles...
- Page 32 190b 181a 157d 176c 105a 173g 164a 173e 173f 187a 184b 193a 182d 182c 182b Fig. 37 Exploded view, SL pump, explosion-proof version, 6-poles...
-
Page 33: Motor Drawings
7.9 Motor drawings 520c 522c 520a 173f 173g 173e 190b 187a 164a 178b 150d 150e 182d 157b 182c 157c 182b 150b 150c Standard 168c 198b 198a 181a 181a 198b 198a 198c 198c 157d 157b 168a 168a 168b 168b 176a 176a 176c 176c FM pumps... - Page 34 520c 522c 520a 173g 173f 173e 190b 182d 182c 164a 187a 182b 178b Standard 168c 198a 198b 181a 181a 198b 198a 198c 198c 157d 157d 168a 168a 168b 168b 176a 176a 176c 176c FM pumps 521a 524a 521b 521b 521a 184b Fig.
-
Page 35: Pump Drawings
7.10 Pump drawings 173g Fig. 40 Sectional drawing, SE pump with guide claw, 2-4 poles... - Page 36 173g Fig. 41 Sectional drawing, SL pump with guide claw, 2-4 poles...
-
Page 37: Components And Material Specification
7.11 Components and material specification Motor DIN W.-Nr. / DIN W.-Nr. / Pos. Component Material AISI/ASTM Pos. Component Material AISI/ASTM standard standard Cable Pressure test plug Stainless steel 1.4436 181b EMC cable/shield Hexagon socket 25a* Stainless steel 1.4436 head cap screw Hexagon socket Stainless steel 1.4436... - Page 38 Pump Accessories DIN W.-Nr. / DIN W.-Nr. / Pos. Component Material AISI/ASTM Pos. Component Material AISI/ASTM standard standard Rivet Base stand, Galvanized horizontal steel Key (for keyway) Stainless steel 1.4436 Auto-coupling base Cast iron or Adjusting screw Stainless steel 1.4436 unit stainless steel Screw...
-
Page 39: Sensor Positions
7.12 Sensor positions Moisture switch Leakage switch (only in FM pumps) Leakage switch Fig. 42 Sectional drawing showing sensor positions... -
Page 40: Alignment Grooves
7.13 Alignment grooves Alignment grooves Alignment grooves Alignment grooves Alignment grooves Fig. 43 Alignment grooves... - Page 41 Canada México Grundfos Water Utility Inc. GRUNDFOS Canada GRUNDFOS México 3905 Enterprise Court 2941 Brighton Road Boulevard TLC No. 15 P.O. Box 6620 Oakville, Ontario L6H 6C9 Canada Parque Industrial Stiva Aeropuerto Aurora, IL 60598-0620 Phone: +1-905 829 9533 C.P. 66600 Apodaca, N.L. México...
- Page 42 98355584 0418 ECM: 1218488 www.grundfos.com www.grundfos.us...
Need help?
Do you have a question about the SE 12-42 hp and is the answer not in the manual?
Questions and answers