
Related Manuals for ECO-WORTHY IPT3000-21


Summary of Contents for ECO-WORTHY IPT3000-21
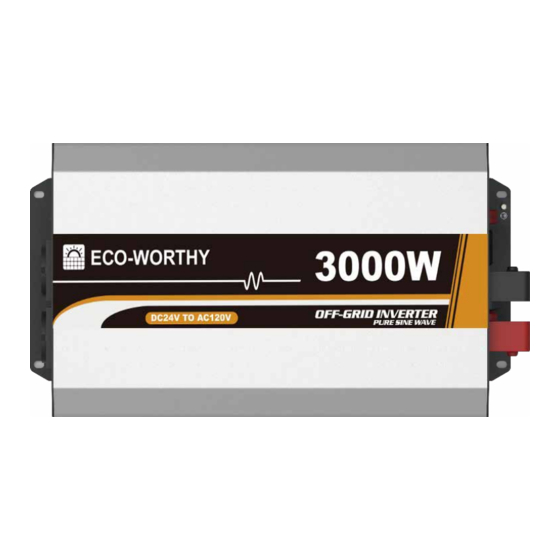
- Page 1 ECO-WORTHY 3000W 24V PURE SINE WAVE OFF-GRID INVERTER (USER MANUAL) +44 20 7570 0328(EU) Tel: E-mail:customer.service@eco-worthy.com Web:www.eco-worthy.com 1-866-939-8222(US)
-
Page 2: Table Of Contents
Contents Important Safety Instructions ............1 1 Overview ..................5 2 Appearance ...................6 3 Naming rule ...................7 4 Connection diagram ...............9 5 Installation ..................9 5.1 Attentions ................9 5.2 Wire size and circuit breaker ..........10 5.3 Mounting ................11 6 Parameters setting ..............15 6.1 Power Saving Mode ..............15 6.2 Other parameters ..............17... -
Page 3: Important Safety Instructions
Important Safety Instructions Please reserve this manual for future review. This manual contains instructions on the safety, installation, and operation of the IPT series high-frequency pure sine wave inverter ("inverter" as referred to in this manual). 1. Explanation of Symbols Please read related literature accompanying the following symbols to enable users to use the product efficiently and ensure personal and property safety. - Page 4 2. Requirements for Professional and Technical Personnel • Professionally trained; • Familiar with related safety specifications for the electrical system; • Read this manual carefully and master related safety cautions. 3. Professional and Technical Personnel is Allowed to do • Install the inverter to a specified location. •...
- Page 5 • Check whether wiring connections are tight to avoid the danger of heat accumulation due to loose connections. • The protective grounding is connected to the ground. The cross-section of the wire should not be less than 4mm2. • The DC input voltage must strictly follow the parameter table. Too high or too low DC input voltage will affect the inverter's normal operation and damage it.
- Page 6 • The connection of the power cable is loose. • Screw or other spare parts inadvertently falls into the inverter. • Improper operations by untrained non-professional or technical personnel. Once an accident occurs, it must be handled by professional and technical personnel.
-
Page 7: Overview
Overview The IPT series, a high-frequency sine wave inverter, adopts a fully digital intelli- gent design and voltage-current dual closed-loop control algorithm. Featured with fast response, high conversion efficiency, low Total Harmonic Distortion(THD), and high reliability running, the IPT series can be widely used in the DC-AC off-grid systems (such as vehicle systems, security monitoring systems, emergen- cy lighting systems, household power systems, field power systems, and other systems requiring higher power quality). -
Page 8: Appearance
Appearance The appearance varies with different product models; please refer to the actual product appearance. CAUTION ③ DC input terminal positive RS485 communication port DC input terminal negative Remote switch port (RJ11, Reserved) ① To connect an Cooling fan External switch port external relay Grounding terminal Indicator... -
Page 9: Naming Rule
③ The RS485 communication port can be connected to the remote meter, Blue- tooth module, WIFI module, PC, etc., for parameter setting and remote monitor- ing. ② Indicators include the Power indicator and Fault indicator. The indicator and buzzer status under different working conditions are shown in the table below. Status Power indicator Fault indicator... - Page 10 GFCI Socket Needs to be Tested After Power-on to Ensure Proper Operation. A.Preparation Connect a circuit breaker and an AC load (it is recommended to use a night light to observe the status conveniently) to the GFCI socket. Turn on the inverter after confirming the wiring.
-
Page 11: Connection Diagram
Connection Diagram Domestic Invweter Appliances It is recommended to directly connect the inverter DC input terminal to the battery. CAUTION Installation 5.1Attentions • Read all the installation instructions carefully in the manual before installation. • Be very careful when installing the batteries. When installing the open-type lead-acid battery, please wear eye protection and rinse with clean water for battery acid contact. -
Page 12: Wire Size And Circuit Breaker
• Loose power connectors and corroded wires may result in high heat, melt wire insulation, burn surrounding materials, or cause a fire. Ensure tight connections and secure cables with cable clamps to prevent them from swaying in moving applications. • The DC input voltage must strictly follow the parameter table. Too high or too low DC input voltage affects the normal operation and may damage the inverter. -
Page 13: Mounting
According to the recommended battery wire size, 2 battery wires, connected in parallel, are necessary for IPT1500-11, IPT1500-12, IPT2000-11, IPT2000-12, IPT3000-21, IPT3000-22, and IPT5000-42. 4 battery wires, connected in parallel, are necessary for IPT3000-11 and IPT3000-12. The above wire size and circuit breaker size are for reference only;... - Page 14 It is not recommended to install the product in an enclosed cabinet, where the device cooling will be influenced. If mounted in an enclosure cabinet, make sure there’s effective ventilation and do not turn on all the loads in case the over temperature protection is caused. CAUTION Step 3: Wiring •...
- Page 15 2.Battery Connection A fuse must be installed on the battery side, conformed to the following require- ments. 1. Fuse voltage is 1.5 to 2 times the inverter's rated voltage. 2. Fuse current is 2 to 2.5 times the inverter's rated current. CAUTION 3.
- Page 16 Optional Accessories Connection 1)RS485 Communication Port RJ45 Pin Definition: Instruction Definition Instruction Definition +5VDC RS485-A RS485-A 5V/200mA +5VDC RS485-A RS485-B Power GND RS485-B RS485-B Step 4:Turn on the Inverter (1)Connect the breaker at the inverter input terminal or the fuse at the battery terminal.
-
Page 17: Parameters Setting
When supplying power for different loads, it is recommended to first turn on the load with a large impulse current. And then turn on the load with a smaller impulse current after the load output is stable. CAUTION (4)If the FAULT indicator flashes red and the buzzer alarms after powering the inverter, please immediately turn off the load and the inverter. - Page 18 1) Enable power saving mode (PSE) Step1: In the real-time interface of the remote meter, press and hold the button to enter the parameters setting interface. Step2: Click the button to select the PSE parameter. Step3: Press and hold the button until the PSE parameter (OFF default) flashes.
-
Page 19: Other Parameters
Step4: Press and hold the button to confirm. 3) Set the power to enter the power saving mode (PSI) Step1: In the parameters setting interface, click the button to select the PSI parameter. Step2: Press and hold the button until the PSI value flashes. Step3: Click the button to set the PSI parameter. - Page 20 Step3: Press for 2s to enter the configuration interface of the specified parameter. Step4: Click to configure the parameter value. Step5: Press for 2s to confirm the configuration. Step6: Click to exit the current interface. Parameters Setting Range: Display Parameters Default Setting range Output voltage class...
-
Page 21: Protections
① After configuring the parameters marked with ①, the inverter will restart auto- matically. It will resume work according to the new parameter value. ② Due to the length limit of the LCD displayed data. When the baud rate is set to 115200, the value displayed on the LCD is 1152. - Page 22 The output is switched OFF after 1 minute. S=1.2Pe Buzzer beeps. (S: Output power; Pe: Rated power) Red indicator slowly flashes. IPT3000-21 The output is switched OFF after 30 seconds. S=1.5Pe Buzzer beeps. (S: Output power; Pe: Rated power) Red indicator slowly flashes.
-
Page 23: Troubleshooting
Troubleshooting A high voltage occurs inside the inverter. DO NOT try to repair or maintain the inverter by yourself, and it may cause an electric shock. WARNING Faults Possible Reasons Troubleshooting Green indicator Slowly Check whether the DC input voltage is lower flashes (1/4Hz) The DC input voltage is than10.8/21.6/43.2V by a multi-meter. -
Page 24: Specifications
Risk of electric shock! Confirm all the power is turned off and all the capaci- tor's energy has been discharged before performing the above operations. WARNING Specifications IPT3000-21 IPT3000-22 Model Continuous output power 3000W@35℃@Rated input voltage... - Page 25 ① The "Surge current when power on" parameter is for the customized products with an anti-surge function (whose product model has "S"). For other products, the actual surge current prevails. ② It means the rated output efficiency when the load power equals the "continu- ous output power"...
Need help?
Do you have a question about the IPT3000-21 and is the answer not in the manual?
Questions and answers