
Related Manuals for Mustek PL8A90T


Summary of Contents for Mustek PL8A90T
-
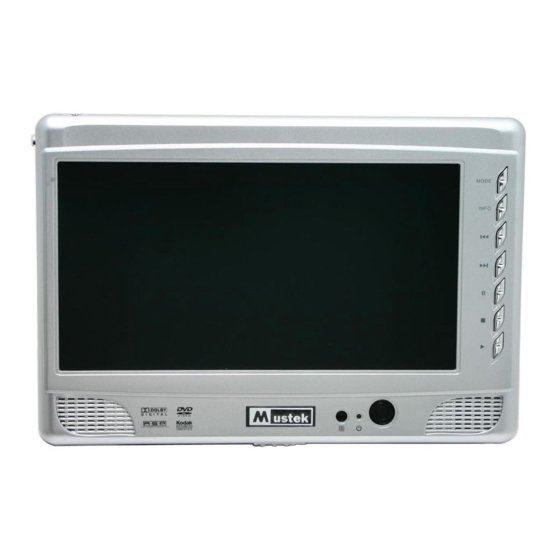
Page 1: Portable Dvd Player
Portable DVD Player User Guide Playable Disk Format: DVD/VCD/CD/MP3/CD-R/CD-RW/MMC/SD card 82-184-00060... -
Page 2: Table Of Contents
FCC and Safety Information... 4 Important Safety Instructions... 5 Precautions... 6 Selecting the type of disc for the type of TV connected... 7 Chapter 1. DVD 1-1 DVD Playback...8 Basic Playback... 8 Stopping Playback and Returning to The Menu Screen (If a Menu Is Available on The Disc)... 8 Stopping Playback... - Page 3 Table of Contents Chapter 4. Setup 4-1 Language Setup...23 On Screen Display (OSD) Language Setting... 23 DVD MENU Language Setting... 24 AUDIO Soundtrack Language Selection [DVD]... 25 SUBTITLE Language Selection [DVD]... 26 4-2 Screen TV Tuner... 27 TV Type Setting...27 Screen Saver Setting...
-
Page 4: Fcc And Safety Information
CAUTION: This unit employs a laser. Due to possible eye injury, only qualified service personnel should remove the cover or attempt to service this device. Use of controls or adjustments or performance of procedures other than those specified herein may result in hazardous radiation exposure. NOTE: This equipment has been tested and found to comply with the limits for a Class B digital device pursuant to part 15 of the FCC Rules. -
Page 5: Important Safety Instructions
Important Safety Instructions Read these instructions. Keep these instructions. Heed all warnings. Follow all instructions. Do not use this apparatus near water. Clean only with a damp cloth. Do not block any of the ventilation openings. Install in accordance with the manufacturer’s instructions. Do not install near any heat sources such as radiators, heat registers, stoves, or other apparatus (including amplifiers) that produce heat. -
Page 6: Precautions
Please read these precautions before operating this unit. Power cord protection To avoid any malfunctions of the unit and to protect against electric shock, fire or personal injury, please observe the following. Hold the plug firmly when connecting or disconnecting the AC power cord. Keep the AC power cord away from heating appliances. -
Page 7: Selecting The Type Of Disc For The Type Of Tv Connected
Selecting the type of disc for the type of TV connected DVDs are recorded in PAL or NTSC formats. Please refer to the table below to find the appropriate format for your region. Connecting to a multi-system TV Connecting to a NTSC TV Connecting to a PAL TV... -
Page 8: Dvd Playback
The portable DVD player stops playback, and then displays the menu screen. After operation When the portable DVD player is not in use, remove the disc and press POWER to turn off the player. Then close the display panel. << NOTE >>... -
Page 9: Stopping Playback
Press <PREVIOUS> during playback. When you press the button once midway through a chapter, the portable DVD player returns to the beginning of the chapter being played back. The player skips a chapter each time you press the button. Still Picture (PAUSE) Press <PAUSE>... -
Page 10: Repeat Viewing
D V D Repeat Viewing Press <1/ALL REPEAT> during playback. Each time you press the button, the disc will repeat a chapter or title. Press once: Chapter (Repeat chapter) Press twice: Title (Repeat title) Press three times: Disc (Repeat disc) Press four times: off (Repeat cancelled) *To return to normal playback... -
Page 11: Convenient Functions
When you turn on or remove the disc, the portable DVD player will playback the language which is selected at the initial setting. If you select a language which is not recorded on the disc, the portable DVD player will playback a prior language programmed on the disc. -
Page 12: Changing Subtitle Language (B)
When you turn on or remove the disc, the portable DVD player will playback the subtitle language which is selected at the initial setting. If you select a subtitle language which is not recorded on the disc, the portable DVD player will playback a prior subtitle language programmed on the disc. -
Page 13: Using A Dvd Menu
1-2 Convenient functions Using a DVD Menu Some DVD discs have unique menu structures. For example, DVDs programmed with complex contents provide guide menus, and those recorded with various languages provide menus for audio and subtitle language. Although the DVD menu’s contents and operation vary from disc to disc, the following explains basic operation when this feature is used. -
Page 14: Audio Cd Playback
Audio DVD Preparation Attach the battery or connect the portable DVD player to a wall outlet. If connecting to external equipment, please perform the following: Press on the power button of the TV set, and select “Video” as the TV input. -
Page 15: Skipping Ahead Or Back To Tracks
Press <PREVIOUS> during playback. When you press the button once midway through a track, the portable DVD player returns to the beginning of the track being played back. The player skips a track each time the button is pressed. Pause Playback Press <PAUSE>... -
Page 16: Chapter 3. Special Functions
You can play Kodak picture CDs for viewing on the screen. Load a kodak picture CD. After few seconds, the portable DVD player starts to play back the pictures in a slide show automatically. You can press the number buttons corresponding to the order of the picture, then press <PLAY/SEL.>. -
Page 17: Thumbnail Mode
3-1 Playing Kodak Picture CDs Thumbnail Mode Press <TITLE> to enter Thumbnail mode. While in Thumbnail mode, there are 20 pictures per page for viewing. Press < selected picture in its original size, press When you view the picture in its original size, you can press Press <NEXT>... -
Page 18: Playing Jpeg Picture Cds
You can play JPEG pictures CDs for viewing on the screen. Load a JPEG picture CD. After few seconds, the portable DVD player starts to play back the pictures in a slide show automatically. You can press the number buttons corresponding to the order of the picture, then press <PLAY/SEL.>. -
Page 19: Playing Mode
3-2 Playing JPEG Picture CDs Playing Mode Press <NEXT> to view the next picture or picture. Press <RIGHT> button or <RIGHT> button to rotate right by 90 degrees. Press <LEFT> button to rotate left by 90 degrees. Press *To pause playback ---Press <PAUSE>. -
Page 20: Playing Mp3 Music Discs
Special Functions Basic Playback Press POWER on. Press <OPEN> to open the disc cover. Insert the MP3 disc and close the cover. Playback will start automatically after approximately 5 seconds. MP3 files will begin to playback automatically. To play a specific file, find the file using the up and down buttons and once selected, press the play button. -
Page 21: Playing A Cd Containing Jpeg Pictures And Mp3 Music
Playing a CD containing JPEG pictures and MP3 music Basic Playback Load a disc containing JPEG pictures and MP3 music. After few seconds, the unit will enter File Manager. Under File Manager Menu, press Press <PLAY/SEL.> to playback the picture or MP3 music. *To pause playback ---Press <PAUSE>. -
Page 22: Thumbnail Mode
Thumbnail Mode Press <TITLE> to enter Thumbnail mode. While in Thumbnail mode, there are 20 pictures per page. Press < the selected picture in its original size, press When you view the picture in its original size, you can press thumbnail. -
Page 23: Chapter 4. Setup
4-1 Language Setup On Screen Display (OSD) Language Setting Allows you to set various languages for the on screen display (OSD). Press <SETUP> in the stop mode. Press <UP> button / press <PLAY/SEL.>. Press <UP> button / <PLAY/SEL.>. Press <UP> button / Press <PLAY/SEL.>. -
Page 24: Dvd Menu Language Setting
Setup DVD Menu Language Setting You can select a language that has been recorded on the disc menu. Press <SETUP> in the stop mode. Press <UP> button / press <PLAY/SEL.>. Press <UP> button / <PLAY/SEL.>. Press <UP> button / Press <PLAY/SEL.>. -
Page 25: Audio Soundtrack Language Selection [Dvd]
<SETUP> to exit or select EXIT from SETUP MENU screen. ---Press For your reference: If the language selected is not recorded on the disc, the portable DVD player will playback the top- priority language of the disc. -continued <DOWN> button to select “Language Setup”, and then <DOWN>... -
Page 26: Subtitle Language Selection [Dvd]
<SETUP> to exit or select EXIT from SETUP MENU screen. ---Press For your reference: If the language selected is not recorded on the disc, the portable DVD player will playback the top- priority language of the disc. 4-1 Language Setup <DOWN>... -
Page 27: Screen Tv Tuner
4-2 Screen TV Tuner Setup TV Type Setting The kind of TV set (4:3 or 16:9) connected to the player and a wide-screen picture type for a 4:3 TV can be selected. Press <SETUP> in the stop mode. Press <UP> button / press <PLAY/SEL.>. -
Page 28: Screen Saver Setting
Setup Screen Saver Setting This function will only work when the player is stopped. Press <SETUP> in the stop mode. Press <UP> button / press <PLAY/SEL.>. Press <UP> button / press <PLAY/SEL.>. Press <UP> button / Press <PLAY/SEL.>. The waiting time of the screen saver is set to 10 minutes. Screen TV Tuner TV Type Screen Saver... - Page 29 4-2 Screen TV Tuner Setup TV System Setting The player provides “PAL”, “NTSC” and “AUTO” settings for your selection. When connecting the portable DVD player to your TV, set the “TV SYSTEM” from the on-screen display to the format that is compatible with your TV’s system.
- Page 30 Setup Video Output Setting Please choose the preferred video output supported by your equipment. Press <SETUP> in the stop mode. Press <UP> button / press <PLAY/SEL.>. Press <UP> button / press <PLAY/SEL.>. Press <UP> button / setting. Press <PLAY/SEL.>. Screen TV Tuner TV Type Screen Saver TV System...
- Page 31 If you choose “P-Scan” as the video output setting, make sure your TV set supports P-Scan input feature and the YUV cable be properly connected to your TV and the portable DVD player. If your TV doesn’t support P-Scan feature, press <<Troubleshooting>>...
-
Page 32: Screen Saver Setting
Setup Country Setting For the channel search setting, please choose your country. Press <SETUP> in the stop mode. Press <UP> button / press <PLAY/SEL.>. Press <UP> button / <PLAY/SEL.>. Press <UP> button / Press <PLAY/SEL.>. NTSC TV Tuner NTSC TV Tuner Canada, Japan, Korea, Panama, U.S., etc. -
Page 33: Audio Setup
4-3 Audio Setup Digital Out Setting The portable DVD player provides three options, “SPDIF/PCM”, “SPDIF/RAW” and “Off” for the digital out setting. Press <SETUP> in the stop mode. Press <UP> button / press <PLAY/SEL.>. Press <UP> button / press <PLAY/SEL.>. -
Page 34: Analog Out Setting
Setup Analog Out Setting Press <SETUP> in the stop mode. Press <UP> button / press <PLAY/SEL.>. Press <UP> button / <PLAY/SEL.>. Press <UP> button / setting. Press <PLAY/SEL.>. Audio Setup Digital Out Analog Out : Move *To return to the SETUP MENU screen <LEFT>... -
Page 35: Custom Setup
<PLAY/SEL.>. << Important >> If you set the MMC/SD setting to “On”, the portable DVD player can only read SD/MMC card. The portable DVD player can’t playback any discs. While the disc is played back, you can only press the... -
Page 36: Parental Control Setting [Dvd]
Setup Parental Control Setting [DVD] A built-in viewer rating setting enables you to lock the videos that you do not want children to view. For example, setting the ratting limit to PG-13 will prevent the unit from playing video rated R, NC-17 or X unless the correct password is entered. -
Page 37: Password Setting [Dvd]
4-4 Custom Setup Password Setting [DVD] You can change the password to the portable DVD player. Press <SETUP> in the stop mode. Press <UP> button / press <PLAY/SEL.>. Press <UP> button / press <PLAY/SEL.>. Enter your old password and then press... -
Page 38: Angle Mark Setting [Dvd]
Setup Angle Mark Setting [DVD] You can choose to display or hide the angle mark “ Press <SETUP> in the stop mode. Press <UP> button / press <PLAY/SEL.>. Press <UP> button / press <PLAY/SEL.>. Press <UP> button / press <PLAY/SEL.>. <<... -
Page 39: Default Setting
4-4 Custom Setup Default Setting You may re-set the previous settings in CUSTOM SETUP to the default setting. Press <SETUP> in the stop mode. Press <UP> button / press <PLAY/SEL.>. Press <UP> button / <PLAY/SEL.>. Press <RIGHT> button to select “Read”, and then press <<... -
Page 40: Lcd Setup
Setup Panel Setting The portable DVD player provides five options for the panel adjustment: “Normal”, “16:9”, “4:3”, “Zoom” or “Close”. Press <LCD>, the LCD setting box show on the screen. Press <UP> button / <PLAY/SEL.>. Press <UP> button / setting. The panel will change to the selected setting. -
Page 41: Bright Setting
4-5 LCD Setup Bright Setting Press <LCD>, the LCD setting box show on the screen. Press <UP> button / <PLAY/SEL.>. Press <UP> button / setting. The panel will change to the selected setting. P a n e l P a n e l P a n e l P a n e l P a n e l... -
Page 42: Chapter 5. For Your Reference
For Your Reference Before requesting service for your portable DVD player, check the chart below for a possible cause of the problem you are experiencing. Some simple checkups or a minor adjustment on your part may eliminate the problem and restore proper operation. -
Page 43: Disc Handling And Maintenance
5-2 Disc Handling and Maintenance Handling Precautions Hold the disc by the edges so the surface will not be soiled with fingerprints. (A) Fingerprints, dirt and scratches can cause skipping and distortion. Do not write on the label side with a ball-point pen or other writing utensils that can leave indentations or scratch the surface of the disc. -
Page 44: Defintion Of Terms
5-3 Definition of Terms For Your Reference Angle Recorded onto some DVD discs are scenes which have been simultaneously shot from a number of different angles (the same scene is shot from the front, from the left side, from the right side, etc.). With such discs, the ANGLE button can be used to view the scene from different angles.
Need help?
Do you have a question about the PL8A90T and is the answer not in the manual?
Questions and answers