Table of Contents
Advertisement
Quick Links
Advertisement
Table of Contents

Subscribe to Our Youtube Channel
Related Manuals for TKH SVS-VISTEK EoSens CL


Summary of Contents for TKH SVS-VISTEK EoSens CL
- Page 1 EoSens® CL User Guide...
-
Page 2: Table Of Contents
Contents Before you start About this manual 1.1.1 Tips, remarks, and notes 1.1.2 Registered trademarks 1.1.3 Conformity and use 1.1.4 Supplements Warranty and non-warranty clause Support Introduction Intended use Scope of delivery Optional accessories System requirements The camera Camera description Operating temperature Additional cooling Interfaces of the camera... - Page 3 5.3.2 Power connector Sensor defect specifications Camera dimensions Timing diagrams 5.6.1 Free run with electronic shutter 5.6.2 External sync with internal timer 5.6.3 Pulse width mode Spectral response 5.7.1 Monochrome and color with UV/IR Cut Filter 5.7.2 Monochrome and color without UV/IR Cut Filter Appendix Declaration of Conformity...
- Page 4 Figures Fig.: 3-1: Interfaces of the camera EoSens® CL Fig.: 4-1: Power connector pinning Fig.: 4-2: Optocoupler Fig.: 4-3: Connecting camera and image processing system Fig.: 5-1: CameraLink connector, MDR-26 Fig.: 5-2: Power connector Fig.: 5-3: Quantum Efficiency mono and color with UV/IR Cut Filter Fig.: 5-4: Quantum Efficiency mono and color without UV/IR Cut Filter...
-
Page 5: Before You Start
Before you start About this manual This manual contains helpful information to install and operate the described camera. It has been produced with care. Nevertheless, information might be erroneous or incomplete. Mikrotron GmbH cannot be held responsible for any prob- lems resulting from incomplete or erroneous information. -
Page 6: Registered Trademarks
1 Before you start 1.1.2 Registered trademarks In this manual the following registered trademarks may be used: MotionBLITZ® ImageBLITZ® EoSens® GenICam® Microsoft® and Windows® Intel® Throughout the manual, these trademarks are not specifically marked as registered trademarks. This in no way implies that these trademarks can be used in another con- text without the trademark sign. -
Page 7: Supplements
1 Before you start 注 意 事項 : こ のリ フ ァ レンスガイ ド に明 示 的 に承 認 し ていない変 更や修 正を行 っ た 場 合 には、 本 製品 を使用 する権 利 が無効 と なるこ と があり ます。 1.1.4 Supplements For customers in Canada This apparatus complies with the Class A limits for radio noise emissions set out in... - Page 8 1 Before you start 2. Contact us in one of the following ways: Contact us via email: support@mikrotron.de. Our support team will guide you through the process. Or visit our support website www.mikrotron.de/en/services/support.html and fill out the form. You will receive an automatic reply from our ticket sys- tem.
-
Page 9: Introduction
Introduction Intended use The camera EoSens® CL belongs to the product class of so-called high-speed machine vision (MV) cameras that are integrated into test or measurement systems. High-speed MV cameras are designed to capture images with high frame rate for various purposes in an industrial or scientific environment to deliver image data for further analysis. -
Page 10: Optional Accessories
Optional accessories Lenses Only lenses for industrial purpose are suitable. To find lenses or other accessories, visit www.mikrotron.de/en. Cable KKRDCLSRxx: CameraLink cables with lengths from 0.5 to 8 m are available. INFO If the cable length exceeds 8m, high-quality cables are required. In order to use Full camera link, two cables for each camera are needed. -
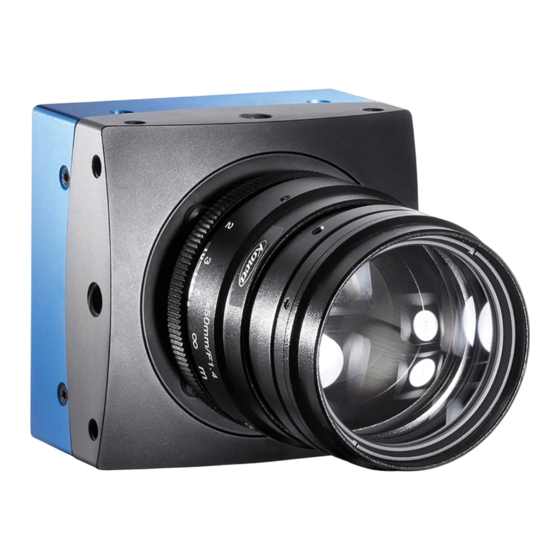
Page 11: The Camera
The camera Camera description The CMOS 1.3 Megapixel CameraLink cameras offer a high photo sensitivity and therefore make inspection in low light conditions possible. Both BASE and FULL mode cameras are available as monochrome and color version. Mikrotron CameraLink cameras comply with the CameraLink standard. The camera link standard defines the following items: Three configuration types BASE, MEDIUM and FULL with different data transfer speeds... -
Page 12: Operating Temperature
Operating temperature Despite of its high performance, the fanless 1.3CL camera is compact and works silently. If the camera is mounted on mechanical parts, the heat generated during operation will be dissipated by the cooling fins at the rear of the camera and the mechanical parts. -
Page 13: Status Led
Fig.: 3-1: Interfaces of the camera EoSens® CL 1 FULL interface 2 BASE interface 3 LED 4 6-pin Hirose socket This connection allows a standardized real-time communication between frame grab- ber and camera via the standardized CameraLink machine vision protocol. The 6-pin Hirose connector is used to connect an external power supply. -
Page 14: First Steps
First steps Connecting power and I/O signals The power connector of DC power supply must be connected to the 6-pin Hirose plug (HR10A-7P-6S). Fig.: 4-1: Power connector pinning NOTICE If it is connected with another 12 - 24 V/2A power supply, take the pinning of the connector into account. -
Page 15: Connecting Camera And Image Processing System
Fig.: 4-2: Optocoupler NOTICE The camera must be used with a supply voltage according to the camera spe- cification. Connecting a lower or higher supply voltage, AC voltage, reversal polar- ity or using wrong pins of the power connector may damage the camera. If doing so, the warranty will expire immediately. -
Page 16: Camera Settings And Profiles
1. Switch off the image processing system (1). 2. Connect the BASE connector of the camera (4) with the BASE connector of the frame grabber (2). 3. For FULL CL, connect the FULL connector of the camera (4) with the FULL con- nector of the frame grabber (2). -
Page 17: Changing The Pixel Clock
Video Pixel data Image Profile clock width Resolution frequency [MB/s] [pixel] [fps] Mode CL config. [MHz] 640 x 480 2 x 10 Base 1280 x 1024 2 x 10 Base 640 x 480 2 x 8 Base 1280 x 1024 2 ... -
Page 18: Cleaning Sensor And Lens
Preparation 1. Download and install the 64 bit version of the MC Control Tool from the website https://mikrotron.de/en/services/downloads.html 2. Close the Director2 application if running and make sure the camera is correctly connected. 3. Changing the pixel clock with the software 4. -
Page 19: Technical Data
Technical data Camera specifications Resolution 1.3 Megapixel Frame rate (8 bit) max. 506 fps Shutter speed 2 µs – 1 s Shutter time (steps) 2 µs Max. Jitter via CXP ±4 ns Trigger Max. Trigger fre- 300 kHz quency Quantum efficiency 35% @ 550 nm Interfaces CameraLink... -
Page 20: Sensor Specifications
Sensor specifications Sensor type CMOS, monochrome or RGB (Bayer filter) Image sensor size 17.92 x 14.34 mm Resolution 1280 x 1024 px Pixel depth Cube6, mini1, EoSens GE: 8 bit EoSens CL: 10 bit Pixel size 14 x 14 μm Active area 17,92 x 14,34 mm ROI min. -
Page 21: Connector Pinning
Connector pinning 5.3.1 CameraLink connector Fig.: 5-1: CameraLink connector, MDR-26 Signal Signal XCLK- XCLK+ SERTC+ SERTC- SERTFG- SERTFG+ CC1- CC1+ CC2+ CC2- CC3- CC3+ CC4+ CC4- Table: 5-1: Base CameraLink pinning 5 Technical data... -
Page 22: Power Connector
Signal Signal YCLK- YCLK+ 100 Ω Term. 100 Ω Term ZCLK- ZCLK+ Table: 5-2: Full CameraLink pinning 5.3.2 Power connector Before applying power to the camera we strongly recommend to verify the used pins of the power connector, the polarity (+/-) of the leads and the supply voltage. NOTICE The camera must be used with a supply voltage according to the camera spe- cification. - Page 23 Signal Voltage level 8 - 24 V DC 8 - 24 V DC STROBE LVTTL 3.3 V Table: 5-3: Power connector pinning D GND ... digital GND for STRB signal 5 Technical data...
-
Page 24: Sensor Defect Specifications
Sensor defect specifications Parameter Description Limit BrightPix Number of bright pixels allowed in the full window size max. 25 bright pixels of 1696 x 1710 pixels. allowed; bright pixel A bright pixel is defined as a pixel that has a 25% defects are stored in a higher response than the median response of the dark global defect map... - Page 25 31.3 14.9 69.8 41.3 F-mount C-mount 5 Technical data...
-
Page 26: Timing Diagrams
Timing diagrams 5.6.1 Free run with electronic shutter In this mode, the frame rate and exposure time are controlled by the camera. At the strobe output (power connector) is a high signal while the camera exposes a picture. 5.6.2 External sync with internal timer In this mode, the frame rate is controlled by the frame grabber while the exposure time is controlled by the camera. -
Page 27: Spectral Response
Spectral response 5.7.1 Monochrome and color with UV/IR Cut Filter Fig.: 5-3: Quantum Efficiency mono and color with UV/IR Cut Filter 5.7.2 Monochrome and color without UV/IR Cut Filter Fig.: 5-4: Quantum Efficiency mono and color without UV/IR Cut Filter 5 Technical data... -
Page 28: Appendix
Appendix The following page contains the Declaration(s) of Conformity. 6 Appendix... -
Page 29: Declaration Of Conformity
EU Declaration of Conformity EU-Konformitätserklärung Mikrotron GmbH Phone: +49 (0)89 72634200 Landshuter Str.20-22 Fax: +49 (0)89 726342-99 D-85716 Unterschleissheim Mail to: info@mikrotron.de www.mikrotron.de We herewith declare under our sole responsibility that the products mentioned below: Hiermit erklären wir in alleiniger Verantwortung, dass die folgenden Produkte: Product type: 1.3 Camera Link Camera Produkt:... - Page 30 SVS-Vistek GmbH Ferdinand-Porsche-Str. 3 82205 Gilching Phone: +49 8105 3987-60 https://www.svs-vistek.com info@svs-vistek.com © 09-2022 This document and the product(s) described are subject to change without further notice.
Need help?
Do you have a question about the SVS-VISTEK EoSens CL and is the answer not in the manual?
Questions and answers