
Related Manuals for Moxa Technologies AWK-3121-M12


Summary of Contents for Moxa Technologies AWK-3121-M12
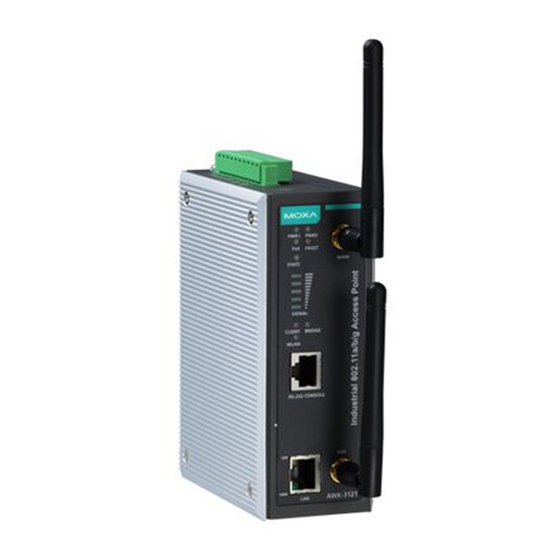
- Page 1 AWK-3121-M12 Quick Installation Guide Moxa AirWorks Second Edition, March 2012 2012 Moxa Inc. All rights reserved. Reproduction without permission is prohibited. P/N: 1802031210060...
-
Page 2: Package Checklist
AWK-3121-M12 has a default IP address that you must use when connecting to the device for the first time. Step 1: Select the power source The AWK-3121-M12 can be powered by a DC power input or PoE (Power over Ethernet). The AWK-3121-M12 will use whichever power source you choose. - Page 3 Step 6: Test communications We will describe two test methods. Use the first method if you are using only one AWK-3121-M12, and use the second method if you are using two or more AWK-3121-M12s. Testing method for one AWK-3121-M12 If you are only using one AWK-3121-M12, you will need a second notebook computer (B) equipped with a WLAN card.
- Page 4 (B) equipped with an Ethernet port. Use the default settings for the first AWK-3121-M12 connected to notebook A, and change the second or third AWK-3121-M12 connected to notebook B to Client mode and then configure the notebooks and AWK-3121-M12s properly.
-
Page 5: Mounting Dimensions (Unit = Mm)
DIN-Rail Mounting The aluminum DIN-Rail attachment plate should be fixed to the back panel of the AWK-3121-M12 when you take it out of the box. If you need to reattach the DIN-Rail attachment plate to the AWK-3121-M12, make sure the stiff metal spring is situated towards the top, as shown in the figures below. -
Page 6: Wall Mounting (Optional)
STEP 2: Mounting the AWK-3121-M12 to a wall requires 4 screws. Use the AWK-3121-M12 device, with wall mount plates attached, as a guide to mark the correct locations of the 4 screws. The heads of the screws should be less than 6.0 mm in diameter, and the shafts... -
Page 7: Wiring Requirements
Wiring Requirements WARNING Safety First! Be sure to disconnect the power cord before installing and/or wiring your Moxa AWK-3121-M12. WARNING Safety First! Calculate the maximum possible current in each power wire and common wire. Observe all electrical codes dictating the maximum current allowed for each wire size. -
Page 8: Wiring The Redundant Power Inputs
Wiring the Redundant Power Inputs The top two pairs of contacts of the 10-contact terminal block connector on the AWK-3121-M12’s top panel are used for the AWK-3121-M12’s two DC inputs. Top and front views of the terminal block connector is shown here. -
Page 9: Wiring The Relay Contact
Cable Holder Installation (Optional) You can attach the cable holder to the bottom of the AWK-3121-M12. This helps to keep cabling neat and avoid accidents that result from untidy cables. -
Page 10: Communication Connections
Pinouts for the 10/100BaseT(X) Port RS-232 Connection The AWK-3121-M12 has one RS-232 (8-pin RJ45) console port located on the front panel. Use either an RJ45-to-DB9 or RJ45-to-DB25 cable to connect the Moxa AWK-3121-M12’s console port to your PC’s COM port. -
Page 11: Led Indicators
LED Indicators The front panel of the Moxa AWK-3121-M12 contains several LED indicators. The function of each LED is described in the table below. Color State Description Front Panel LED Indicators (System) Power is being supplied from power input 1. -
Page 12: Specifications
Specifications Standards: IEEE 802.11a/b/g for Wireless LAN IEEE 802.11i for Wireless Security IEEE 802.3 for 10BaseT IEEE 802.3u for 100BaseTX IEEE 802.3af for Power-over-Ethernet IEEE 802.1D for Spanning Tree Protocol IEEE 802.1w for Rapid STP Spread Spectrum and Modulation (typical): •... -
Page 13: Protocol Support
CLIENT MODE, BRIDGE MODE, WLAN, 10/100 (TP port), 100M (fiber port), LAN (M12 port) *PoE is only available for the AWK-3121 and AWK-3121-M12 Alarm Contact: 1 relay output with current carrying capacity of 1 A @ 24 Digital Inputs: 2 electrically isolated inputs •... -
Page 14: Power Requirements
Warranty Period: 5 years Details: See www.moxa.com/support/warranty.aspx ATTENTION The AWK-3121-M12 is NOT a portable mobile device and should be located at least 20 cm away from the human body. The AWK-3121-M12 is NOT designed for the general public. To establish a wireless network safely using the AWK-3121-M12, a well-trained technician should be consulted for installation. - Page 15 Technical Support Contact Information www.moxa.com/support Moxa Americas: Moxa China (Shanghai office): Toll-free: 1-888-669-2872 Toll-free: 800-820-5036 Tel: 1-714-528-6777 Tel: +86-21-5258-9955 Fax: 1-714-528-6778 Fax: +86-21-5258-5505 Moxa Europe: Moxa Asia-Pacific: Tel: +49-89-3 70 03 99-0 Tel: +886-2-8919-1230 Fax: +49-89-3 70 03 99-99 Fax: +886-2-8919-1231 - 15 -...
Need help?
Do you have a question about the AWK-3121-M12 and is the answer not in the manual?
Questions and answers