Table of Contents
Advertisement
Assembly Instructions & User's Manual
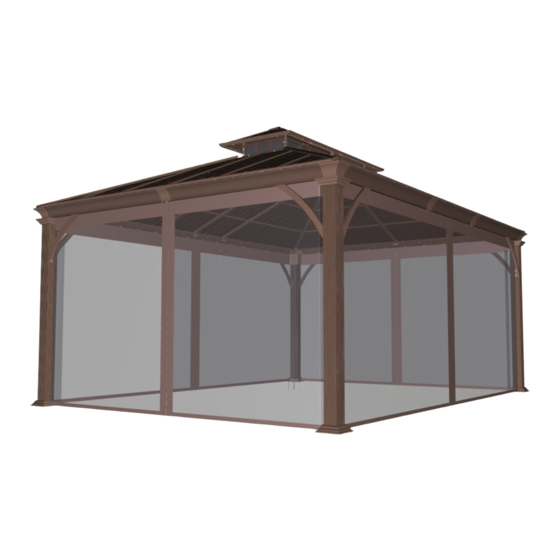
Member's Mark [12'x16'Salemo Hardtop Gazebo]
Item Number: 980295691
Model Number:TPGAZ2204
Customer Assistance (spare/replacement parts):1-800-847-7508
or Email: servicet@taipengchina.com
DISCLAIMER: Supplier is fully responsible for the entire content of the assembly
manual, including all Sam's Club suggested edits or revisions.
THIS ASSEMBLY MANUAL CONTAINS IMPORTANT SAFETY INFORMATION.
PLEASE READ AND KEEP FOR FUTURE REFERENCE.
for
TM
1
Advertisement
Table of Contents

Related Manuals for Member's Mark 12x16 Salemo TPGAZ2204


Summary of Contents for Member's Mark 12x16 Salemo TPGAZ2204
- Page 1 Assembly Instructions & User’s Manual Member’s Mark [12'x16'Salemo Hardtop Gazebo] Item Number: 980295691 Model Number:TPGAZ2204 Customer Assistance (spare/replacement parts):1-800-847-7508 or Email: servicet@taipengchina.com DISCLAIMER: Supplier is fully responsible for the entire content of the assembly manual, including all Sam’s Club suggested edits or revisions. THIS ASSEMBLY MANUAL CONTAINS IMPORTANT SAFETY INFORMATION.
-
Page 2: Table Of Contents
Table of Contents Quality Statement ..................3 Important Safety Information ................3 Before Assembly ....................3 Care & Use.....................3 Product Information..................3 Components....................4 Hardware......................7 Tools.......................7 Step 1 – Step 4....................8 Warning....................23 Danger....................23 Care & Use and Storage Instructions.............23 Warranty Information..................24 Need Assistance? Visit us at: samsclub.com/membersmarkhelp... -
Page 3: Quality Statement
Quality Statement Important Safety Information Please read all instructions carefully before assembling this gazebo. For your safety, assembly by two or more adults is strongly recommended. Hardware may loosen overtime. Periodically check that all connections are tight. NOTICE: To prevent injury and property damage from unexpected tipping of furniture, we highly recommend installation of the anti-tip kit included with this product. -
Page 4: Components
Components Left-Support Left-Lintel Right-Lintel Right-Support Short Lintel Top Frame Connecting Connector Tube Corner cover Small Top Lintel #1 Small Top Lintel Cover Lintel #2 Connection Center Cover Piece Center Post Connector Hook Base Plate Small Top Base Cover Support Bar Small Top Corner Center Bar... - Page 5 Short-Top Bar Big Top Pane -Left Roof Framing Big Top Pane Beam-Left Top -Right 31" / 790mm Roof Framing 31" / 790mm Beam-Right Top Big Top Pane -Left Roof Framing Beam- 51" / 1295mm Left Middle Roof Framing Beam- 51" / 1295mm Right Middle Big Top Pane -Right...
- Page 6 Edge Cover- Left Big Top Panel Edge Cover- Right Edge Cover Small Top Panel Short Edge Small Top Panel Sealing -Small Top Long Edge Sealing Small Top Panel -Small Top Small Top Panel 2 “L”Shape Cover Roof Cover- “L”Shape Small Top Cover Panel Cover- Air Vent...
-
Page 7: Hardware
Hardware Bolt\Flat Bolt\Plastic Washer (m6*15) Washer (m6*20) Flat Bolt\Plastic Bolt\ Washer (m6*35) Washer (m6*20) Bolt\Plastic Screw Washer (m6*40) Bolt\Flat Washer\ Nut Stake (m6*35) Bolt\Flat Hook Washer\ Nut (m6*55) Bolt\Plastic Washer (m6*15) Tools Wrench (Included) Hammer(Not Included) Allen Wrench (Included) Qty: Part No:GJ Qty: Part No:GK... -
Page 8: Step 1 - Step 4
Step 1 Bolt\Flat 130PCS Washer (M6X15) Bolt\Flat 24PCS Washer (M6X20) Fig 2 Fig 1 Fig 2 Fig 1 1-a. Insert the Post (E) into the Base Cover (G), then connect the (F) to the Base Plate Post (E) by Bolt\Flat Washer M6*15 (GA), as per Fig 1. Connect the Corner Connector (H) to the Post (E) by Bolts \Flat Washer M6*20 (GB), as per Fig 2. - Page 9 ×12PCS ×16PCS Fig 3 1-b. Insert the Hook (GM) into the track of Right Lintel (A2). Insert the Connector (B) into Left Lintel (A1)/Right Lintel (A2), at the same time connect it to Left Lintel (A1)/Right Lintel (A2) by the Connector (B) with \Flat Washer M6*15 (GA) Bolt (GA).
- Page 10 1-c. Connect the Left Lintel (A1) to the Corner Connector (H) by Bolts \Flat Washer M6*15 (GA). Connect the Right Lintel (A2) to the Corner Connector (H) by Bolts \Flat Washer M6*15 (GA), as per Fig4. 1-d. Attach the Support Bar (J1/J2) to the Lintel (A1/A2) and Post (E) by Bolts \Flat Washer M6*15 (GA), as per Fig 5.
- Page 11 Fig 7 Fig 8 1-e. Attach the Slanting Bar Connector (I) to the Post (E) by Bolts \Flat Washer M6*20 (GB), as per Fig 8. A3/A2 A1/A3 1-f. Attach the Lintel Cover (C2) to the Lintel (A1/A2/A3) by Bolt\Flat Washer M6*15 (GA),as per Fig 9 Fig 9 Step 2...
- Page 12 Fig 10 2-a. Connect the Top Frame (M) and Top connecting Tube (M1) by Bolts \Flat Washer M6*15 (GA) .as the Fig 10. Need Assistance? Visit us at: samsclub.com/membersmarkhelp...
- Page 13 Fig 11 Fig 12 2-b.Connect the other end of Long-Top Bar (S) to the Slanting Bar connector (I) by Bolts \Flat Washer\Nut M6*55 (GE). Connect the Long-Top Bar (S) to the Top Frame (M) by Bolts \Flat Washer M6*15 (GA) .see Fig.11-12 Fig 14 Fig 13 A1/A2/A3...
- Page 14 Step 3 (GC) (GF) (GA) Bolt\Plastic Washer (M6X40) Bolt\Plastic Washer (M6X15) Bolt\Flat Washer (M6X15) Qty: Qty: 16 Qty: (GD) (GE) (GH) Bolt\Flat Bolt\Flat Bolt\Plastic Washer\Nut (M6X35) Washer (M6X55) Washer (M6X35) Qty: 8 Qty: 6 Qty: 8 (GJ) Wrench Qty: Need Assistance? Visit us at: samsclub.com/membersmarkhelp...
- Page 15 Fig 15 Fig 16 Fig 18 Fig 17 3-a. Attach the Small Top Lintel #1 (N) to the Small Top Lintel #2 (O) by Bolts \Flat Washer\ Nut M6*35 (GD), as per Fig 15.Connect the Small Top Support Bar (R1) with the Center Connector (Q2) by bolts \Flat Washer\ Nut M6*55 (GE).
- Page 16 Fig 19 Fig 20 Fig 21 Fig 22 Small Top Lintel #1 Top Connecting Tube \Flat Washer 3-b.Connect the (N) to the (M1) by Bolts M6*15 (GA) See Fig.19-20 , \Flat Washer M6*15 Connect the Small Top Center Bar (R2) to the Top Connecting Tube (M1) by Bolts (GA), \Flat Washer\ Connect the Small Top Center Bar (R2) to the Center Connector (Q2) by Bolts...
- Page 17 Fig 24 Plastic Plastic Washer Washer Y1/Y2 the connected shape of steel top panel 3-d. Assemble the Small Top Panels (AH, AJ, AI) in sequence, fix them on the Roof Framing Beam- Left Small Top(Y1)/ Roof Framing Beam- Right Small Top(Y2) with Bolt\Plastic Washer M6*15 (GF), then install the Small Top Panel (AL), attach on the Roof Framing Beam- Small Top (Y3) with Bolt\Plastic Washer M6*15(GF).as per Fig 24.
- Page 18 Plastic Washer Fig 25 3-e. Connect the Roof Cover- Small Top (BA) to the Small Top Support Bar (R1) by Bolt\Plastic Washer (GH), connect the Centor Connector (Q2) to the Center Cover (Q1) by Bolts \Flat Washer M6*35 M6*40(GC), connect the Long Edge Sealing-Small Top (DF) to the Roof Framing Beam- Left Small by Bolts \Flat Washer (GA), then connect the Top(Y1)/ Roof Framing Beam- Right Small Top(Y2)
- Page 19 UL/VL UR/VR Fig 26 3-f. Connect the Roof Framing Beam-Left Top/ Roof Framing Beam-Left Middle (UL/VL) to the Long-Top Bar/Short-Top Bar (S/T) by Bolts \Flat Washer M6*15 (GA). Connect the Roof Framing Beam-Right Top/ Roof Framing Beam- Right Middle (UR/VR) to the Long-Top Bar/Short-Top Bar (S/T) by Bolts \Flat Washer M6*15 (GA).
- Page 20 Step 4 (GC) (GF) (GG) Bolt\Plastic Washer (M6X40) Bolt\Plastic Washer (M6X15) Bolt\Plastic Washer (M6X20) Qty: 8 Qty: 56 Qty: (GI) (GJ) (GK) Screw Wrench Allen Wrench Qty: 46 Qty: 1 Qty: 1 12' side 16' side Need Assistance? Visit us at: samsclub.com/membersmarkhelp...
- Page 21 Plastic Washer Plastic Washer AE/AF Fig 28 Fig 29 the connect shape of steel top panel 4-a. Attach the Big Top Panel-Left (AA/AC) to the assembled Roof Framing Beam-Left Bottom(WL) by Bolts\Plastic Washer M6*15 (GF) , Attach the Big Top Panel-Middle (AE) to the assembled Roof Framing See Fig.28 Beam-Left Bottom (WL) by Bolts\Plastic Washer M6*15 (GF) In the same way.
- Page 22 Fig 33 4-e. Hang the Mosquito Netting (FB) on the hooks(GM). See Fig.33 Fig 34 Fig 35 4-f. Put the Air Vent (FA) inside of the frame and attach the Air Vent (FA) to the Small Top Lintel #1 (N)/Small Top Lintel #2(O) using the velcro straps. See Fig.34 4-d.
-
Page 23: Warning
WARNING KEEP ALL FLAME AND HEAT SOURCES AWAY FROM THIS TENT FABRIC. This tent meets the flammability requirements of CPAI-84. The fabric may burn if left in continuous contact with any flame source. The application of any foreign substance to the tent fabric may render the flame-resistant properties ineffective. -
Page 24: Warranty Information
Warranty Information This product component has a 1 year guarantee against defects in material and/or workmanship. If you have any questions regarding the warranty or spare / replacement parts, please call our toll-free number 1-800-847-7508 or email us at servicet@taipengchina.com NOTE: Please consider recycling all applicable packaging material. - Page 25 MADE IN CHINA Need Assistance? Visit us at: samsclub.com/membersmarkhelp Need Assistance? Visit us at: samsclub.com/membersmarkhelp...
Need help?
Do you have a question about the 12x16 Salemo TPGAZ2204 and is the answer not in the manual?
Questions and answers