
Related Manuals for STM ROCKETBOX 2.0


Summary of Contents for STM ROCKETBOX 2.0
- Page 1 ( 5 0 9 ) 2 0 4 - 3 1 4 8 ( C A L L O R T E X T ) | S T M C A N N A . C O M | S A L E S @ S T M C A N N A . C O M...
- Page 2 ROCKETBOX 2.0 ™ WEIGHT & Approximately 300 lbs DIMENSIONS Machine Dimensions 24" L x 37" H x 27" W USER MANUAL V1.4 VOLUME 453, 143 or 72 Pre-Rolls Every Cycle CAPACITY Standard 110V POWER 8 Full Load Amps 5-1/2 ft. Cord Length...
-
Page 3: Table Of Contents
TABLE OF CONTENTS Table of Contents ......... 1 Operation Of Machine ....... 11 Touch Screen ..........12 Break-In Procedure ........2 Components ..........3 Startup Manual .......... 13 Lift Plate ............5 Input Density Screen ......... 14 Adaptor Plate ..........6 Parameters/Cycle Run ....... -
Page 4: Break-In Procedure
Thank you for being a valuable and loyal client After setting up the RocketBox™, run the machine through of STM. Our goal is to bring our customers the multiple cycles with each of your tray systems - empty and very best in product quality and customer unloaded. -
Page 5: Components
COMPONENTS 1. Rubber Flaps - Helps 5. Power Switch prevent material from falling into the base of machine. 1. Rubber Flaps 2. Guide Rods - Threaded rods to guide and secure the top 2. Guide Rod and bottom trays into machine. 3. - Page 6 COMPONENTS 8. Adjustable Top Tray 11. Loading Box 8. Adjustable Top Tray - Used to funnel material into bottom tray and control desired fill level of pre-rolls. 9. Bottom Tray - Cone holding tray (84, 98, or 109 mm cones). 10. Wingnuts + Washers- Threads onto guide rods to secure Top and Bottom Tray into Rocketbox.
-
Page 7: Lift Plate
LIFT PLATE The Lift Plate rests on the four (4) default riser bolts connected to the bottom of the shaker box. *Because all papers are rolled by hand, this allows an even fill line from the bottom up.* The Lift Plate uses four (4) Riser Bolts to adjust for 98mm (A) and 84mm (B) pre-rolls. -
Page 8: Adaptor Plate
1. Adaptor Plate 1. Adaptor Plate - Allows the 2. Flat Washer/ Lock Washer / Nut Rocketbox 2.0 to run with two (2) Mini Trays at once - 143ct. or 72ct. 2. Flat Washer / Lock Washer / Nut - Secures adaptor plate to Rocketbox 2.0. -
Page 9: Adjustable Top Tray
ADJUSTABLE TOP TRAY Included Reset Brackets The RocketBox 2.0 includes (2) removable Reset Brackets to reset the height of the TRAY ASSEMBLY Top Tray to the default 1/4" setting. Top Tray Bottom Tray Placement of Reset Brackets Reset Brackets fit in between the Top and Bottom Tray. - Page 10 (2) Removable Reset Brackets rolls. The RocketBox 2.0 is pre-installed with an Adjustable Top Tray. The default adjustment is set at at ¼", easily RESETTING THE TOP TRAY adjusted with a 7/16" wrench.
-
Page 11: Loading & Unloading Cones
LOADING AND UNLOADING CONES LOADING CONES Always use good quality paper cones and discard all paper cones that appear to be defective. Place the Bottom Tray into the Loading Box. Carefully drop cones into the Bottom Tray. Discard any cones that appear bent, crushed, or otherwise defective. -
Page 12: Getting Started
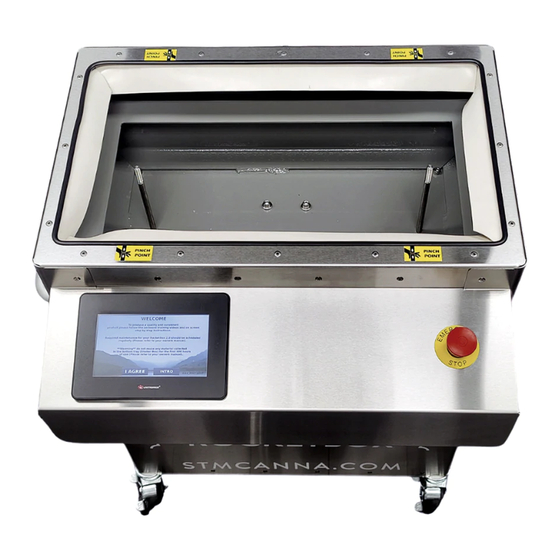
GETTING STARTED SUGGESTED TOOLS AND ACCESSORIES POWERING ON THE ROCKETBOX Scoop for Material Thousandths Scale Power on the RocketBox by plugging it Shop Vac Spray Bottle into a 120v outlet. Stainless Steel Chopsticks Pipe Cleaners Turn the power button clockwise. The 70-99% Isopropyl Alcohol Collection Bin arrow will point upwards. -
Page 13: Operation Of Machine
OPERATION OF MACHINE Insert the married Top and Bottom 453 Count Tray trays into the RocketBox™. Secure with washers and wingnuts. Adjust the settings on the 'Start Up / Density / Parameters' screens if necessary. The default settings provide a good starting point. Select SYSTEM START to run the cycle. -
Page 14: Touch Screen
TOUCH SCREEN WELCOME SCREEN The welcome screen will appear after powering on the machine. Select START to begin a new cycle or select TRAINING to view the training module. TRAINING MODULE Select USER MANUAL to view the manual, or select TRAINING VIDEOS to access the full series of RocketBox™... -
Page 15: Startup Manual
STARTUP MENU STARTUP MENU The startup menu will appear after selecting START on the Welcome screen. On this screen, the operator will select the cone size and weight variance preferred. Additionally, the operator can view total operation hours of the machine, training/data logs, target density, and target weight of pre-roll. -
Page 16: Input Density Screen
INPUT DENSITY INPUT DENSITY The Rocketbox 2.0 utilizes a pre-installed density calculator to measure the ground product's average mass per ml of material. *PLEASE NOTE - These inputs do NOT affect the operation of the Rocketbox 2.0* Measured Density The calculated density of your product - Determined by performing a density test (See pg. -
Page 17: Parameters/Cycle Run
PARAMETERS / CYCLE RUN OPERATION PARAMETERS These parameters directly affect the performance of your machine. Altering these may impact your pre-rolls internal pack and the overall weight of your pre-roll. Shaker Speed Vibration intensity range of 10-100% A.L.S. Pressure Measured air level system PSI range of 60-95 PSI Cycle Time Desired time per run CYCLE RUN... - Page 18 DENSITY TEST MODE DENSITY TEST MODE To attain the variance goal, performing a density test is crucial for success. Run the Shaker Speed / A.L.S. Pressure / Cycle Time at settings that will be used during full scale pre-roll production. Run the density test THREE TIMES to obtain the average density of the product to be used in full scale production...
-
Page 19: Density Testing
DENSITY TESTING PERFORMING A DENSITY TEST Tare empty 10 mL beaker on thousandths scale. Fill the included beaker just above the 10 mL line with ground material. Hold filled beaker firmly onto lift plate and begin density test - "System Start." Continue adding material until it settles at the 10ml fill line while the beaker is vibrating in the machine. - Page 20 DENSITY The RocketBox™ 2.0's built-in Density Calculator assists with reaching targeted weight accuracy based on density of material. WHAT IS DENSITY? Density is a characteristic property of a substance. The density of a substance is the relationship between the mass of the substance and how much space it takes up (volume).
-
Page 21: Cleaning And Maintenance
CLEANING AND MAINTENANCE HOW TO CLEAN Each tray can be separated and cleaned using regular soap and water, removing all residue. To clean stainless steel, use isopropyl alcohol and a soft cloth. Saturate the rag with at least 70% isopropyl alcohol and wipe down all areas thoroughly. -
Page 22: Terms Of Business
All products are first-come-first-serve and that receipt of payment is required in order to receive a confirmed shipping date in the queue. Due to high demands, certain items may have a lead time of 4-8 weeks or more from payment date, unless otherwise stated. Following the receipt of an invoice, STM Canna must receive payment within a maximum of 7 days before the invoice expires –... - Page 23 TERMS All orders must be paid in full before the order is placed. Order quotes expire within 10 days. STM Canna & STM Supply reserve the right to specify collection by certified check, money order, or company check. Personal checks are not accepted.
- Page 24 We may ask you for pictures, video, descriptions, and other identifying information to make a determination. If you are unable to provide adequate documentation requested, your return request will be denied. If your item is deemed defective, which is solely at STM’s discretion, we will issue you an RMA # which you will need to place in and on the package.
- Page 25 LIABILITY The purchaser of any products releases the manufacturer of those parts and STM Canna from all liabilities pertaining to use of the products. CLAIMS Since ownership of product transfers at the FOB point, claims for damaged, lost, or short shipments must be made at the time of receipt.
Need help?
Do you have a question about the ROCKETBOX 2.0 and is the answer not in the manual?
Questions and answers