
Related Manuals for STM ROCKETBOX


Summary of Contents for STM ROCKETBOX
- Page 1 ROCKETBOX INSTRUCTION MANUAL Sesh Technologies Manufacturing, LLC. Tech/Deliveries: 509.204.3148 www.stmcanna.com P a g e © 2 0 1 9 s t m c a n n a v 1 . 6...
- Page 2 PAGE 3. GETTING STARTED PAGE 4. TECHNICAL SPECIFICATIONS PAGE 5. SETTING UP & USING THE LOADING STATION PAGE 6. POWERING ON THE ROCKETBOX PAGE 7. TOUCH SCREEN OPERATION PAGE 8. TOUCH SCREEN ICONS PAGE 9. USING TOUCH SCREEN MODES – AUTOMATIC MODE PAGE 10.
-
Page 3: Break-In Procedure
Contained System Thank you for being a valuable and loyal Client of STM. Our goal is to bring our customer the very best in product quality and customer service. We value your feedback, this is how we consider what to improve and or update in our existing products. -
Page 4: Getting Started
The areas dedicated to pre-roll production depend on your volume and the labor involved. See Technical Specifications page for power requirements and other details. Recommend Areas for A Smooth Workflow: GRINDING AREA – for preparing material going into the RocketBox LOADING AREA – dedicated to loading cones into empty bottom trays ROCKETBOX AREA –... - Page 5 453 Pre-Rolled Joints Per Run Minimal Material Lost during Operation. Excess can be Re-Collected and Re-Used Product Loss During Use from Top Tray & Bottom of Machine. All Parts of the RocketBox are Food Grade or Powder Coated Food Grade. Variance Range Within .05g Weight Variance Falls Within Health Canada’s 5% +/- Rule...
- Page 6 The Loading Box improves efficiency by making it easier to load and unload the cones in the trays before and after they are used in the RocketBox. *The Loading Box is optional product. If you are interested in purchasing one or, please contact our sales team at stmcanna.com.
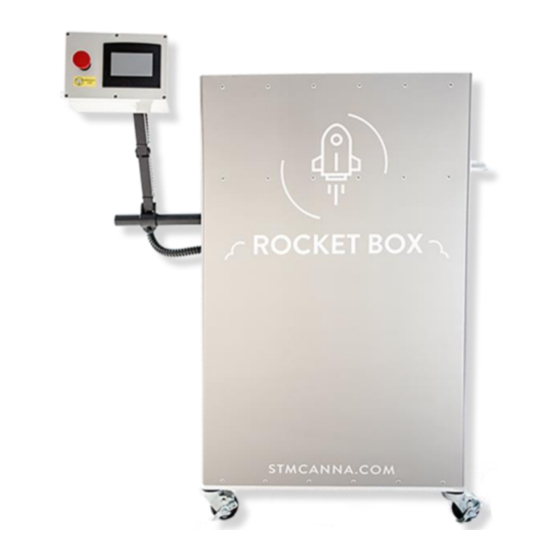
- Page 7 POWERING ON THE ROCKETBOX TURNING ON THE ROCKETBOX Step 1. Plug three-prong cord into a standard 110v/20amp wall outlet. Step 2. Turn the red lock out switch to the up position (on the right side of machine) for . Turn back for Step 3.
-
Page 8: Touch Screen Operation
2 Methods of Operation: Automatic 3- Stage Cycle Mode The RocketBox ships with a factory preset setting for filling cones. This preset is comprised of 3 stages. Each stage has a pre-determined level of vibration and timing. The factory preset setting is a base setting to help get you started. -
Page 9: Touch Screen Icons
HOUSE ICON: MAIN HOME SCREEN HOUSE icon is for the main home screen. *This is the main home screen that appears when you first power on the RocketBox. MONITOR ICON: RUN TIME MONITOR icon is for stats on current run time for the motor. - Page 10 USING TOUCH SCREEN MODES USING AUTOMATIC MODE (Preset Sample) This is the 3-Stage Automatic Preset Mode Detailed on Page 6 Step 1. Click on the Gears Icon Step 2. Click on #1 Sample mode. This is the default 3-stage mode. Step 3.
- Page 11 100 or the motor will not function. Step 3. Press the GO and STOP buttons to start and stop the RocketBox. You can also click on the House Icon to go back to the Home page and do it from there also.
- Page 12 USING TOUCH SCREEN MODES Cont. TO SAVE A PRESET Step 1. From Home Screen, click Gears Icon. Step 2. From Preset Screen, click Gears Icon Again. Step 3. On Cycles Set-Up Screen, click in boxes to make adjustments for each stage. For example, Stage 1 could be a light pack for 20 seconds at 60 motor speed.
-
Page 13: Machine Operation
Step 1. Step 2. Place Tray into RocketBox using the handles on each end of the tray. following the guides on the RocketBox. The Tray should sit even in the RocketBox. Step 3. Place rubber gaskets & plastic gaskets over threads on the top tray. - Page 14 Make sure RocketBox is in the lowered position before removing tray. Step 2. Unscrew the lock nuts which hold the tray in RocketBox. Step 3. Lift tray from RocketBox with the handles on each end of the trays. Load tray into loading/unloading station. Step 4. REMOVING FINAL PRODUCT Step 1.
-
Page 15: Cleaning And Maintenance
ü If there is any material left inside which is deemed unusable, scoop out or vacuum the material and discard. ü Clean as often as needed or required. Set the RocketBox on regular cleaning schedule, dependent on use and materials. -
Page 16: Troubleshooting
TROUBLESHOOTING RocketBox will not power on . Make sure power button on the side is turn to the up position. If this does not resolve the issue, check to make sure the E-Stop button is not depressed. (Page 5) Top Tray is clogging during filling stage . - Page 17 Extent of Warranty: Any STM system properly returned to STM will be repaired or replaced by STM. STM is not responsible for any other expense incurred by the customer under the terms of this limited warranty, nor is STM responsible for any damages either consequential, incidental, special, contingent or otherwise;...
- Page 18 Liability: The purchaser of any parts releases the manufacturer of those parts and STM from all liabilities pertaining to use of the parts. The purchaser recognizes that any alteration or modifications to any STM system may increase the risk of accident and/or injury and may also render the machine inoperable.
- Page 19 If your item is deemed defective, which is solely at STM’s discretion, we will issue you an RMA # which you will need to place in and on the package. After receiving your RMA #, you may send the item to: 3223 North Market St.
- Page 20 NOTES: 19 | P a g e © 2 0 1 9 s t m c a n n a v 1 . 6...
Need help?
Do you have a question about the ROCKETBOX and is the answer not in the manual?
Questions and answers