Table of Contents
Advertisement
Quick Links
High-Definition Multimedia Interface (HDMI) and the HDMI Logo are trademarks or registered trademarks of HDMI
Licensing Administrator, Inc.
For DTS patents, see http://patents.dts.com. Manufactured under license from DTS Licensing Limited. DTS,
DTS-HD, DTS Studio Sound, and the DTS-HD logo are registered trademarks or trademarks of DTS, Inc. in the
United States and other countries.© 2020 DTS, Inc. ALL RIGHTS RESERVED.
II Dolby Audio
Manufactured under license from Dolby Laboratories. Dolby, Dolby Audio, and the double-Dsymbol are trademarks of
Dolby Laboratories Licensing Corporation.
* Model: XM03A
* XGIMI Technology reserves the right to interpret and amend the Instructions.
1
Advertisement
Table of Contents

Related Manuals for XGIMI AURA


Summary of Contents for XGIMI AURA
- Page 1 United States and other countries.© 2020 DTS, Inc. ALL RIGHTS RESERVED. II Dolby Audio Manufactured under license from Dolby Laboratories. Dolby, Dolby Audio, and the double-Dsymbol are trademarks of Dolby Laboratories Licensing Corporation. * Model: XM03A * XGIMI Technology reserves the right to interpret and amend the Instructions.
-
Page 2: What's Included
What's Included < <;) XGIMIAURA □ Power cord Remote Control Instruction Manual Warranty Card Note: Please keep the original package in case of needed transportation in the future. To protect the product, please wrap it how it was received. -
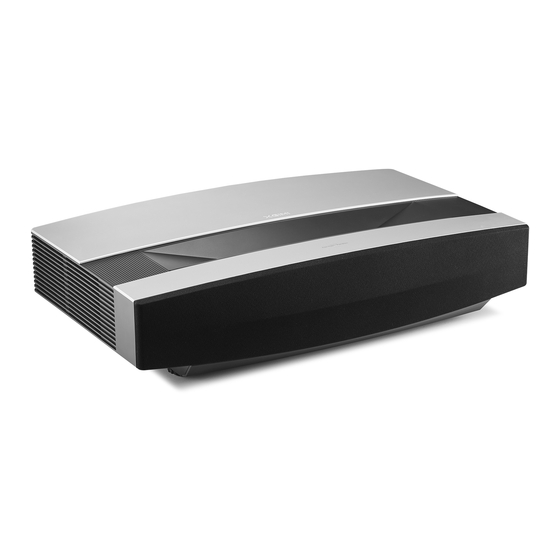
Page 3: Front & Top View
Overview Front & Top View Laser light source unit Orange Light The device is powered on aft e r plugging in Steady - on for several seconds the power cord. White Light Flashing The device is powering on/off. The device is powered on with the White Light Steady - on "Display Off". - Page 4 Side View (right) Rear View 1111111111111111111111111111111111111111111111111111111111111111111111 □□• ,a,a,a B BO II 1111 � � (§) (§) (§) HDMI 1/ARC HDMl2 HDMI 3 USB 2.0 � © USB 2.0 AUDIO OPTICAL SERVICE Note: Use HDMI 2.0 cables when using HDMI 2.0 interfaces.
-
Page 5: Remote Control
Remote Control @--------- ---------- Power On/Off ©--------- --------- Settings Shortcut (§) - Google Assistant D-pad Select ® Home Back-------- �@ Volume- Volume+ Menu , ___________ ,, Focus )CGIMI... -
Page 6: Getting Started
Getting Started Placement Place the projector on a stable, flat surface and ensure the lens is aligned with the projection plane (display wall/surface). The rear of the projector should be parallel to the projection plane. To achieve optimal projection, make sure the projection plane is white and flat, or you can use a projector screen. The wall for projection should be larger than the size of your desired image. - Page 7 177.1 cm 99.6 cm 10.9 cm 32.9 cm 80’’ (69.7”) (39.2”) (4.3”) (13.0”) 199.3cm 112.1 cm 15.4 cm 34.0 cm 90’’ (78.4”) (44.1”) (6.1”) (13.4”) 221.4 cm 124.5 cm 20.9 cm 38.8 cm 100’’ (87.2”) (49.0”) (8.2”) (15.3”) 243.5 cm 137.0cm 24.7 cm 39.5 cm...
-
Page 8: Using The Remote Control
Using the Remote Control Upon the first use, press the battery compartment release button on the back of the remote control to remove the battery compartment. Then, insert two AAA batteries. $When you insert the batteries, make sure that the+ and - symbols on the batteries match the+ and - symbols inside the battery compartment, and then �... -
Page 11: Adjusting The Focus
For iOS users, follow the instructions below to complete the setup: 1.Skip the quick setup process. 2.Connect XGIMI AURA to your network. 3.Log in with your Google account. YourXGIMI AURA will be powered by Android TV after the setup process is complete. - Page 12 Adjusting the Projection Picture Adjust the picture angle by moving the projector left or right or by altering the tilt angle adjustment foot at the bottom to make the screen rectangular. If you still think the projection picture is not square enough, use the remote control to open [Settings], select [Projector Settings]->...
- Page 13 r·--·--·--·--•--·--·--·--•--·--·--·--•--·--·--·--•--·--·--·--•--·--• Manuall y ad j ust the p ro j ection p icture b y usin g one of the followin g two methods: ◄ Four- p oint correction: Manuall y correct the p ro j ection p icture b y ad j ustin g the 4 p oints.
- Page 14 Play a video clip with a smartphone or PC app that supports Chromecast built-in", and then select ,;J on the screen. Select the target device, "XGIMI AURA", to begin projecting your smartphone content. Note: Make sure the projector and your smartphone or PC are connected to the same network.
- Page 15 XGIMI XMusic Player XMusic Player is a built-in music playerforXGIMI AURA and can play local music or music via Bluetooth. In the XMusic Player app, you can select different playback wallpapers to achieve an immersive listening experience. If you need to turn off the projection frame during music playback, you can press the l'.l button and select "Display Off".
- Page 16 File Manager Use the File Manager app to view files on the device storage or external storage. On the home page, click Apps to open the app list. Select File Manager, and then select the device storage or external storage device. Press and hold on to the "Settings"...
-
Page 17: System Upgrade
Image Mode When watching content via HDMI or watching videos, select different image modes for different scenarios, such as movie, football, office, and game, to enjoy the optimal viewing experience. Movie: Ideal for watching films or TV series thanks to its cinematic picture quality. Football: Ideal for watching football games. -
Page 18: Important Precautions
Important Precautions Correct use of the device: • Do not face lens into eyes because the strong projector light may cause injury to the eyes. • Do not block the air inlet/outlet of the device in order to avoid damage to internal electronic devices arising from normal heat dissipation failure of the device. •... -
Page 19: Fcc Warning
FCC warning The device meets provisions of part 15 of FCC rule. Operation meets the following 2 conditions: (1) the device will not cause harmful interference, and (2) the device must accept any interference received, including interference that may result in accidental operations. User ma nu al or operating instructions shall remind users that intentional or unintentional modification and replacement of radiators without explicit approval from the responsible compliance party may prevent the user from operating the device. -
Page 20: Declaration Of Conformity
6. The device complies with RF specifications when the device is used at a distance of 20 cm away from your body. Declaration of Conformity Chengdu XGIMI Technology Co., Ltd. hereby declares that this product is in compliance with the essential requirements and other relevant provisions of Directive 2014/53/EU. -
Page 21: Radiation Exposure Statement
Radiation Exposure Statement For remote control, this device complies with FCC and IC radiation exposure limits set forth for an uncontrolled environment. The transmitter shall not be placed or operated in conjunction with any other antenna or transmitter. For the laser projector, the device meets FCC and IC radiation exposure limits specified for uncontrolled environments. In the installation and operation of the device, the distance between radiator and body should be at least 20 cm.
Need help?
Do you have a question about the AURA and is the answer not in the manual?
Questions and answers