Advertisement
OVERVIEW
Ports

Remote

Getting Started
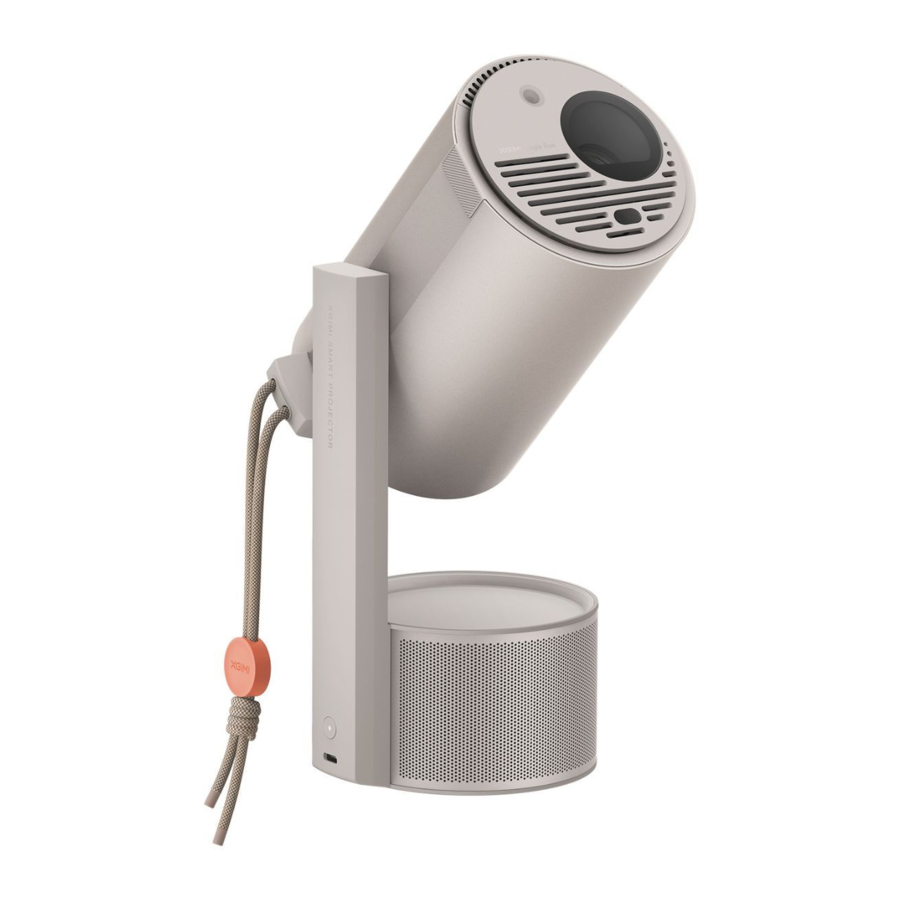
Device on/off

- Connect the power cable and wait for the indicator light to go out.
- Lift the projector to turn it on.
- Rotate the projector. The projector enters viewing mode
![]()

In the power-on state, press and hold the power button or close the projector vertically to shut it down.

Remote Control Pairing
Position the remote control within 10cm of the device, press " " and "
 " simultaneously. An indicator light will begin flashing as the remote control enters pairing mode. Release the buttons when the flashing begins. After hearing a "ding" sound, the connection is successful.
If pairing fails, wait 30 seconds and repeat the steps above.

Functions Description of Remote Control
You can use the focus key on the remote to focus. Press it for auto focus. Press and hold it for manual focus, and use the left and right keys to manually adjust the focus.
Extra spacing between keystone & correction
When the automatic keystone correction function is enabled, the frame will be adjusted automatically if you move the device to another location.

When the automatic obstacle avoidance function is enabled, the frame will automatically avoid obstacles if there are any in the projection area. When the automatic screen alignment function is enabled, the frame will automatically match the screen if there is a 16:9 or 16:10 screen in the projection area.

Use the " " button on the remote control to go to Settings > Projector > Keystone > Auto Keystone Correction. Select "Auto Keystone Correction" to enable the automatic keystone correction function. Select "Manual Keystone Correction" to adjust the four points and the size of the frame.

Google Assistant
Press the Google Assistant button on your remote control and use your voice to search for movies and shows, inquiry answers, recommendations to match your mood, control your smart home devices, and more.
Google Cast

Easily cast your favorite movies, music, and more to your TV with Google Cast.
Simply tap the Cast button from apps you already know and love to stream entertainment from your phone, tablet or laptop to the TV. While you're streaming, you can keep using your phone for other things like scrolling through social media, sending texts, and even accepting calls.
System Upgrade
- Online upgrade
The online upgrade can be performed through system settings.
Note: The online upgrade can be made through system settings "![]() ".
".
Important Precautions
- Do not stare directly into the projector lens or have it facing you as the light may be harmful to your eyes.
- Do not block the device's air inlet/outlet to prevent heat dissipation issues and damage to the internal electronic components.
- Do not wipe the lens with cleaning paper, cloth, or other materials as doing so may damage the lens. Please use an air blower to remove dust from the lens instead.
- Do not wash the device with cleaning chemicals, detergents, or any other liquid to prevent the circuit board from corroding. Avoid exposing the device to rainwater, moisture, and mineral-containing liquids.
- Keep the device, its components and accessories, out of the reach of children.
- Make sure that the device is used in a dry and ventilated environment.
- Do not store the device in extremely hot or cold temperatures as doing so will shorten the life of the device. Place and use the device in an environment of 0°C-40°C.
- Do not put the device into any heating equipment (such as a dryer or microwave oven) for drying.
- Do not squeeze the device or place nay obstructions above or behind it to avoid damaging the device and blocking the light path.
- Do not throw, strike, or sharply vibrate the device to prevent damaging the internal circuit board.
- Do not try to disassemble and assemble the device yourself. If any issue occurs, please contact the after-sales service of XGIMI.
- Do not repair any product on your own. If the device or any component does not work properly, consult the after-sales service of XGlMI in a timely manner or return the defective product to XGIMI for repair.
- Due to different HDMI specifications, some HDMI cables and devices may not be compatible with the product. Using uncertified HDMI cables may cause display or connection failures. Please use HDMI cables with good radiation shielding.
- As with any bright source, do not stare into the direct beam, RG2 IEC 62471-5:2015
![]()

Documents / ResourcesDownload manual
Here you can download full pdf version of manual, it may contain additional safety instructions, warranty information, FCC rules, etc.
Advertisement


Need help?
Do you have a question about the MoGo 3 Pro and is the answer not in the manual?
Questions and answers