Table of Contents
Advertisement
Quick Links
Advertisement
Table of Contents

Subscribe to Our Youtube Channel
Related Manuals for Turbo Energy SunBox 5.0 Series


Summary of Contents for Turbo Energy SunBox 5.0 Series
-
Page 1: Instruction Manual
Instruction manual SunBox Series 5.0... - Page 2 ENERGY S.L. This applies to both copies, translations, microfilms, and storage on computer systems. Editor: Turbo Energy S.L. Important note: The satisfaction of the end user will depend heavily on having made an adequate estimate of the demand, power, and energy, present and future, to which the equipment will be subjected.
-
Page 3: Table Of Contents
Content Instruction manual .......................... 1 1. Scope ............................4 2. Safety instructions ........................4 3. Description and operation ......................5 4. Specifications ..........................8 5. Installation and assembly ......................9 Recommendations for setting up strings ......................9 5.1 Installation options ........................... 11 5.2 Gen-Port .............................. -
Page 4: Scope
Instruction Manual and Datasheet for Batteries (Lithium Series 48V 5.1kWh) For any other questions about the inverter or the battery, consult the corresponding manuals that can be found on the Turbo Energy website. 2. Safety instructions To ensure correct installation it is recommended: Use safe mounting tools and install safety devices. -
Page 5: Description And Operation
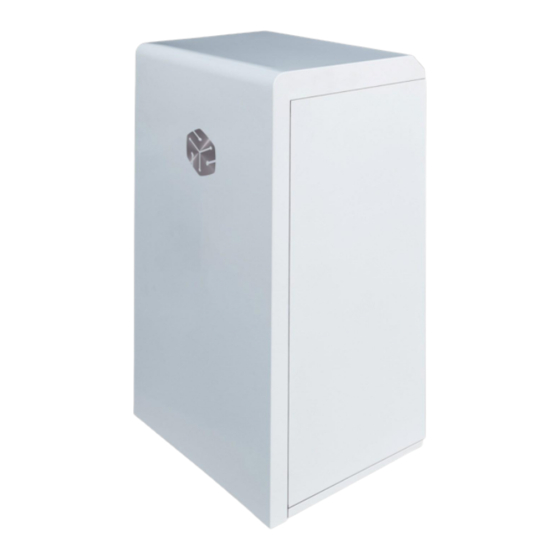
Description: The SunBox consists of a mounted and wired cabinet prepared to include up to 2 Turbo Energy Lithium Batteries (Lithium Series 48V 5.1kWh) and a Turbo Energy Single Phase Hybrid Series 48V 5.0. The system includes several protections for both DC and AC:... - Page 6 2. Self-consumption mode For the general mode of operation and depending on the energy coming from the photovoltaic panels, there are two different situations: When the demand for electricity consumption is lower than the energy produced by photovoltaic panels, the Inverter transforms the DC into AC to meet the demand for electricity, while charging the batteries with excess power.
- Page 7 When the batteries do not have enough charge level to ensure proper operation, the inverter takes the missing power to meet the demand from the grid. In this way the system works in parallel with the grid and with photovoltaic panels. Furthermore, in this mode, in the event of a network failure, the switch automatically switches to off-grid mode to continue its correct operation and comply with anti-island regulations.
-
Page 8: Specifications
4. Specifications Batteries • Manufacturer: Turbo Energy SL • Model: Lithium Series 48V 5.1kWh • Attached data sheet and instruction manual. Inverter/Charger • Manufacturer: Turbo Energy SL • Model: Single Phase Hybrid Series 48V 5.0 (HIS5000/48) • Attached data sheet and instruction manual. -
Page 9: Installation And Assembly
5. Installation and assembly Recommendations for setting up strings Preliminary recommendations for installation The installation of the SunBox should be carried out in a place protected from inclement weather, and it is especially relevant that its location is kept dry and avoid potentially flooded areas. - Page 10 In case batteries need to be installed, the SunBox Series 5.0 comes ready • to store up to 2 Turbo Energy Lithium Series 48V 5.1kWh batteries. Its installation is explained below. *The Grid and Load outputs in normal grid operation will be the same as they are...
-
Page 11: Installation Options
5.1 Installation options Option 1 For load powers lower than 11 kW (5kW if in off-grid mode), the general connection of the SunBox will be as shown in the following diagram: Smart Meter It is the simplest configuration and avoids manipulation of the load connections. As all the power from the network passes through the equipment (Load output) and it distributes the energy, it implies that the maximum power of the loads is 11kW in self-consumption mode and 5kW in off-grid mode. - Page 12 Smart Meter In this way, we have a series of critical loads connected to the Load output (up to a maximum of 5 kW) that will allow the panels and / or batteries to supply them with energy despite a grid failure. The rest of the loads above 11kW must be connected on the grid side.
-
Page 13: Gen-Port
5.2 Gen-Port The SunBox has an intelligent input / output that can provide the equipment with different functionalities. Generator input The output of a generator can be connected to this input, so that the off-grid installation can rely on this source for power supply. The maximum power value is 5000 W. -
Page 14: Dc Wiring
5.3 DC wiring The series of photovoltaic panels shall be carried out as indicated in section 4.1. The cabinet already has the right protections installed for continuous sockets. To access the connections, open the back door of the SunBox cabinet. It is very important to note that each positive must be connected to its negative in the cabinet, for this it is recommended to mark the cables or make connections one at a time until the installation is complete. -
Page 15: Configuration Of Lithium Series Slim 48V 5.1 Kwh
5.5 Configuration of Lithium Series Slim 48V 5.1 kWh Each module has 4 DIP (Dual Inline Package) switches that will be configured differently depending on the number of batteries to be connected 1=ON 1 2 3 4 0=OFF Address Dial switch position Explain Pack1/Master Pack2... -
Page 16: Wheels Mounting
5.7 Wheels mounting The SunBox has 4 wheels that must be mounted using the included screws and washers. The order of placement of the elements is Grower washer, DIN 125 washer and screw. 5.8 Start-up Once you are finished with all connections, the machine is ready to start working. It will proceed as follows: 1. -
Page 17: Inverter/Charger Configuration
6. Inverter/Charger Configuration The LCD is touchscreen, and the main screen shows the overall information of the inverter. 1. The icon in the center of the home screen indicates that the system is operating normally. If it turns into “comm./F01~F64”, it means the inverter has communication error or other errors. - Page 18 • PV power and Load power always keep positive. • Grid power negative means sell to grid, positive means get from grid. • Battery power negative means charge, positive means discharge. 6.1.1. LCD operation flow chart...
- Page 19 5.2. Information from Main Menu...
- Page 20 5.3. Curve page - Solar, Load and Grid Solar power curve for daily, monthly, yearly and total can be roughly checked on the LCD. For more accuracy in power generation, please check on the monitoring system. Click the up and down arrow to check power curve of different period.
-
Page 21: System Setup Menu
5.4. System Setup Menu 5.5. Basic Setup Menu This is the basic system setup Beep: activate/desactivate alarm noise 5.6. Battery Setup Menu Lithium: Use of the battery with communication Use Batt V: Use of the battery without commmunication (charge information on volts) Use Batt %: Use of the battery without commmunication (charge information on percentage %) -
Page 22: System Work Mode Setup Menu
Menu 1: Generator Menu 2: Grid Start Indicates the charge level of the Indicates the amperage de the charge from the battery (recomended 40A) Gen Max Run Time: Configurate on 24.0 hous Gen Down Time: Configurate on 0.0 hours battery to start charging Lithium Mode: Select according to the BMS protocol of the battery Shutdown: The inverter will shut down if the SOC... -
Page 23: System Work Mode Menu 2
Enable: Enables the system to work for time periods GPS: Grid Peak Shaving. Sets the power limit to be taken from the grid per period. SOC2: Configurate slightly below SOC1. SOC1: Minimum battery reserve. Do not set below 10% Start/End: Start and End hour of each period. -
Page 24: Grid Setup Menu
The system will not use system work mode 1 and 2 at the same time, depending on our installation In the last page of the system work mode, you can set the days of the week that the configuration of the system work operates 5.9. - Page 25 Smart Load OFF Batt: SOC of the battery when load will turn off Smart Load ON Batt: SOC of the battery when load will turn on. The condition of solar production being above the value of ‘’Power’’ must happen simultaneously. On Grid always on: The load connected to Gen Port will always be fed if there is Grid Micro Inv Input: Use of the as micro-inverter entry or on-grid inverter.
-
Page 26: Threephase Installation With Three Monophase Inverters
5.13. Threephase installation with three monophase inverters 1. Select all three inverters as master 2. Do not select ‘’Parallel’’ 3. Choose a Modbus number for each one (they must be different) 4. Choose a diferent phase for each inverter In case of including Meters, select the option Ex_Meter For CT. -
Page 27: Wi-Fi Connection Setup
7. Wi-Fi connection setup In order to upload the SunBox to the cloud and be able to see the monitoring of the system, it is essential to connect the equipment to the internet. To do this, the following steps must be followed: Step 0: Locate the serial number of the logger At the bottom of the inverter there is a plate with a QR code, the serial number of your logger and the logger's wifi access password. - Page 28 Step 2: Connect to the web portal Once connected to the Wi-Fi network with your PC, Tablet or smartphone, you must access the logger’s web portal. To do this, open a web browser on the PC, tablet or smartphone that has been connected to the logger’s Wi-Fi.
- Page 29 Click on the "Wizard" link under the "Status" link to connect the logger to the Wi- Fi (the Wi-Fi of your house or your plant). Step 3: Setup logger access to the Wi-Fi Step 3.1: select the Wi-Fi When we run the connection wizard, the list of Wi-Fi networks to which the logger has access appears.
- Page 30 Step 3.3: In this step it is NOT necessary to select any option and then press the “Next” button. It is used to configure the security of the connection to the Wi-Fi. By selecting Hide AP, the Wi-Fi network will appear as a hidden network. Step 3.4 If the adjustment has been made correctly, press the “OK”...
- Page 31 If the restart is successful, a message will appear indicating that it was successful, if it does not appear then refresh the browser page: Step 4: Verify the logger connection to the Wi-Fi After restarting the web page, log back in to the “Status” page and check the status of the recorder's network connection: Once we have verified that the logger is connected to the Wi-Fi, it is possible to add the plant to the cloud platform.
-
Page 32: Maintenance Recommendations
We recommend not to change the password of the access portal or the password of the inverter's Wi-Fi through the portal 10.10.100.254. If you forget the password, you will not be able to access the portal again to configure the WiFi. We recommend to use a 2.4 Gh wifi network to assure a sucessful connection. - Page 33 3. The problem description (including the fault code and indicator status displayed on the LCD) is as detailed as possible. Error Description Solutions code Check battery fuse. DC/DC_Softsart_Fault Reset inverter. When inverter is in Split phase(120/240Vac) or three- phasesystem (120/208Vac) system, the backup load GFDI _Relay_Failure port N line needs to connect ground.
-
Page 34: Battery Errors
1.When in parallel mode, check the parallel communication cableconnection and hybrid inverter communication address setting. 1.During the parallel system startup period, inverters will Parallel CAN Bus fault report F29. when all inverters are in ON status, it will disappear automatically. Check the PV panels charge to see if there are too many panels connected to one string.
Need help?
Do you have a question about the SunBox 5.0 Series and is the answer not in the manual?
Questions and answers