Table of Contents
Advertisement
Quick Links
Advertisement
Table of Contents

Related Manuals for Turbo Energy Hybrid Series


Summary of Contents for Turbo Energy Hybrid Series
- Page 1 Instruction manual Three phase Hybrid Series 48V 10.0 https://www.turbo-e.com/...
-
Page 2: Table Of Contents
Read this manual before installing the inverter and follow the instructions carefully during the installation process. Content SAFETY INSTRUCTIONS ......................4 PRODUCT INSTRUCTIONS ...................... 4 2.1. Product overview ....................... 5 2.2. Dimensions ......................... 6 2.3. Inverter features ........................ 6 INSTALLATION ........................7 3.1. - Page 3 5.5. Basic Setup Menu ......................25 5.6. Battery Setup Menu ......................26 5.7. System Work Mode Setup Menu ..................27 5.8. Grid Setup Menu ......................28 5.9. GEN PORT USE Setup Menu ..................... 29 5.10. Advanced Function Setup Menu ..................29 5.11.
-
Page 4: Safety Instructions
1. SAFETY INSTRUCTIONS • This chapter contains important safety and operating instructions. Read and keep this manual for future reference. • Before using the inverter, please read the instructions and warning signs of the battery and corresponding sections in the instruction manual. •... -
Page 5: Product Overview
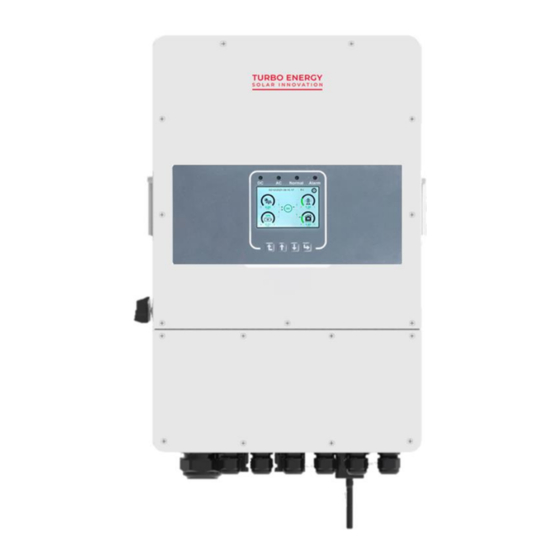
2.1. Product overview 1. Inverter LED indicators 9. Function port 2. LCD display 10. ModeBUS port 3. Function buttons 11. BMS port 4. Power ON/OFF button 12. PV input (2 MPPTs) 5. DC switch 13. Grid 6. Parallel port 14. Load 7. -
Page 6: Dimensions
2.2. Dimensions 2.3. Inverter features • 230V/400V three-phase pure sinusoidal wave inverter. • Self-consumption and feed-in to grid. • Auto restart while AC is recovering. • Programmable supply priority for battery or grid. • Programmable multiple operation modes: on grid, off grid and UPS. •... -
Page 7: Installation
• Time of use function. • Smart load function. 3. INSTALLATION 3.1. Component list... -
Page 8: Assembly Instructions
3.2. Assembly instructions Installation precaution This Hybrid inverter is designed for outdoor use (IP65). Please make sure the installation site meets below conditions: • Not in direct sunlight. • Not in areas where highly flammable materials are stored. • Not in potential explosive areas. •... - Page 9 Consider the following considerations before selecting the installation location: - Please select a vertical wall with load-bearing capacity for installation, suitable for installation on concrete or other non- flammable surfaces. Installation is shown below. - Install this inverter at eye level in order to allow the LCD display to be read at all times.
-
Page 10: Battery Connection
Inverter should be vertically installed. Choose the recommended drill head (as shown in below pic) to drill 4 holes on the wall, 52-60mm deep, and follow the procedure bellow: 1. Use a proper hammer to fit the expansion bolt into the holes. 2. -
Page 11: Temperature Sensor Connection For Lead-Acid Battery
3. Make sure polarity at both the battery and inverter is correctly connected. 3.4. Temperature sensor connection for lead-acid battery... -
Page 12: Function Port Definition
3.5. Function port definition... -
Page 13: Grid Connection And Backup Load Connection
3.6. Grid connection and backup load connection - Before connecting to grid, please install a separate AC breaker between inverter and AC input power source. This will ensure the inverter can be securely disconnected during maintenance and fully protected from over current. The recommended AC breaker is 25A. -
Page 14: Pv Connection
3. Then, insert AC output wires according to polarities indicated on the terminal block and tighten terminal. Be sure to connect corresponding N wires and PE wires to related terminals as well. 4. Make sure the wires are securely connected. 5. -
Page 15: Pv Module Wire Connection
3.7.2. PV Module wire connection 1. Switch the grid supply main switch (AC) OFF. 2. Switch the DC isolator OFF. 3. Assemble PV input connector to the inverter. Cross section (mm Cable type Range Recommended value Industry generic PV cable 4.0-6.0 4.0 (12AWG) (model: PV1-F) - Page 16 c) Insert the contact pin to the top part of the connector and screw up the cap nut to the top part of the connector. d) Finally insert the DC connector into the positive and negative input of the inverter.
-
Page 17: Ct Connection
3.8. CT connection... -
Page 18: Ground Connection
3.9. Ground connection Ground cable shall be connected to ground plate on grid side. This prevents electric shock if the original protective conductor fails. 3.10. Wi-Fi connection For the configuration of Wi-Fi Plug, please refer to illustrations of the Wi-Fi Plug. -
Page 19: Connection Diagram
3.12. Connection diagram... -
Page 20: Parallel Connection Diagram
3.13. Parallel connection diagram 4. OPERATION 4.1. POWER ON/OFF Once the unit has been properly installed and the batteries are well connected, press On/Off button (located on the lower left side of the case) to turn on the unit. When the system is not battery-connected but connected to either PV or grid and ON/OFF button is switched off, LCD will still light up (Display will show OFF). -
Page 21: Lcd Display
5. LCD DISPLAY 5.1. Main screen The LCD is touchscreen, and the main screen shows the overall information of the inverter. 1. The icon in the center of the home screen indicates that the system is operating normally. If it turns into “comm./F01~F64”, it means the inverter has communication error or other errors. -
Page 22: Lcd Operation Flow Chart
5.1.1. LCD operation flow chart... -
Page 23: Information From Main Menu
5.2. Information from Main Menu... -
Page 24: Curve Page - Solar, Load And Grid
5.3. Curve page - Solar, Load and Grid Solar power curve for daily, monthly, yearly and total can be roughly checked on the LCD, for more accuracy power generation, pls check on the monitoring system. Click the up and down arrow to check power curve of different period. -
Page 25: System Setup Menu
5.4. System Setup Menu 5.5. Basic Setup Menu... -
Page 26: Battery Setup Menu
5.6. Battery Setup Menu... -
Page 27: System Work Mode Setup Menu
5.7. System Work Mode Setup Menu Enable: Habilita el sistema de trabajo por periodos horarios. Enable: enables the system to work for time periods GPS: Grid Peak Shaving. Establece el límite de potencia a tomar de GPS: Grid Peak Shaving. Sets the power limit to be taken Por periodo horario from the grid per period. -
Page 28: Grid Setup Menu
5.8. Grid Setup Menu... -
Page 29: Gen Port Use Setup Menu
5.9. GEN PORT USE Setup Menu 5.10. Advanced Function Setup Menu... -
Page 30: Device Info Setup Menu
5.11. Device Info Setup Menu 6. MODES Mode I: Basic... - Page 31 Mode II: With wind turbine Mode III: With generator Mode IV: With smart load...
-
Page 32: Limitation Of Liability
The manufacturer is not responsible for the possible loss of profit or economic losses incurred by product failures covered by the scope of the product warranty. 8. DATASHEET Model THREE PHASE HYBRID SERIES 48V 10.0 Battery Input Data Battery Type Lead-acid or Li-Ion Battery Voltage Range (V) - Page 33 Self-adaption to BMS Charging Strategy for Li-Ion Battery DC Input Data (PV strings) 13000W PV Input Range 550V (160V - 800V) MPPT Range 200 - 650V Start-up Voltage (V) 160V PV Input Current 26A + 13A No. of MPPT Trackers No.
- Page 34 Communication with BMS RS485; CAN Weight (kg) 36.8 kg Size (Height x Width x Depth) (mm) 658 x 422 x 281 mm Protection Degree IP65 Installation Style Wall-mounted Warranty 5 years...
-
Page 35: Appendix
9. APPENDIX CT dimensions (mm) Secondary output cable length is 4m.
Need help?
Do you have a question about the Hybrid Series and is the answer not in the manual?
Questions and answers