Allen-Bradley DeviceNet 1756-DNB Installation Instructions Manual
Hide thumbs
Also See for DeviceNet 1756-DNB:
- Configuration manual (68 pages) ,
- Installation instructions manual (29 pages) ,
- Installation instructions manual (48 pages)

Related Manuals for Allen-Bradley DeviceNet 1756-DNB


Summary of Contents for Allen-Bradley DeviceNet 1756-DNB
- Page 1 Installation Instructions DeviceNet Modules Catalog Numbers 1756-DNB, 1769-ADN, 1769-SDN...
- Page 2 Identifies information that is critical for successful application and understanding of the product. IMPORTANT Allen-Bradley, Compact I/O, CompactLogix, ControlLogix, FlexLogix, Logix5000, MicroLogix, Rockwell Automation, Rockwell Software, RSLinx, RSLinx Classic, RSLogix 5000, RSNetWorx for DeviceNet, and TechConnect are trademarks of Rockwell Automation, Inc.
-
Page 3: Topic Page
Summary of Changes This manual contains new and updated information. Changes throughout this revision are marked by change bars, as shown to the right of this paragraph. New and Updated This table contains the changes made to this revision. Information Topic Page Added new warnings for USB cable usage... - Page 4 Summary of Changes Notes: Rockwell Automation Publication DNET-IN001B-EN-P - January 2012...
-
Page 5: Table Of Contents
Table of Contents Preface Additional Resources ..........7 Chapter 1 Install a 1756 DeviceNet Installation Summary. - Page 6 Table of Contents Chapter 3 Configure a Workstation to Connect a Computer to the DeviceNet Network....40 Configure a Driver for a Network........41 Operate on a DeviceNet Verify that the Driver Works .
-
Page 7: Additional Resources
Preface This manual describes how to install and start DeviceNet module systems with Logix5000™ controllers. Use this manual if you program applications that use an EtherNet/IP network with one of these Logix5000 controllers: • CompactLogix™ controller ® • ControlLogix controller You should also understand the following: •... - Page 8 Preface Notes: Rockwell Automation Publication DNET-IN001B-EN-P - January 2012...
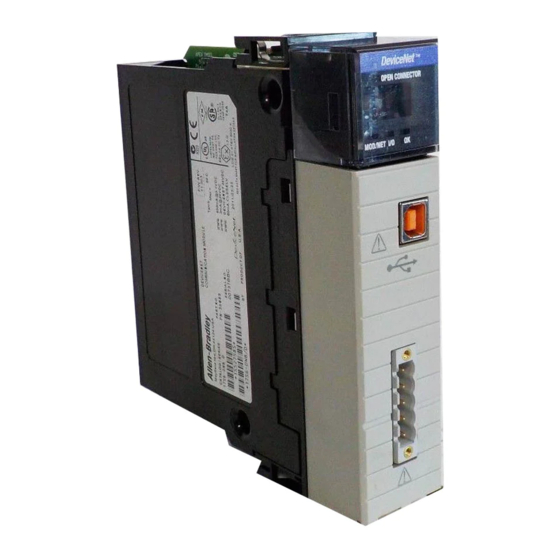
- Page 9 Chapter Install a 1756 DeviceNet Communication Module Topic Page Installation Summary Determine Module Slot Location Set the Communication Rate Set the Node Address Restore the Factory Default Settings Install the Module Connect the Module to a DeviceNet Network Download the Add-on Profile Connect to the Module via the USB Port Apply Chassis Power and Check Status Indicators Install or Remove the Module Under Power...
- Page 10 Chapter 1 Install a 1756 DeviceNet Communication Module North American Hazardous Location Approval The following information applies when operating this equipment Informations sur l’utilisation de cet équipement en environnements in hazardous locations. dangereux. Products marked "CL I, DIV 2, GP A, B, C, D" are suitable for use in Class I Les produits marqués "CL I, DIV 2, GP A, B, C, D"...
-
Page 11: Installation Summary
Install a 1756 DeviceNet Communication Module Chapter 1 ATTENTION: This equipment is not resistant to sunlight or other sources of UV radiation. ATTENTION: Prevent Electrostatic Discharge This equipment is sensitive to electrostatic discharge, which can cause internal damage and affect normal operation. Follow these guidelines when you handle this equipment: •... -
Page 12: Determine Module Slot Location
Chapter 1 Install a 1756 DeviceNet Communication Module Determine Module Slot Install the communication module in any slot in the ControlLogix chassis. You can install multiple communication modules in the same chassis. This example Location shows chassis slot numbering in a 4-slot chassis. Slot 0 is the first slot and is always the leftmost slot in the rack. -
Page 13: Set The Rotary Switch
Install a 1756 DeviceNet Communication Module Chapter 1 Figure 1 - Communication Rate Rotary Switch Top of Module Front of Module Communication (data) Rate Rotary Switch Table 1 - Switch Settings and Communication Rate Switch Setting Communication Rate 125 Kbps 250 Kbps 500 Kbps When all three switches are set to 8, this resets the 1756-DNB... -
Page 14: Set The Node Address
Chapter 1 Install a 1756 DeviceNet Communication Module 5. From the Data Rate pull-down menu, choose the communication (data) rate. 6. Click Apply. 7. Cycle power to the 1756-DNB scanner module. Set the Node Address The 1756-DNB scanner module supports DeviceNet node addresses 00…63. The factory default setting is node address 63. -
Page 15: Use Rsnetworx For Devicenet Software
Install a 1756 DeviceNet Communication Module Chapter 1 Use RSNetWorx for DeviceNet Software Follow this procedure to use RSNetWorx for DeviceNet software to set the node address. 1. In RSNetWorx for DeviceNet software, select the 1756-DNB scanner module. 2. From the Tools menu, choose Node Commissioning. 3. -
Page 16: Install The Module
Chapter 1 Install a 1756 DeviceNet Communication Module Install the Module To install the module, follow this procedure. WARNING: When you insert or remove the module while backplane power is on, an electrical arc can occur. This could cause an explosion in hazardous location installations. -
Page 17: Connect The Module To A Devicenet Network
Install a 1756 DeviceNet Communication Module Chapter 1 Connect the Module to a Use an open-style 5- or 10-position linear plug to connect to the DeviceNet network. An open-style 10-position linear plug is provided with your module. DeviceNet Network For detailed DeviceNet connection information, see the DeviceNet Media IMPORTANT Design and Installation Guide, publication DNET-UM072. -
Page 18: Download The Add-On Profile
Chapter 1 Install a 1756 DeviceNet Communication Module Download the Add-on If you are using a later firmware revision for the communication module than recognized in the most current version of RSLogix 5000 software, you may need Profile to download the Add-on Profile (AOP) for the communication module so it can be recognized in the Controller Organizer. -
Page 19: Set Up The Hardware
Install a 1756 DeviceNet Communication Module Chapter 1 Set Up the Hardware In this example, the controller in the local chassis produces a tag that the Logix5000 controller in the remote chassis consumes. The local controller can also send a MSG instruction to the remote controller. Figure 3 - Sharing Data and Transferring Messages USB Connection DeviceNet... - Page 20 Chapter 1 Install a 1756 DeviceNet Communication Module To configure RSLinx Classic software to use a USB port, you need to first set up a USB driver. To set up a USB driver, perform this procedure. 1. Connect your EtherNet/IP module to your computer by installing a USB cable in your module’s USB port.
- Page 21 Install a 1756 DeviceNet Communication Module Chapter 1 These RSLinx dialog boxes appear consecutively. 4. Click Finish to set up your USB driver. 5. In RSLinx software, from the Communications pull-down menu, choose RSWho. Rockwell Automation Publication DNET-IN001B-EN-P - January 2012...
-
Page 22: Load Firmware Through A Usb Port
Chapter 1 Install a 1756 DeviceNet Communication Module The RSLinx Workstation organizer appears. Virtual Chassis Driver USB Port Driver Your 1756-EN2T module appears under two different drivers, a virtual chassis and the USB port. Load Firmware through a USB Port Do not simultaneously load firmware for more than one module at a IMPORTANT time through a USB port. -
Page 23: Apply Chassis Power And Check Status Indicators
Install a 1756 DeviceNet Communication Module Chapter 1 Apply Chassis Power and Before you apply power, you must install and connect a ControlLogix chassis and power supply. Check Status Indicators To apply power, follow these steps. 1. Apply chassis power as shown. 2. -
Page 24: Install Or Remove The Module Under Power
Chapter 1 Install a 1756 DeviceNet Communication Module Install or Remove the You can install or remove this module while chassis power is applied. Module Under Power WARNING: When you insert or remove the module while backplane power is on, an electrical arc can occur. This could cause an explosion in hazardous location installations. - Page 25 Chapter Install a 1769 DeviceNet Communication Module Topic Page Installation Summary System Assembly Panel Mounting DIN Rail Mounting Connect the Module to a DeviceNet Network Set the Node Address Download the Add-on Profile Apply Chassis Power and Check Status Indicators Replace a Module within a System ATTENTION: Environment and Enclosure This equipment is intended for use in a Pollution Degree 2 industrial environment, in overvoltage Category II applications...
- Page 26 Chapter 2 Install a 1769 DeviceNet Communication Module North American Hazardous Location Approval The following information applies when operating this equipment Informations sur l’utilisation de cet équipement en environnements in hazardous locations. dangereux. Products marked "CL I, DIV 2, GP A, B, C, D" are suitable for use in Class I Les produits marqués "CL I, DIV 2, GP A, B, C, D"...
-
Page 27: Installation Summary
Install a 1769 DeviceNet Communication Module Chapter 2 Installation Summary To install a communication module in a 1769 ControlLogix chassis, complete these steps. System Assembly. Panel Mounting. DIN Rail Mounting. Connect the Module to a DeviceNet Network. Set the Node Address. -
Page 28: System Assembly
Chapter 2 Install a 1769 DeviceNet Communication Module System Assembly The module can be attached to an adjacent controller, power supply, or I/O module. Follow these steps to assemble the Compact I/O system. 1. Disconnect power. 2. Check that the bus lever of the module (A) is in the unlocked (fully right) position. -
Page 29: Panel Mounting
Install a 1769 DeviceNet Communication Module Chapter 2 Panel Mounting ATTENTION: During panel or DIN rail mounting of all devices, be sure that all debris, such as metal chips and wire strands, is kept from falling into the module. Debris that falls into the module could cause damage on powerup. -
Page 30: Panel Mounting Procedure Using Modules As A Template
Chapter 2 Install a 1769 DeviceNet Communication Module Panel Mounting Procedure Using Modules as a Template This procedure lets you use the assembled modules as a template for drilling holes in the panel. Due to module mounting hole tolerance, it is important to follow these procedures. -
Page 31: Connect The Module To A Devicenet Network
If the 1769-SDN module is the first or last device connected to the IMPORTANT DeviceNet network trunkline, be sure to add a termination resistor (120 Ω 1% ≥ ¼W resistor, Allen-Bradley catalog number 1485A-C2) across the blue (CAN Low) and white (CAN High) wires. -
Page 32: Set The Node Address Of A 1769-Adn Module
Chapter 2 Install a 1769 DeviceNet Communication Module Set the Node Address of a 1769-ADN Module The module supports DeviceNet node addresses 00...63. The factory default setting is node address 63. Set the node address by using the two rotary switches. Use a small, slotted screwdriver to set the switches. -
Page 33: Set The Node Address Of A 1769-Sdn Module
Install a 1769 DeviceNet Communication Module Chapter 2 Set the Node Address of a 1769-SDN Module You can use the following options to set the node address of DeviceNet devices: • Set the Node Address via Software on page 33 •... - Page 34 Chapter 2 Install a 1769 DeviceNet Communication Module Set the Node Address via the DeviceNet Node Commissioning Tool You can use the DeviceNet node commissioning tool available in RSNetWorx for DeviceNet software to set the node addresses of devices on the DeviceNet network.
- Page 35 Install a 1769 DeviceNet Communication Module Chapter 2 5. On the Device Selection dialog box, check the ‘I want to input the address for the device on the selected network’ box. 6. Browse to the DeviceNet network. 7. Type the current address for the device. Out of the box, devices use address 63.
-
Page 36: Download The Add-On Profile
Chapter 2 Install a 1769 DeviceNet Communication Module Download the Add-on If you are using a later firmware revision for the communication module than recognized in the most current version of RSLogix 5000 software, you may need Profile to download the Add-on Profile (AOP) for the communication module so it can be recognized in the Controller Organizer. - Page 37 Install a 1769 DeviceNet Communication Module Chapter 2 4. On the module to be replaced and the right-side adjacent module (or end cap if the module is the last module in the bank), move the bus levers to the right (unlock) to disconnect the module from the adjacent modules. 5.
- Page 38 Chapter 2 Install a 1769 DeviceNet Communication Module Notes: Rockwell Automation Publication DNET-IN001B-EN-P - January 2012...
- Page 39 Chapter Configure a Workstation to Operate on a DeviceNet Network Topic Page Connect a Computer to the DeviceNet Network Configure a Driver for a Network You can connect a computer to the network before or after connecting devices to the network. You can also connect a computer to the network before or after configuring the network offline.
-
Page 40: Connect A Computer To The Devicenet Network
Chapter 3 Configure a Workstation to Operate on a DeviceNet Network Connect a Computer to the To access the DeviceNet network, use one of these methods: • Connect directly to the network via a DeviceNet interface device. If you DeviceNet Network connect directly to a DeviceNet network, you can access only the devices on that network. -
Page 41: Configure A Driver For A Network
Configure a Workstation to Operate on a DeviceNet Network Chapter 3 Depending on how you decide to connect your computer to the DeviceNet network, do the following. 1. If you are connecting directly to the network, install the1784-PCD card, 1784-PCIDS card, or 1784-U2DN cable. –... - Page 42 Chapter 3 Configure a Workstation to Operate on a DeviceNet Network 2. From the Available Driver Types pull-down menu, choose DeviceNet Drivers. 3. Click Add New and name the new driver. 4. Click OK. 5. Configure the driver. The configuration screens may differ for each driver. Driver Configuration If unused, use the default Node Address of 62 and set...
-
Page 43: Verify That The Driver Works
Configure a Workstation to Operate on a DeviceNet Network Chapter 3 Verify that the Driver Works Complete these steps to verify that the driver works. 1. Open the Configure Drivers dialog box and verify that the driver is running. 2. Close the Configure Drivers dialog box. 3. - Page 44 Chapter 3 Configure a Workstation to Operate on a DeviceNet Network Notes: Rockwell Automation Publication DNET-IN001B-EN-P - January 2012...
-
Page 45: 1756-Dnb Devicenet Scanner Status Indicators
Appendix 1756 DeviceNet Status Indicators and Data Structures Topic Page 1756-DNB DeviceNet Scanner Status Indicators 1756-DNB DeviceNet Scanner Alphanumeric Display 1756-DNB DeviceNet Scanner Data Structures 1756-DNB DeviceNet The 1756-DNB scanner has three status indicators that provide information about your network and its connections. Scanner Status Indicators DeviceNet Module/Network... - Page 46 Appendix A 1756 DeviceNet Status Indicators and Data Structures Table 3 - Module/Network Status (MOD/NET) Indicator Status Description One of the following conditions exists: • The device has not completed the Dup_MAC_ID test. • The device may not have power. Either wait for the Dup_MAC_ID test to complete or make sure the device has power.
-
Page 47: 1756-Dnb Devicenet Scanner Alphanumeric Display
1756 DeviceNet Status Indicators and Data Structures Appendix A Table 5 - OK Status Indicator Status Description The device is not powered. Apply chassis power, and verify the module is completely inserted into the chassis. Solid green The device is operating normally and has at least one connection to it from a controller. -
Page 48: Status Messages
Appendix A 1756 DeviceNet Status Indicators and Data Structures Status Messages This table summarizes the DeviceNet status messages that appear on the alphanumeric display. Table 6 - Status Messages Display Description The scanner is in Run mode. IDLE The scanner is in Idle mode. AUTO The AutoScan option is on, and the scanner is in Idle mode. -
Page 49: Status Codes
1756 DeviceNet Status Indicators and Data Structures Appendix A Status Codes This table summarizes the DeviceNet status codes that appear on the alphanumeric display. Table 7 - Status Codes Status Code Description Recommended Action 0…63 Indicates the scanner’s DeviceNet node address. None. - Page 50 Appendix A 1756 DeviceNet Status Indicators and Data Structures Table 7 - Status Codes Status Code Description Recommended Action The controller has set the scanner to the Faulted mode. The The Bit O.CommandRegister.Fault for the scanner is on. Command bit also indicates a DeviceNet network fault state. Correct the condition that caused the controller to set this bit and then turn this bit off.
-
Page 51: 1756-Dnb Devicenet Scanner Data Structures
1756 DeviceNet Status Indicators and Data Structures Appendix A Table 7 - Status Codes Status Code Description Recommended Action The DeviceNet cable is not supplying power to the device’s • Verify that the network’s 24V DC power supply is operating communication port. -
Page 52: Input Structure
Appendix A 1756 DeviceNet Status Indicators and Data Structures Input Structure The controller receives input I/O by reading input data from an input structure in the 1756-DNB scanner module. The scanner module receives input data from DeviceNet modules and delivers a copy of these values to the controller. The input structure consists of one 32-bit status register and a variable size 32-bit array of up to 124 words for input data. -
Page 53: Module Status Register Bit Definitions
1756 DeviceNet Status Indicators and Data Structures Appendix A If the module is halted because the HaltScanner bit is set, power must be IMPORTANT physically cycled to restart the module. Module Status Register Bit Definitions The Module Status Register bits are defined as follows. Name Description 1 = in Run mode... -
Page 54: Status Structure
Appendix A 1756 DeviceNet Status Indicators and Data Structures Status Structure The controller receives status information concerning the 1756-DNB scanner module’s ability to exchange DeviceNet messages with other nodes by reading from the status structure in the 1756-DNB scanner module. The scanner module periodically updates the contents of the status structure and copies its contents to the controller. -
Page 55: 1769-Adn Adapter Status Indicators
Appendix 1769 DeviceNet Modules Status Indicators and Data Structures Topic Page 1769-ADN Adapter Status Indicators 1769-ADN Adapter Data Structures 1769-SDN Scanner Status Indicators 1769-SDN Scanner Status Codes 1769-SDN Scanner Data Structures 1769-ADN Adapter Status The 1769-ADN adapter has four status indicators that provide information about your network and its connections. - Page 56 Appendix B 1769 DeviceNet Modules Status Indicators and Data Structures Table 8 - Module Status Indicator Status Description The adapter is not powered. Verify that the adapter is installed correctly. Flashing green The adapter is online, but the configuration is missing. Configure the adapter.
- Page 57 1769 DeviceNet Modules Status Indicators and Data Structures Appendix B Table 10 - Network Status (NS) Indicator Status Description The network or the adapter is not powered. Check power connections to the network and then verify that the adapter is installed correctly. Flashing green The device is fully operational but is not communicating with the controller.
-
Page 58: 1769-Adn Adapter Data Structures
Appendix B 1769 DeviceNet Modules Status Indicators and Data Structures 1769-ADN Adapter Data The scanner uses the input and output data images to transfer data, status, and command information between the adapter and the scanner. Structures Input Data This is the I/O data the 1769-ADN adapter sends to the DeviceNet master. All inputs are in words. -
Page 59: 1769-Sdn Scanner Status Indicators
1769 DeviceNet Modules Status Indicators and Data Structures Appendix B 1769-SDN Scanner Status The 1769-SDN scanner has two status indicators that provide information about the scanner and its network connection. Indicators Module Status Indicator Network Status Indicator Status Indicator Description Module Status Indicator A bicolor (green/red) status indicator that provides device status. - Page 60 Appendix B 1769 DeviceNet Modules Status Indicators and Data Structures Table 13 - Network Status Indicator Indicator Condition Description One of these conditions exists: • The scanner is not powered. • The network is not powered. • Communication is not occurring between the scannner and the DeviceNet network.
-
Page 61: 1769-Sdn Scanner Status Codes
1769 DeviceNet Modules Status Indicators and Data Structures Appendix B 1769-SDN Scanner Status The 1769-SDN scanner has a 2-character numeric display that provides the DeviceNet node address and diagnostic information about the status of the Codes module. Numeric Display Numeric Display Description 0…63 Indicates the 1769-SDN module’s DeviceNet node address. - Page 62 Appendix B 1769 DeviceNet Modules Status Indicators and Data Structures Table 14 - Status Codes Status Code Description Recommended Action During initialization, the data size expected by the device does Use RSNetWorx for DeviceNet software to check the slave not match the scan list entry. device and the scan list for the correct input and output sizes for the slave device.
-
Page 63: 1769-Sdn Scanner Data Structures
1769 DeviceNet Modules Status Indicators and Data Structures Appendix B Table 14 - Status Codes Status Code Description Recommended Action The scanner failed to configure a device by using the • Make sure that you installed a compatible device. Automatic Device Recovery (ADR) parameters. •... -
Page 64: Output Data Image
Appendix B 1769 DeviceNet Modules Status Indicators and Data Structures Output Data Image The output data image is transferred from the controller to the scanner module. Word Description Data Type 0 and 1 Module Command Array 2-word array 2…181 Output Data Image 180-word array The following table shows the bit descriptions for the module’s command array. - Page 68 Rockwell Automation Support Rockwell Automation provides technical information on the Web to assist you in using its products. At http://www.rockwellautomation.com/support/, you can find technical manuals, a knowledge base of FAQs, technical and application notes, sample code and links to software service packs, and a MySupport feature that you can customize to make the best use of these tools.
Need help?
Do you have a question about the DeviceNet 1756-DNB and is the answer not in the manual?
Questions and answers