
Subscribe to Our Youtube Channel
Related Manuals for Nvidia ConnectX-6 Dx MCX623432AE-ADAB


Summary of Contents for Nvidia ConnectX-6 Dx MCX623432AE-ADAB
- Page 1 NVIDIA ConnectX-6 Dx Ethernet Adapter Cards for OCP Spec 3.0 User Manual Exported on Sep/19/2022 12:36 PM...
-
Page 2: Table Of Contents
Operating Systems/Distributions ..............14 Connectivity ..................14 Interfaces ..................15 ConnectX-6 Dx IC................... 16 Encryption ..................16 NVIDIA Multi-HostTM Support ..............16 Ethernet Networking Interfaces ..............18 PCI Express Interface................18 Networking Ports LEDs Interface ..............18 SMBus Interface ..................19 Voltage Regulators ................. - Page 3 UEFI Secure Boot................53 Performance Tuning ................55 VMware Driver Installation ............... 55 Hardware and Software Requirements ............. 55 Installing NVIDIA NATIVE ESXi Driver for VMware vSphere ....... 55 Removing Earlier NVIDIA Drivers ............. 56 Firmware Programming ............... 56 Updating Adapter Firmware ..............57 Troubleshooting ................58...
- Page 4 Linux Troubleshooting ................58 Windows Troubleshooting................. 59 Specifications..................60 MCX623432AE-ADAB / MCX623432AN-ADAB / MCX623432AC-ADAB / MCX623432AS-ADAB Specifications..................60 MCX623432AC-GDAB / MCX623432AN-GDAB / MCX623432AS-GDAI Specifications ..61 MCX623435MN-CDAB Specifications ............. 62 MCX623439MC-CDAB / MCX623439MN-CDAB Specifications ......... 63 MCX623436AC-CDAB / MCX623436AN-CDAB / MCX623436AS-CDAB / MCX623436MC- CDAB / MCX623436MN-CDAB / MCX623436MS-CDAB / MCX623436AS-CDAI Specifications..................
- Page 5 About This Manual This is the User Guide for Ethernet NVIDIA® ConnectX®-6 Dx adapter cards for Open Compute Project Spec 3.0. These adapters' connectivity provides the highest performing low latency and most flexible interconnect solution for servers supporting OCP spec 3.0 adapter cards used in Enterprise Data Centers and High-Performance Computing environments.
- Page 6 This manual is intended for the installer and user of these cards. The manual assumes basic familiarity with the Ethernet network and architecture specifications. Technical Support Customers who purchased NVIDIA products directly from NVIDIA are invited to contact us through the following methods: •...
- Page 7 Direct Attach Copper cables (DACs), copper splitter cables, Active Optical Cables (AOCs), and transceivers in a wide range of lengths from 0.5m to 10km. NVIDIA tests every product in an end-to-end environment ensuring a Bit Error Rate of less than 1E-15. Read more at...
- Page 8 When discussing memory sizes, MB and MBytes are used in this document to mean size in MegaBytes. The use of Mb or Mbits (small b) indicates the size in Megabits. In this document, PCIe is used to mean PCI Express.
-
Page 9: Introduction
PCI connector may exceed the maximum insertion force that is allowed by the connector’s spec. NVIDIA is updating the OCP 3.0 cards to ensure the proper insertion process. The following table provides the ordering part number, port speed, number of ports, and PCI Express speed. ... -
Page 10: Connectx-6 Dx 100Gbe Adapter Cards For Ocp 3.0
ConnectX-6 Dx 50GbE Adapter Cards for OCP 3.0 MCX623432AN-GDAB MCX623432AC-GDAB MCX623432AS-GDAI Network Connector Type Dual-port SFP56 Dual-port SFP56 Dual-port SFP56 Ethernet Data Rate 10/25/50 Gb/s PCI Express Connectors PCIe Gen 3.0 / 4.0 x16 SERDES @ 8.0GT/s / 16.0GT/s Dimensions Small Form Factor (SFF) OCP 3.0 4.52 in. -
Page 11: Connectx-6 Dx 200Gbe Adapter Cards For Ocp 3.0
6234 6234 6234 6234 6234 6234 6234 6234 6234 6234 6234 6234 36AN 36AC 36AS 39MC [/N]- CDAB CDAB CDAB CDAI CDAI CDAB Reten Thumb Thumb Thumb Thumb Thumb Intern Thumb Thumb Thumb Thumb Thumb tion screw ( screw ( screw ( screw screw Intern screw... -
Page 12: Features And Benefits
Uses PCIe Gen 3.0 (8GT/s) or Gen 4.0 (16GT/s) through x16 edge connector. Up to 200 Gigabit Ethernet NVIDIA adapters comply with the following IEEE 802.3 standards: • 200GbE / 100GbE / 50GbE / 40GbE / 25GbE / 10GbE / 1GbE • IEEE 802.3bj, 802.3bm 100 Gigabit Ethernet •... - Page 13 RBT, MCTP over SMBus, and MCTP over PCIe – Baseboard Management Controller (BMC) interface, supporting both NC-SI and PLDM management protocols using these interfaces. NVIDIA OCP 3.0 adapters support these protocols to offer numerous Host Management features such as PLDM for Firmware Update, network boot in UEFI driver, UEFI secure boot, and more.
-
Page 14: Operating Systems/Distributions
In STBY mode, only port0 is available. Reset-on-LAN (RoL) Supported ® ® NVIDIA Multi-Host NVIDIA Mellanox Multi-Host technology enables next-generation Cloud, Web 2.0 and high-performance data centers to design and build new scale-out heterogeneous compute and storage racks with direct connectivity between multiple hosts and the centralized network controller. -
Page 15: Interfaces
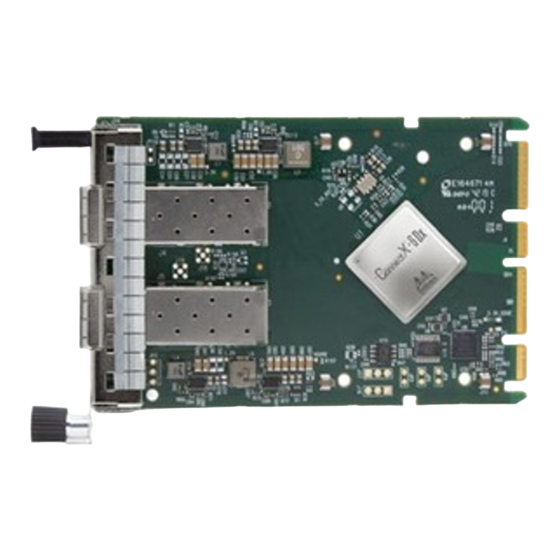
Interfaces The below figures show the component side of the NVIDIA ConnectX-6 Dx adapter card. Each numbered interface referenced in the figure is described in the following table with a link to detailed information. The ConnectX-6 Dx adapter card includes special circuits to protect from ESD shocks to the card/server when plugging copper cables. -
Page 16: Connectx-6 Dx Ic
The figure below shows a ConnectX-6 Dx device with NVIDIA Multi-Host connected to four separate hosts, each with a PCIe x4 interface, on one side to a switch on the other side. - Page 17 The server determines the configuration through the BIF[2:0]# pins, which it drives to the adapter card. The NVIDIA OCP3.0 card has an internal logic that uses the BIF[2:0]# data and determines the correct operating mode to boot at. The combination of the PRSNTB[3:0]# and BIF[2:0]# pins deterministically sets the PCIe lane width for a given combination of ...
-
Page 18: Ethernet Networking Interfaces
Ethernet Networking Interfaces The network ports of the ConnectX®-6 Dx adapter card are compliant with the IEEE 802.3 Ethernet standards listed in Features and Benefits. Ethernet traffic is transmitted through the networking connectors on the adapter card. The adapter card includes special circuits to protect from ESD shocks to the card/server when plugging copper cables. -
Page 19: Smbus Interface
OCP 3.0 adapter can be connected to a BMC using MCTP over SMBus or MCTP over PCIe protocols as if it is a standard NVIDIA OCP 3.0 adapter. For configuring the adapter for the server's specific manageability solution, please contact NVIDIA Support. -
Page 20: Heatsink
Heatsink A heatsink is attached to the ConnectX®-6 Dx IC to dissipate the heat. It is connected by four spring- loaded push pins that insert into four mounting holes. ConnectX®-6 Dx IC has a thermal shutdown safety mechanism that automatically shuts down the ConnectX®-6 Dx card in case of a high-temperature event, improper thermal coupling, or heatsink removal. -
Page 21: Hardware Installation
Hardware Installation Installation and initialization of ConnectX-6 Dx adapter cards for OCP Spec 3.0 require attention to electronic equipment's mechanical attributes, power specification, and precautions. Safety Warnings Safety warnings are provided here in the English language. For safety warnings in other languages, refer to the Adapter Installation Safety Instructions. -
Page 22: Installation Procedure Overview
System Requirements Unless otherwise specified, NVIDIA products are designed to work in an environmentally controlled data center with low gaseous and dust (particulate) contamination levels. The operating environment should meet severity level G1 as per ISA 71.04 for gaseous... -
Page 23: Hardware Requirements
Cold Aisle Cooling Heatsink-to-port Airflow Direction Port-to-heatsink Airflow Direction Software Requirements • See Operating Systems/Distributions section under the Introduction section. • Software Stacks - NVIDIA OpenFabric software package MLNX_OFED for Linux, WinOF-2 for Windows, and VMware. See the Driver Installation section. -
Page 24: Safety Precautions
Safety Precautions The adapter is being installed in a system that operates with voltages that can be lethal. Before opening the case of the system, observe the following precautions to avoid injury and prevent damage to system components. Remove any metallic objects from your hands and wrists. Make sure to use only insulated tools. -
Page 25: Cards With Thumbscrew (Pull-Tab) Bracket
Retention Mechanism Installation Instructions Internal-Lock Bracket Installation Instructions for Cards with Internal Lock Ejector-Latch Bracket Installation Instructions for Cards with Internal-Lock Bracket Please note that the following figures are for illustration purposes only. Cards with Thumbscrew (Pull-tab) Bracket Before installing the card, ensure the system is off, and the power cord is not connected to the server. -
Page 26: Cards With Internal Lock Bracket
Cards with Internal Lock Bracket Before installing the card, ensure the system is off, and the power cord is not connected to the server. Please follow proper electrical grounding procedures. Open the system case. Align the card with the system rails. Push the card until connectors are in full mate and a clicking sound is heard. -
Page 27: Cables And Modules
To uninstall the adapter card, see Uninstalling the Card. Cables and Modules To obtain the list of supported NVIDIA cables for your adapter, please refer to the Cables Reference Table at http://www.nvidia.com/products/interconnect/cables-configurator.php. Cable Installation All cables can be inserted or removed with the unit powered on. -
Page 28: Identifying The Card In Your System
Network controller: Mellanox Technologies MT28800 Family [ On Windows Open Device Manager on the server. Click Start => Run, and then enter devmgmt.msc. Expand System Devices and locate your NVIDIA ConnectX-6 Dx adapter card. Right-click the mouse on your adapter's row and select Properties to display the adapter card properties window. -
Page 29: Card Extraction Instructions
In the Value display box, check the fields VEN and DEV (fields are separated by '&'). In the display example above, notice the sub-string "PCI\VEN_15B3&DEV_1003": VEN is equal to 0x15B3 – this is the Vendor ID of NVIDIA; DEV is equal to 1018 (for ConnectX-6 Dx) – this is a valid NVIDIA PCI Device ID. -
Page 30: Cards Extraction Instructions
Cards Extraction Instructions Please note that the following images are for illustration purposes only. Cards with Thumbscrew (Pull-tab) Bracket Verify that the system is powered off and unplugged. Wait 30 seconds. Rotate the captive screw counterclockwise. While holding the tab, carefully pull out the adapter card. Cards with Internal-Lock Bracket Extraction ... - Page 31 Verify that the system is powered off and unplugged. Wait 30 seconds. Open the ejector latch. Gently extract the adapter card from the server.
-
Page 32: Driver Installation
VMware Driver Installation Windows Driver Installation For Windows, download and install the latest NVIDIA WinOF-2 for Windows software package available via the NVIDIA web site at: http://www.nvidia.com > Products > Software > Ethernet Drivers > Download. Follow the installation instructions included in the download package (also available from the download page). -
Page 33: Installing Nvidia Winof-2 Driver
Both Attended and Unattended installations require administrator privileges. WinOF-2 supports adapter cards based on the NVIDIA ConnectX®-4 and above family of adapter IC devices only. If you have ConnectX-3 and ConnectX-3 Pro on your server, you will need to install WinOF driver. For details on how to install WinOF driver, please refer to WinOF User Manual. - Page 34 Click Next in the Welcome screen. Read then accept the license agreement and click Next. Select the target folder for the installation. The firmware upgrade screen will be displayed in the following cases: If the user has an OEM card. In this case, the firmware will not be displayed.
- Page 35 If the user has a standard NVIDIA card with an older firmware version, the firmware will be updated accordingly. However, if the user has both an OEM card and a NVIDIA card, only the NVIDIA card will be updated. Select a Complete or Custom installation, follow Step a and on.
- Page 36 Diagnostic Tools - installation tools used for diagnostics, such as mlx5cmd Click Next to install the desired tools. Click Install to start the installation. In case that firmware upgrade option was checked in Step 7, you will be notified if a firmware upgrade is required. See TBD.
- Page 37 Click Finish to complete the installation. Unattended Installation If no reboot options are specified, the installer restarts the computer whenever necessary without displaying any prompt or warning to the user. Use the /norestart or /forcerestart standard command-line options to control reboots. The following is an example of an unattended installation session.
-
Page 38: Installation Results
Device Manager. Upon installation completion, the inf files can be located at: %ProgramFiles% \Mellanox\MLNX_WinOF2\Drivers\<OS> To see the NVIDIA network adapters, display the Device Manager and pull down the Network adapters menu. Extracting Files Without Running Installation To extract the files without running installation, perform the following steps. - Page 39 Click Next to create a server image. Click Change and specify the location in which the files are extracted to. Click Install to extract this folder, or click Change to install to a different folder.
-
Page 40: Uninstalling Nvidia Winof-2 Driver
/v"/qn" Firmware Upgrade If the machine has a standard NVIDIA card with an older firmware version, the firmware will be automatically updated as part of the WinOF-2 package installation. For information on how to upgrade firmware manually, please refer to the MFT User Manual... -
Page 41: Deploying The Driver On A Nano Server
Deploying the Driver on a Nano Server Offline Installation To deploy the Driver on a Nano Server: Go to the NVIDIA WinOF web page at http://www.nvidia.com > Products > Ethernet Drivers > Windows SW/Drivers. Download the driver (MLNX_WinOF2_MLNX_WinOF2-1_64_mlx5_All_win2016_x64_fre_1_64_15407.exe). Extract the driver to a local directory (see Extracting Files Without... -
Page 42: Linux Driver Installation
To upgrade, it is recommended to run a script that will execute all the required upgrade commands. Linux Driver Installation This section describes how to install and test the NVIDIA OFED for Linux package on a single server with a NVIDIA ConnectX-6 Dx adapter card installed. Prerequisites... -
Page 43: Installing Nvidia Ofed
You will be prompted to acknowledge the deletion of the old packages. • If you need to install NVIDIA OFED on an entire (homogeneous) cluster, a common strategy is to mount the ISO image on one of the cluster nodes and then copy it to a shared file system such as NFS. - Page 44 RAM. For your machine to be part of the Ethernet fabric, a Subnet Manager must be running on one of the fabric nodes. At this point, NVIDIA OFED for Linux has already installed the OpenSM Subnet Manager on your machine. For the list of installation options, run: ./mlnxofedinstall --h...
- Page 45 Installation Procedure Login to the installation machine as root. Mount the ISO image on your machine. # mount -o ro,loop MLNX_OFED_LINUX-<ver>-<OS label>-<CPU arch>.iso /mnt Run the installation script. /mnt/mlnxofedinstall Logs dir: /tmp/MLNX_OFED_LINUX-x.x-x.logs This program will install the MLNX_OFED_LINUX package on your machine. Note that all other Mellanox, OEM, OFED, RDMA or Distribution IB packages will be removed.
- Page 46 /etc/infiniband/info. Most of the NVIDIA OFED components can be configured or reconfigured after the installation, by modifying the relevant configuration files. See the relevant chapters in this manual for details.
- Page 47 OPENIBD_POST_START OPENIBD_PRE_STOP OPENIBD_POST_STOP Example: OPENIBD_POST_START=/sbin/openibd_post_start.sh An example of OPENIBD_POST_START script for activating all interfaces is provided in the MLNX_OFED package under the docs/scripts/openibd-post-start-configure-interfaces/ folder. Driver Load Upon System Boot Upon system boot, the NVIDIA drivers will be loaded automatically.
-
Page 48: Installing Mlnx_Ofed Using Yum
Failed to start the mst driver Uninstalling MLNX_OFED Use the script /usr/sbin/ofed_uninstall.sh to uninstall the NVIDIA OFED package. The script is part of the ofed-scripts RPM. Installing MLNX_OFED Using YUM This type of installation is applicable to RedHat/OL, Fedora, XenServer Operating Systems. - Page 49 # mount -o ro,loop MLNX_OFED_LINUX-<ver>-<OS label>-<CPU arch>.iso /mnt Download and install NVIDIA Technologies GPG-KEY: The key can be downloaded via the following link: http://www.nvidia.com/downloads/ofed/ RPM-GPG-KEY-nvidia # wget http://www.nvidia.com/downloads/ofed/RPM-GPG-KEY-Mellanox --2014-04-20 13:52:30-- http://www.nvidia.com/downloads/ofed/RPM-GPG-KEY-Mellanox Resolving www.nvidia.com... 72.3.194.0 Connecting to www.nvidia.com|72.3.194.0|:80... connected. HTTP request sent, awaiting response... 200 OK Length: 1354 (1.3K) [text/plain]...
- Page 50 --> Processing Dependency: kmod-isert = 1.0-OFED.3.1.0.1.2.1.g832a737.rhel7u1 for package: mlnx-ofed-all-3.1-0.1.2.noarch ........qperf.x86_64 0:0.4.9-9 rds-devel.x86_64 0:2.0.7-1.12 rds-tools.x86_64 0:2.0.7-1.12 sdpnetstat.x86_64 0:1.60-26 srptools.x86_64 0:1.0.2-12 Complete! Uninstalling MLNX_OFED Using the YUM Tool Use the script /usr/sbin/ofed_uninstall.sh to uninstall the NVIDIA OFED package. The script is part of the ofed-scripts RPM.
-
Page 51: Installing Mlnx_Ofed Using Apt-Get Tool
Setting up MLNX_OFED apt-get Repository Log into the installation machine as root. Extract the MLNX_OFED package on a shared location in your network. You can download it from http://www.nvidia.com > Products > Software> Ethernet Drivers. Create an apt-get repository configuration file called "/etc/apt/sources.list.d/mlnx_ofed.list" with the following content: # deb file:/<path to extracted MLNX_OFED package>/DEBS ./... -
Page 52: Updating Firmware After Installation
The firmware can be updated either manually or automatically (upon system boot), as described in the sections below. Updating the Device Online To update the device online on the machine from the NVIDIA site, use the following command line: mlxfwmanager --online -u -d <device> Example: mlxfwmanager --online -u -d 0000:09:00.0... -
Page 53: Uefi Secure Boot
The following steps are also appropriate in case that you wish to burn newer firmware that you have downloaded from NVIDIA’s Web site (http://www.nvidia.com > Support > Firmware Download). Get the device’s PSID. mlxfwmanager_pci | grep PSID PSID: MT_1210110019 Download the firmware BIN file from the NVIDIA website or the OEM website. - Page 54 In order to support loading MLNX_OFED drivers when an OS supporting Secure Boot boots on a UEFI- based system with Secure Boot enabled, the NVIDIA x.509 public key should be added to the UEFI Secure Boot key database and loaded onto the system key ring by the kernel.
-
Page 55: Performance Tuning
ESXi 6.5 Installer Privileges The installation requires administrator privileges on the target machine. Installing NVIDIA NATIVE ESXi Driver for VMware vSphere Please uninstall all previous NVIDIA driver packages prior to installing the new version. See Removing Earlier NVIDIA Drivers for further information. -
Page 56: Removing Earlier Nvidia Drivers
Please unload the previously installed drivers before removing them. To remove all the drivers: Log into the ESXi server with root permissions. List all the existing NATIVE ESXi driver modules. (See Step 4 in Installing NVIDIA NATIVE ESXi Driver for VMware vSphere.) Remove each module: #>... -
Page 57: Updating Adapter Firmware
To check that your card is programmed with the latest available firmware version, download the mlxup firmware update and query utility. The utility can query for available NVIDIA adapters and indicate which adapters require a firmware update. If the user confirms, mlxup upgrades the firmware using embedded images. -
Page 58: Troubleshooting
Troubleshooting General Troubleshooting Server unable to find the adapter • Ensure that the adapter is placed correctly • Make sure the adapter slot and the adapter are compatible Install the adapter in a different PCI Express slot • Use the drivers that came with the adapter or download the latest •... -
Page 59: Windows Troubleshooting
NVIDIA Firmware Tool (NFT) Download and install MFT: http://www.nvidia.com/content/ pages.php?pg=management_tools&menu_section=34 Refer to the User Manual for installation instructions. Once installed, run: mst start mst status flint -d <mst_device> q Ports Information ibstat ibv_devinfo Firmware Version Upgrade To download the latest firmware version refer to http://... -
Page 60: Specifications
Specifications Install the ConnectX-6 Dx OCP 3.0 card in a PCIe slot that is capable of supplying the power levels mentioned below for the appropriate use case In Standby mode only port0 is available. MCX623432AE-ADAB / MCX623432AN-ADAB / MCX623432AC-ADAB / MCX623432AS-ADAB Specifications Physical Form Factor: Small Form Factor (SFF) OCP 3.0... -
Page 61: Mcx623432Ac-Gdab / Mcx623432An-Gdab / Mcx623432As-Gdai Specifications
Dx adapters supplement the auto-negotiation specification to get better bit error rates and longer cable reaches. This supplemental feature only initiates when connected to another NVIDIA Ethernet product. b. Typical power for ATIS traffic load. c. For both operational and non-operational states. -
Page 62: Mcx623435Mn-Cdab Specifications
Dx adapters supplement the auto-negotiation specification to get better bit error rates and longer cable reaches. This supplemental feature only initiates when connected to another NVIDIA Ethernet product. b. Typical power for ATIS traffic load. c. For both operational and non-operational states. -
Page 63: Mcx623439Mc-Cdab / Mcx623439Mn-Cdab Specifications
Dx adapters supplement the auto-negotiation specification to get better bit error rates and longer cable reaches. This supplemental feature only initiates when connected to another NVIDIA Ethernet product. b. Typical power for ATIS traffic load. c. For both operational and non-operational states. -
Page 64: Mcx623436Ac-Cdab / Mcx623436An-Cdab / Mcx623436As-Cdab / Mcx623436Mc- Cdab / Mcx623436Mn-Cdab / Mcx623436Ms-Cdab / Mcx623436As-Cdai Specifications
Voltage: 3.3VAUX, 12V Powe r and Power Cable Type Active Mode Standby Mode Envir onme Passive Cables 17.22W 4.3W ntal Typical Power Maximum Power Passive Cables 22.77W 8.1W Maximum power available through QSFP56 port: 5W Temperature Operational 0°C to 55°C Non-operational -40°C to 70°C Humidity 90% relative humidity... -
Page 65: Mcx623430Ms-Cdab Specifications
Dx adapters supplement the auto-negotiation specification to get better bit error rates and longer cable reaches. This supplemental feature only initiates when connected to another NVIDIA Ethernet product. b. Typical power for ATIS traffic load. c. For both operational and non-operational states. -
Page 66: Mcx623435Ac-Cdab / Mcx623435Ae-Cdab / Mcx623435An-Cdab / Mcx623435Ac- Vdab / Mcx623435Ae-Vdab / Mcx623435An-Vdab / Mcx623435As-Vdai Specifications
ConnectX-6 Dx adapters supplement the auto-negotiation specification to get better bit error rates and longer cable reaches. This supplemental feature only initiates when connected to another NVIDIA Ethernet product. b. Typical power for ATIS traffic load. c. For both operational and non-operational states. - Page 67 Dx adapters supplement the auto-negotiation specification to get better bit error rates and longer cable reaches. This supplemental feature only initiates when connected to another NVIDIA Ethernet product. b. Typical power for ATIS traffic load. c. For both operational and non-operational states.
-
Page 68: Board Mechanical Drawing And Dimensions
Board Mechanical Drawing and Dimensions All dimensions are in millimeters. The PCB mechanical tolerance is +/- 0.13mm. ConnectX-6 Dx SFP28/SFP56 OCP 3.0 Mechanical Drawing and Dimensions ConnectX-6 Dx Dual-Port QSFP56 OCP 3.0 Mechanical Drawing and Dimensions ConnectX-6 Dx Single-Port QSFP56 OCP 3.0 Mechanical Drawing and Dimensions ... -
Page 69: Bracket Mechanical Drawings And Dimensions
Bracket Mechanical Drawings and Dimensions All dimensions are in millimeters. The bracket's mechanical tolerance is +/- 0.25mm. Dual-port SFP28/SFP56 Thumbscrew Bracket Dual-port QSFP56 Thumbscrew Bracket ... -
Page 70: Single-Port Qsfp56 Thumbscrew Bracket
Single-port QSFP56 Thumbscrew Bracket ... -
Page 71: Finding The Mac And Serial Number On The Adapter Card
Finding the MAC and Serial Number on the Adapter Card Each NVIDIA adapter card has a different identifier printed on the label: serial number and the card MAC for the Ethernet protocol. The product revisions indicated on the labels in the following figures do not necessarily represent the latest revisions of the cards. - Page 72 MCX623436AN-CDAB Board Label Example MCX623436AC-CDAB Board Label Example MCX623435AN-VDAB Board Label Example MCX623435AC-VDAB Board Label Example...
-
Page 73: Document Revision History
Document Revision History Date Revision Description of Changes Jul. 2022 Updated brackets' mechanical drawings. Jun. 2022 Added Multi-Host description in the Introduction and Supported Interfaces. Mar. 2022 Updated MCX623430MS-CDAB Specifications. Feb. 2022 Added table Legacy (EOL) Ordering Part Numbers. Aug. 2021 Added OPN MCX623430MS-CDAB. - Page 74 NVIDIA accepts no liability related to any default, damage, costs, or problem which may be based on or attributable to: (i) the use of the NVIDIA product in any manner that is contrary to this document or (ii) customer product designs.
- Page 75 Copyright © 2022 NVIDIA Corporation & affiliates. All Rights Reserved.
Need help?
Do you have a question about the ConnectX-6 Dx MCX623432AE-ADAB and is the answer not in the manual?
Questions and answers