Nvidia ConnectX-6 User Manual
Infiniband/vpi adapter card
Hide thumbs
Also See for ConnectX-6:
- Manual (88 pages) ,
- User manual (79 pages) ,
- User manual (72 pages)

Related Manuals for Nvidia ConnectX-6


Summary of Contents for Nvidia ConnectX-6
- Page 1 NVIDIA ConnectX-6 InfiniBand/VPI Adapter Cards User Manual Exported on Sep/19/2022 12:34 PM...
-
Page 2: Table Of Contents
ConnectX-6 Socket Direct™ Cards ............12 Package Contents .................. 15 ConnectX-6 PCIe x8/x16 Adapter Cards ............ 15 ConnectX-6 PCIe x16 Adapter Card for liquid-cooled Intel® Server System D50TNP Platforms ..................15 ConnectX-6 Socket Direct Cards (2x PCIe x16) ..........15 Features and Benefits ................ - Page 3 Uninstalling NVIDIA WinOF-2 Driver ............69 Extracting Files Without Running Installation ..........69 Firmware Upgrade ................72 VMware Driver Installation ............... 72 Hardware and Software Requirements ............. 72 Installing NVIDIA NATIVE ESXi Driver for VMware vSphere ....... 73 Removing Earlier NVIDIA Drivers ............. 73...
- Page 4 Firmware Programming ............... 74 Updating Adapter Firmware ..............75 Troubleshooting ................76 General Troubleshooting ................76 Linux Troubleshooting ................77 Windows Troubleshooting................. 77 Specifications..................79 MCX651105A-EDAT Specifications..............79 MCX653105A-HDAT Specifications ............... 80 MCX653106A-HDAT Specifications ............... 82 MCX653105A-HDAL Specifications ............... 83 MCX653106A-HDAL Specifications ............... 85 MCX653105A-ECAT Specifications..............
- Page 5 Ordering Part Numbers The table below provides the ordering part numbers (OPN) for the available ConnectX-6 InfiniBand/ VPI adapter cards. Marketing Description MCX65410 ConnectX®-6 VPI adapter card, 100Gb/s (HDR100, EDR InfiniBand and 100GbE), dual-port QSFP56,...
- Page 6 • URL: https://www.nvidia.com > Support • E-mail: Network-support@nvidia.com Customers who purchased NVIDIA M-1 Global Support Services, please see your contract for details regarding Technical Support. Customers who purchased NVIDIA products through a NVIDIA approved reseller should first seek assistance through their reseller. Related Documentation...
- Page 7 Revision History A list of the changes made to this document are provided in Document Revision History.
-
Page 8: Introduction
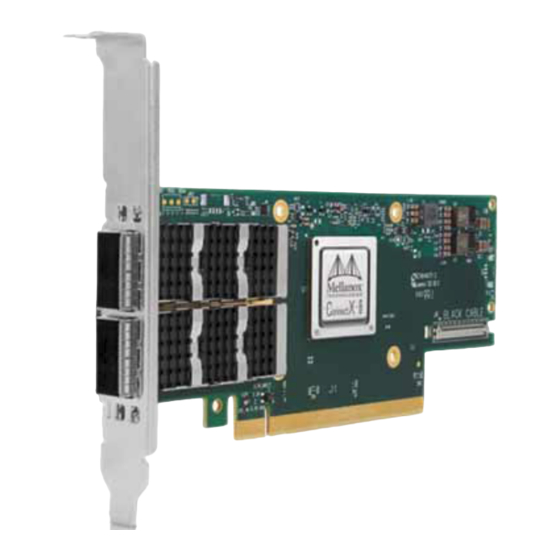
Introduction Product Overview This is the user guide for VPI adapter cards based on the ConnectX-6 integrated circuit device. ConnectX-6 connectivity provides the highest performing low latency and most flexible interconnect solution for PCI Express Gen 3.0/4.0 servers used in enterprise datacenters and high-performance computing environments. -
Page 9: Connectx-6 Pcie X8 Card
IBand100GbE), dual-port QSFP56, PCIe3.0/4.0 Socket Direct 2x8 in a row, tall bracket ConnectX-6 PCIe x8 Card ConnectX-6 with a single PCIe x8 slot can support a bandwidth of up to 100Gb/s in a PCIe Gen 4.0 slot. Part Number MCX651105A-EDAT Form Factor/Dimensions PCIe Half Height, Half Length / 167.65mm x 68.90mm... -
Page 10: Connectx-6 Pcie X16 Card
ConnectX-6 PCIe x16 Card ConnectX-6 with a single PCIe x16 slot can support a bandwidth of up to 100Gb/s in a PCIe Gen 3.0 slot, or up to 200Gb/s in a PCIe Gen 4.0 slot. This form-factor is available also for Intel® Server System D50TNP Platforms where an Intel liquid-cooled cold plate is used for adapter cooling mechanism. ... -
Page 11: Connectx-6 De Pcie X16 Card
ConnectX-6 DE PCIe x16 Card ConnectX-6 DE (ConnectX-6 Dx enhanced for HPC applications) with a single PCIe x16 slot can support a bandwidth of up to 100Gb/s in a PCIe Gen 3.0 slot, or up to 200Gb/s in a PCIe Gen 4.0 slot. -
Page 12: Connectx-6 Socket Direct™ Cards
CPUs). For ConnectX-6 Socket Direct card with Multi-Host functionality, please contact NVIDIA. ConnectX-6 Socket Direct cards are available in two configurations: Dual-slot Configuration (2x PCIe x16) and Single-slot Configuration (2x PCIe x8). ConnectX-6 Dual-slot Socket Direct Cards (2x PCIe x16) In order to obtain 200Gb/s speed, NVIDIA offers ConnectX-6 Socket Direct that enable 200Gb/s... - Page 13 into two 16-lane buses, with one bus accessible through a PCIe x16 edge connector and the other bus through an x16 Auxiliary PCIe Connection card. The two cards should be installed into two PCIe x16 slots and connected using two Cabline SA-II Plus harnesses, as shown in the below figure. MCX654105A- Part Number MCX65410...
- Page 14 ConnectX-6 Single-slot Socket Direct Cards (2x PCIe x8 in a row) The PCIe x16 interface comprises two PCIe x8 in a row, such that each of the PCIe x8 lanes can be connected to a dedicated CPU in a dual-socket server. In such a configuration, Socket Direct brings...
-
Page 15: Package Contents
Item Cards ConnectX-6 adapter card Accessories Adapter card short bracket Adapter card tall bracket (shipped assembled on the card) ConnectX-6 PCIe x16 Adapter Card for liquid-cooled Intel® Server System D50TNP Platforms Applies to MCX653105A-HDAL and MCX653106A-HDAL. Category Item Cards ConnectX-6 adapter card... -
Page 16: Features And Benefits
PCIe Gen 3.0/4.0 SERDES @ 8.0/16.0 GT/s through Edge Connector PCIe Gen 3.0 SERDES @ 8.0GT/s through PCIe Auxiliary Connection Card 200Gb/s ConnectX-6 offers the highest throughput VPI adapter, supporting HDR 200b/s InfiniBand and Virtual 200Gb/s Ethernet and enabling any standard networking, clustering, or storage to operate Protocol seamlessly over any converged network leveraging a consolidated software stack. - Page 17 NVGRE and VXLAN. While this solves network scalability issues, it hides the TCP packet from the hardware offloading engines, placing higher loads on the host CPU. ConnectX-6 effectively addresses this by providing advanced NVGRE and VXLAN hardware offloading engines that...
- Page 18 RDMA ConnectX-6, utilizing IBTA RDMA (Remote Data Memory Access) and RoCE (RDMA over Converged Ethernet) technology, delivers low-latency and high-performance over InfiniBand and Ethernet RDMA networks. Leveraging datacenter bridging (DCB) capabilities as well as ConnectX-6 advanced over congestion control hardware mechanisms, RoCE provides efficient low-latency RDMA services Converg over Layer 2 and Layer 3 networks.
-
Page 19: Operating Systems/Distributions
Powered connectors for optical and active cable support Manageability ConnectX-6 technology maintains support for manageability through a BMC. ConnectX-6 PCIe stand- up adapter can be connected to a BMC using MCTP over SMBus or MCTP over PCIe protocols as if it is a standard NVIDIA PCIe stand-up adapter. -
Page 20: Interfaces
The adapter card includes special circuits to protect from ESD shocks to the card/server when plugging copper cables. The network ports of the ConnectX-6 adapter card are compliant with the IEEE 802.3 Ethernet standards listed in Features and Benefits. Ethernet traffic is transmitted through the QSFP56/QSFP connectors on the adapter card. - Page 21 • LED 3 and 4: Reserved for future use. LED1 and LED2 Link Status Indications - Ethernet Protocol: LED Color and State Description A link has not been established Beacon command for locating the adapter card 1Hz blinking Yellow Error 4Hz blinking Yellow Indicates an error with the link. The error can be one of the following: Error Type Description...
-
Page 22: Heatsink Interface
ConnectX-6 technology maintains support for manageability through a BMC. ConnectX-6 PCIe stand- up adapter can be connected to a BMC using MCTP over SMBus protocol as if it is a standard NVIDIA PCIe stand-up adapter. For configuring the adapter for the specific manageability solution in use by the server, please contact NVIDIA Support. -
Page 23: Thermal Sensors
Thermal Sensors Unable to render include or excerpt-include. Could not retrieve page. -
Page 24: Hardware Installation
Hardware Installation Installation and initialization of ConnectX-6 adapter cards require attention to the mechanical attributes, power specification, and precautions for electronic equipment. Safety Warnings Safety warnings are provided here in the English language. For safety warnings in other languages, refer to the... -
Page 25: Installation Procedure Overview
CLASS 1 LASER PRODUCT and reference to the most recent laser standards: IEC 60 825-1:1993 + A1:1997 + A2:2001 and EN 60825-1:1994+A1:1996+ A2:20 Installation Procedure Overview The installation procedure of ConnectX-6 adapter cards involves the following steps: Step Procedure Direct Link Check the system’s hardware and software... -
Page 26: Airflow Requirements
Refer to the Specifications section of the manual for more power requirements. Please make sure to install the ConnectX-6 cards in a PCIe slot that is capable of supplying the required power as stated in Specifications. ConnectX-6 Configuration Hardware Requirements... -
Page 27: Software Requirements
Bracket Replacement Instructions. Bracket Replacement Instructions The ConnectX-6 card and PCIe Auxiliary Connection card are usually shipped with an assembled high-profile bracket. If this form factor is suitable for your requirements, you can skip the remainder of this section and move to Installation... -
Page 28: Installation Instructions
Use a torque driver to apply up to 2 lbs-in torque on the screws. Installation Instructions This section provides detailed instructions on how to install your adapter card in a system. Choose the installation instructions according to the ConnectX-6 configuration you have purchased. OPNs Installation Instructions... -
Page 29: Cables And Modules
Cables and Modules To obtain the list of supported NVIDIA cables for your adapter, please refer to the Cables Reference Table at http://www.nvidia.com/products/interconnect/cables-configurator.php. Cable Installation All cables can be inserted or removed with the unit powered on. To insert a cable, press the connector into the port receptacle until the connector is firmly seated. - Page 30 3:00.0 Infiniband controller: Mellanox Technologies MT28908 Family [ConnectX-6] Dual-port PCIe x16 Card [root@mftqa-009 ~]# lspci |grep mellanox -i 86:00.0 Network controller: Mellanox Technologies MT28908A0 Family [ConnectX-6] 86:00.1 Network controller: Mellanox Technologies MT28908A0 Family [ConnectX-6] On Windows Open Device Manager on the server. Click Start => Run, and then enter devmgmt.msc.
-
Page 31: Pcie X8/16 Cards Installation Instructions
In the Value display box, check the fields VEN and DEV (fields are separated by ‘&’). In the display example above, notice the sub-string “PCI\VEN_15B3&DEV_1003”: VEN is equal to 0x15B3 – this is the Vendor ID of NVIDIA; and DEV is equal to 1018 (for ConnectX-6) – this is a valid NVIDIA PCI Device ID. - Page 32 Please make sure to install the ConnectX-6 cards in a PCIe slot that is capable of supplying the required power and airflow as stated in Specifications. Connect the adapter Card in an available PCI Express x16 slot in the chassis.
-
Page 33: Uninstalling The Card
Secure the adapter card to the chassis. Step 1: Secure the bracket to the chassis with the bracket screw. Uninstalling the Card Safety Precautions The adapter is installed in a system that operates with voltages that can be lethal. Before uninstalling the adapter card, please observe the following precautions to avoid injury and prevent damage to system components. -
Page 34: Socket Direct (2X Pcie X16) Cards Installation Instructions
4. Holding the adapter card from its center, gently pull the ConnectX-6 and Auxiliary Connections cards out of the PCI Express slot. Socket Direct (2x PCIe x16) Cards Installation Instructions The hardware installation section uses the terminology of white and black harnesses to differentiate between the two supplied cables. -
Page 35: Installing The Card
Please make sure to install the ConnectX-6 cards in a PCIe slot that is capable of supplying the required power and airflow as stated in Specifications. Connect the adapter card with the Auxiliary connection card using the supplied Cabline CA-II Plus harnesses. - Page 36 Step 2: Plug the Cabline CA-II Plus harnesses on the ConnectX-6 adapter card while paying attention to the color-coding. As indicated on both sides of the card; plug the black harness to the component side and the white harness to the print side.
- Page 37 Step 4: Clamp the retention clip. Verify both latches are firmly locked.
- Page 38 Step 5: Slide the Cabline CA-II Plus harnesses through the retention clip. Make sure that the clip opening is facing the plugs. Step 6: Plug the Cabline CA-II Plus harnesses on the PCIe Auxiliary Card. As indicated on both sides of the Auxiliary connection card; plug the black harness to the component side and the white harness to the print side.
- Page 39 Step 9: Clamp the retention clip. Verify both latches are firmly locked. Connect the ConnectX-6 adapter and PCIe Auxiliary Connection cards in available PCI Express x16 slots in the chassis. Step 1: Locate two available PCI Express x16 slots. Step 2: Applying even pressure at both corners of the cards, insert the adapter card in the...
- Page 40 Step 3: Applying even pressure at both corners of the cards, insert the Auxiliary Connection card in the PCI Express slots until firmly seated. Secure the ConnectX-6 adapter and PCIe Auxiliary Connection Cards to the chassis. Step 1: Secure the brackets to the chassis with the bracket screw.
-
Page 41: Uninstalling The Card
Uninstalling the Card Safety Precautions The adapter is installed in a system that operates with voltages that can be lethal. Before uninstalling the adapter card, please observe the following precautions to avoid injury and prevent damage to system components. Remove any metallic objects from your hands and wrists. It is strongly recommended to use an ESD strap or other antistatic devices. -
Page 42: Cards For Intel Liquid-Cooled Platforms Installation Instructions
4. Holding the adapter card from its center, gently pull the ConnectX-6 and Auxiliary Connections cards out of the PCI Express slot. Cards for Intel Liquid-Cooled Platforms Installation Instructions The below instructions apply to ConnectX-6 cards designed for Intel liquid-cooled platforms with ASIC interposer cooling mechanism. OPNs: MCX653105A-HDAL and MCX653106A-HDAL. -
Page 43: Installing The Card
The below instructions should be used in conjunction with the server's documentation. Installing the Card Please make sure the system is capable of supplying the required power as stated in Specifications. Pay extra attention to the black bumpers located on the print side of the card. Failure to do so may harm the bumpers. ... - Page 44 The thermal pad should be applied on the coldplate from its tacky (wet) side. The pad should be applied with its non-tacky side facing up. Ensure the thermal pad is in place and intact. Once the thermal pad is applied to the ASIC interposer, the non-tacky side should be visible on the card's faceplate.
- Page 45 Disengage the adapter riser from the blade. Please refer to the blade documentation for instructions. Applying even pressure at both corners of the card, insert the adapter card into the adapter riser until firmly seated. Care must be taken to not harm the black bumpers located on the print side of the card.
- Page 46 Applying even pressure on the riser, gently insert the riser into the server. Secure the riser with the supplied screws. Please refer to the server blade documentation for more information.
-
Page 47: Driver Installation
Linux Driver Installation • Windows Driver Installation • VMware Driver Installation Linux Driver Installation This section describes how to install and test the NVIDIA OFED for Linux package on a single server with a NVIDIA ConnectX-6 adapter card installed. Prerequisites Requirements Description Platforms A server platform with a ConnectX-6 InfiniBand/VPI adapter card installed. - Page 48 MLNX_OFED_LINUX-<ver>-<OS label><CPU arch>.iso You can download and install the latest OpenFabrics Enterprise Distribution (OFED) software package available via the NVIDIA web site at http://www.nvidia.com > Products > Software > Ethernet Drivers > Linux SW/Drivers > Download.. Scroll down to the Download wizard, and click the Download tab.
-
Page 49: Installing Nvidia Ofed
You will be prompted to acknowledge the deletion of the old packages. • If you need to install NVIDIA OFED on an entire (homogeneous) cluster, a common strategy is to mount the ISO image on one of the cluster nodes and then copy it to a shared file system such as NFS. - Page 50 RAM. For your machine to be part of the InfiniBand/VPI fabric, a Subnet Manager must be running on one of the fabric nodes. At this point, NVIDIA OFED for Linux has already installed the OpenSM Subnet Manager on your machine. For the list of installation options, run: ./mlnxofedinstall --h...
- Page 51 Device #1: ---------- Device Type: ConnectX-6 Part Number: MCX654106A-HCAT Description: ConnectX®-6 VPI adapter card, HDR IB (200Gb/s) and 200GbE, dual-port QSFP56, Socket Direct 2x PCIe3.0 x16, tall bracket...
- Page 52 /etc/infiniband/info. Most of the NVIDIA OFED components can be configured or reconfigured after the installation, by modifying the relevant configuration files. See the relevant chapters in this manual for details.
- Page 53 MLNX_OFED package under the docs/scripts/openibd-post-start-configure-interfaces/ folder. Driver Load Upon System Boot Upon system boot, the NVIDIA drivers will be loaded automatically. To prevent automatic load of the NVIDIA drivers upon system boot: Add the following lines to the "/etc/modprobe.d/mlnx.conf" file. blacklist mlx4_core blacklist mlx4_en...
-
Page 54: Installing Mlnx_Ofed Using Yum
Failed to start the mst driver Uninstalling MLNX_OFED Use the script /usr/sbin/ofed_uninstall.sh to uninstall the NVIDIA OFED package. The script is part of the ofed-scripts RPM. Installing MLNX_OFED Using YUM This type of installation is applicable to RedHat/OL, Fedora, XenServer Operating Systems. - Page 55 Check that the key was successfully imported. # rpm -q gpg-pubkey --qf '%{NAME}-%{VERSION}-%{RELEASE}\t%{SUMMARY}\n' | grep Mellanox gpg-pubkey-a9e4b643-520791ba gpg(Mellanox Technologies <support@mellanox.com>) Create a yum repository configuration file called "/etc/yum.repos.d/mlnx_ofed.repo" with the following content: [mlnx_ofed] name=MLNX_OFED Repository baseurl=file:///<path to extracted MLNX_OFED package>/RPMS enabled=1 gpgkey=file:///<path to the downloaded key RPM-GPG-KEY-Mellanox>...
-
Page 56: Installing Mlnx_Ofed Using Apt-Get Tool
Complete! Uninstalling MLNX_OFED Using the YUM Tool Use the script /usr/sbin/ofed_uninstall.sh to uninstall the NVIDIA OFED package. The script is part of the ofed-scripts RPM. Installing MLNX_OFED Using apt-get Tool This type of installation is applicable to Debian and Ubuntu operating systems. - Page 57 Installing MLNX_OFED using the “apt-get” tool does not automatically update the firmware. To update the firmware to the version included in MLNX_OFED package, run: # apt-get install mlnx-fw-updater Or, update the firmware to the latest version available on the NVIDIA website as described in Updating Adapter Firmware.
-
Page 58: Updating Firmware After Installation
The firmware can be updated either manually or automatically (upon system boot), as described in the sections below. Updating the Device Online To update the device online on the machine from the NVIDIA site, use the following command line: mlxfwmanager --online -u -d <device> Example: mlxfwmanager --online -u -d 0000:09:00.0... -
Page 59: Uefi Secure Boot
In order to support loading MLNX_OFED drivers when an OS supporting Secure Boot boots on a UEFI- based system with Secure Boot enabled, the NVIDIA x.509 public key should be added to the UEFI Secure Boot key database and loaded onto the system key ring by the kernel. - Page 60 Add the public key to the MOK list using the mokutil utility. # mokutil --import mlnx_signing_key_pub.der Reboot the system. The pending MOK key enrollment request will be noticed by shim.efi and it will launch MokManager.efi to allow you to complete the enrollment from the UEFI console. You will need to enter the password you previously associated with this request and confirm the enrollment.
-
Page 61: Performance Tuning
Windows Driver Installation For Windows, download and install the latest NVIDIA WinOF-2 for Windows software package available via the NVIDIA web site at: http://www.nvidia.com > Products > Software > Ethernet Drivers > Download. Follow the installation instructions included in the download package (also available from the download page). - Page 62 %PROCESSOR_ARCHITECTURE% On an x64 (64-bit) machine, the output will be “AMD64”. Go to the NVIDIA WinOF-2 web page at: http://www.nvidia.com > Products > InfiniBand/VPI Drivers => Windows SW/Drivers. Download the .exe image according to the architecture of your machine (see Step 1). ...
- Page 63 MLNX_WinOF2-2_10_50000_All_x64.exe /v"/l*vx MyLog.txt=1" Click Next in the Welcome screen. Read and accept the license agreement and click Next. Select the target folder for the installation.
- Page 64 If the user has an OEM card. In this case, the firmware will not be displayed. • If the user has a standard NVIDIA card with an older firmware version, the firmware will be updated accordingly. However, if the user has both an OEM...
- Page 65 Select a Complete or Custom installation, follow Step a onward. Select the desired feature to install: • Performances tools - install the performance tools that are used to measure performance in user environment • Documentation - contains the User Manual and Release Notes • Management tools - installation tools used for management, such as mlxstat •...
- Page 66 b. Click Next to install the desired tools. 9. Click Install to start the installation. ...
- Page 67 10. In case firmware upgrade option was checked in Step 7, you will be notified if a firmware upgrade is required (see ). 11. Click Finish to complete the installation. Unattended Installation...
- Page 68 Installation Results Upon installation completion, you can verify the successful addition of the network card(s) through the Device Manager. The inf files can be located at: %ProgramFiles%\Mellanox\MLNX_WinOF2\Drivers\ To see the NVIDIA network adapters, display the Device Manager and pull down the “Network adapters” menu. ...
-
Page 69: Uninstalling Nvidia Winof-2 Driver
Uninstalling NVIDIA WinOF-2 Driver Attended Uninstallation To uninstall MLNX_WinOF2 on a single node: Click Start > Control Panel > Programs and Features > MLNX_WinOF2 > Uninstall. (NOTE: This requires elevated administrator privileges) Unattended Uninstallation To uninstall MLNX_WinOF2 in unattended mode: Open a CMD console. (Click Task Manager > File > Run new task, and enter CMD.) To uninstall the driver, run: MLNX_WinOF2-2_0_All_x64.exe /S /x... - Page 70 To extract the files without running installation, perform the following steps: Open a CMD console-> Click Start-> Task Manager-> File-> Run new task-> and enter CMD. Extract the driver and the tools: MLNX_WinOF2-2_0_<revision_version>_All_x64 /a To extract only the driver file MLNX_WinOF2-2_0_<revision_version>_All_x64 /a /vMT_DRIVERS_ONLY=1 Click Next to create a server image. ...
- Page 71 Click Install to extract this folder, or click Change to install to a different folder. ...
-
Page 72: Firmware Upgrade
To complete the extraction, click Finish. Firmware Upgrade If the machine has a standard NVIDIA card with an older firmware version, the firmware will be automatically updated as part of the WinOF-2 package installation. For information on how to upgrade firmware manually, please refer to the MFT User Manual at www.nvidia.com >Products >... -
Page 73: Installing Nvidia Native Esxi Driver For Vmware Vsphere
The installation requires administrator privileges on the target machine. Installing NVIDIA NATIVE ESXi Driver for VMware vSphere Please uninstall all previous NVIDIA driver packages prior to installing the new version. See Removing Earlier NVIDIA Drivers for further information. To install the driver: Log into the ESXi server with root permissions. -
Page 74: Firmware Programming
To remove the modules, you must run the command in the same order as shown in the example above. Reboot the server. Firmware Programming Download the VMware bootable binary images v4.6.0 from the NVIDIA Firmware Tools (MFT) site. ESXi 6.5 File: mft-4.6.0.48-10EM-650.0.0.4598673.x86_64.vib MD5SUM: 0804cffe30913a7b4017445a0f0adbe1 Install the image according to the steps described in the MFT User Manual. -
Page 75: Updating Adapter Firmware
To check that your card is programmed with the latest available firmware version, download the mlxup firmware update and query utility. The utility can query for available NVIDIA adapters and indicate which adapters require a firmware update. If the user confirms, mlxup upgrades the firmware using embedded images. -
Page 76: Troubleshooting
Troubleshooting General Troubleshooting • Ensure that the adapter is placed correctly Server unable to find the adapter • Make sure the adapter slot and the adapter are compatible Install the adapter in a different PCI Express slot • Use the drivers that came with the adapter or download the latest •... -
Page 77: Linux Troubleshooting
<interface> ethtool -i <interface_of_Mellanox_port_num> ibdev2netdev lspci | grep -i Mellanox Card Detection Download and install MFT: http://www.nvidia.com/content/ NVIDIA Firmware Tool (MFT) pages.php?pg=management_tools&menu_section=34 Refer to the User Manual for installation instructions. Once installed, run: mst start mst status flint -d <mst_device> q... - Page 78 • Event log viewer Collect Log File • MST device logs: • mst start • mst status • flint –d <mst_device> dc > dump_configuration.log • mstdump <mst_device> dc > mstdump.log...
-
Page 79: Specifications
Specifications MCX651105A-EDAT Specifications Please make sure to install the ConnectX-6 card in a PCIe slot that is capable of supplying the required power and airflow as stated in the below table. Physic Adapter Card Size: 6.6 in. x 2.71 in. (167.65mm x 68.90mm) -
Page 80: Mcx653105A-Hdat Specifications
RoHS: RoHS Compliant MCX653105A-HDAT Specifications Please make sure to install the ConnectX-6 card in a PCIe slot that is capable of supplying the required power and airflow as stated in the below table. Physi Adapter Card Size: 6.6 in. x 2.71 in. (167.65mm x 68.90mm) - Page 81 Adap Voltage: 12V, 3.3VAUX Card Power Cable Passive Cables 19.3W Typical Power Maximum Power Please refer to ConnectX-6 VPI Power Specifications (requires NVONline login credentials) Voltage: 3.3Aux Maximum current: 100mA Maximum power available through QSFP56 port: 5W Envir Temperature Operational 0°C to 55°C...
-
Page 82: Mcx653106A-Hdat Specifications
- add 250LFM MCX653106A-HDAT Specifications Please make sure to install the ConnectX-6 card in a PCIe slot that is capable of supplying the required power and airflow as stated in the below table. Physic Adapter Card Size: 6.6 in. x 2.71 in. (167.65mm x 68.90mm) -
Page 83: Mcx653105A-Hdal Specifications
ATIS traffic load. c. For both operational and non-operational states. MCX653105A-HDAL Specifications Please make sure to install the ConnectX-6 card in an liquid-cooled Intel® Server System D50TNP platform. Physic Adapter Card Size: 6.6 in. x 2.71 in. (167.65mm x 68.90mm) - Page 84 Voltage: 12V, 3.3VAUX Card Power Cable Power 18.5W Passive Cables Typical Power Maximum Power Please refer to ConnectX-6 VPI Power Specifications (requires NVONline login credentials) Voltage: 3.3Aux Maximum current: 100mA Maximum power available through QSFP56 port: 5W Enviro Temperature Operational 0°C to 55°C...
-
Page 85: Mcx653106A-Hdal Specifications
ATIS traffic load. c. For both operational and non-operational states. MCX653106A-HDAL Specifications Please make sure to install the ConnectX-6 card in an liquid-cooled Intel® Server System D50TNP platform. Physic Adapter Card Size: 6.6 in. x 2.71 in. (167.65mm x 68.90mm) -
Page 86: Mcx653105A-Ecat Specifications
For both operational and non-operational states. MCX653105A-ECAT Specifications Please make sure to install the ConnectX-6 card in a PCIe slot that is capable of supplying the required power and airflow as stated in the below table. Physic Adapter Card Size: 6.6 in. x 2.71 in. (167.65mm x 68.90mm) - Page 87 Voltage: 12V, 3.3VAUX Card Power Cable Power Passive Cables 15.6W Typical Power Maximum Power Please refer to ConnectX-6 VPI Power Specifications (requires NVONline login credentials) Voltage: 3.3Aux Maximum current: 100mA Maximum power available through QSFP56 port: 5W Enviro Temperature Operational 0°C to 55°C...
-
Page 88: Mcx653106A-Ecat Specifications
For both operational and non-operational states. MCX653106A-ECAT Specifications Please make sure to install the ConnectX-6 card in a PCIe slot that is capable of supplying the required power and airflow as stated in the below table. For power specifications when using a single-port configuration, please refer to... -
Page 89: Mcx654105A-Hcat Specifications
For both operational and non-operational states. MCX654105A-HCAT Specifications Please make sure to install the ConnectX-6 card in a PCIe slot that is capable of supplying the required power and airflow as stated in the below table. Physical Adapter Card Size: 6.6 in. x 2.71 in. (167.65mm x 68.90mm) Auxiliary PCIe Connection Card Size: 5.09 in. - Page 90 Voltage: 12V, 3.3VAUX Card Power Power Cable Passive Cables 27.1W Typical Power Maximum Power Please refer to ConnectX-6 VPI Power Specifications (requires NVONline login credentials) Voltage: 3.3Aux Maximum current: 100mA Maximum power available through QSFP56 port: 5W Active Typical Power 3.0W...
-
Page 91: Mcx654106A-Hcat Specifications
For engineering samples - add 250LFM MCX654106A-HCAT Specifications Please make sure to install the ConnectX-6 card in a PCIe slot that is capable of supplying the required power and airflow as stated in the below table. For power specifications when using a single-port configuration, please refer to... - Page 92 Voltage: 12V, 3.3VAUX Card Power Power Cable Passive Cables 31.4W Typical Power Maximum Power Please refer to ConnectX-6 VPI Power Specifications (requires NVONline login credentials) Voltage: 3.3Aux Maximum current: 100mA Maximum power available through QSFP56 port: 5W Active Typical Power 3.0W...
-
Page 93: Mcx654106A-Ecat Specifications
For both operational and non-operational states. MCX654106A-ECAT Specifications Please make sure to install the ConnectX-6 card in a PCIe slot that is capable of supplying the required power and airflow as stated in the below table. Physical Adapter Card Size: 6.6 in. x 2.71 in. (167.65mm x 68.90mm) Auxiliary PCIe Connection Card Size: 5.09 in. - Page 94 Adapter Card Voltage: 12V, 3.3VAUX Power Power Cable Passive Cables 27.1W Typical Power Maximum Power Please refer to ConnectX-6 VPI Power Specifications (requires NVONline login credentials) Voltage: 3.3Aux Maximum current: 100mA Maximum power available through QSFP56 port: 5W Active Typical Power 3.0W...
-
Page 95: Mcx653105A-Efat Specifications
For both operational and non-operational states. MCX653105A-EFAT Specifications Please make sure to install the ConnectX-6 card in a PCIe slot that is capable of supplying the required power and airflow as stated in the below table. Physic Adapter Card Size: 6.6 in. x 2.71 in. (167.65mm x 68.90mm) - Page 96 EMC: CE / FCC / VCCI / ICES / RCM / KC RoHS: RoHS Compliant Notes: a. The ConnectX-6 adapters supplement the IBTA auto-negotiation specification to get better bit error rates and longer cable reaches. This supplemental feature only initiates when connected to another NVIDIA InfiniBand product.
-
Page 97: Mcx653106A-Efat Specifications
MCX653106A-EFAT Specifications Please make sure to install the ConnectX-6 card in a PCIe slot that is capable of supplying the required power and airflow as stated in the below table. For power specifications when using a single-port configuration, please refer to MCX653105A-EFAT Specifications. -
Page 98: Mcx683105An-Hdat Specifications
For both operational and non-operational states. MCX683105AN-HDAT Specifications Please make sure to install the ConnectX-6 card in a PCIe slot that is capable of supplying the required power and airflow as stated in the below table. Physic Adapter Card Size: 5.59 in. x 2.71 in. (142mm x 68.90mm) - Page 99 EMC: CE / FCC / VCCI / ICES / RCM / KC RoHS: RoHS Compliant Notes: a. The ConnectX-6 adapters supplement the IBTA auto-negotiation specification to get better bit error rates and longer cable reaches. This supplemental feature only initiates when connected to...
-
Page 100: Adapter Card And Bracket Mechanical Drawings And Dimensions
For both operational and non-operational states. Adapter Card and Bracket Mechanical Drawings and Dimensions All dimensions are in millimeters. The PCB mechanical tolerance is +/- 0.13mm. Adapter Cards ConnectX-6 PCIe x16 Adapter Card ConnectX-6 PCIe x8 Adapter Card MCX683105AN-HDAT Auxiliary PCIe Connection Card ... -
Page 101: Brackets Dimensions
Brackets Dimensions Tall Bracket Short Bracket... -
Page 102: Pci Express Pinouts Description For Single-Slot Socket Direct Card
This section applies to ConnectX-6 single-slot cards (MCX653105A-EFAT and MCX653106A- EFAT). ConnectX-6 single-slot Socket Direct cards offer improved performance to dual-socket servers by enabling direct access from each CPU in a dual-socket server to the network through its dedicated PCIe interface. The PCIe x16 interface is split into two PCIe x8 in a row, such that each of the PCIe x8 lanes can be connected to a dedicated CPU in a dual-socket server. -
Page 103: Finding The Guid/Mac On The Adapter Card
Finding the GUID/MAC on the Adapter Card Each NVIDIA adapter card has a different identifier printed on the label: serial number and the card MAC for the Ethernet protocol and the card GUID for the InfiniBand protocol. VPI cards have both a GUID and a MAC (derived from the GUID). ... -
Page 104: Document Revision History
Document Revision History Date Revi Comments/Changes sion Aug. 2022 • Added mechanical drawing and board label example for MCX683105AN-HDAT. • Added a note about FRU EEPROM memory component under the Features and Benefits table. Jul. 2022 Updated the "SMBus Interface" under Interfaces. Jan. - Page 105 Date Revi Comments/Changes sion • Updated “Hardware Requirements” • Updated “Product Overview” Dec. 2018 Nov. 2018 Updated “Hardware Requirements” Oct. 2018 First release...
- Page 106 NVIDIA accepts no liability related to any default, damage, costs, or problem which may be based on or attributable to: (i) the use of the NVIDIA product in any manner that is contrary to this document or (ii) customer product designs.
- Page 107 Copyright © 2022 NVIDIA Corporation & affiliates. All Rights Reserved.
Need help?
Do you have a question about the ConnectX-6 and is the answer not in the manual?
Questions and answers