Table of Contents
Advertisement
Quick Links
Advertisement
Table of Contents

Related Manuals for BESV TRB1


Summary of Contents for BESV TRB1
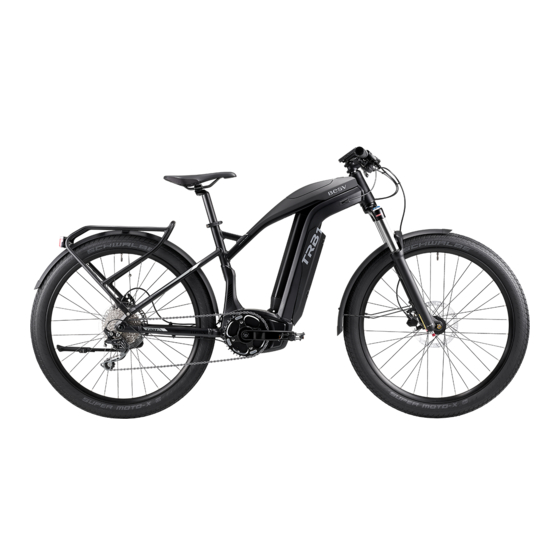
- Page 1 BESV TRB1 Technical Manual...
-
Page 2: Table Of Contents
Contents 1 General Information ..........................3 Electronic components connection .......................... 3 Symbols used ..............................4 2 Safety Instructions ..........................5 Safety symbols ................................ 5 Safety instructions ..............................6 Necessary skills and training ........................... 7 Personal protective equipment .......................... 7 3 Assembly ............................8 Components ................................ -
Page 3: General Information
General Information Electronic components connection The following figure shows the connection of all bike’s electronic components HMI Docking Handlebar Display Switch Motor Speed Battery Key Sensor Lock Battery... -
Page 4: Symbols Used
Symbols used Assembly instructions Please read the instructions thoroughly prior to assembly and follow the safety instructions. Information Indicates important information to be observed in the following sections. Personal protective equipment Indicates the personal protective equipment that must be worn in the following steps. Brose scope of delivery Indicates the parts or materials from Brose's scope of delivery that are to be used in the following steps. -
Page 5: Safety Instructions
Safety Instructions This section contains safety instructions and information that must be followed at every step. Observing the information contained in this section will ensure safe assembly. Safety symbols This document contains symbols indicating possible sources of danger. They help you identify important safety-related information so that you can act accordingly. -
Page 6: Safety Instructions
Safety instructions These safety instructions are designed for your protection and to prevent damage to the product or individual compo- nents. Please read them thoroughly before working on the product: Please retain all safety instructions and information for future reference. Make sure you read and understand the assembly instructions to ensure safe product handling. -
Page 7: Necessary Skills And Training
Necessary skills and training The following conditions must be met to ensure safe operation: Make sure all staff receive a safety briefing about possible dangers. Only suitably trained and instructed staff should be permitted to carry out assembly work. These employees must have received a special briefing about possible dangers and been issued with appropriate information on the Brose e-Bike System. -
Page 8: Assembly
Assembly This section provides a detailed description of how to assemble the Brose e-Bike System. All references to ‘left’ and ‘right’ are from the rider’s perspective (direction of travel). Components 3.1.1 Overview of components to be fitted The Brose material number for the relevant component is indicated below the illustrations. Drive unit Display unit Wiring harness display unit + holder + remote control... -
Page 9: Fitting The Battery Pack
Wiring harnesses Battery pack Battery charger B012-0 B013-0 B014-0 Battery Pack Different models Different models available available Different models available Take all necessary precautions to avoid damaging components, cables and coatings during assembly. WARNING Risk of serious injury Always wear the personal protective equipment indicated during assembly. Watch out for rotating components during assembly. -
Page 10: Drive Unit
Drive unit Drive unit (C16162) 3 x M8 hex serrated flange nut (C34175) Torque wrench SW 13 nut driver M8 hex serrated flange nut = 25-30 Nm 3.3.1 Fitting the drive unit Make sure the assembly position is correct when fitting the drive unit. Take care to avoid bending or pinching any existing cables during assembly. -
Page 11: Cable Assignment
Cable assignment 3.4.1 General information on cable routing CAUTION Risk of product damage Make sure that the connecting cables are correctly routed in the drive unit housing. Do not bend or pinch the connecting cables. Route cables according to your own specifications. 3.4.2 Cable assignment plan Select cable length and route cables accor-... -
Page 12: Display Unit
Display unit Wiring harness + holder + remote control unit, supplied with 2 x M3x16 hexagon socket screws and 1 x M3x10 hexagon socket screw (lock screw) (C54760) Display unit (C54764) SW 2.5 hexagon socket wrench Torque wrench M3x16 hexagon socket screw = 0.5 Nm M3x10 hexagon socket screw (lock screw) = 0.3-0.5 Nm Suitable for handlebar diameter: 31.8 mm 3.5.1... - Page 13 The figure on the right-hand side shows the dimensions of the holder for the display unit. 11.45 45.5 B019-0...
-
Page 14: Remote Control Unit
Remote control unit Wiring harness + holder + remote control unit, supplied with 2 x M3x16 hexagon socket screws and 1 x M3x10 hexagon socket screw (lock screw) (C54760) SW 3 hexagon socket wrench Torque wrench M4x12 hexagon socket screw = 0.1-0.3 Nm Suitable for handlebar diameter: 22.2 mm 3.6.1 Fitting the remote control unit... -
Page 15: Speed Sensor And Spoke Magnet
Speed sensor and spoke magnet Speed sensor with M5x12 Torx screw (C54738) Spoke magnet with M4x6 cross-recessed screw (C54757) Torque wrench Torx T 20 PH02 cross-recessed screw drive M5x12 Torx screw = 0.8 Nm M4x6 cross-recessed screw = 3 Nm Optimal distance speed sensor/spoke magnet = 5-17 mm 3.7.1 Fitting the speed sensor and spoke magnet... -
Page 16: Fitting The Motor Design Covers
Fitting the motor design covers Right-hand motor design cover with 3 x M4x8 hexagon socket screws and 2 x M4x6 hexagon socket screws (C60330) Left-hand motor design cover with 6 x M4x30 hexagon socket screws (C11692) SW 3 hexagon socket wrench Torque wrench M4x6 hexagon socket screw = 0.1-0.3 Nm M4x8 hexagon socket screw = 0.1-0.3 Nm... -
Page 17: Fitting The Spider, Chain Ring And Groove Nut
Fitting the spider, chain ring and groove nut Brose groove nut (C13572) Torque wrench Bottom bracket tool for ISIS bottom bracket Brose groove nut = 25-30 Nm 3.9.1 Connecting the spider and chain rings Assemble spider and chain rings accor-ding to manufacturer's specifications. B025-0 3.9.2 Fitting the spider and chain ring unit... -
Page 18: Fitting The Crank Arms And Pedals
3.10 Fitting the crank arms and pedals Torque wrench SW 8 hexagon socket wrench Hexagon socket screw (dimensions and torque according to manufacturer's specifications) 3.10.1 Fitting the crank arms Before fitting the crank arms, check that you have the correct side. ... -
Page 19: Disassembly
Disassembly DANGER Risk of electric shock Disconnect the power supply before starting to disassemble the product. Remember to always remove the battery pack before working on the Brose e-Bike System. Take care not to damage components, cables and coatings during disassembly. The referenced sections mainly relate to specified tools and work steps and are intended for guidance only. -
Page 20: Spider, Chain Ring And Groove Nut
Spider, chain ring and groove nut Brose groove nut (C13572) Bottom bracket tool for ISIS bottom bracket Standard puller 4.2.1 Removing the spider and chair ring unit Please follow the manufacturer's instructions when removing the spider and chain ring unit. ... -
Page 21: Wiring
Wiring CAUTION Risk of product damage Never grab the cables to pull the connectors out of their connection sockets. 4.4.1 Removing the cables Pull connectors out of the connection sockets by hand or using a suitable tool. For more information, see “Cable assignment” on page 11. Drive unit Drive unit (C16162) 3 x M8 hex serrated flange nut (C34175) -
Page 22: Battery Bracket
Battery Bracket Battery bracket 1 x M4x10 hexagon socket screw, 2 x M6x12 hexagon socket screw (truss head), 2 x M6x10 hexagon socket screws (cap head) and 5 x M6x12 hexagon socket screws (cap head) SW 3 hexagon socket wrench SW 4 hexagon socket wrench SW 5 hexagon socket wrench Torque wrench... -
Page 23: Removing The Battery Bracket
For more further disassembly Remove crank, motor cover and motor unit according to above CH 4.1/4.3/4.5 Disconnect the lock cable and power cable, and remove cable out of the frame carefully. Remove the battery bracket set. -
Page 24: 5.1 Error Codes
Troubleshooting If any problems occur during use of your Brose e-Bike System, first of all check them off against those listed in the table. This will enable you to solve the problem yourself in many cases. Symptom Possible cause Solution approach Display unit (1) and/or Brose e-Bike System Malfunction of battery pack (26) despite full Press the LED button (28) to check whether... -
Page 25: Trouble Shotting
Error code Description Solution approach Fault in motor turning Switch off the system completely and then back on using the LED button (28) on the battery pack (26). If the problem persists, contact your e-Bike dealer. Short-circuit in motor Overheating of motor Reduce the load on the motor by pedaling less or by reducing the assist level.
Need help?
Do you have a question about the TRB1 and is the answer not in the manual?
Questions and answers