Table of Contents
Advertisement
Quick Links
Advertisement
Table of Contents

Related Manuals for Saeco Xelsis Suprema


Summary of Contents for Saeco Xelsis Suprema
-
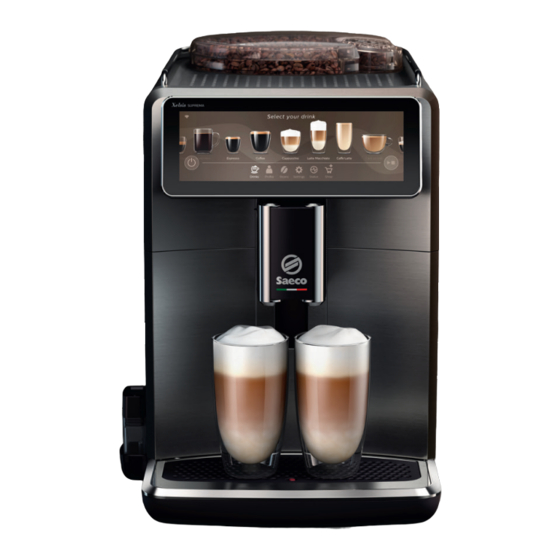
Page 13: Machine Overview (Fig. A)
Introduction Congratulations on your purchase of a Saeco full-automatic coffee machine! To fully benefit from the online support that Saeco offers, go to www.saeco.com/ MyCoffeeMachine and register your product. Note: This machine has been tested with coffee. Although it has been carefully cleaned, there may be some coffee residues left. -
Page 14: Before First Use
Before first use Special functions Special function Purpose With CoffeeMaestro you can personalize your coffee by selecting a pre-set taste profile (Delicato, Intenso, Forte) for your beverage instead of changing the settings yourself. HygieSteam function automatically cleans the milk system, removing microorganisms: use it after brewing cappuccino or other milk-based drinks. -
Page 15: Brewing Drinks
Our durable grinder is made from 100% ceramic to be exceptionally hard and precise. It can be adjusted to your taste with 12-step levels. Brewing drinks General steps 1 Fill the water tank with tap water and fill the bean hopper with coffee beans. 2 Insert the small plug into the socket located on the back of the machine. -
Page 16: Brewing Coffee With Pre-Ground Coffee
You can now adjust the drink to your own preference. 5 Press the start/stop button. For specific drinks, the machine first dispenses milk and then coffee. For a number of other drinks this is the other way around, the machine will first dispense coffee and then milk. -
Page 17: Selecting A Profile
The main settings of the drink are now adjusted accordingly. 4 Press the start/stop button to start brewing the drink. CoffeeEqualizer function After selecting a drink, the CoffeeEqualizer function is activated automatically. You can use the up and down arrows to adjust the following settings: 1 Aroma strength 6 Foam amount 2 Coffee quantity... -
Page 18: Adjusting Machine Settings
2 Tap one of the one-touch drinks icons to select a drink or tap the 'More Drinks' icon to select a different drink. 3 Use the up arrow to set the strength to the top level and select the ExtraShot function. -
Page 19: Restoring Factory Settings
Do not turn the grind setting knob more than one notch at a time to prevent damage to the grinder. 1 Place a cup under the coffee dispensing spout. 2 Remove the lid from the coffee bean hopper. 3 Tap the Espresso icon and then press the start/stop button. - Page 20 AquaClean filter status indication When the AquaClean is active, the status of the AquaClean filter is always visible on the screen as a percentage. If the status of the AquaClean filter is 10% or less, the screen shows a message for 2 seconds each time you switch on the machine. This message advises you to buy a new filter.
-
Page 21: Removing The Brew Group From The Machine
Consult the table below for a detailed description on when and how to clean all detachable parts of the machine. You can find more detailed information and video instructions on www.saeco.com/care. See figure C for an overview of which parts can be cleaned in the dishwasher. - Page 22 Perform the 'Deep Milk Clean' procedure with the Philips milk circuit cleaner. Select 'Deep Milk Clean' in the cleaning menu and follow the instructions on the screen. Go to www.saeco.com/care for detailed video instructions. Milk container Weekly Disassemble the milk...
-
Page 23: Cleaning The Brew Group
Cleaning the brew group Regular cleaning of the brew group prevents coffee residues from clogging up the internal circuits. Visit www.saeco.com/care for support videos on how to remove, insert and clean the brew group. Cleaning the brew group under the tap... -
Page 24: Cleaning The Internal Cappuccinatore Under The Tap
Then move the internal cappuccinatore upwards until it locks into place. 7 Close the door. Visit www.saeco.com/care for detailed video instructions. Descaling procedure Please use Philips descaler only. Under no circumstances should you use a... -
Page 25: Error Codes
Error codes Below you find a list of the error codes showing problems that you can solve yourself. Video instructions are available on www.saeco.com/care . If another error code appears, please contact the Consumer Care Center in your country. For contact details, see the warranty leaflet. -
Page 26: Ordering Accessories
This chapter summarizes the most common problems you could encounter with the machine. Support videos and a complete list of frequently asked questions are available on www.saeco.com/care. If you are unable to solve the problem, contact the Consumer Care Center in your country. For contact details, see the... - Page 27 Problem Cause Solution There are some coffee This machine has been tested with Although it has been carefully cleaned, residues inside my new coffee. there may be some coffee residues left. coffee machine. However, the machine is absolutely new. The drip tray fills up This is normal.
- Page 28 Problem Cause Solution The machine is performing its Brew 5 cups of coffee initially to allow the self-adjustment procedure. This machine to complete its self-adjustment procedure is started automatically procedure. when you use the machine for the first time, when you change to another type of coffee beans or after a long period of non-use.
- Page 29 Problem Cause Solution The pre-ground coffee Switch off the machine and remove the compartment is clogged brew group. Open the lid of the pre- ground coffee compartment and insert the spoon handle into it. Move the handle up and down until the clogged ground coffee falls down.
- Page 30 Problem Cause Solution The milk tubes are clogged. Always store the milk container without the milk tubes in the refrigerator. Leftover milk could accumulate inside the milk tubes and block the flow of milk through the tubes. Rinse the milk tubes before storage.
-
Page 31: Technical Specifications
Problem Cause Solution The water tank is not fully inserted Make sure the water tank is in the correct and air is drawn into the machine. position: remove it and reinsert it by pushing it into the machine as far as possible. - Page 33 © 2021 Koninklijke Philips N.V. All rights reserved xxxx.yyy.zzzz.a (12/6/2022) >75 % recycled paper >75 % papier recyclé...
Need help?
Do you have a question about the Xelsis Suprema and is the answer not in the manual?
Questions and answers