Table of Contents
Advertisement
Quick Links
Advertisement
Table of Contents

Subscribe to Our Youtube Channel
Related Manuals for Launch X-431 Torque HD


Summary of Contents for Launch X-431 Torque HD
- Page 1 Version: V1.00.000 Revised date: 12-03-2021 Statement: All information, specifications and illustrations in this manual are based on the latest information available at the time of release. LAUNCH reserves the rights to make changes at any time without notice.
- Page 2 Statement: LAUNCH owns the complete intellectual property rights for the software used by this product. For any reverse engineering or cracking actions against the software, LAUNCH will block the use of this product and reserve the right to pursue their legal liabilities.
- Page 3 LAUNCH X-431 Torque HD User Manual Using This Manual This manual contains device usage instructions. Some illustrations shown in this manual may contain modules and optional equipment that are not included in your system. The following conventions are used. Bold Text Bold text is used to highlight selectable items such as buttons and menu options.
- Page 4 LAUNCH X-431 Torque HD User Manual diagnostic tool at the same time is dangerous, and could cause a serious traffic accident. Illustrations Illustrations used in this manual are samples, the actual testing screen may vary for each vehicle being tested. Observe the menu titles and on-screen instructions to make correct option selection.
- Page 5 LAUNCH X-431 Torque HD User Manual while testing. Use extreme caution when working around the ignition coil, distributor cap, ignition wires and spark plugs. These components create hazardous voltage when the engine is running. To avoid damaging the tool or generating false data, please make sure the vehicle battery is fully charged and the connection to the vehicle DLC (Data Link Connector) is clear and secure.
- Page 6 LAUNCH X-431 Torque HD User Manual FCC Statement Any Changes or modifications not expressly approved by the party responsible for compliance could void the user’s authority to operate the equipment. This device complies with part 15 of the FCC Rules. Operation is subject to the...
-
Page 7: Table Of Contents
LAUNCH X-431 Torque HD User Manual TABLE OF CONTENTS 1 Introduction ....................1 1.1 Product Profile ..................1 1.2 Package List ................... 1 2 Components & Controls ................3 2.1 Display Tablet ..................3 2.2 SmartLink C Device ................5 2.3 Technical Specifications ................. - Page 8 5.3 Tech 2 Tech ..................35 5.3.1 Interface Layout ................36 5.3.2 Add Friends ................... 36 5.3.3 Start Instant Messaging ..............38 5.3.4 Launch Remote Diagnosis (Device-To-Device) ......39 5.3.5 Launch Remote Diagnosis (Device-To-PC) ........43 5.4 Diagnostic History................. 45 6 Diagnostic Feedback ................47 7 I/M Readiness ....................
- Page 9 LAUNCH X-431 Torque HD User Manual 10.7 Change Password ................60 10.8 Settings ....................60 10.8.1 General ..................60 10.8.2 Shop Information ................. 61 10.8.3 Printer Set ................... 61 10.8.4 Clear Cache ................63 10.8.5 Login/Logout ................63 10.9 Diagnostic Software Clear ..............63 11 Add-on Modules ..................
-
Page 10: Introduction
Inspection and Maintenance testing. Tech 2 Tech: This option aims to help repair shops or technicians launch instant messaging and remote diagnosis, making the repair job getting fixed faster. - Page 11 LAUNCH X-431 Torque HD User Manual local agency or check the package list supplied with the tool together. Item Descriptions Display tablet Indicates the test result. Collects vehicle data and sends it to the tablet for analysis. VCI extension Connects the VCI to the OBD II cable vehicle’s DLC.
-
Page 12: Components & Controls
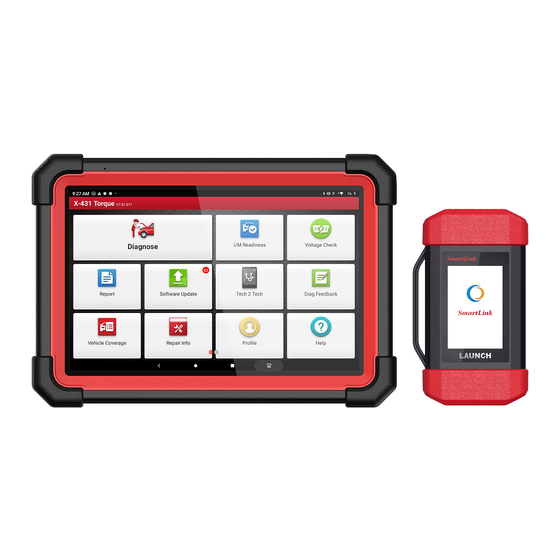
LAUNCH X-431 Torque HD User Manual 2 Components & Controls There are two main components to the diagnostic system: Display tablet – the central processor and monitor for the system (See Chapter 2.1). VCI – the device for accessing vehicle data (See Chapter 2.2). - Page 13 LAUNCH X-431 Torque HD User Manual • Connect to AC outlet for charging. • Connect to PC for data exchange. 4. POWER Key In Off mode, press it for 3 seconds to turn the tablet on. In On mode: • Press it once to activate the LCD if the LCD is off. Press it once to turn off the LCD if the LCD lights up.
-
Page 14: Smartlink C Device
LAUNCH X-431 Torque HD User Manual 2.2 SmartLink C Device The SmartLink C device works as a vehicle communication interface device. It is used to read the vehicle data and then send it to the tablet via wireless (BT) communication or data cable connection. -
Page 15: Technical Specifications
LAUNCH X-431 Torque HD User Manual Warning: The SmartLink C device obtains power through the vehicle's DLC, and it is prohibited to connect to an external DC power supply. No responsibility can be assumed for any damage or loss caused as a result of not strictly following the above method. -
Page 16: Initial Use
Recent App: Views the recently launched applications and running applications. VCI Connection: Shows whether the VCI device is properly connected or not. Screenshot: Captures the current screen. Back: Returns to the previous screen. 3.3 Basic Gestures Single-tap: To select an item or launch a program. -
Page 17: Change System Language
LAUNCH X-431 Torque HD User Manual Double-tap: To zoom in so that the text on a webpage appears in a column that fits your device’s screen. Long press: Tap and hold on the current interface or area until a contextual menu pops up on the screen, and then release it. -
Page 18: Network Setup
3.7 Network Setup The tablet has built-in Wi-Fi that can be used to get online. Once you’re online, you can register your tool, surf the Internet, get apps, send email, launch the remote diagnosis, and check for software updates etc. -
Page 19: Getting Started
4 Getting Started 4.1 Register & Update On the home screen, tap the application icon to launch it, a dialog box similar to the following will pop up on the screen: A. If you are a new user and want to register your tool directly, tap New Customer to start your sign-up. - Page 20 LAUNCH X-431 Torque HD User Manual b) Activate VCI: Input the Serial Number and Activation Code, which can be found in the password envelope. Product SN Product SN Activation code Note: To exit and activate it later, tap Skip. In this case, please activate the VCI by tapping Profile ->...
-
Page 21: Job Menu
LAUNCH X-431 Torque HD User Manual On the download page, tap Update to start downloading. To pause downloading, tap Stop. To resume it, tap Continue. Once download is complete, the system will install the software package automatically. Note: In process of download, please make sure the tablet has a strong Wi-Fi signal. - Page 22 LAUNCH X-431 Torque HD User Manual Name Description Diagnose Configures the tablet as a professional diagnostic tool. I/M Readiness indicates whether or not the various emissions-related systems on the vehicle are operating I/M Readiness properly and are ready for Inspection and Maintenance testing.
-
Page 23: Toolbox
LAUNCH X-431 Torque HD User Manual To manage VCI, reports, change password, configure Profile printer, system settings and logout etc. Includes customer service phone and email, training Help videos, FAQ and user manual of add-on modules. 4.2.1 Toolbox It mainly includes the following items:... -
Page 24: Connections
LAUNCH X-431 Torque HD User Manual 4.3 Connections 4.3.1 Preparation 1. Make sure that the vehicle battery voltage is 11~36V and the ignition is turned on. 2. Find the vehicle’s DLC location: The DLC (Data Link Connector) is typically a standard 16 pin connector where diagnostic tools interface with the vehicle’s... -
Page 25: Communication Setup
LAUNCH X-431 Torque HD User Manual 4.4 Communication Setup After the VCI device is successfully activated and powered on, the VCI device will pair with the tablet automatically. Users have no need to make any setting any more. Once the communication failure occurs, the diagnostic app will pop up some prompt information. -
Page 26: Diagnosis
LAUNCH X-431 Torque HD User Manual 5 Diagnosis Three methods are available for vehicle diagnosis: Smart Diagnosis (AutoDetect), Manual Diagnosis and Tech to Tech Remote Diagnosis. Tap Diagnose on the Job Menu to enter the Diagnose main menu. 1. Auto Detect: Obtains vehicle data from the cloud server to perform quick test via reading VIN, to avoid various defects resulting from step-by-step menu selection. -
Page 27: Smart Diagnosis (Autodetect)
Home: Returns to Job menu screen. Print: Print the current screen. To perform printing, you need to purchase an extra Wi-Fi printer manufactured by LAUNCH or other manufacturers separately and then properly configure the wireless printer following the steps described in Chapter 10.8.3. - Page 28 LAUNCH X-431 Torque HD User Manual 2. Once pairing is complete, the tablet starts reading the vehicle VIN. A. If the VIN can be found from the remote server database, the following screen will appear. • Tap Diagnostic to start a new diagnostic session.
- Page 29 LAUNCH X-431 Torque HD User Manual • To perform other functions, tap Quick Access to directly go to the function selection screen. Choose the desired one to start a new diagnostic session. B. If the tablet failed to access the VIN information, the following screen will...
- Page 30 LAUNCH X-431 Torque HD User Manual • Tap the input field to directly, tap OK. If the VIN exists on the remote server, the system will enter the diagnostic function selection screen. • Tap to launch the VIN recognition module.
-
Page 31: Manual Diagnosis
LAUNCH X-431 Torque HD User Manual of the vehicle. • Tap to scan the VIN barcode. If the VIN barcode cannot be recognized, please manually input the VIN. • Tap to scan the VIN character. If the VIN character cannot be recognized, please manually input the VIN. - Page 32 LAUNCH X-431 Torque HD User Manual On-screen Buttons: Vehicle Coverage: Tap to view the vehicle models that the current diagnostic software covers. What’s new: Tap to view the optimized items and enhancements. Introduction: Tap to check the software function list.
- Page 33 LAUNCH X-431 Torque HD User Manual 3). Select test system: Select the desired system. Take ECM (Engine Control Module) -> Cummins for example. 5). Select test function: Select the desired diagnostic function to proceed.
-
Page 34: Version Information
LAUNCH X-431 Torque HD User Manual Note: Different vehicle has different diagnostic menus. 5.2.1 Version Information This function is used to read the version information of system mode, vehicle VIN, software and ECU. 5.2.2 Read Fault Code This function displays the detailed information of DTC records retrieved from the vehicle’s control system. - Page 35 LAUNCH X-431 Torque HD User Manual On-screen Buttons: Freeze Frame: When an emission-related fault occurs, certain vehicle conditions are recorded by the on-board computer. This information is referred to as freeze frame data. Freeze frame data includes a snapshot of critical parameter values at the time the DTC is set.
-
Page 36: Clear Fault Code
LAUNCH X-431 Torque HD User Manual Post-Repair report and Diagnostic Scan. No matter which type you saved the report as, the report type will be appended as a tag on the upper right corner of the diagnostic report for easier identification. -
Page 37: Read Data Stream
LAUNCH X-431 Torque HD User Manual position with the engine off. Note: Clearing DTCs does not fix the problem(s) that caused the code(s) to be set. If proper repairs to correct the problem that caused the code(s) to be set are not made, the code(s) will appear again and the check engine light will illuminate as soon as the problem that cause the DTC to set manifests itself. - Page 38 LAUNCH X-431 Torque HD User Manual On-screen Buttons: Select Page: Tap to select all items of the current page. Select All: Tap to select all items. To select certain data stream item, just check the box before the item name.
- Page 39 LAUNCH X-431 Torque HD User Manual value, the whole line will display in red. If it complies with the reference value, it displays in blue (normal mode). 3. The indicator 1/X shown on the bottom of the screen stands for the current page/total page number.
- Page 40 LAUNCH X-431 Torque HD User Manual • Combine: This option is mostly used in graph merge status for data comparison. In this case, different items are marked in different colors (maximum 4 items can be displayed on the same screen simultaneously).
- Page 41 LAUNCH X-431 Torque HD User Manual Compare Sample: Tap to select the sample DS file. All the values you customized and saved in process of DS sampling will be imported into the Standard Range (See below) column for your comparison.
- Page 42 LAUNCH X-431 Torque HD User Manual to end recording and save it. The saved file follows the naming rule: It begins with vehicle type, and then the product S/N and ends with record starting time (To differentiate between files, please configure the accurate system time).
-
Page 43: Actuation Test
LAUNCH X-431 Torque HD User Manual data revision screen. Tap the Min./Max. value to change it. After modifying all desired items, tap Save to save it as a sample DS file. All DS files are stored in Profile -> Data Stream Sample. -
Page 44: Special Function
5.3 Tech 2 Tech This option aims to help repair shops or technicians launch instant messaging and remote diagnosis, making the repair job getting fixed faster. Tap Tech 2 Tech on the Job menu, a disclaimer page will pop up on the screen:... -
Page 45: Interface Layout
LAUNCH X-431 Torque HD User Manual 5.3.1 Interface Layout 1. Home button Tap it to navigate to the Job menu screen. 2. Search bar Directly input the registered username of the tool to start searching, and then tap the desired one to add it into your friend list. - Page 46 In the search bar, input the partner’s username and tap Search button next to the search bar to starts searching from Launch’s golo business database. The partner must be the users who have registered their Launch’s diagnostic tools. They may be the following roles: ...
-
Page 47: Start Instant Messaging
(Contact). Or tap Ignore to ignore this request. 5.3.3 Start Instant Messaging Note: The I/M (Instant Messaging) function is open to all users who had Launch’s diagnostic tool equipped with this module. After adding your friends, tap the desired one’s photo to enter the following... -
Page 48: Launch Remote Diagnosis (Device-To-Device)
Camera: Open camera to take pictures. Tap Clear to delete all the partner’s dialog logs. 5.3.4 Launch Remote Diagnosis (Device-To-Device) The display tablet is allowed to launch remote diagnosis with other diagnostic tools (including but not limited to the X-431 Torque series) of Launch family,... - Page 49 LAUNCH X-431 Torque HD User Manual which are equipped with this module. Note: Before performing this operation, please make sure the following no matter which side sends the remote request: Turn on the vehicle power supply. Throttle should be in a closed position.
- Page 50 LAUNCH X-431 Torque HD User Manual Tap “Request control remote device” Wait for partner’s confirmation Start connecting after request confirmed Start Diagnosis Generate diagnostic report Use this option to invite a technician to perform a remote control on your tool.
- Page 51 LAUNCH X-431 Torque HD User Manual Cancel To cancel this operation.
-
Page 52: Launch Remote Diagnosis (Device-To-Pc)
X-431 Torque HD User Manual 5.3.5 Launch Remote Diagnosis (Device-To-PC) Except that the remote diagnosis can be done between different Launch’s diagnostic tools that come loaded with the module, user also can ask for remote control from PC client technician. - Page 53 LAUNCH X-431 Torque HD User Manual 1. Slide the switch Allow device to be connected to the WEB client remote diagnostic device to ON so that the partner can find and connect to this device while using the PC. 2. Notify the partner of the PC client website http://remote.x431.com. When the...
-
Page 54: Diagnostic History
LAUNCH X-431 Torque HD User Manual 4. Tell the partner to check the box Series number and enter the Serial Number provided by you, and then tap Start remote diagnosis to control your device remotely. In process of remote diagnosis, please note the following things: 1) You are not suggested to execute any actions. - Page 55 LAUNCH X-431 Torque HD User Manual listed on the screen in date sequence. • Tap certain vehicle model to view the details of the last diagnostic report. • To delete certain diagnostic history, select it and then tap Delete. To delete all historical records, tap Select All and then tap Delete.
-
Page 56: Diagnostic Feedback
LAUNCH X-431 Torque HD User Manual 6 Diagnostic Feedback This item allows you to feedback your diagnostic problems to us for analysis and troubleshooting. Tap Diag Feedback, a pop-up message will appear: Tap OK, the following 3 options will be displayed on the left column of the screen. - Page 57 LAUNCH X-431 Torque HD User Manual Tap it to view all diagnostic feedback records. Different process states are marked with different colors. C. Offline list Tap it to display all diagnostic feedback logs which have not been submitted successfully due to network failure. Once the handset gets a stable network...
-
Page 58: M Readiness
LAUNCH X-431 Torque HD User Manual 7 I/M Readiness An important part of a vehicle’s OBD II system is the Readiness Monitors, which are indicators used to find out if all of the emissions components have been evaluated by the OBD II system. They are running periodic tests on specific systems and components to ensure that they are performing within allowable limits. - Page 59 LAUNCH X-431 Torque HD User Manual 7) Heated Catalyst 8) A/C system I/M refers to Inspection and Maintenance that is legislated by the Government to meet federal clean-air standards. I/M Readiness indicates whether or not the various emissions-related systems on the vehicle are operating properly and are ready for Inspection and Maintenance testing.
- Page 60 LAUNCH X-431 Torque HD User Manual Note: means not available on this vehicle, means incomplete or not ready, means Completed or Monitor Ok.
-
Page 61: Reports
LAUNCH X-431 Torque HD User Manual 8 Reports This option is used to view, delete or share the saved reports. 1. Health Reports This module stores all diagnostic reports generated in process of vehicle diagnosis. All diagnostic reports are sorted by Date and Make. Tap the desired type to re-arrange and filter it. - Page 62 LAUNCH X-431 Torque HD User Manual 4. ROXIE Reports This option stores all vehicle inspection reports generated by the ROXIE W device that has been bound to the tool. 5. Recorded Data If user records the running parameters or waveform graphs while reading data stream, it will be saved as diagnostic records and appear under this tab.
-
Page 63: Software Update
LAUNCH X-431 Torque HD User Manual 9 Software Update This module enables you to update the diagnostic software & App and frequently used software. 9.1 Update Diagnostic Software & APP Go to Software Update on the Job Menu and tap the Downloaded tab. -
Page 64: Update Frequently Used Software
LAUNCH X-431 Torque HD User Manual To download certain software that is not frequently used, check the box before the vehicle model. Tap Update to start downloading. Once download is finished, the software packages will be installed automatically. 9.2 Update Frequently Used software If the user only intends to update the frequently used software, go to Software Update and tap the Downloaded tab. -
Page 65: Renew Subscription
LAUNCH X-431 Torque HD User Manual 9.3 Renew Subscription If the software subscription is due or expires, the system will prompt you to renew your subscription. Tap Renewal on the bottom of the screen to enter the payment screen. There are two ways available for you to make payment: Subscription Renewal Card (*need to buy it from the local dealer where you purchased the tool) and Credit Card. - Page 66 LAUNCH X-431 Torque HD User Manual 3). Go to update center to update the diagnostic software. 2. Using Credit Card 1). Select Credit Card, and then follow the on-screen instructions to finish the transaction. 2). After payment, go to update center to update the diagnostic software.
-
Page 67: Profile
LAUNCH X-431 Torque HD User Manual 10 Profile This function allows users to manage personal information and VCI etc. 10.1 VCI Management If several VCI devices are activated on this tool, a list of VCI devices will be displayed on the screen. -
Page 68: Roxie Management
LAUNCH X-431 Torque HD User Manual Input the Serial Number and Activation Code (can be found from the included Password Envelope), and then tap Activate to activate it. Note: please be sure to keep the VCI powered on while performing the operation. -
Page 69: Sample
LAUNCH X-431 Torque HD User Manual 10.3 Sample This feature allows you to manage the recorded data stream sample files. 10.4 My Order This item allows you to check the status of all your orders. 10.5 Subscription Renewal Card This item is used to check the status of the subscription renewal card. -
Page 70: Shop Information
This option is designed to establish a wireless connection between the tablet and the Wi-Fi printer (sold separately) while performing printing operations. The App is compatible with the LAUNCH Wi-Fi Printer (sold separately) and System (external printer). For LAUNCH Wi-Fi mini printer, follow the instructions described in the user manual included with the Wi-Fi mini printer to configure it. - Page 71 LAUNCH X-431 Torque HD User Manual • The print service plug-in associated with the printer is already installed on the tablet (Go to Google Play or use the Browser to download and install it). Follow the steps below to proceed: 1.
-
Page 72: Clear Cache
LAUNCH X-431 Torque HD User Manual 6. Select the desired Wi-Fi printer from the list. If the chosen Wi-Fi printer hotspot is open, the tablet can connect it directly. If it is encrypted, a password may be required. Refer to the Wi-Fi printer user manual to get the default password. - Page 73 LAUNCH X-431 Torque HD User Manual Under the Remove Software tab, select the desired diagnostic software and tap Delete, it will disappear from the screen. Note: Removing software may completely delete the software from the tablet. If some software is not used and the tablet runs out of space, please use this feature to...
-
Page 74: Add-On Modules
LAUNCH X-431 Torque HD User Manual 11 Add-on Modules 11.1 TPMS This module allows you to configure the tablet as TPMS activation & diagnostic tool, which provides the ability to trigger TPMS sensor, program TPMS sensor, perform the relearning procedure. It needs to work with the compatible TSGUN device (sold separately). -
Page 75: Mall
LAUNCH X-431 Torque HD User Manual EEPROM, MCU, and EEPROM/FLASH of vehicle engine and gearbox ECU. It needs to work with the specific immobilizer programmer (sold separately). For more details, please refer to the User Manual included with the module. - Page 76 LAUNCH X-431 Torque HD User Manual 9 Synchronization You can transfer media files, screenshots and APK between the PC and tablet. 1. Connect one end of the included charging/data cable to the charging/data I/O port of the tablet, and the other end to the USB port of the PC.
-
Page 77: Faq
LAUNCH X-431 Torque HD User Manual 12 FAQ 1. How to save power? • Please turn off the screen while the tool keeps idle. • Set a shorter standby time. • Decrease the brightness of the screen. • If WLAN connection is not required, please turn it off. - Page 78 6. How to retrieve the login password? Please follow below steps to proceed in case you forgot the login password: 1. Tap the application icon on the home screen to launch it. 2. Tap the Login button on the upper right corner of the screen.
- Page 79 The exclusive remedy for any automotive meter found to be defective is repair or replacement, and LAUNCH shall not be liable for any consequential or incidental damages.
- Page 80 If the unit is determined to be out of warranty, it will be repaired for a nominal service charge plus return freight. Send the unit pre-paid to: Attn: LAUNCH Tech USA 1820 South Milliken Ave. Ontario, CA 91761...
Need help?
Do you have a question about the X-431 Torque HD and is the answer not in the manual?
Questions and answers