Nvidia ConnectX-6 Manual
Infiniband/ethernet adapter cards for ocp spec 3.0
Hide thumbs
Also See for ConnectX-6:
- User manual (107 pages) ,
- User manual (146 pages) ,
- User manual (72 pages)

Subscribe to Our Youtube Channel
Related Manuals for Nvidia ConnectX-6


Summary of Contents for Nvidia ConnectX-6
- Page 1 NVIDIA ConnectX-6 InfiniBand/Ethernet Adapter Cards for OCP Spec 3.0 User Manual Exported on Oct/31/2023 10:25 AM...
-
Page 2: Table Of Contents
Table of Contents Introduction............................9 Products Overview ............................... 9 Features and Benefits ............................10 Operating Systems/Distributions ..........................13 Connectivity ..............................13 Interfaces ............................. 14 InfiniBand Interface ............................14 Ethernet QSFP56 Interfaces ...........................14 PCI Express Interface............................14 LED Interface ..............................14 FRU EEPROM ..............................15 Heatsink Interface ..............................15 SMBus Interface ..............................16 Voltage Regulators ..............................16 CPLD Interface ..............................16... - Page 3 Hardware Requirements ........................... 19 Airflow Requirements ............................19 Software Requirements ............................ 20 Safety Precautions ..............................20 Pre-Installation Checklist ............................21 OCP 3.0 Bracket Replacement Instructions .........................21 OCP 3.0 Adapter Card Installation Instructions......................25 Cables and Modules............................27 Identifying the Card in Your System........................28 Adapter Cards Extraction Instructions ........................30 Safety Precautions ............................
- Page 4 Installing MLNX_OFED Using apt-get ......................... 61 Performance Tuning ............................65 VMware Driver Installation ............................65 Hardware and Software Requirements ........................65 Installing NATIVE ESXi Driver for VMware vSphere ..................... 66 Removing Earlier NVIDIA Drivers .......................... 66 Firmware Programming ............................ 67 Updating Adapter Firmware ........................68...
- Page 5 Troubleshooting ............................70 General Troubleshooting ............................70 Linux Troubleshooting ............................71 Windows Troubleshooting............................72 Specifications............................73 MCX653435A-HDAI/MCX653435M-HDAI Specifications .....................73 MCX653436A-HDAI/MCX653436A-HDAB Specifications ....................74 MCX653435A-EDAI Specifications ..........................76 MCX653435A-HDAE Specifications ..........................78 Board Mechanical Drawing and Dimensions .........................80 Brackets Mechanical Drawings and Dimensions ......................81 Cards with Ejector Latch Bracket ........................81 Cards with Internal Lock Bracket.........................
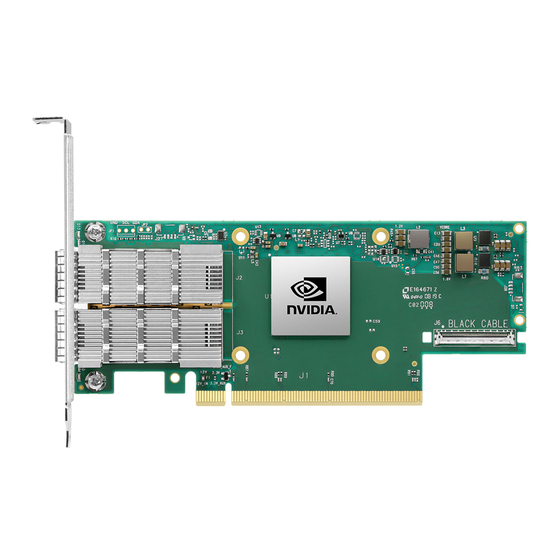
- Page 6 About This Manual This User Manual describes NVIDIA® ConnectX®-6 InfiniBand/Ethernet adapter cards for Open Compute Project (OCP), Spec 3.0. It provides details as to the interfaces of the board, specifications, required software and firmware for operating the board, and relevant documentation.
- Page 7 (100Gb/s), HDR (200Gb/s) and NDR (400Gb/s) cables, including Direct Attach Copper cables (DACs), copper splitter cables, Active Optical Cables (AOCs) and transceivers in a wide range of lengths from 0.5m to 10km. In addition to meeting IBTA standards, NVIDIA tests every product in an end-to-end environment ensuring a Bit Error Rate of less than 1E-15. Read more at LinkX Cables and...
- Page 8 Document Conventions When discussing memory sizes, MB and MBytes are used in this document to mean size in mega Bytes. The use of Mb or Mbits (small b) indicates size in mega bits. In this document PCIe is used to mean PCI Express.
-
Page 9: Introduction
ConnectX-6 OCP 3.0 cards were tested for Shock & Vibe in accordance with NVIDIA specifications and setups as defined in document XXX, as the OCP spec 3.0 available at that time did not contain any S&V definitions. A newer version of the OCP spec 3.0 has defined S&V specifications and NVIDIA is in the midst of retesting these cards to comply with OCP spec 3.0. -
Page 10: Features And Benefits
Uses PCIe Gen 3.0 (8GT/s) or Gen 4.0 (16GT/s) through x16 edge connector. 200Gb/s InfiniBand/Ethernet Adapter ConnectX-6 offers the highest throughput InfiniBand/Ethernet adapter, supporting HDR 200Gb/s InfiniBand and 200Gb/s Ethernet and enabling any standard networking, clustering, or storage to operate seamlessly over any converged network leveraging a consolidated software stack. - Page 11 NVGRE and VXLAN. While this solves network scalability issues, it hides the TCP packet from the hardware offloading engines, placing higher loads on the host CPU. ConnectX-6 effectively addresses this by providing advanced NVGRE and VXLAN hardware offloading engines that encapsulate and de-capsulate the overlay protocol.
- Page 12 PeerDirect™ communication provides high-efficiency RDMA access by eliminating unnecessary internal data copies between components on the PCIe bus (for example, from GPU to CPU), and therefore significantly reduces application run time. ConnectX-6 advanced acceleration technology enables higher cluster efficiency and scalability to tens of thousands of nodes.
-
Page 13: Operating Systems/Distributions
Operating Systems/Distributions • RHEL/CentOS • Windows • FreeBSD • VMware • OpenFabrics Enterprise Distribution (OFED) • OpenFabrics Windows Distribution (WinOF-2) Connectivity • Interoperable with 1/10/25/40/50/100/200 Gb/s Ethernet switches • Passive copper cable with ESD protection • Powered connectors for optical and active cable support... -
Page 14: Interfaces
The adapter card includes special circuits to protect from ESD shocks to the card/server when plugging copper cables. PCI Express Interface The table below describes the supported PCIe interface in ConnectX-6 adapter cards. Supported PCIe Interface Features PCIe Gen 3.0/4.0 (1.1 and 3.0 compatible) through x16 edge connectors Link Rates: 2.5. -
Page 15: Fru Eeprom
SLOT_ID0 and SLOT_ID1 and its capacity is 4Kb. Heatsink Interface A heatsink is attached to the ConnectX-6 IC in order to dissipate the heat from the ConnectX-6 IC. It is attached either by using four spring-loaded push pins that insert into four mounting holes. -
Page 16: Smbus Interface
ConnectX-6 technology maintains support for manageability through a BMC. ConnectX-6 OCP 3.0 adapter can be connected to a BMC using MCTP over SMBus or MCTP over PCIe protocols as if it is a standard NVIDIA OCP 3.0 adapter. For configuring the adapter for the specific manageability solution in use by the server, please contact NVIDIA Support. -
Page 17: Hardware Installation
Hardware Installation Installation and initialization of ConnectX-6 adapter cards for OCP Spec 3.0 require attention to the mechanical attributes, power specification, and precautions for electronic equipment. Safety Warnings Safety warnings are provided here in the English language. For safety warnings in other languages, refer to the Adapter Installation Safety Instructions. -
Page 18: Installation Procedure Overview
CLASS 1 LASER PRODUCT and reference to the most recent laser standards: IEC 60 825-1:1993 + A1:1997 + A2:2001 and EN 60825-1:1994+A1:1996+ A2:20 Installation Procedure Overview The installation procedure of ConnectX-6 adapter cards for OCP Spec 3.0 involves the following steps: Step Procedure Direct Link Check the system’s hardware and software requirements. -
Page 19: System Requirements
A system with a PCI Express x16 slot for OCP spec 3.0 is required for installing the card. Airflow Requirements ConnectX-6 adapter cards are offered with two airflow patterns: from the heatsink to the network ports, and vice versa, as shown below. -
Page 20: Software Requirements
• See Operating Systems/Distributions section under the Introduction section. • Software Stacks - NVIDIA OpenFabric software package MLNX_OFED for Linux, WinOF-2 for Windows, and VMware. See the Driver Installation section. Safety Precautions The adapter is being installed in a system that operates with voltages that can be lethal. Before opening the case of the system, observe the... -
Page 21: Pre-Installation Checklist
It is strongly recommended to use an ESD strap or other antistatic devices. Pre-Installation Checklist Unpack the ConnectX-6 adapter card. Unpack and remove the ConnectX-6 card. Check the parts for visible damage that may have occurred during shipping. Please note that the cards must be placed on an antistatic surface. ... - Page 22 • The new bracket of the desired form factor. • The screws supplied with the new bracket kit. • The required torx tool type as specified in the instructions. Removing the Existing Bracket Using the torx tool type listed in the below table, remove the screws according to the instructions per OCP 3.0 bracket type. Internal Lock Bracket Pull-tab (Thumbscrew) Bracket ...
- Page 23 Internal Lock Bracket Pull-tab Bracket Ejector-Latch Bracket Be careful not to put stress on the LEDs on the adapter card. Save the two screws. Installing the New Bracket Assemble the new bracket onto the card. ...
- Page 24 Internal Lock Bracket Pull-tab Bracket Ejector-Latch Bracket Do not force the bracket onto the adapter card. Ensure that the insulator's front edge is beneath the bracket, as shown in the below figure.
-
Page 25: Ocp 3.0 Adapter Card Installation Instructions
Screw on the OCP 3.0 bracket with the supplied screws that came with the new bracket kit. Use the specified torx tool type and apply the specified torque on the screws per bracket form factor. Internal Lock Bracket Pull-tab Bracket Ejector-Latch Bracket Note that one screw is flat-head 90°... - Page 26 Internal Lock Bracket Pull-tab (Thumbscrew) Bracket Ejector-Latch Bracket Push the card until connectors are in a full mate. Internal Lock Bracket Pull-tab (Thumbscrew) Bracket Ejector-Latch Bracket Secure the card.
-
Page 27: Cables And Modules
Internal Lock Bracket Pull-tab (Thumbscrew) Bracket Ejector-Latch Bracket A clicking sound is heard once the connectors are in a Turn the captive screw clockwise until firmly locked. Close the ejector. full mate. To uninstall the adapter card, see Uninstalling the Card. Cables and Modules Cable Installation All cables can be inserted or removed with the unit powered on. -
Page 28: Identifying The Card In Your System
On Windows Open Device Manager on the server. Click Start => Run, and then enter devmgmt.msc. Expand System Devices and locate your ConnectX-6 adapter card. Right click the mouse on your adapter's row and select Properties to display the adapter card properties window. Click the Details tab and select Hardware Ids (Windows 2012/R2/2016) from the Property pull-down menu. - Page 29 In the Value display box, check the fields VEN and DEV (fields are separated by ‘&’). In the display example above, notice the sub-string “PCI\VEN_15B3&DEV_1003”: VEN is equal to 0x15B3 – this is the Vendor ID of NVIDIA; and DEV is equal to 1018 (for ConnectX-6) – this is a valid NVIDIA PCI Device ID.
-
Page 30: Adapter Cards Extraction Instructions
Adapter Cards Extraction Instructions Follow the below instructions depending on the card form-factor you have purchased. Safety Precautions The adapter is installed in a system that operates with voltages that can be lethal. Before uninstalling the adapter card, please observe the following precautions to avoid injury and prevent damage to system components. - Page 31 Internal Lock Bracket Pull-tab (Thumbscrew) Bracket Ejector-Latch Bracket While holding the heatsink, Rotate the captive screw counterclockwise. Open the ejector latch. gently push the card out of the server. Careful, the heatsink might be hot. Gently pull out the adapter card. Internal Lock Bracket Pull-tab (Thumbscrew) Bracket ...
-
Page 32: Driver Installation
• VMware Driver Installation Windows Driver Installation For Windows, download and install the latest WinOF-2 for Windows software package available via the NVIDIA website at: WinOF-2 webpage. Follow the installation instructions included in the download package (also available from the download page). -
Page 33: Downloading Winof-2 Driver
On an x64 (64-bit) machine, the output will be “AMD64”. Go to the WinOF-2 web page at: https://www.nvidia.com/en-us/networking/ > Products > Software > InfiniBand Drivers (Learn More) > Nvidia WinOF-2. Download the .exe image according to the architecture of your machine (see Step... -
Page 34: Attended Installation
• Attended Installation An installation procedure that requires frequent user intervention. • Unattended Installation An automated installation procedure that requires no user intervention. Attended Installation The following is an example of an installation session. Double click the .exe and follow the GUI instructions to install MLNX_WinOF2. [Optional] Manually configure your setup to contain the logs option (replace “LogFile”... - Page 35 Click Next in the Welcome screen. Read and accept the license agreement and click Next.
- Page 36 8. Select the target folder for the installation.
- Page 37 • If the user has a standard NVIDIA® card with an older firmware version, the firmware will be updated accordingly. However, if the user has both an OEM card and a NVIDIA® card, only the NVIDIA® card will be updated.
- Page 38 10. Select a Complete or Custom installation, follow Step a onward.
- Page 39 Select the desired feature to install: • Performances tools - install the performance tools that are used to measure performance in user environment • Documentation - contains the User Manual and Release Notes • Management tools - installation tools used for management, such as mlxstat •...
- Page 40 b. Click Next to install the desired tools.
- Page 41 Click Install to start the installation. In case firmware upgrade option was checked in Step 7, you will be notified if a firmware upgrade is required (see ). ...
-
Page 43: Unattended Installation
Click Finish to complete the installation. Unattended Installation If no reboot options are specified, the installer restarts the computer whenever necessary without displaying any prompt or warning to the user. To control the reboots, use the /norestart or /forcerestart standard command-line options. The following is an example of an unattended installation session. - Page 44 Install the driver. Run: MLNX_WinOF2-[Driver/Version]_<revision_version>_All_-Arch.exe /S /v/qn [Optional] Manually configure your setup to contain the logs option: MLNX_WinOF2-[Driver/Version]_<revision_version>_All_-Arch.exe /S /v/qn /v”/l*vx [LogFile]" [Optional] if you wish to control whether to install ND provider or not (i.e., MT_NDPROPERTY default value is True). MLNX_WinOF2-[Driver/Version]_<revision_version>_All_Arch.exe /vMT_NDPROPERTY=1 [Optional] If you do not wish to upgrade your firmware version (i.e.,MT_SKIPFWUPGRD default value is False).
-
Page 45: Firmware Upgrade
Manual. Attach the adapters back to VM with the DDA tools. Linux Driver Installation This section describes how to install and test the MLNX_OFED for Linux package on a single server with a NVIDIA ConnectX-6 adapter card installed. Prerequisites Requirements... -
Page 46: Downloading Mlnx_Ofed
The image’s name has the format . MLNX_OFED_LINUX-<ver>-<OS label><CPU arch>.iso You can download and install the latest OpenFabrics Enterprise Distribution (OFED) software package available via the NVIDIA web site at nvidia.com/en-us/networking → Products → Software → InfiniBand Drivers → NVIDIA MLNX_OFED Scroll down to the Download wizard, and click the Download tab. - Page 47 • Discovers the currently installed kernel • Uninstalls any software stacks that are part of the standard operating system distribution or another vendor's commercial stack • Installs the MLNX_OFED_LINUX binary RPMs (if they are available for the current kernel) • Identifies the currently installed InfiniBand and Ethernet network adapters and automatically upgrades the firmware Note: To perform a firmware upgrade using customized firmware binaries, a path can be provided to the folder that contains the firmware binary files, by running --fw-image-dir.
- Page 48 If you regenerate kernel modules for a custom kernel (using ), the packages installation will not involve --add-kernel-support automatic regeneration of the initramfs. In some cases, such as a system with a root filesystem mounted over a ConnectX card, not regenerating the initramfs may even cause the system to fail to reboot.
-
Page 49: Installation Procedure
For the list of installation options, run: ./mlnxofedinstall --h Installation Procedure This section describes the installation procedure of MLNX_OFED on NVIDIA adapter cards. Log in to the installation machine as root. Mount the ISO image on your machine. host1# mount -o ro,loop MLNX_OFED_LINUX-<ver>-<OS label>-<CPU arch>.iso /mnt Run the installation script. - Page 50 For unattended installation, use the --force installation option while running the MLNX_OFED installation script: /mnt/mlnxofedinstall --force MLNX_OFED for Ubuntu should be installed with the following flags in chroot environment: ./mlnxofedinstall --without-dkms --add-kernel-support --kernel <kernel version in chroot> --without-fw-update --force For example: ./mlnxofedinstall --without-dkms --add-kernel-support --kernel 3.13.0-85-generic --without-fw-update --force Note that the path to kernel sources (--kernel-sources) should be added if the sources are not in their default location.
- Page 51 Status: No matching image found Error message #2: The firmware for this device is not distributed inside NVIDIA driver: 0000:01:00.0 (PSID: IBM2150110033) To obtain firmware for this device, please contact your HW vendor. Case A: If the installation script has performed a firmware update on your network adapter, you need to either restart the driver or reboot your system before the firmware update can take effect.
-
Page 52: Installation Results
In case your machine has an unsupported network adapter device, no firmware update will occur and the error message below will be printed. "The firmware for this device is not distributed inside NVIDIA driver: 0000:01:00.0 (PSID: IBM2150110033) To obtain firmware for this device, please contact your HW vendor."... -
Page 53: Driver Load Upon System Boot
Driver Load Upon System Boot Upon system boot, the NVIDIA drivers will be loaded automatically. To prevent the automatic load of the NVIDIA drivers upon system boot: Add the following lines to the "/etc/modprobe.d/mlnx.conf" file. blacklist mlx5_core blacklist mlx5_ib Set “ONBOOT=no” in the "/etc/infiniband/openib.conf" file. -
Page 54: Installation Logging
In case your machine has an unsupported network adapter device, no firmware update will occur and the error message below will be printed. "The firmware for this device is not distributed inside NVIDIA driver: 0000:01:00.0 (PSID: IBM2150110033) To obtain firmware for this device, please contact your HW vendor."... -
Page 55: Additional Installation Procedures
Mount the ISO image on your machine and copy its content to a shared location in your network. # mount -o ro,loop MLNX_OFED_LINUX-<ver>-<OS label>-<CPU arch>.iso /mnt Download and install NVIDIA's GPG-KEY: The key can be downloaded via the following link: http://www.mellanox.com/downloads/ofed/RPM-GPG-KEY-Mellanox # wget http://www.mellanox.com/downloads/ofed/RPM-GPG-KEY-Mellanox... - Page 56 warning: rpmts_HdrFromFdno: Header V3 DSA/SHA1 Signature, key ID 6224c050: NOKEY Retrieving key from file:///repos/MLNX_OFED/<MLNX_OFED file>/RPM-GPG-KEY-Mellanox Importing GPG key 0x6224C050: Userid: "Mellanox Technologies (Mellanox Technologies - Signing Key v2) <support@mellanox.com>" From : /repos/MLNX_OFED/<MLNX_OFED file>/RPM-GPG-KEY-Mellanox this ok [y/N]: Check that the key was successfully imported. # rpm -q gpg-pubkey --qf '%{NAME}-%{VERSION}-%{RELEASE}\t%{SUMMARY}\n' | grep Mellanox...
- Page 57 # mount -o ro,loop MLNX_OFED_LINUX-<ver>-<OS label>-<CPU arch>.iso /mnt Build the packages with kernel support and create the tarball. # /mnt/mlnx_add_kernel_support.sh --make-tgz <optional --kmp> -k $(uname -r) -m /mnt/ Note: This program will create MLNX_OFED_LINUX TGZ rhel7.6 under /tmp directory. Do you want to continue?[y/N]:y See log file /tmp/mlnx_iso.4120_logs/mlnx_ofed_iso.4120.log Checking all needed packages are installed...
- Page 58 repo id repo name status mlnx_ofed MLNX_OFED Repository rpmforge RHEL 6Server - RPMforge.net - dag 4,597 repolist: 8,351 Installing MLNX_OFED Using the YUM Tool After setting up the YUM repository for MLNX_OFED package, perform the following: View the available package groups by invoking: # yum search mlnx-ofed- mlnx-ofed-all.noarch : MLNX_OFED all installer package...
- Page 59 (User Space packages only where: mlnx-ofed-all Installs all available packages in MLNX_OFED mlnx-ofed-basic Installs basic packages required for running NVIDIA cards mlnx-ofed-guest Installs packages required by guest OS mlnx-ofed-hpc Installs packages required for HPC mlnx-ofed-hypervisor Installs packages required by hypervisor OS...
- Page 60 mlnx-ofed-guest-3.17.4-301.fc21.x86_64.noarch : MLNX_OFED guest installer package for kernel 3.17.4-301. fc21.x86_64 (without KMP support) mlnx-ofed-hpc-3.17.4-301.fc21.x86_64.noarch : MLNX_OFED hpc installer package for kernel 3.17.4-301.fc21 .x86_64 (without KMP support) mlnx-ofed-hypervisor-3.17.4-301.fc21.x86_64.noarch : MLNX_OFED hypervisor installer package for kernel 3.17.4-301.fc21.x86_64 (without KMP support) mlnx-ofed-vma-3.17.4-301.fc21.x86_64.noarch : MLNX_OFED vma installer package for kernel 3.17.4-301.fc21 .x86_64 (without KMP support)
-
Page 61: Installing Mlnx_Ofed Using Apt-Get
Log into the installation machine as root. Extract the MLNX_OFED package on a shared location in your network. It can be downloaded from https://www.nvidia.com/en-us/networking/ → Products → Software→ InfiniBand Drivers. Create an apt-get repository configuration file called "/etc/apt/sources.list.d/mlnx_ofed.list" with the following content: deb file:/<path to extracted MLNX_OFED package>/DEBS ./ Download and install NVIDIA's Technologies GPG-KEY. ... - Page 62 # apt-key list 1024D/A9E4B643 2013-08-11 Mellanox Technologies <support@mellanox.com> 1024g/09FCC269 2013-08-11 Update the apt-get cache. # sudo apt-get update Setting up MLNX_OFED apt-get Repository Using --add-kernel-support Log into the installation machine as root. Mount the ISO image on your machine and copy its content to a shared location in your network. # mount -o ro,loop MLNX_OFED_LINUX-<ver>-<OS label>-<CPU arch>.iso /mnt Build the packages with kernel support and create the tarball. ...
- Page 63 # tar -xvf /tmp/MLNX_OFED_LINUX-5.2-0.5.5.0-rhel7.6-x86_64-ext.tgz Create an apt-get repository configuration file called "/etc/apt/sources.list.d/mlnx_ofed.list" with the following content: deb [trusted=yes] file:/<path to extracted MLNX_OFED package>/DEBS ./ Update the apt-get cache. # sudo apt-get update Installing MLNX_OFED Using the apt-get Tool After setting up the apt-get repository for MLNX_OFED package, perform the following: View the available package groups by invoking: ...
- Page 64 mlnx-ofed-all-user-only - MLNX_OFED all-user-only installer package (User Space packages only) mlnx-ofed-vma-eth - MLNX_OFED vma-eth installer package (with DKMS support) mlnx-ofed-vma - MLNX_OFED vma installer package (with DKMS support) mlnx-ofed-dpdk-upstream-libs-user-only - MLNX_OFED dpdk-upstream-libs-user-only installer package (User Space packages only) mlnx-ofed-basic-user-only - MLNX_OFED basic-user-only installer package (User Space packages only) mlnx-ofed-basic-exact - MLNX_OFED basic installer...
-
Page 65: Performance Tuning
Depending on the application of the user's system, it may be necessary to modify the default configuration of network adapters based on the ConnectX® adapters. In case that tuning is required, please refer to the Performance Tuning Guide for NVIDIA Network Adapters. -
Page 66: Installing Native Esxi Driver For Vmware Vsphere
4.16.8.8-1OEM.650.0.0.4240417 PartnerSupported 2017-01-31 nmlx5-rdma 4.16.8.8-1OEM.650.0.0.4240417 PartnerSupported 2017-01-31 After the installation process, all kernel modules are loaded automatically upon boot. Removing Earlier NVIDIA Drivers Please unload the previously installed drivers before removing them. To remove all the drivers:... -
Page 67: Firmware Programming
Log into the ESXi server with root permissions. List all the existing NATIVE ESXi driver modules. (See Step 4 in Installing NATIVE ESXi Driver for VMware vSphere.) Remove each module: #> esxcli software vib remove -n nmlx5-rdma #> esxcli software vib remove -n nmlx5-core ... -
Page 68: Updating Adapter Firmware
Updating Adapter Firmware Each adapter card is shipped with the latest version of qualified firmware at the time of manufacturing. However, NVIDIA issues firmware updates occasionally that provide new features and bug fixes. To check that your card is programmed with the latest available firmware version, download the mlxup firmware update and query utility. - Page 69 Restart needed for updates to take effect. Log File: /var/log/mlxup/mlxup-yyyymmdd.log...
-
Page 70: Troubleshooting
Troubleshooting General Troubleshooting • Ensure that the adapter is placed correctly Server unable to find the adapter • Make sure the adapter slot and the adapter are compatible Install the adapter in a different PCI Express slot • Use the drivers that came with the adapter or download the latest •... -
Page 71: Linux Troubleshooting
-d <mst_device> q ibstat Ports Information ibv_devinfo To download the latest firmware version, refer to the NVIDIA Update and Query Utility. Firmware Version Upgrade cat /var/log/messages Collect Log File dmesg >> system.log journalctl (Applicable on new operating systems) -
Page 72: Windows Troubleshooting
Windows Troubleshooting From the Windows desktop choose the Start menu and run: msinfo32 Environment Information To export system information to a text file, choose the Export option from the File menu. Assign a file name and save. Download and install MFT: MFT Documentation Mellanox Firmware Tool (MFT) Refer to the User Manual for installation instructions. -
Page 73: Specifications
Specifications MCX653435A-HDAI/MCX653435M-HDAI Specifications Please make sure to install the ConnectX-6 OCP 3.0 card in a PCIe slot that is capable of supplying 35W. Size: 2.99 in. x 4.52 in (76.00mm x 115.00mm) Physical Connector: Single QSFP56 InfiniBand and Ethernet (copper and optical) -
Page 74: Mcx653436A-Hdai/Mcx653436A-Hdab Specifications
Typical power for ATIS traffic load. c. Airflow numbers are measured while using NVIDIA HDR optic cable. The maximum allowed temperature (internal sensor) for NVIDIA HDR optic cable is 75C. d. The non-operational storage temperature specifications apply to the product without its package. - Page 75 Size: 2.99 in. x 4.52 in (76.00mm x 115.00mm) Physical Connector: Dual QSFP56 InfiniBand and Ethernet (copper and optical) Retention Mechanism: Internal Lock Ethernet: 200GBASE-CR4, 200GBASE-KR4, 200GBASE-SR4, 100GBASE-CR4, 100GBASE-KR4, 100GBASE-SR4, 50GBASE-R2, 50GBASE-R4, 40GBASE-CR4, 40GBASE-KR4, Protocol Support 40GBASE-SR4, 40GBASE-LR4, 40GBASE-ER4, 40GBASE-R2, 25GBASE-R, 20GBASE-KR2, 10GBASE-LR,10GBASE-ER, 10GBASE-CX4, 10GBASE-CR, 10GBASE-KR, SGMII, 1000BASE- CX, 1000BASE-KX, 10GBASE-SR InfiniBand: IBTA v1.3 Auto-Negotiation...
-
Page 76: Mcx653435A-Edai Specifications
Typical power for ATIS traffic load. c. Airflow numbers are measured while using NVIDIA HDR optic cable. The maximum allowed temperature (internal sensor) for NVIDIA HDR optic cable is 75C. d. The non-operational storage temperature specifications apply to the product without its package. - Page 77 InfiniBand: IBTA v1.3 Auto-Negotiation : 1X/2X/4X SDR (2.5Gb/s per lane), DDR (5Gb/s per lane), QDR (10Gb/s per lane), FDR10 (10.3125Gb/s per lane), FDR (14.0625Gb/s per lane), EDR (25Gb/s per lane) port, HDR100 (2 lane x 50Gb/s per lane), HDR (50Gb/s per lane) port Data Rate: Ethernet 1/10/25/40/100 Gb/s...
-
Page 78: Mcx653435A-Hdae Specifications
The non-operational storage temperature specifications apply to the product without its package. MCX653435A-HDAE Specifications Please make sure to install the ConnectX-6 OCP 3.0 card in a PCIe slot that is capable of supplying 35W. Size: 2.99 in. x 4.52 in (76.00mm x 115.00mm) Physical... - Page 79 CE / FCC / VCCI / ICES / RCM RoHS RoHS compliant a.ConnectX-6 adapters supplement the IBTA auto-negotiation specification to get better bit error rates and longer cable reaches. This supplemental feature only initiates when connected to another NVIDIA InfiniBand product. b. Typical power for ATIS traffic load. ...
-
Page 80: Board Mechanical Drawing And Dimensions
Board Mechanical Drawing and Dimensions All dimensions are in millimeters. The PCB mechanical tolerance is +/- 0.13mm. ConnectX-6 for OCP 3.0 Mechanical Drawing and Dimensions ... -
Page 81: Brackets Mechanical Drawings And Dimensions
Brackets Mechanical Drawings and Dimensions All dimensions are in millimeters. The brackets mechanical tolerance is +/- 0.25mm. Cards with Ejector Latch Bracket Cards with Internal Lock Bracket... -
Page 82: Dual-Port Cards With Internal Lock Bracket
Dual-port Cards with Internal Lock Bracket... -
Page 83: Monitoring
Monitoring Thermal Sensors The adapter card incorporates the ConnectX IC, which operates in the range of temperatures between 0°C and 105°C. Three thermal threshold definitions impact the overall system operation state: • Warning – 105°C: On managed systems only: When the device crosses the 105°C thresholds, a Warning Threshold message is issued by the management SW, indicating to system administration that the card has crossed the warning threshold. -
Page 84: Finding The Guid/Mac And Serial Number On The Adapter Card
Finding the GUID/MAC and Serial Number on the Adapter Card Each NVIDIA adapter card has a different identifier printed on the label: serial number and the card MAC for the Ethernet protocol and the card GUID for the InfiniBand protocol. VPI cards have both a GUID and a MAC (derived from the GUID). -
Page 86: Document Revision History
Document Revision History Date Description of Changes May. 2023 Updated Specifications to include non-operational storage temperature specifications Apr. 2023 Added a bracket mechanical drawing for dual-port cards with internal lock bracket Sep. 2022 Added a note on FRU EEPROM memory under the Features and Benefits table. Feb. - Page 87 NVIDIA product and may result in additional or different conditions and/or requirements beyond those contained in this document. NVIDIA accepts no liability related to any default, damage, costs, or problem which may be based on or attributable to: (i) the use of the NVIDIA product in any manner that is contrary to this document or (ii) customer product designs.
- Page 88 INDIRECT, SPECIAL, INCIDENTAL, PUNITIVE, OR CONSEQUENTIAL DAMAGES, HOWEVER CAUSED AND REGARDLESS OF THE THEORY OF LIABILITY, ARISING OUT OF ANY USE OF THIS DOCUMENT, EVEN IF NVIDIA HAS BEEN ADVISED OF THE POSSIBILITY OF SUCH DAMAGES. Notwithstanding any damages that customer might incur for any reason whatsoever, NVIDIA’s aggregate and cumulative liability towards customer for the products described herein shall be limited in...
Need help?
Do you have a question about the ConnectX-6 and is the answer not in the manual?
Questions and answers