Table of Contents
Advertisement
Quick Links
Advertisement
Table of Contents

Subscribe to Our Youtube Channel
Related Manuals for Essilor Instruments VISION-R 700


Summary of Contents for Essilor Instruments VISION-R 700
- Page 1 SER MANUAL...
-
Page 2: Table Of Contents
Modify the type of occlusion 4. Manage the patient data a. Add a patient folder 5. Access with contextual assistance V. P ERFORMANCE OF TESTS DURING A REFRACTION EXAMINATION Vision-R 700 - Essilor automatic phoropter > V1 - 09-2020... - Page 3 Magnetic and electromagnetic immunity e. Electromagnetic immunity, radio frequencies 4. Cleaning & Maintenance a. Cleaning and disinfection the head b. Cleaning the console 5. Intended use XII. QR C Vision-R 700 - Essilor automatic phoropter > V1 - 09-2020...
-
Page 4: Introduction
I. I NTRODUCTION... -
Page 5: Main Features Of The Refraction Head
Warning: a hazardous situation that, if not avoided, could result in death or serious injury. Danger: a hazardous situation that, if not avoided, will result in death or serious injury. Vision-R 700 - Essilor automatic phoropter > V1 - 09-2020... - Page 6 Indicate the humidity limits to which the medical device can be exposed in complete safety. Indicate the limits of atmospheric pressure to which the medical device can be exposed in complete safety. Vision-R 700 - Essilor automatic phoropter > V1 - 09-2020...
-
Page 7: Copyright
The instrument is a system that can save, store and share relative information with the patient such as refraction measurements, name or photo. It is the device user’s responsibility to comply with patient data confidentiality regulations, applicable on their site. Vision-R 700 - Essilor automatic phoropter > V1 - 09-2020... -
Page 8: Instrument
II. I NSTRUMENT... -
Page 9: Instrument Inspection
Screw M5 (x4) for fixing the power supply box if needed Plastic bag with a cable support and 1 screw, to fix on the power supply box Cleaning swab (x20) Disinfectant wipes (x100) Optional accessories Printer Printer paper (x5) Vision-R 700 - Essilor automatic phoropter > V1 - 09-2020... -
Page 10: Installation And Connection
> Despite the holes, the power supply box does not need to be fixed. > But, if you want to fix the power supply horizontally you need to use 4 M5 screws. Vision-R 700 - Essilor automatic phoropter > V1 - 09-2020... -
Page 11: Connection
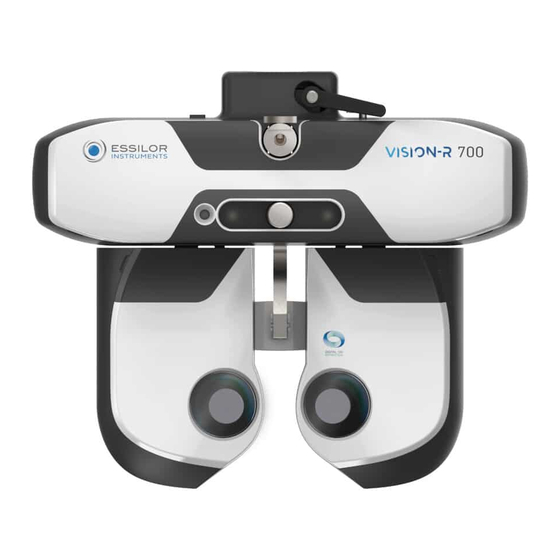
5. Identification and locating of the elements a. Complete unit The main components that make up the Vision-R 700 unit are: A refraction head A console A power supply box Vision-R 700 - Essilor automatic phoropter > V1 - 09-2020... -
Page 12: Refraction Head - (Ref. V01112)
Used to measure the Vertex distance of the patient and to light up their eyes if necessary during the pupillary distance adjustment. Rotation axis 360° rotation movement, during the handling of the instrument. Vision-R 700 - Essilor automatic phoropter > V1 - 09-2020... -
Page 13: Console - (Ref. V01Kb1)
Keys [+/-] Used for increasing or decreasing the power values. Key “+”: allows you to increment the positive power values. Key “-”: allows you to increment the negative power values. Vision-R 700 - Essilor automatic phoropter > V1 - 09-2020... -
Page 14: Power Supply Box - (Ref. V01Ps1)
Used for the connection to the phoropter head. USB port Ethernet port Console connection port Used for the connection to the console On/off switch Network isolation switch. Power cable socket Vision-R 700 - Essilor automatic phoropter > V1 - 09-2020... -
Page 15: Test Presentation Screen
Used to visualize, personalize the test in progress and to include the answers of the patient. Management of the patient data and user help display Allows you to: Manage the patient data. Display and call up memorized data. Display the contextual assistance. Vision-R 700 - Essilor automatic phoropter > V1 - 09-2020... -
Page 16: Adjustments Before The Examination
III. A DJUSTMENTS BEFORE THE EXAMINATION... -
Page 17: Configure The Instrument
Restoring the instrument data can be carried out: On the console keyboard, by quickly pressing on the key [Clear]. On the touch screen, by pressing on > Vision-R 700 - Essilor automatic phoropter > V1 - 09-2020... -
Page 18: Pass From The Manual Mode To The Automatic Mode
The importing and exporting of the instrument data can be carried out: On the console keyboard, by pressing on the [Import] or [Export] keys. On the touch screen, by pressing on > Vision-R 700 - Essilor automatic phoropter > V1 - 09-2020... -
Page 19: Setting Up The Patient
The adjustment below can be carried out via the touch screen or the keyboard on the console. It is advisable to adjust: The horizontality of the refraction head with the knob located on the top of the refraction head, Monocular or Binocular pupillary distances Vision-R 700 - Essilor automatic phoropter > V1 - 09-2020... -
Page 20: Adjusting The Horizontality Of The Refraction Head
The adjustment of the inter-pupillary distances is carried out via the console touch screen by pressing on > The reticles are placed in front of the patient's eyes and the right and left distance values are displayed. Vision-R 700 - Essilor automatic phoropter > V1 - 09-2020... - Page 21 The adjustment of the inter-pupillary distances can be carried out on the console: By turning the central button clockwise or counterclockwise. By pressing on the keys [+/-]. By pressing the PD portion And entering the values on the keyboard. Vision-R 700 - Essilor automatic phoropter > V1 - 09-2020...
-
Page 22: Adjusting The Forehead Rest
To refresh the image, press the touchscreen on the eye and a new picture will be taken. d. Going from far-vision mode to near-vision mode Going from far-vision mode to near-vision mode can be performed: On the console keyboard, by pressing on the key [NV/FV]. Vision-R 700 - Essilor automatic phoropter > V1 - 09-2020... - Page 23 Far vision Near vision Switching to near vision mode modifies, the inter-pupillary distances, the convergence of the refraction head and the lighting up of the LEDs. Vision-R 700 - Essilor automatic phoropter > V1 - 09-2020...
-
Page 24: Basic Functions For Performing A Refraction Examination
IV. B ASIC FUNCTIONS FOR PERFORMING A REFRACTION EXAMINATION... -
Page 25: Choose A Test
If you wish to deactivate this function, go into manual mode on the touch screen by pressing on: > (displayed by default). Red/Green test example Manual Jackson cross cylinder example Vision-R 700 - Essilor automatic phoropter > V1 - 09-2020... -
Page 26: Start An Existing Test Program
This recommendation is calculated by the information imported into the phoropter. For the most completed recommendation the ECP will need to enter objective measurement, lensmeter and age of the patient. Then, the recommended program will appear in bold. Vision-R 700 - Essilor automatic phoropter > V1 - 09-2020... -
Page 27: Checking The Optical Module
(S, C, A, ADD, Hor., Ver.) for the simultaneous inspection of both eyes. Vision-R 700 - Essilor automatic phoropter > V1 - 09-2020... -
Page 28: Change The Controlled Settings
On the touch screen, by pressing on the setting that you wish to check (on the value of the right eye or the left eye or on the setting). On the console keyboard, by pressing on the central button. Vision-R 700 - Essilor automatic phoropter > V1 - 09-2020... -
Page 29: Modify The Power And The Incrementation Steps
> In this case a numeric keypad is displayed. Enter the desired value and confirm Once input is complete, do not forget to save the initial prescription in the memory of your choice. Vision-R 700 - Essilor automatic phoropter > V1 - 09-2020... -
Page 30: Modify The Incrementation Steps
The unit and the step value depend on this setting. The modification of the incrementation step can be carried out: On the touch screen, by selecting the desired step value. Vision-R 700 - Essilor automatic phoropter > V1 - 09-2020... -
Page 31: Value Locking Function
> By default, the step is 1D. e. Value locking function The value locking function is useful if you wish to lock in different values. To do this, press on the lock icon. Vision-R 700 - Essilor automatic phoropter > V1 - 09-2020... -
Page 32: Mask An Eye And Check The Filters
Check and modify the filters To personalize the filters to be applied in front of the eyes of the patient, press and hold on one of the two eyes. Vision-R 700 - Essilor automatic phoropter > V1 - 09-2020... -
Page 33: Modify The Type Of Occlusion
Modify the type of occlusion To personalize the type of occlusion to be applied in front of the unchecked eye, press and hold on one of the two eyes. A window opens: Vision-R 700 - Essilor automatic phoropter > V1 - 09-2020... -
Page 34: Manage The Patient Data
The action is manual. If a type of occlusion is applied, the adjustment is temporary up to the start of a new session. 4. Manage the patient data a. Add a patient folder To create a patient folder press on > Vision-R 700 - Essilor automatic phoropter > V1 - 09-2020... -
Page 35: Access With Contextual Assistance
To access with contextual assistance, press on The phraseology of the tests as well as actions to be performed on the console are displayed on the right part of the screen. Vision-R 700 - Essilor automatic phoropter > V1 - 09-2020... - Page 36 ASIC FUNCTIONS FOR PERFORMING A REFRACTION EXAMINATION If you wish to display more information on the test, press on [More help] An additional help page is displayed: Press on to close the page. Vision-R 700 - Essilor automatic phoropter > V1 - 09-2020...
-
Page 37: Performance Of Tests During A Refraction Examination
V. P ERFORMANCE OF TESTS DURING A REFRACTION EXAMINATION... -
Page 38: Patient Refraction Data Input
Data importing from Essibox.com The patient refraction data importing from Essibox.com can be done: On the touch screen, by pressing on > On the console keyboard, by pressing on the [Import] Vision-R 700 - Essilor automatic phoropter > V1 - 09-2020... -
Page 39: Manual Entry
Press on the setting which you wish to enter. Sphere (S) Cylinder (C) Axis (A) The selection can be done independently for the right eye, the left eye or in binocular. Vision-R 700 - Essilor automatic phoropter > V1 - 09-2020... - Page 40 2 - Using of the console keyboard Press on the keys [R, BINO or L]. Turn the console keyboard’s central button clockwise (-) or counterclockwise (+). > The values of the selected setting change. Vision-R 700 - Essilor automatic phoropter > V1 - 09-2020...
- Page 41 Do not forget to save the data entered in one of the available memories (here [Lensmeter]). 3 - Data memorization Press: > The list of the available memories is displayed. Vision-R 700 - Essilor automatic phoropter > V1 - 09-2020...
-
Page 42: Standard Tests
1. The previous measured refraction on the glasses of the patient, 2. The objective refraction: measured with the auto-refractometer or a skiascope, determined by an aberrometer. 3. The patient folder. Vision-R 700 - Essilor automatic phoropter > V1 - 09-2020... - Page 43 E of Snellen Once you have made your choice, press on the icon of the desired test. The visualization of the test is then displayed at the bottom of the main screen: Vision-R 700 - Essilor automatic phoropter > V1 - 09-2020...
- Page 44 Choice of optotypes scale Scales of acuity Types Icons Display zone at the bottom of the screen letters numbers Rational progression C of Landolt scale E of Snellen stylized figures Vision-R 700 - Essilor automatic phoropter > V1 - 09-2020...
- Page 45 Display of the visual acuity values To display acuity values, press on The acuity values are displayed below the table with the visual acuity value(s) currently being presented highlighted in blue. Vision-R 700 - Essilor automatic phoropter > V1 - 09-2020...
- Page 46 It is possible to choose four display types of optotypes: 1. In table 2. In column 3. In line 4. In isolated optotype Display types Display in zone at the bottom of the screen Table Column Vision-R 700 - Essilor automatic phoropter > V1 - 09-2020...
- Page 47 In this section the ECP can fix the focus of the patient on a specific area. Press . Now it is possible to focus from: Arrow Block Underline Opposite lines Choice of contrast type To choose a type of contrast, press on Vision-R 700 - Essilor automatic phoropter > V1 - 09-2020...
- Page 48 (or describe them).” > If the patient manages to make out 3 out of 5 optotypes on the same line of acuity, the level of acuity is considered as achieved. Vision-R 700 - Essilor automatic phoropter > V1 - 09-2020...
- Page 49 The value of the visual acuity of patient (RE, LE or BINO) changes into blue and is saved in the section “Patient Data”, in the memory “Visual Acuity”. > It appears in the dial on the right of the screen. Vision-R 700 - Essilor automatic phoropter > V1 - 09-2020...
- Page 50 > - darker on the red background add -0.25 D (*) to the value of the sphere. Either: On the console keyboard, by pressing on the key " - ". Vision-R 700 - Essilor automatic phoropter > V1 - 09-2020...
- Page 51 This can occur in particular with young patients who can be sometimes appear short- sighted by the excessive inclusion of their accommodation. It is thus important to make sure not to let it result in a too concave (or negative) sphere value. Vision-R 700 - Essilor automatic phoropter > V1 - 09-2020...
- Page 52 This cylinder is automatically generated by the optical module through combination with the patient’s correction. It is not an additional lens added in front of the correction of the patient (as in the traditional phoropters). Vision-R 700 - Essilor automatic phoropter > V1 - 09-2020...
- Page 53 - clearer horizontal lines add +0.25 D (*) to the value of the sphere. Either: On the console keyboard, by pressing on the key “+”. On the console keyboard, by turning the central button anticlockwise (*). Vision-R 700 - Essilor automatic phoropter > V1 - 09-2020...
- Page 54 The reversed cross cylinder test takes place in three stages: 1. Cylinder axis search 2. Cylinder power search 3. Sphere power adjustment (based on the cylinder value) Vision-R 700 - Essilor automatic phoropter > V1 - 09-2020...
- Page 55 The reversed cross cylinder test is displayed in the display area in the bottom of the touch screen of the console. > The dot test is displayed on the test presentation screen. Vision-R 700 - Essilor automatic phoropter > V1 - 09-2020...
- Page 56 It is important to always propose the three options: Position 1 Position 2 Same > The position change appears in the test presentation area in two ways: Blue highlighting of positions 1 and 2 Cross cylinder position change Vision-R 700 - Essilor automatic phoropter > V1 - 09-2020...
- Page 57 The axis (the negative cylinder of the correction and the cross cylinder) rotate in the direction of the negative axis of the patient's preferred position (*). > Repeat the test until the patient no longer sees any difference between the two positions in the cross cylinder. Vision-R 700 - Essilor automatic phoropter > V1 - 09-2020...
- Page 58 The no change in cylinder axis is by default 5° but can be adjusted in settings. It can also be modified during the examination by selecting it in the steps display area. Vision-R 700 - Essilor automatic phoropter > V1 - 09-2020...
- Page 59 To show the dots in position 2, press the "2" key on the console keyboard. It is important to always propose the three options: Position 1 Position 2 Same Vision-R 700 - Essilor automatic phoropter > V1 - 09-2020...
- Page 60 The negative cylinder value of the correction is then increased by -0.25 D. > Repeat the test until the patient no longer sees any difference between the two positions in the cross cylinder. Vision-R 700 - Essilor automatic phoropter > V1 - 09-2020...
- Page 61 Example: if -0.50 D cylinder has been added, the sphere should be adjusted by +0.25 D (*). This adjustment, by correction of the sphere, is manual. You can do it: On the console keyboard, by pressing on the central button. Vision-R 700 - Essilor automatic phoropter > V1 - 09-2020...
- Page 62 It will allow the patient to simultaneously take a different red/green test for each eye. It will then be possible to simultaneously search for red/green equality for each eye, with both eyes open. Vision-R 700 - Essilor automatic phoropter > V1 - 09-2020...
- Page 63 Two polarized letter lines appear on the test presentation screen. The patient can see: The upper line with the right eye (*) The bottom line with the left eye (*) Vision-R 700 - Essilor automatic phoropter > V1 - 09-2020...
- Page 64 - sharper letters on the top line, add +0.25 D (*) to the value of the sphere. To do this: Press the [R] key on the console keyboard. On the console keyboard: Press the “+” key. Vision-R 700 - Essilor automatic phoropter > V1 - 09-2020...
- Page 65 Or, turn the center button counterclockwise (*). > Repeat the operation until the patient sees a balance in the blurred vision between the top and bottom lines or its reversal. Vision-R 700 - Essilor automatic phoropter > V1 - 09-2020...
-
Page 66: Near Vision Tests
This information corresponds to the phoropter default settings. The sphere variation step is by default 0.25 D but can be adjusted in settings. b. Near vision tests Near vision tests to be preformed with rod and near point chart. Vision-R 700 - Essilor automatic phoropter > V1 - 09-2020... -
Page 67: Smart Tests
> The test view window in the bottom of the touch screen of the console allows you to choose under which conditions the test will be performed (RE, LE, Bino). Vision-R 700 - Essilor automatic phoropter > V1 - 09-2020... - Page 68 The center part of the screen appears grayed out. It is no longer possible to modify the values of controlled settings, the masks, the filters or the adjustments of the instrument. > The corresponding table of optotypes is displayed on the test presentation screen. Vision-R 700 - Essilor automatic phoropter > V1 - 09-2020...
- Page 69 - darker on the red background. Select the answer by either: Pressing on the corresponding answer on the touch screen. On the console keyboard, by pressing on the key " - ". Vision-R 700 - Essilor automatic phoropter > V1 - 09-2020...
- Page 70 The response window also allows for: Return to the beginning of the test Visualize the progress of the test Three status indications on the progression bar are available. Cancel the last answer Vision-R 700 - Essilor automatic phoropter > V1 - 09-2020...
- Page 71 On the touch screen by pressing on [Next]. On the console keyboard, by pressing on the central button. The "next" option will only appear if the link is deactivated on the smart test. Vision-R 700 - Essilor automatic phoropter > V1 - 09-2020...
-
Page 72: Refraction Comparison (Bluetouch)
With the action button which can be set up in a personalized test. [New refraction] tab This value will give the refraction done last and if you press on the block those powers will be displayed. Vision-R 700 - Essilor automatic phoropter > V1 - 09-2020... - Page 73 Example: How to compare new refraction vs previous refraction Once the datas are updated, click on: > The following screen appear: Vision-R 700 - Essilor automatic phoropter > V1 - 09-2020...
-
Page 74: Alert Function In The Comparison Screen
This auto alert function is an option, which can be activated and personalized in the [Setting] menu. When activated, this alert will appear in red as shown in the image below. Vision-R 700 - Essilor automatic phoropter > V1 - 09-2020... -
Page 75: Other Tests
Note that this function can be activated, deactivated or personalized in the following [Setting] screen. When activated, the ECP can decide whether to see this “Alert” when the dioptric difference is greater than 0.50 D or when greater than 1.00 D. 5. Other tests Vision-R 700 - Essilor automatic phoropter > V1 - 09-2020... -
Page 76: Measurement
VI. M EASUREMENT... -
Page 77: Vertex Distance Measurement
The distance can easily be adjusted by using the rotating button located in front side of the Vision-R, turning it clockwise to reduce the Vertex distance and anti-clockwise to increase it. Vision-R 700 - Essilor automatic phoropter > V1 - 09-2020... - Page 78 Two vertical lines appear on the images and the practitioner just has to align them with the apex of the cornea, either binoculary or minoculary. On the console keyboard: by turning the central button clockwise or counterclockwise, or by pressing on the keys [+/-]. Vision-R 700 - Essilor automatic phoropter > V1 - 09-2020...
- Page 79 > M SER MANUAL EASUREMENT > The value(s) of the Vertex distance(s) are automatically displayed and can then be recorded. A Vertex distance of 10 to 20 mm is appropriate. Vision-R 700 - Essilor automatic phoropter > V1 - 09-2020...
-
Page 80: Refraction Programs
VII. R EFRACTION PROGRAMS... -
Page 81: Standard Programs
Editing and customizing programs and tests Customize program The Vision-R 700 allows you to personalize your test sequence (program). Personalizing a program refers to the program itself and not the detail within the test. Vision-R 700 - Essilor automatic phoropter > V1 - 09-2020... - Page 82 > R SER MANUAL EFRACTION PROGRAMS Press on > Click on and click on [+] to create a new program. > The following page appears: Vision-R 700 - Essilor automatic phoropter > V1 - 09-2020...
- Page 83 By default the name is [New program]. At this stage, it is possible to modify the name of the program. Name the program and click on > The new program appears in italics in the list of programs. Vision-R 700 - Essilor automatic phoropter > V1 - 09-2020...
- Page 84 Select a first test from the test bank, favorites or the library (by clicking on the corresponding tab at the top of the right column). The test contents appear in the center block of the screen. The contents of the program appear in the left section. Vision-R 700 - Essilor automatic phoropter > V1 - 09-2020...
- Page 85 You can click on [Stop] to return to the list of programs, edit tests or favorites before you exit edit mode by validating with the key Customize test The Vision-R 700 allows you to edit the specific test in great detail. Vision-R 700 - Essilor automatic phoropter > V1 - 09-2020...
- Page 86 Select the test to customize (on the left column). You can then click on: > to remove the selected test >to edit and change the test > to duplicate the test Vision-R 700 - Essilor automatic phoropter > V1 - 09-2020...
- Page 87 Allows you to rename the test [Color] Allows you to change the color of the corner (top right) of the icon [Help] Allows you to change the text of the test help. Vision-R 700 - Essilor automatic phoropter > V1 - 09-2020...
- Page 88 Display Personalize your chart to be initiated with this test: [Summary] Help wording with each default test. [Rename] Name your test as you wish. [Color] Choose your color for recognition. Vision-R 700 - Essilor automatic phoropter > V1 - 09-2020...
-
Page 89: Favorite Tests Selection
Click on the [Favoris] tab in the left column. Select a first test from the test bank or library (by clicking on the corresponding tab at the top of the right column). Vision-R 700 - Essilor automatic phoropter > V1 - 09-2020... - Page 90 > to remove the selected test > to edit and change the test > to duplicate the favorite > You can change the order of the tests by dragging and dropping in the test section. Vision-R 700 - Essilor automatic phoropter > V1 - 09-2020...
- Page 91 The following page appears: Click on: to confirm to cancel Click and hold on the name of the favorite to change its name or order in the list of favorites. Vision-R 700 - Essilor automatic phoropter > V1 - 09-2020...
- Page 92 Finally, click on: to confirm to cancel A favorite test section can be removed if more than one section is present. If only one section is present, it cannot be removed. Vision-R 700 - Essilor automatic phoropter > V1 - 09-2020...
-
Page 93: Instrument Settings
VIII. I NSTRUMENT SETTINGS... -
Page 94: Description Of The Settings Menus
It is possible to modify the default settings of the instrument by pressing on > > The instrument settings page is displayed. 1. Description of the settings menus a. General information The general information menu has two pages: 1. [General] 2. [Devices] Vision-R 700 - Essilor automatic phoropter > V1 - 09-2020... - Page 95 Access to the remote maintenance Access to the statistics and the log files Recording on SIS Deletion of recording Connection refreshing After-sales service Restoration of the factory default settings 2 - Page [Devices] Vision-R 700 - Essilor automatic phoropter > V1 - 09-2020...
- Page 96 Launch of all the autotests List of available autotests Display of errors codes and comments Number of autotests launch Test of LEDs (horizontality / near-vision light) Launch cancellation Launch confirmation Vision-R 700 - Essilor automatic phoropter > V1 - 09-2020...
- Page 97 On the [Device] page, press on > The following page appears: Not used Test of the speaker Not used If you press a button on the console, then the buttons are displayed in blue. Vision-R 700 - Essilor automatic phoropter > V1 - 09-2020...
-
Page 98: Measurement Data
Allows user to combine or separate the addition of the near vision from/to the far-vision sphere. [Prism format] [Mask type] The choice of the type of mask during a test in monocular vision. [PD type] Define the defaut settings of monocular or binocular pupillary distance. Vision-R 700 - Essilor automatic phoropter > V1 - 09-2020... - Page 99 Conversion to "infinite". None or a fix value. [Comparison Screen] Default setting on comparison screen. [Comparison Screen Alert] Alert ECP if the difference is higher than selected value. (Value to appear in red in Bluetouch). Vision-R 700 - Essilor automatic phoropter > V1 - 09-2020...
-
Page 100: Import/Export Data
Determining whether rounding of the axis should be performed automatically. Once the adjustments are made, press on: to confirm. to cancel. c. Import/Export data The Import/export menu has two pages: 1. Import/export 2. Memory Vision-R 700 - Essilor automatic phoropter > V1 - 09-2020... - Page 101 Defines the way data is processed during export: Sent to the printer Sent to the Essibox Both [Horizontal axis] Selecting default value of either 0 or 180°. [Minus Rounding] Selecting the minus rounding. 2 - Page [Memory] Vision-R 700 - Essilor automatic phoropter > V1 - 09-2020...
- Page 102 Waste bin Allows you to remove an export data type. Allows you to edit and change an export data type. It is possible to rename the memories (long press on name). Vision-R 700 - Essilor automatic phoropter > V1 - 09-2020...
-
Page 103: Communication Settings
The element settings menu consists of three pages: Chart Essibox 2.0 1 - Page [Chart] [Mirror Mode] Mirror Mode Activation (according to configuration) [IR Channel] Used during set up of chart system for communication Vision-R 700 - Essilor automatic phoropter > V1 - 09-2020... - Page 104 > I SER MANUAL NSTRUMENT SETTINGS 2 - Page [Ip] [Ip adress] Can be [Static] or [Dhcp] 3 - Page [Essibox 2.0] Vision-R 700 - Essilor automatic phoropter > V1 - 09-2020...
-
Page 105: Local Settings
Regional Settings 1 - [Chart Display] Page [Visual acuity format] Define the visual acuity format depending on local usage. ETDRS progression Configuration of the ETDRS progression : logMar or Snellen. Vision-R 700 - Essilor automatic phoropter > V1 - 09-2020... - Page 106 Sets the default display on the right side of the console screen 3 - Page [Regional Settings] [Language] Sets the display of the console language [Time Zone] Sets the display of the console time zone Vision-R 700 - Essilor automatic phoropter > V1 - 09-2020...
-
Page 107: Backups Restore
Export of refraction head data to an USB key Export of all the instrument data Settings export Export of the technician data Export of tests, favorites and test programs Statistics exportation Vision-R 700 - Essilor automatic phoropter > V1 - 09-2020... - Page 108 Importing of data from an USB key to the refraction head Settings importing Importing a memory update Importing new tests, favorites and test programs Statistics importing Once the adjustments are made, press on: to confirm. to cancel. Vision-R 700 - Essilor automatic phoropter > V1 - 09-2020...
-
Page 109: Troubleshooting
IX. T ROUBLESHOOTING... - Page 110 Change the console or change the refraction head If the problem has not been resolved after taking the measures listed above, contact your local distributor immediately. Your dealer has been trained by Essilor. Vision-R 700 - Essilor automatic phoropter > V1 - 09-2020...
-
Page 111: Technical Data
X. T ECHNICAL DATA... - Page 112 Console (keyboard + screen): Keyboard: 28 x 22 cm Screen display: 10.4” Total weight: 3.0 Kg Power supply: Length: 16.3 cm Width: 19.3 cm Depth: 5.8 cm Total weight : 1.0 Kg Vision-R 700 - Essilor automatic phoropter > V1 - 09-2020...
- Page 113 Class: NC Input/Output Power supply box: AC input 100-240V; 50/60 Hz; 1,2-0,5A DC output: 24V Power output: 48 VA Refraction head: AC input 24V, 48VA Console: AC input 24V, 48VA Vision-R 700 - Essilor automatic phoropter > V1 - 09-2020...
-
Page 114: Cautions & Warnings
XI. C & W AUTIONS ARNINGS... -
Page 115: Exclusion Of Liability Clause
[800 hPA; 1060 hPA] Storage [- 10°C; + 55°C] [10 %; 95 %] [700 hPA; 1060 hPA] Transport [- 40°C; + 70°C] [10 %; 95 %] [700 hPA; 1060 hPA] Vision-R 700 - Essilor automatic phoropter > V1 - 09-2020... -
Page 116: Power Supply
Do not touch the power plug with wet hands. This may cause an electric shock. If you do not use the instrument for an extended period, disconnect the power cord from the outlet. Vision-R 700 - Essilor automatic phoropter > V1 - 09-2020... -
Page 117: Computer Network
Please contact your distributor for detailed information on this instrument. Vision-R 700 - Essilor automatic phoropter > V1 - 09-2020... -
Page 118: Disposal
In case the device stop working, reset the device, restart test from the beginning, do not use the previous data for make prescription. Vision-R 700 - Essilor automatic phoropter > V1 - 09-2020... -
Page 119: Length Of Cables, Cords, Etc
The product may be used in all Harmonic current emission (IEC61000-3- Class A establishments, including domestic sites and those connected directly to the public Complies low-voltage power Voltage variations, voltage fluctuations Complies and flicker (IEC61000-3-3) Vision-R 700 - Essilor automatic phoropter > V1 - 09-2020... -
Page 120: Magnetic And Electromagnetic Immunity
(UPS, Single phase: 0° etc.). 0% U for 250 cycles at Voltage Interruptions (IEC61000-4-11) 50Hz for 300 cycles at 60Hz is the AC mains voltage before applying the test level. Vision-R 700 - Essilor automatic phoropter > V1 - 09-2020... -
Page 121: Electromagnetic Immunity, Radio Frequencies
To disinfect the areas likely to be in contact with the patient (face shields and forehead rest cover), use disinfectant wipes for medical use. Disinfect these areas between testing each patient. Vision-R 700 - Essilor automatic phoropter > V1 - 09-2020... -
Page 122: Cleaning The Console
Operating principle: basic operating cycle is: patient installation / patient's eyes centering / refraction protocol selection & launch / refraction result recovery (data export, printing or manual recording) / removal from patient. No contraindications. Vision-R 700 - Essilor automatic phoropter > V1 - 09-2020... - Page 123 > C & W SER MANUAL AUTIONS ARNINGS No undesirable side-effects. Vision-R 700 - Essilor automatic phoropter > V1 - 09-2020...
-
Page 124: Qr Code
XII. QR C... - Page 125 > QR C SER MANUAL Vision-R 700 - Essilor automatic phoropter > V1 - 09-2020...
- Page 126 > QR C SER MANUAL Vision-R 700 - Essilor automatic phoropter > V1 - 09-2020...
- Page 127 > QR C SER MANUAL Vision-R 700 - Essilor automatic phoropter > V1 - 09-2020...
- Page 128 Essilor Instruments USA 8600 W. Catalpa Avenue, Suite 703 Chicago, IL 60656 Phone: 855.393.4647 Email: info@essilorinstrumentsusa.com www.essilorinstrumentsusa.com...
Need help?
Do you have a question about the VISION-R 700 and is the answer not in the manual?
Questions and answers