Table of Contents
Advertisement
Quick Links
[1] INTRODUCTION
These models are a modified version of the AR-M350U/M350N, providing a different printing speed.
This Service Manual, therefore, describes only the different points from the AR-M350U/M350N and supplementary items.
For items which are not described in this Service Manual, refer to the following Service Manuals and Parts Guides.
•AR-M350/M450
•AR-P350/P450
•AR-M350U/N•AR-M450U/N
•AR-NC5J
Note: Depending on the option, additional service documentation may be required.
[2] LIST OF DIFFERENCES FROM AR-M350U/N
A.Product composition
Base Engine
Print Speed
Multi Function Controller
Multi Function Controller(for U-Model)
Print Server Card
Printer Extension Kit
Hardware
MFP-ROM
*1: Installation of the AR-P14 on U-series machines provides functions equivalent to the M-series machines.
Parts marked with "
To maintain the safety and performance of the machine, use only the replacement parts specified.
MODEL
Service Manual : 00ZARM350/A1E
Service Manual : 00ZARP350/A2E
Service Manual : 00ZARM350UA1E
Service Manual : 00ZARNC5J/A1E
Model Name
Network Printer Option Model
AR-M350U
35ppm
AR-M11
Not Available
Standard
AR-NC5J
Option
AR-P14
Option
Only U-type
35/45ppm
" are important for maintaining the safety of the machine.
SHARP CORPORATION
CODE : 00ZARM280UA1E
LASER PRINTER
AR-M280U/M280N
Parts Guide : 00ZARM450/P1E
Parts Guide : 00ZAR350LPP1/
NIC Standard Model
AR-M280U
AR-M350N
28ppm
35ppm
Not Available
Standard
Standard
Not Available
Option
Standard
Option
Standard
Only U-type
Only M-type
28ppm
35/45ppm
This document was been published to faciliate
after sales service only.
The contents are subject to change without notice.
Circuit Diagram : 00ZARM350/C1/
Circuit Diagram : 00ZARP350/C1/
Note
AR-M280N
28ppm
Standard
Not Available
No registered
as a product
Standard
Standard
*1
Only M-type
28ppm
Advertisement
Table of Contents

Related Manuals for Sharp AR-M350N


Summary of Contents for Sharp AR-M350N
- Page 1 Note: Depending on the option, additional service documentation may be required. [2] LIST OF DIFFERENCES FROM AR-M350U/N A.Product composition Model Name Network Printer Option Model NIC Standard Model Note Base Engine AR-M350U AR-M280U AR-M350N AR-M280N Print Speed 35ppm 28ppm 35ppm 28ppm Multi Function Controller AR-M11 Not Available...
- Page 3 • Power supply unit (AR-DC1) MFP model (45ppm) (Without network printer function) AR-M450U MFP model (28ppm) (With NIC card (standard)) AR-M280N MFP model (35ppm) (With NIC card (standard)) AR-M350N MFP model (45ppm) (With NIC card (standard)) AR-M450N AR-M280U CONFIGURATION 3-1...
- Page 4 3. List of combination of peripheral devices A.AR-M280U As shown in the table below, some other peripheral devices ( B ) may be needed for installation of a peripheral device ( A ) and some peripheral devices cannot be installed together. Related for scanner feature B/W scanner module/DSPF AR-EF1...
- Page 5 B.AR-M280N As shown in the table below, some other peripheral devices ( B ) may be needed for installation of a peripheral device ( A ) and some peripheral devices cannot be installed together. Related for scanner feature B/W scanner module/DSPF AR-EF1 Scanner rack AR-RK1...
- Page 6 [4] SPECIFICATIONS (in mm) Paper size 1. Basic Specification A. Base Engine (1) Form AR-M280U/M280N Console type (2) Engine speed Japanese postcard Paper size AR-M280U/N Ledger A4, 8.5" x 11" 28ppm Legal A5R/5.5" x 8.5"R 28ppm Foolscap 28ppm Letter B4/8.5" x 14 16ppm Executive A3/11"...
- Page 7 B. Document Feeding Equipment (4) Print Function a. General (1) One-drawer tray (included in the base engine) Paper feed method One-drawer tray When an optional PS3 expansion kit is installed Sizes to be fed A4, B5, 8.5" x 11" Function PCL5e/ Paper capacity 500 sheets (at 80g/m²)
- Page 8 f. Others <Operation-assured Memory> (As of March / 2001) When an optional PS3 expansion Manufacture Capacity Model name RAM CHIP name Note kit is installed Kingston 128MB KVR133X64C3/128 HYB39S64800BT-7.5 Function PCL5e/ Technology 128MB KVR133X64C3-128 D456821G-A75-9JF PCL6 (Windows) (Macintosh) 256MB KVR133X64C3-256 HY57V28820AT-H Watermark*7 Viking 64MB...
- Page 9 (9) Functions (6) Exposure/Copy Quality Process Transmitting Rotating transmission Available Exposure mode Binary: Text(auto/manual), Text/photo, Photo functions (to be matched with FAX 256 levels: Not provided specification) Manual steps 9 steps Long length original Not Available Smoothing Standard transmission Toner save mode Standard Verification stamp function Option...
- Page 10 [5] CONSUMABLE PARTS 1.Supply system table Note: The consumable parts are the same as those of the AR-M350/M450 series and the AR-P350/P450. A.USA Name Content Life Product name Remark Toner (Black) Toner(Toner : Net Weight 814g) AR-450NT *Life setup is based on A4 6% (*1 AR-450NT-J) Developer Developer(Developer : Net Weight 450g)
- Page 11 2.Production number identification A. Drum cartridge C. Developer The lot number, printed on the front side flange, is composed of 10 digits, The lot number is composed of 8 digit, and each digit indicates as each digit showing the following content: following.
- Page 12 4.Different point of 50K drum and 80K drum 50K drum 80K drum Marking No mark on Flange White paint mark on rear side of Flange Lot number 2 digit : [ T ] 2 digit : [ S ] Flange assembly direction Painting upper limit : F side Painting upper limit : R side Color band on Drum...
- Page 13 AR-D13 /AR-DC1 AR-PK1 electric devices AR-D14 /AR-DC1 AR-NS2 installed? Main unit AR-NC5J (Not required for the AR-M350N/M450N) AR-P14 (Only AR-M350U/M450U) Extended memory [Electrical setting/adjustment] Install duplex / bypass device. 1) Installation of driver software, setting, Duplex/bypass and operation check...
- Page 14 2. AR-P14 installing procedure <3>Remove the control PWB unit. Remove the five screws that fix the control PWB unit to the main unit of <Before installation> the printer. Then, hold the two grips and pull out the control PWB unit to remove it This installation procedure is provided for use with the from the main unit.
- Page 15 <6>Connect the cables to the control PWB. 3) Prepare to enable the printer expansion function. Connect all the cables that have been removed in <2> to the original To enable the printer expansion function, use the keys on the operation positions of the control PWB unit.
- Page 16 [7] MAINTENANCE 1. Self print of set values Use SIM 22-6 to print the set values (machine settings) and jam history. These values must be printed before execution of maintenance or disassembly procedures. 2. Maintenance System Table The maintenance items and positions are the same as those of the AR-M350 series. However, the maintenance cycle differs. A.
- Page 17 B. Engine section For disassembly procedures, refer to the AR-P350/P450 Service Manual. Maintenance cycle : 80K O Check (Clean, replace, or adjust as necessary.) X Clean Replace Adjust Lubricate Move position When Unit name Part name 160k 240k 320k Remark calling Drum peripheral Drum...
- Page 18 C. Peripheral devices Maintenance cycle : 80K O Check (Clean, replace, or adjust as necessary.) X Clean Replace Adjust Lubricate Move position When Option name Part name 160k 240k 320k Remark calling Paper feed Paper feed Note 3 (O)X + Manual feed separation section rollers Separation pad...
- Page 19 [8] ADJUSTMENTS 6) The unit stops after 30 sec of output. 1. Process section A. High voltage output adjustment (1) Developing bias output check and setup 1) Remove the rear cabinet to allow checking of the high voltage monitor output pin. 2) Execute the simulation of the target high voltage.
- Page 20 [9] SIMULATION The following simulations have been changed. 8-17 Main code 8 Purpose Operation test, check Function (Content) Used to set and check the transfer roller output. Section Process (OPC drum, developing, transfer, cleaning) Purpose Adjustment Item Operation Function (Content) Used to check and adjust the transfer charger Operation/Procedure Enter the output value to be adjusted with current and its control circuit.
- Page 21 *1: Only when this value is 0, control is performed with the actual measurement value of process Thermistor. Main code 44 If it is not 0, control is forcibly performed. *2: When the drum motor standby time is greater than this value, the 44-1 correction of SIM 44-1 Vb1 is performed.
- Page 22 <List of set values 1> 45PPM 28PPM Main code 51 35PPM 51-2 0 TRAY Paper feed tray selection (1 - 5) SELECT Purpose Adjustment 1 PRINT Copy start (Initial value) Function (Content) Used to adjust the contact pressure of paper on START the resist roller in each section (machine paper feed, duplex paper feed, SPF paper feed).
- Page 23 Default setup for supporting 100K drums 61-3 1) When the value is changed from 127 to 255 by SIM 44-1, the Purpose Adjustment following default values of the laser power setup must be adjusted. Function (Content) Used to adjust the scanner (exposure) laser Drum 100K(80K) power (absolute value) in the FAX reception...
-
Page 25: Laser Printer (Multi Function)
PARTS GUIDE LASER PRINTER (MULTI FUNCTION) AR-M280N AR-M280U MODEL CONTENTS 1 Exteriors 2 Left door unit 3 PS roller unit 4 TC unit 7 Fusing unit 8 Delivery turn over unit 9 MC unit F Process unit G Developer unit H Controller BOX unit J Rear frame section 1 K Rear frame section 2... - Page 26 DEFINITION The definition of each Rank is as follows and also noted in the list A: Parts necessary to be stocked as High usage parts. B: Parts necessary to be stocked as Standard usage parts. C: Low usage parts. D: Parts necessary for refurbish. E: Unit parts recommended to be stocked for efficient after sales service.
- Page 27 Delivery turn over unit PRICE PART PARTS CODE DESCRIPTION RANK MARK RANK N F A N P 0 0 6 9 F C Z Z P G I D M 1 8 9 6 F C Z 1 Paper exit upper PG L D A I U 0 6 2 6 F C Z 2 Paper exit follower roller fixing plate N B L T H 0 3 2 7 F C Z 1...
- Page 28 Developer unit PRICE PART PARTS CODE DESCRIPTION RANK MARK RANK L P L T M 6 0 2 2 F C Z Z M4 plate P M L T - 1 2 4 1 F C Z 1 DV-BOX cushion P M L T - 1 2 4 4 F C Z 1 Docter cushion R P M L T - 1 2 9 6 F C Z Z...
- Page 29 Rear frame section 1 PRICE PART PARTS CODE DESCRIPTION RANK MARK RANK N F A N P 0 0 6 9 F C Z Z X H B S E 4 0 P 0 8 0 0 0 Screw(4×8) P S H E Z 4 8 7 4 F C Z 1 LSU cleaning sheet R P S H E Z 4 8 7 3 F C Z 1 LSU cleaning sheet F...
- Page 30 PCU PWB unit PRICE PART PARTS CODE DESCRIPTION RANK MARK RANK Q C N C M 0 6 7 0 F C Z Z Connector(5pin) [CN17] Q C N C M 0 8 7 8 F C Z Z Connector(30pin) [CN12] Q C N C M 0 9 2 3 F C 2 4 Connector(24pin)
- Page 31 PCU PWB unit PRICE PART PARTS CODE DESCRIPTION RANK MARK RANK V H P 1 L H E E - 0 0 2 A LED (Red)(1LHEE-002A) [LED1] V H V I C P S 1 . 2 / - 1 IC protecrot(ICPS1.2) [ICP1] Resistor(1/4W 910Ω...
- Page 32 MFP Control PWB (ARM280N) PRICE PART PARTS CODE DESCRIPTION RANK MARK RANK Q C N C W 1 1 4 9 F C Z Z Connector(8AL068S305C) [CN8] Q F S - D 1 3 2 C Q C Z Z Fuse(1.25/250T) [F1] Q F S H B 0 0 2 8 F C Z Z...
- Page 33 MFP Control PWB (ARM280N) PRICE PART PARTS CODE DESCRIPTION RANK MARK RANK V H I S D 4 M 1 6 L 1 - 1 IC(SD4M16L1) [IC22] V H I S D 8 M 1 6 L 1 - 1 IC(SD8M16L1) [IC4,5,6,7,27] V H I S R 1 0 2 4 - 7 L L...
- Page 34 STD control PWB (ARM280U) PRICE PART PARTS CODE DESCRIPTION RANK MARK RANK R C R U A 0 0 0 9 F C Z Z Crystal(66.666MHZ) [X3] R C R U A 0 0 1 2 F C Z Z Crystal(66.666MHz)Åi5VLLLÅj [X1] R C R U A 0 0 1 4 F C Z Z...
- Page 35 STD control PWB (ARM280U) PRICE PART PARTS CODE DESCRIPTION RANK MARK RANK Resistor(1/16W 0Ω ±5%) V R S - C Z 1 J D 0 0 0 J [R106,108,120,141,166] Resistor(1/16W 0Ω ±5%) V R S - C Z 1 J D 0 0 0 J [R198,220,222,225,229] Resistor(1/16W 0Ω...
- Page 36 Index PRICE PART PARTS CODE RANK MARK RANK QCNCM1069ACZZ PRICE PART PARTS CODE QCNCM1143FCZZ RANK MARK RANK QCNCM1144FCZZ QCNCM1146FCZZ CDSKA0005FC39 17- 12 " CHLDZ1473DS51 10- 501 CPLTM6048DS51 QCNCM1175FCZZ CPNLH0020QS41 QCNCM1182FCZZ 1- 26 " CPNLH0020QS42 1- 26 QCNCM1183FCZZ CPWBN1515FCE2 15- 26 "...
- Page 37 PRICE PART PRICE PART PARTS CODE PARTS CODE RANK MARK RANK RANK MARK RANK VHI74LCX32MTC 27- 46 TCADZ1521FCZ1 VHI74LVX16128 26- 47 TINSE2288FCZZ " 17- 20 27- 47 TINSE2290FCZZ VHI74VHCT240X 17- 20 18- 63 TINSE2292FCZZ VHI74VHCT244X 17- 20 18- 64 TINSE2294FCZZ VHI90LV17AW-1 17- 20 26- 48...
- Page 38 PRICE PART PRICE PART PARTS CODE PARTS CODE RANK MARK RANK RANK MARK RANK VRD-HT2HY242J XBPSD30P06000 18- 68 12- 47 VRD-HT2HY471J XHBSE30P06000 18- 69 12- 50 VRS-CZ1JD000J XHBSE40P08000 18- 70 " 26- 78 " 27- 78 VRS-CZ1JD100J 26- 79 " 27- 79 VRS-CZ1JD101J 18- 71...
- Page 39 CAUTION FOR BATTERY DISPOSAL (For USA,CANADA) Contains lithium-ion battery. Must be disposed of properly. Remove the battery from the product and contact federal or state environmental agencies for information on recycling and disposal options.
- Page 40 COPYRIGHT 2002 BY SHARP CORPORATION All rights reserved. Printed in Japan. No part of this publication may be reproduced, stored in a retrieval system, or transmitted, in any form or by any means, electronic, mechanical, photocopying, recording, or otherwise, without prior written permission of the publisher.
- Page 41 AR-P14 [1] INTRODUCTION The AR-M350U/M450U and AR-M350N/M450N are minor change models based on the AR-M350/M450. This service manual only provides information on these minor changes. In addition to this service manual, the documents listed below are required to properly maintain these machines.
- Page 42 • Stand/MPD&2000 sheet paper drawer (AR-D13) or Three paper drawer stand MFP model (35ppm) AR-M350U (AR-D14) MFP model (45ppm) AR-M450U • Power supply unit (AR-DC1) (Without network printer function) MFP model (35ppm) AR-M350N (With NIC card (standard)) MFP model (45ppm) AR-M450N AR-M350U CONFIGURATION 3-1...
- Page 43 3. List of combination of peripheral devices A.AR-M350U/M450U As shown in the table below, some other peripheral devices ( B ) may be needed for installation of a peripheral device ( A ) and some peripheral devices cannot be installed together. Related for scanner feature B/W scanner module/DSPF AR-EF1...
- Page 44 B.AR-M350N/M450N As shown in the table below, some other peripheral devices ( B ) may be needed for installation of a peripheral device ( A ) and some peripheral devices cannot be installed together. Related for scanner feature B/W scanner module/DSPF...
- Page 45 Printable area (Only main unit) Approx.99kg *1 If a printer driver for Windows or Macintosh is used for printing, the AR-M350N/M450N:Approx.39.9kg printable area will be smaller. The actual printable area depends on the (Only main unit) printer driver to be used.
- Page 46 B. Document Feeding Equipment (4) Print Function a. General (1) One-drawer tray (included in the base engine) Paper feed method One-drawer tray When an optional PS3 expansion kit is Sizes to be fed A4, B5, 8.5" x 11" installed Paper capacity 500 sheets (at 80g/m²) Function PCL5e/...
- Page 47 e. Font B. Expanded RAM When an optional PS3 expansion kit is Installation of an expanded RAM will avoid the following status. installed Function PCL5e/ 1) Time out error reduction PCL6 (Windows) (Macintosh) 2) Spool time reduction Resident font 45 fonts 136 fonts 35 fonts 3) Avoidance of VM error / memory full...
- Page 48 (5) Image Process D. Copy function Half tone reproduction Equivalent to 256 levels (1) Copy Speed Exposure adjustment Light / Auto / Dark AR-M350U/N AR-M450U/N Quality selection Half-tone ON/OFF Resolution* Normal ( 200x200dpi ) Actual Reduction Enlargement Actual Reduction Enlargement Fine ( 300x300dpi ) Super fine ( 400x400dpi ) 8.5"x11"...
- Page 49 (7) Copy Function Function APS Standard Function Standard Function Paper type select Standard Function (By type setting) Auto tray switching Standard Function Rotation copy Standard Function Electronic sort Standard Function Rotation sort Not provided Reserved copy Standard Function Prior tray setting Not provided Recall/register of program Standard Function...
- Page 50 [5] CONSUMABLE PARTS 1.Supply system table Note: The consumable parts are the same as those of the AR-M350/M450 and the AR-P350/P450. A.USA Name Content Life Product name Remark Toner CA(Black) Toner(Toner : Net Weight 814g) AR-450NT *Life setup is based on A4 6% (*1 AR-450NT-J) Developer Developer(Developer : Net Weight 450g)
- Page 51 2.Production number identification A. Drum cartridge C. Developer The lot number, printed on the front side flange, is composed of 10 digits, The lot number is composed of 8 digit, and each digit indicates as each digit showing the following content: following.
- Page 52 AR-D13 /AR-DC1 AR-PK1 electric devices AR-D14 /AR-DC1 AR-NS2 installed? Main unit AR-NC5J (Not required for the AR-M350N/M450N) AR-P14 (Only AR-M350U/M450U) Extended memory [Electrical setting/adjustment] Install duplex/pypass device. 1) Installation of driver software, setting, Duplex/bypass and operation check...
- Page 53 2. AR-P14 installing procedure <3>Remove the control PWB unit. Remove the five screws that fix the control PWB unit to the main unit of <Before installation> the printer. Then, hold the two grips and pull out the control PWB unit to remove it This installation procedure is provided for use with the AR-M350U/ from the main unit.
- Page 54 <6>Connect the cables to the control PWB. 3) Prepare to enable the printer expansion function. Connect all the cables that have been removed in <2> to the original To enable the printer expansion function, use the keys on the operation positions of the control PWB unit.
- Page 55 [7] MAINTENANCE 1. Self print of set values Use SIM 22-6 to print the set values (machine settings) and jam history. These values must be printed before execution of maintenance or disassembly procedures. 2. Maintenance System Table The maintenance system table is the same as that of the AR-M350/M450. A.
- Page 56 B. Engine section For disassembly procedures, refer to the AR-P350/P450 Service Manual. Maintenance cycle : 50K Check (Clean, replace, or adjust as necessary.) Clean Replace Adjust Lubricate Move position When Unit name Part name 50K 100K 150K 200K 250K 300K 350K 400K Remark calling Drum peripheral...
- Page 57 C. Peripheral devices Maintenance cycle : 50K Check (Clean, replace, or adjust as necessary.) Clean Replace Adjust Lubricate Move position When Option name Part name 50K 100K 150K 200K 250K 300K 350K 400K Remark calling Paper feed Paper feed Note 3 + Manual feed separation section rollers...
- Page 58 [8] SIMULATION <List of machine model codes> Item Display Content For the simulation, the following items have been changed. MACHINE AR-P350/350LP 22-10 AR-P450/450LP Purpose Adjustment, setup, operation data output, check AR-M350/350M (Include the N model) (display) AR-M450/450M (Include the N model) Function (Content) Used to check the system configuration AR-310M...
- Page 59 [9] CIRCUIT DIAGRAM 1. MFP Control PWB(for AR-M350U/M450U) A.Block Diagrams General TMPR4955AF-200 MEMD[31:0] Flash Mask DIMM DIMM (32MB) (8MB) PS Kanji Slot1,2,3 SRAM SysAD[54:33] LA[22:2] (256KB) MAA[12:0] SDRAM SDRAM DIMM 64MByte 64/128/ MD[63:0] (128Mbit x 4) 256MB LDATA[15:0] IOA[15:1] I/O G/A EEPROM SYSTEM Controller (ASIC1)
- Page 60 CPU Block Regulator 1.5V(Core) Engine I/F 3.3V(I/O) CN13 Clock buffer 66.666Mhz TDI, TMS, TDO ,TCK, TRST* JTAG CN10 COLDRST Reset IC PONRST CPURST PST598DN 3_EXTRQST IC47 TMPR4955AF 3.3V NMI, INT0* System 200Mhz Reset IC Controller IC20 PST598IN IC19 160pin-QFP IC48 SysCMD[8:0], SysAD[31:0] SysAD[54:33] Flash DIMM...
- Page 61 ROM Block ( Flash & Mask ) 3.3V VCCW SysAD[54:32] Address LA[22:2] Buffer IC12, 21 SysAD[31:0] MEMD[31:0] LCX16245 IC16, 24 DIMM Slot CN4:8MB-Flash ROMBUFOE* CN5:8MB-Flash ROMBUFDIR* CN6:8MB-Flash FMCS8:CN4 FMCS10:CN5 CODECS0* CODECS1* FMCS12:CN6 CODECS2* CODECS3* FONTCS0* FONTCS1* System I/O G/A FONTCS2* FONTCS3* Controller FONTCS4*...
- Page 62 SDRAM Block ( Standard & Option ) 66.666Mhz DRCLK Clock buffer MEMCLK0 MAA[12:0] MD[63:0] SDRAM SDQMA[7:0] IC4, 5,6,7 MCS0 128Mbit x 4 MRASA MCASA BSEL0A,1A System CKEA Controller IC19 456pin- MEMCLK1,2,3,4 DIMM Slot MCS1A,2A MRASA (64,128,256MB) MCASA BSEL0A,1A CKEA SDA,SCL AR-M350U CIRCUIT DIAGRAM 9-4...
- Page 63 PCI Block ( ICU & Option ) PCI-Bus System Controller IC19 456pin-BGA SDRAM IC22, IC27 24MB Scanner I/F ICU ASIC Engine I/F PM2500 IC25 CN13 304pin-QFP IC13 160pin-QFP Selector IC14 66.66Mhz 68.5Mhz 40.57Mhz 31.55.Mhz JCI-NIC (100Base-T) no support for STD control PWB J HDD-PWB CN12 (2.5inch HDD)
- Page 64 I/O Block ( EEPROM & Misc I/O ) IEEE1284 I/F System Controller IC19 RIC I/F (RS232C) 456pin-BGA CN14 IOA[15:1] 16373 IC34 I/O G/A Engine I/F IC32 IOD[7:0] CN13 240pin-QFP IC31 Scanner I/F 14.7456Mhz Xtal 32.768khz VCC_B Battery IOA[15:1] EEPROM IC36 64Kbit IOD[7:0] AR-M350U CIRCUIT DIAGRAM 9-6...
- Page 65 AR-M350U CIRCUIT DIAGRAM 9-7...
- Page 66 B. Circuit Diagram [DRAGON-D10][CPU TX4955] R127 R126 + C125 C130 C129 3.3V 10uF/16V 0.1uF 1000pF BR26 SYSADC2 R136 R137 SYSADC3 SYSADC0 SYSADC1 SYSADC[3:0] A_SYSAD[31:0] CPUCLK 3.3V 3.3V 3.3V R123 R122 4.7K BUFSEL1 JTDO_A JTDO JTDI JTDI JTCLK JTCK JTMS JTMS VCCIO A_SYSAD4 SYSAD4...
- Page 67 3.3V 1.5V 0.1uF 0.1uF 0.1uF 0.1uF C107 0.1uF C110 0.1uF 0.1uF C108 0.1uF C102 0.1uF C121 0.1uF C122 0.1uF 0.1uF 0.1uF 0.1uF 1.5V 3.3V 3.3V 4.7K 4.7K DIVMODE0 DIVMODE1 MODE43* VCCIO A_SYSAD27 SYSAD27 A_SYSAD26 SYSAD26 VCCINT A_SYSAD25 SYSAD25 NO ASM VCCIO A_SYSAD24 SYSAD24...
- Page 68 [Print Controller (for AR-M350U / M450U) (1/3)] SYSCMD[8:0] IC19A AB11 AC12 MRAS_ AF11 MCAS_ SYSCMD8 AD12 SYSCMD8 MWE_ SYSCMD7 AC13 SYSCMD7 BSEL1 SYSCMD6 AE12 SYSCMD6 BSEL0 SYSCMD5 SYSCMD5 SYSCMD4 AE11 SYSCMD4 MCS_4 SYSCMD3 AD11 SYSCMD3 MCS_3 SYSCMD2 AC11 SYSCMD2 MCS_2 SYSCMD1 AF10 SYSCMD1...
- Page 69 BR18 CKEA MRASA MCASA BSEL1A BSEL0A MCS2A MCS1A MCS0 MAA12 MAA[12:0] BR19 MAA11 AB11 MAA10 MAA9 AC12 MRAS_ MAA8 AF11 MCAS_ AD12 MWE_ AC13 BSEL1 MAA7 AE12 BSEL0 MAA6 MAA5 AE11 MCS_4 MAA4 AD11 MCS_3 AC11 MCS_2 AF10 MCS_1 MAA3 AE10 MCS_0 MAA2...
- Page 70 [Print Controller (for AR-M350U / M450U) (2/3)] 3.3V IC19B 0.1uF BR42 DREQ0 DREQ3 0.1uF DACK3 0.1uF C100 BR46 AB10 0.1uF C106 AB14 AB17 DACK0 AB22 AC18 STC0 22uF/16V SIOCLK 22uF/16V 3.3V BR45 3.3V 2.5V R135 ROMCLK CVDD 4.7K CVDD NO ASM CVDD 0.1uF AB13...
- Page 71 IC19D BOOTCS_ BOOTCS 6,10 DREQ3_ BR42 DREQ2_ CODECS3_ DREQ1_ CODECS2_ CODECS2 DREQ0_ CODECS1_ CODECS1 CODECS0_ CODECS0 DACK3_ DACK2_ FONTCS7_ FONTCS7 DACK1_ FONTCS6_ FONTCS6 DACK0_ FONTCS5_ FONTCS5 BR46 FONTCS4_ FONTCS4 DMA_TC3_ FONTCS3_ FONTCS3 DMA_TC2_ FONTCS2_ FONTCS2 DMA_TC1_ FONTCS1_ FONTCS1 DMA_TC0_ FONTCS0_ FONTCS0 SCLK 3.3V...
- Page 72 [Print Controller (for AR-M350U / M450U) (3/3)] IC19C A_SYSCMD[8:0] SYSCMD[8:0] PCICLKI A_SYSCMD8 SYSCMD8 PCICLKO BR44 PCIMODE A_SYSCMD3 SYSCMD3 A_SYSCMD2 SYSCMD2 A_SYSCMD1 SYSCMD1 A_SYSCMD0 SYSCMD0 PCI_CBE3 PCI_CBE2 BR43 PCI_CBE1 A_SYSCMD7 SYSCMD7 PCI_CBE0 A_SYSCMD6 SYSCMD6 A_SYSCMD5 SYSCMD5 A_SYSCMD4 SYSCMD4 A_SYSAD[31:0] SYSAD[31:0] PCIAD31 BR66 PCIAD30 A_SYSAD0...
- Page 73 PCLK_D PCLK_DR IC19C SYSCMD[8:0] PCICLKI PCICLKO PCIMODE PCBE03 BR68 PCI_CBE3 PCBE02 PCI_CBE2 PCBE01 PCI_CBE1 PCBE00 PCI_CBE0 PCBE0[3:0] 17,18 PCIAD[31:0] 17,18 SYSAD[31:0] BR54 PCIAD31 PCIAD31 PCIAD30 PCIAD30 PCIAD29 PCIAD29 PCIAD28 PCIAD28 PCIAD27 BR69 PCIAD27 PCIAD26 PCIAD26 PCIAD25 PCIAD25 PCIAD24 PCIAD24 PCIAD23 PCIAD22 BR55 PCIAD23...
- Page 74 [SDRAM] MCS0 MRASA MCASA 3_MD[63:0] SDQMA[7:0] MAA[12:0] BSEL0A BSEL1A MAA0 MAA0 3_MD0 3_MD32 MAA1 3_MD1 MAA1 3_MD33 MAA2 MAA2 3_MD2 3_MD34 MAA3 MAA3 3_MD3 3_MD35 MAA4 MAA4 3_MD4 3_MD36 MAA5 MAA5 3_MD5 3_MD37 MAA6 3_MD6 MAA6 3_MD38 MAA7 3_MD7 MAA7 3_MD39 MAA8 MAA8...
- Page 75 MAA[12:0] SDQMA[7:0] 3_MD[63:0] 3.3V SDRAM DIMM Slot 3.3V 3_MD63 3_MD32 3_MD55 DQ32 3_MD33 3_MD62 3_MD54 DQ33 3_MD61 3_MD34 3_MD53 DQ34 3_MD60 3_MD35 3_MD52 DQ35 3_MD36 +3.3V +3.3V 3_MD59 3_MD37 3_MD51 DQ36 3_MD38 3_MD58 3_MD50 DQ37 3_MD39 3_MD57 3_MD49 DQ38 3_MD56 3_MD40 3_MD48 DQ39...
- Page 76 [BUFFER] SYSAD[54:33] SYSAD[31:0] IC21 IC24 SYSAD33 SYSAD15 MEMD15 SYSAD SYSAD34 SYSAD14 MEMD14 SYSAD SYSAD35 SYSAD13 MEMD13 SYSAD SYSAD36 SYSAD12 MEMD12 SYSAD SYSAD37 SYSAD11 MEMD11 SYSAD SYSAD38 SYSAD10 MEMD10 SYSAD SYSAD39 SYSAD9 MEMD9 SYSAD SYSAD40 SYSAD8 MEMD8 SYSAD SYSAD41 SYSAD7 MEMD7 SYSAD SYSAD42 LA10...
- Page 77 IC24 IC16 MEMD15 SYSAD31 MEMD31 MEMD14 SYSAD30 MEMD30 MEMD13 SYSAD29 MEMD29 MEMD12 SYSAD28 MEMD28 MEMD11 SYSAD27 MEMD27 3.3V 10,11 IOD[15:0] MEMD10 SYSAD26 MEMD26 MEMD9 SYSAD25 MEMD25 BR89 MEMD8 SYSAD24 MEMD24 IOD15 IOD14 MEMD7 SYSAD23 MEMD23 IOD13 MEMD6 SYSAD22 MEMD22 IOD12 MEMD5 SYSAD21 MEMD21...
- Page 78 [FLASH SDIMM] 6,8,12 MEMD[31:0] 6,8,10,12 LA[22:2] 6,8,10 FWE1 3.3V 9,10 RD/BY 1,2,9 COLDRST SDIMM4 SDIMM5 MEMD0 MEMD0 MEMD1 MEMD1 MEMD2 MEMD2 MEMD3 MEMD3 MEMD4 MEMD4 MEMD5 MEMD5 MEMD6 MEMD6 MEMD7 MEMD7 MEMD8 MEMD8 LA10 MEMD9 LA10 MEMD9 LA11 MEMD10 LA11 MEMD10 LA12 MEMD11...
- Page 79 PS-J ROM MEMD0 MEMD1 MEMD2 MEMD3 MEMD4 MEMD5 MEMD6 MEMD7 MEMD8 LA10 MEMD9 LA11 MEMD10 LA12 MEMD11 LA13 MEMD12 LA14 MEMD13 LA15 MEMD14 LA16 MEMD15 LA17 MEMD16 LA18 MEMD17 LA19 MEMD18 LA20 MEMD19 LA21 MEMD20 LA22 MEMD21 MEMD22 MEMD23 MEMD24 MEMD25 MEMD26 MEMD27...
- Page 80 [FAX I/F BUF] 6,7,12 MEMD[31:0] IC51 MEMD15 FXD15 MEMD31 MEMD14 FXD14 MEMD30 MEMD13 FXD13 MEMD29 MEMD12 FXD12 MEMD28 MEMD11 FXD11 MEMD27 MEMD10 FXD10 MEMD26 MEMD9 FXD9 MEMD25 MEMD8 FXD8 MEMD24 MEMD7 FXD7 MEMD23 MEMD6 FXD6 MEMD22 MEMD5 FXD5 MEMD21 MEMD4 FXD4 MEMD20 MEMD3...
- Page 81 IC52 MEMD31 FXD31 MEMD30 FXD30 MEMD29 FXD29 MEMD28 FXD28 MEMD27 FXD27 MEMD26 FXD26 MEMD25 FXD25 MEMD24 FXD24 MEMD23 FXD23 MEMD22 FXD22 MEMD21 FXD21 MEMD20 FXD20 MEMD19 FXD19 MEMD18 FXD18 MEMD17 FXD17 MEMD16 FXD16 3.3V 1DIR 2DIR C209 0.1uF 74LCX16245MEA FXD[31:0] IC49 LA17 FXA17...
- Page 82 [FAX I/F CN] FXA[22:2] 3.3V CN16 FXA6 FXA5 FXA21 FXA4 FXA3 FXA2 FXD[31:0] 3.3V FXD31 FXD30 FXD29 FXD28 BR94 FXD27 FXD0 FXD26 FXD1 FXD25 FXD2 FXD24 FXD3 FXD23 FXD22 BR95 FXD21 FXD4 FXD20 FXD5 FXD19 FXD6 FXD18 FXD7 FXD17 FXD16 BR96 FXD15 FXD8...
- Page 83 FVCCW 7,12,13,15 R265 CN16 2.2K R266 2.2K R267 3.3V FAX_PWON FB_IN COLDRST 1,2,7 RD/BY 7,10 MSW_MON 10,15 FRDY FXCS19 FXCS18 CNCT_FAX CTS1 RXD1 RTS1 TXD1 RES_FAX CTS0 RXD0 RTS0 TXD0 WP_FAX C288 C289 C290 C291 FXWE FXOE 22pF 22pF 22pF 22pF FXA22 NO ASM...
- Page 84 [ASIC1] C201 3.3V IC36 IOA1 0.1uF IC43A IOA2 IOA3 IOA4 1,2,11,17,18 CPURST IORESET1 IOA5 IOA6 IOA7 74LCX14MTC IOA8 IOA9 IOA10 IOA11 3.3V IC43C IOA12 R236 R235 IOA13 IOA14 R197 0 NO ASM IOA15 LTL-1LHEE-002A R201 0 NO ASM 74LCX14MTC POWER_LED IC32-1 CAT28C64BP-12 6,11...
- Page 85 3.3V IC32-4 IOD[15:0] 6,11 POWER IC36 GND1 VCC1 IOA1 IOD0 GND2 VCC2 IOA2 IOD1 GND3 VCC3 IOA3 IOD2 GND4 VCC4 IOA4 IOD3 GND5 VCC5 IOA5 IOD4 GND6 VCC6 IOA6 IOD5 GND7 VCC7 IOA7 IOD6 GND8 VCC8 IOA8 IOD7 GND9 VCC9 IOA9 GND10 VCC10...
- Page 86 [ASIC2] 3.3V 6,10 IOA[15:1] IC53 10,21 ASICCLK CLOCK 1,2,10,17,18 CPURST RESET WAIT LCDRD IORD IOWRH LCDLWR IOWRL LCDCS IOCSREG LCDMCS IOCSVR ENERGY ENERGY IOD15 SWAP DATA15 IOD14 DATA14 IOA14 IOD13 DATA13 IOA13 IOD12 DATA12 IOA12 IOD11 DATA11 IOA11 IOD10 DATA10 IOA10 IOD9 DATA9...
- Page 87 A2_INT IC53 IOD[15:0] 6,10 LCDVR[5:0] CLOCK RESET WAIT WAIT IORD IOWRH IOWRL IOCSREG IOCSVR ENERGY IOD15 SWAP DATA15 IOD14 DATA14 OA14 IOD13 DATA13 OA13 IOD12 DATA12 OA12 IOD11 DATA11 OA11 IOD10 DATA10 OA10 IOD9 DATA9 IOD8 DATA8 IOD7 DATA7 IOD6 DATA6 IOD5 DATA5...
- Page 88 [SRAM / BATTERY] 7,9,13,15 FVCCW MEMD[31:0] 6,7,8 3.3BT 6,7,8,10 LA[22:2] C178 FONTCS0 10uF/16V RD3.3E(B) 3,8,10 ROMOE NO ASM 2,3,10,11,22 PONRST 3.3BT IC55 LA13 LA11 LA12 LA10 IC11A CE1# LA15 MEMD7 SDA_RWE I/O8 MEMD6 ROMWE0 I/O7 MEMD5 3,6,10 ROMWE I/O6 BT_CK LA17 MEMD4 I/O5...
- Page 89 7,9,13,15 FVCCW +12V R208 NO ASM R192 DAP202U R191 MEMD[31:0] 6,7,8 NO ASM 3.3BT DAP202U C179 10uF/16V RB451F C178 RLS-73 10uF/16V RD3.3E(B) RLS-73 NO ASM LA12 BT_CK CR2477-H01 BATTERY DTC114EKA 3.3V 3.3V R419 NO ASM 2SB1198K TS3B-SQ 3.3BT NO ASM 2SC2412K NO ASM C311...
- Page 90 [SCANNER I/F] (L5-20) S1_CLK+ PLP3216S 1-2pin: Pattern Short 1_CLK- 3-4pin: Pattern Short R351 MMZ1608D121BTA00 NO ASM S1_CLK- (L31-32, L35 -40) NO ASM AVR-M1608C270KT2AB 1-2pin: Pattern Short R113 FVCCW 7,9,12,15 S1_DATA1+ PLP3216S NO ASM 1_DATA1- R357 MMZ1608D121BTA00 NO ASM 3.3V S1_DATA1- NO ASM AVR-M1608C270KT2AB R425...
- Page 91 1_CLK+ 1_DATA0+ MMZ1608D121BTA00 MMZ1608D121BTA00 PLP3216S S1_DATA0+ PLP3216S 1_CLK- MMZ1608D121BTA00 R354 1_DATA0- AVR-M1608C270KT2AB NO ASM MMZ1608D121BTA00 AVR-M1608C270KT2AB S1_DATA0- NO ASM NO ASM AVR-M1608C270KT2AB AVR-M1608C270KT2AB /1_DBL+ MMZ1608D121BTA00 NO ASM 1_DATA1+ MMZ1608D121BTA00 S/1_DBL+ PLP3216S PLP3216S /1_DBL- R360 MMZ1608D121BTA00 AVR-M1608C080MTAAB 1_DATA1- R357 MMZ1608D121BTA00 NO ASM NO ASM NO ASM S/1_DBL-...
- Page 92 [SIO] [ RIC I/F (SIO #5) ] IC42 TXD5 DIN1 DOUT1 RTS5 DIN2 DOUT2 DTR5 DIN3 DOUT3 DIN4 DOUT4 DSR5 ROUT1 RIN1 CTS5 ROUT2 RIN2 RXD5 ROUT3 RIN3 ROUT4 RIN4 C181 C188 1uF/50V 1uF/50V C195 C206 0.1uF 1uF/50V DS14C238WM [ Debug I/F (SI O#4) ] IC30 TXD4...
- Page 93 C I/F (SIO #5) ] CN14 IC42 DIN1 DOUT1 DIN2 DOUT2 DIN3 DOUT3 DIN4 DOUT4 N.C1 N.C2 ROUT1 RIN1 9A12-1034 ROUT2 RIN2 ROUT3 RIN3 ROUT4 RIN4 C181 C205 1uF/50V C195 1uF/50V 0.1uF DS14C238WM ug I/F (SI O#4) ] CN15 IC30 DIN1 DOUT1 DIN2...
- Page 94 [ENGINE I/F CN] 3.3V 3.3V 7,9,12,13 FVCCW R427 3.3V +12V +24V NO ASM R426 FLASHB NO ASM CN13 RES_PCU VIDEO1 9,10 MSW_MON 13,22 DTC114YKA 3.3V VIDEO0 R288 R289 C167 C184 C185 100pF 0.1uF 47uF/16V 47uF/16V NO ASM C138 C172 C180 C168 C182 0.1uF...
- Page 95 3.3V +12V +24V CN13 TX24-50R-LT-H1 3.3V DTR3 DTR3 TXD3 TXD3 IC41 RXD3 OUT1 RXD3 OUT2 OUT3 DSR3 OUT4 DSR3 OUT5 OUT6 DTEN OUT7 HSYNC COM-E TD62503F C284 C285 C192 22pF 22pF NO ASM NO ASM 0.1uF AR-M350U CIRCUIT DIAGRAM 9-37...
- Page 96 [IEEE1284 I/F] CD[7:0] IC15 BUSY 3.3V SLCT FAULT INIT SLCTIN AUTOFD REVERSE PERI LOGIC IN PERI LOGIC OUT HOST LOGIC IN HOST LOGIC OUT 3.3V VCC CABLE VCC CABLE 74LVX161284MEA 0.1uF 22uF/16V AR-M350U CIRCUIT DIAGRAM 9-38...
- Page 97 IEEE 1284 I 57RE-40360-830B PERI LOGIC OUT HOST LOGIC OUT 1284MEA 0.1uF 22uF/16V AR-M350U CIRCUIT DIAGRAM 9-39...
- Page 98 [PCI BOARD CONNECTOR] 3.3V 4,18 PCIAD[31:0] 4,10,18 PCIREQ[7:0] R131 PCI BOARD 3.3V 3.3V 10,18 PCIINTA PCIINTB CPURST_ PCLK_H PCLK_O1 PCLK_H PCLK_O2 PCIGNT6 PCIGNT4 PCIGNT6 PCIGNT4 PCIREQ4 PCIREQ6 PCIGNT7 PCIGNT7 3.3V PCIREQ7 PCIAD30 PCIAD31 PCIAD29 PCIAD28 4,18 PCBE0[3:0] PCIAD27 PCIAD26 PCIAD25 PCIAD24 PCBE03 PCIAD23...
- Page 99 3.3V 3.3V 4,10,18 PCIREQ[7:0] CPURST 1,2,10,11,18 R405 NO ASM CPURST_ PCIRST PCIREQ2 R406 R168 PCIREQ1 R167 PCIREQ0 R165 PCIGNT6 PCIGNT6 PCIREQ6 3.3V PCIAD30 PCIAD28 PCIAD26 PCIAD24 IC26D PCIAD22 11,22 PCURST PCIRST PCIAD20 PCIAD18 1,2,10,11,18 CPURST PCIAD16 74LCX08MTC PIRDY0 4,18 PDEVSEL0 4,18 PLOCK0 PSERR0...
- Page 100 [ICU ASIC] SDDQ7 BR73 SDDQ8 XDQLM SDDQ6 XDQUM SDDQ9 XSDWE SDDQ5 BR75 XSDCAS SDDQ10 XSDRAS SDDQ4 SDCLK SDDQ11 SDCKE SDDQ3 BR77 SDDQ12 SCLKI SDDQ2 SDDQ13 SDDQ1 BR79 SDDQ14 SDDQ0 SDDQ15 R169 NO ASM 3.3V R170 SDDQ[15:0] R177 R178 NO ASM /1_DBL+ R183 <- 7mm ->...
- Page 101 SDBA1 SDA10 BR50 XDQLM SDA9 XDQUM XSDWE SDA11 XSDCAS BR49 SDA1 XSDRAS SDA7 SDCLK SDA0 SDCKE SDA8 SDA3 BR47 SCLKI SDA5 SDA2 SDA6 SDA4 R117 BR51 XSDCS0 XSDCS1 SDA12 SDBA0 SDA[12:0] 3.3V ICU_V TPAD1 C157 C161 0.1uF 0.1uF 0.1uF 0.1uF <- 7mm - >...
- Page 102 [ICU SDRAM] SDDQ[15:0] SDDQ[15:0] 3.3V 3.3V IC27 IC22 SDDQ0 SDDQ15 SDDQ0 DQ15 DQ15 VCCQ VSSQ VCCQ VSSQ SDDQ1 SDDQ14 SDDQ1 DQ14 DQ14 SDDQ2 SDDQ13 SDDQ2 DQ13 DQ13 VSSQ VCCQ VSSQ VCCQ SDDQ3 SDDQ12 SDDQ3 DQ12 DQ12 SDDQ4 SDDQ11 SDDQ4 DQ11 DQ11 VCCQ VSSQ...
- Page 103 Q[15:0] C220 3.3V 3.3V 3.3V 0.1uF IC22 SDDQ0 SDDQ15 DQ15 R193 VCCQ VSSQ SDDQ1 SDDQ14 DQ14 IC37C SDDQ2 SDDQ13 NO ASM DQ13 VSSQ VCCQ SDDQ3 SDDQ12 DQ12 18,20 IDREQA SDDQ4 SDDQ11 3.3V DQ11 VCCQ VSSQ SDDQ5 SDDQ10 NO ASM DQ10 74LCX14MTC SDDQ6 SDDQ9...
- Page 104 [PM-2500] 3.3V 18,19 ODATA[7:0] BLM11A151SG NO ASM XBACK XDACK R310 DREQ 0.1uF 0.1uF 10,19 CLKOFF CONT SG_8002JC STC 66.666M R311 18,19 IDREQB C263 100pF NO ASM IC13 0.1uF NO ASM Vref5Volt Vddo[1] Vsso[1] 3.3V XRETPMCS nHSync NLRQ nlrq NPOR nPor 3.3V XIORD 18,19...
- Page 105 18,19 ODATA[7:0] XIDACKB XIBACKB R312 ODREQB 18,19 XODACKB XOBACKB R313 PMDONEB CDBDQ[15:0] R310 3.3V R311 0.1uF 0.1uF 0.1uF 0.1uF 0.1uF 0.1uF IC13 0.1uF 0.1uF 0.1uF 0.1uF 0.1uF 0.1uF R318 CDBDQ11 Vref5Volt Data2[11] C264 C265 C266 C267 C268 C269 C270 Vddo[1] Vddo[14] Vsso[1] Vsso[14]...
- Page 106 [CLOCK] 3.3V 3.3V 3.3V 3.3V BLM10B121SBPTM 66CLK CLKOUT SG_8002JC 66.666M CLKA1 66.666MHz CLKA2 CLKA3 CLKA4 CLKB1 0.1uF CLKB2 3.3V CLKB3 CLKB4 C278 PI6C2309-1HW 0.1uF 0.1uF 4.7K 3.3V 0.1uF IC10 FWE0 3.3V 74LCX74MTC BLM10B121SBPTM IC29 R172 33CLK PCLK_DR CLKOUT NO ASM CLKA1 CLKA2 CLKA3...
- Page 107 3.3V 3.3V BLM10B121SBPTM CLKOUT CLKA1 CPUCLK CLKA2 CLKA3 DRCLK CLKA4 ASICCLK 10,11 CLKB1 CLKB2 MEMCLK0 CLKB3 CLKB4 MEMCLK1 MEMCLK2 C278 PI6C2309-1HW MEMCLK3 0.1uF 0.1uF MEMCLK4 22pF FWE0 3.3V BLM10B121SBPTM IC29 CLKOUT R173 CLKA1 PCLK_D CLKA2 R174 CLKA3 PCLK_A CLKA4 R188 PCLK_I CLKB1 R187...
- Page 108 [RESET / POWER] 3.3V HDDPW R409 R410 IC44 NO ASM R219 11,17 PCURST OUT1 XHDDPW 3.3V C165 OUT2 C307 OUT3 RES_PCU R220 EXTRST OUT4 R222 R411 0 NO ASM 0.1uF 10uF/16V IORESET1 OUT5 13,15 OUT6 R412 0 NO ASM OUT7 TDPOF 1,10 COM-E...
- Page 109 ICU_V RB451F IC33 R409 R410 NJM2391DL1-25 3.3V C165 C176 C309 C307 R411 0 NO ASM 0.1uF 10uF/16V 22uF/16V 220uF/10V R412 0 NO ASM 2.5V RB451F IC35 R413 R414 NJM2391DL1-25 CTCT_FAX_A 3.3V C169 C170 C310 FAX_ON C308 R415 0 NO ASM 0.1uF 10uF/16V 22uF/16V...
- Page 110 AR-M350U CIRCUIT DIAGRAM 9-52...
- Page 111 CAUTION FOR BATTERY DISPOSAL (For USA,CANADA) Contains lithium-ion battery. Must be disposed of properly. Remove the battery from the product and contact federal or state environmental agencies for information on recycling and disposal options.
- Page 112 COPYRIGHT 2002 BY SHARP CORPORATION All rights reserved. All rights reserved. All rights reserved. Printed in Japan. Printed in Japan. Printed in Japan. No part of this publication may be reproduced, No part of this publication may be reproduced, No part of this publication may be reproduced,...
- Page 113 Be sure to replace these parts with specified ones for maintaining the safety and performance of the set. This document has been published to be used for SHARP CORPORATION after sales service only. The contents are subject to change without notice.
- Page 115 CONTENTS [1] GENERAL [7] DISASSEMBLY AND ASSEMBLY, MAINTENANCE 1. Note for servicing ......1 1.
- Page 116 [1] GENERAL 1. Note for servicing Pictogram This Service Manual uses some pictographs to assure safe operation. Please understand the meanings of pictographs before servicing. CAUTION: If this CAUTION is ignored, an injury or damage to property could occur. A.Cautions for servicing 1) Do not touch the photoconductive drum.
- Page 117 [2] CONFIGURATION 1.System Configurations Exit tray B/W scanner module/DSPF(AR-EF1) (AR-TE3 or AR-DU4 Standard) Finisher Upper exit tray extension (AR-FN6) Duplex (AR-TE4) module/bypass tray Duplex module (AR-DU3) Mail-bin stacker Saddle stitch (AR-MS1) finisher (AR-FN7) Multi purpose drawer (AR-MU1) Stand/MPD & 2000 sheet paper drawer Stand/3 x 500 sheet paper drawer...
- Page 118 3. List of combination of peripheral devices As shown in the table below, some other peripheral devices ( B ) may be needed for installation of a peripheral device ( A ) and some peripheral devices cannot be installed together. Related to scanner feature B/W scanner module/DSPF AR-EF1...
- Page 119 [3] SPECIFICATIONS (in mm) Paper size 1.Basic Specification A.Base Engine (1) Form AR-P350 / AR-P450 Desktop (2) Engine speed Japanese postcard Paper size AR-P350 AR-P450 Ledger A4, 8.5" x 11" 35ppm 45ppm Legal A5R/5.5" x 8.5"R 35ppm 45ppm Foolscap 35ppm 45ppm Letter B4/8.5"...
- Page 120 B. Document Feeding Equipment E. Print Function (1) One-drawer tray (included in the base engine) (1) General Paper feed method One-drawer tray When an optional PS3 expansion kit is Sizes to be fed A4, B5, 8.5" x 11" installed Paper capacity 500 sheets (at 80g/m²) Function PCL5e/...
- Page 121 (5) Font 3.Expanded RAM When an optional PS3 expansion kit is Installation of an expanded RAM will avoid the following status. installed Function PCL5e/ 1) Time out error reduction PCL6 (Windows) (Macintosh) 2) Spool time reduction Resident font 45 fonts 136 fonts 35 fonts fonts*6...
- Page 122 [4] CONSUMABLE PARTS 1.Supply system table A.USA Name Content Life Product name Remark Toner CA(Black) with IC Toner(Toner : Net Weight 814g) AR-450MT *Life setup is based on A4 6% (*1 AR-450MT-J) Developer Developer(Developer : Net Weight 450g) 100K AR-450ND Drum Drum AR-450DR...
- Page 123 C.Europe/Australia/New Zealand Name Content Life Product name Remark Toner CA(Black) with IC Toner(Toner : Net Weight 814g) AR-450LT *Life setup is based on A4 6% Developer Developer(Developer : Net Weight 450g) 100K AR-450DV Drum Drum AR-450DM 100K PM kit Cleaner blade 100K AR-450KA Screen grid...
- Page 124 E.Israel/Russia/CIS/Philippines Name Content Life Product name Remark Toner CA(Black) with IC Toner(Toner : Net Weight 814g) AR-450ET *Life setup is based on A4 6% Developer Developer(Developer : Net Weight 450g) 100K AR-450SD Drum Drum AR-450DR 100K PM kit Cleaner blade 100K AR-450KA Screen grid...
- Page 125 G.Hong kong/China Name Content Life Product name Remark Toner CA(Black) with IC Toner(Toner : Net Weight 814g) AR-450CT-C *Life setup is based on A4 6% Developer Developer(Developer : Net Weight 450g) 100K AR-450SD-C Drum Drum AR-450DR-C 100K PM kit Cleaner blade 100K AR-450KA Screen grid...
- Page 126 2.Production number identification 3. Environmental conditions A. Drum cartridge A. Operating conditions The lot number, printed on the front side flange, is composed of 10 digits, each digit showing the following content: Number For this model, this digit is 2. Alphabet Indicates the model conformity code.
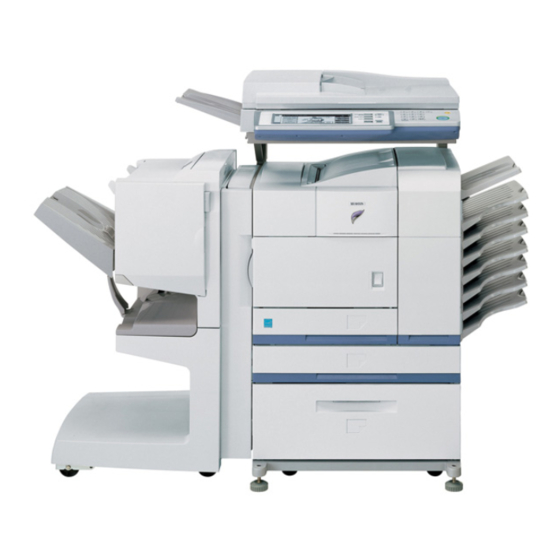
- Page 127 [5] EXTERNAL VIEWS AND INTERNAL STRUCTURES 1.Appearance Bypass tray Exit tray Duplex module Upper paper output area Upper exit tray extension Operation panel Front cover Main switch Paper tray 1 10 Stand / 3 x 500 sheet paper drawer * 11 Stand / MPD & 2000 sheet paper drawer * 12 Multi purpose drawer 1, 2, 3, 5, 10, 11, and 12 are peripheral units.The configuration of peripheral units varies with the main unit model.
- Page 128 3.Operation panel This operation panel is valid only when a scanner unit is not installed. READY DATA ERROR MENU BACK/C INFORMATION Message display [ERROR] indicator [DATA] indicator [READY] indicator [MENU] key ] keys [BACK/C] key [OK] key [INFORMATION] key <Function of each LED> READY DATA ERROR...
- Page 129 4. Cross sectional view Name Name OPC drum Upper heat roller Main charger Pressure roller Cleaning blade Heater roller Thermistor Developing unit Thermostat Magnet roller Fusing back roller Toner hopper Reverse gate Transfer roller Paper exit roller PS roller Full detection lever PS front roller Printer operation PWB Machine tray paper feed roller...
- Page 130 5. PWB Name Function/Operation PRT controller Image process, image data communication control PCU PWB Overall control of the machine and options Power unit DC power supply LD PWB (Inside LSU) Laser ON control (Inside LSU: LSU cannot be disassembled.) Mother PWB Signal interface between PCU and the controller Filter PWB AC power input...
- Page 131 6. Motor, Clutch, Solenoid 13.PSPS 10.CFM2 6.VFM2 3.DSBM 9.FM 1.DM 14.RRC 12.TRC 2.MM 11.CPFC 7.VFM1 7.VFM1 5.LUM 8.CFM1 4.TM Code Function/Operation Type Drum motor Brushless motor Main motor Brushless motor DSBM Paper exit motor Stepping motor Toner motor Synchronous motor Lift-up motor Synchronous motor VFM2...
- Page 132 7. Switch, Sensor 5.POD3 4.POD2 2.DSW-L 3.POD1 7.TCS 8.TUD 10.MAIN SW 6.PPD1 1.DSW-F 9.PED Code Function/Operation Active logic DSW-F Front door open/close detection H= Door open DSW-L Left door open/close detection H=Door open POD1 Paper exit detection L= Paper detection POD2 Paper exit detection L= Paper detection...
- Page 133 [6] UNPACKING AND INSTALLATION 1. Installing procedure flowchart There are many combinations between this machine and option units. For installing option units, observe the following procedures for efficiency. To install the devices effciently, follow the procedure below. Some peripheral devices may have been installed as standard devices depending on the main unit model. Part of descriptions and illustrations may be different.
- Page 134 2. Note for installation place 4. Machine installing procedure Improper installation may damage this product. Please note the following Note: In advance to installation of the machine, the paper feed option during initial installation and whenever the machine is moved. units (AR-MU1, AR-D13 or AR-D14) should have been installed.
- Page 135 B. Installation of paper feed options to the machine C. Setting related to process Note: Before use of this machine, one of the paper feed option units 1) Open he left door and the front door. (AR-D13/AR-D14/AR-MU1) should be installed to the machine for safety reasons.
- Page 136 4) While rotating the MG roller, supply developer into the developer E. Paper setting cartridge evenly.B 1) Pull out the first stage paper feed tray. 2) While pressing the paper holding plate, remove the fixing pin. Note: Before opening the developer seal, shake it 4 or 5 times. 5) Attach the top cover to the developer cartridge and install the cartridge to the machine.
- Page 137 5. Option expansion memory installation <Printer model> HDD PWB A. Hard disk (ARHD3), PS3 Expansion kit (ARPK1), Expansion memory print server card (AR-NC5J), expansion memory PS3 Expansion kit Print server card (commercially available one) Note: Before performing this installation work, check that the data lamp on the operation panel is neither lighting nor blinking.
- Page 138 [7] DISASSEMBLY AND ASSEMBLY, MAINTENANCE 1.Maintenance System Table A. Engine section Maintenance cycle : 50K Check (Clean, replace, or adjust as necessary.) Clean Replace Adjust Lubricate Move position When Unit name Part name 50K 100K 150K 200K 250K 300K 350K 400K Remark calling Drum peripheral...
- Page 139 B. Peripheral devices Maintenance cycle : 50K Check (Clean, replace, or adjust as necessary.) Clean Replace Adjust Lubricate Move position When Option name Part name 50K 100K 150K 200K 250K 300K 350K 400K Remark calling Paper feed Paper feed Note 3 + Manual feed separation section rollers...
- Page 140 2. Disassembly and assembly (4) Paper exit upper cabinet/Front left upper cabinet Note: •When assembling, check that the flat cable and the harness connectors are securely connected. •When connecting the flat cable, be careful not to break the pins. •When installing the PWB unit and the memory module, use an earth band to prevent against breakage by static electricity.
- Page 141 B. Drum peripheral (4) Main charger (1) Drum cartridge Loosen the screw and remove the charger. (5)OPC drum/DSD collar (2)Main charger /charger case Note: When installing the DSD collar, engage the DSD collar boss with the hole in the drum frame. (3) Screen grid AR-P350 DISASSEMBLY AND ASSEMBLY, MAINTENANCE-4...
- Page 142 (6) Drum separation pawl C. Transfer roller unit (1) Discharge plate (7)Cleaning blade (2) Transfer roller AR-P350 DISASSEMBLY AND ASSEMBLY, MAINTENANCE-5...
- Page 143 D. Fusing unit (2)Upper separation pawl (3) Lower heat roller (1)Lower separation pawl AR-P350 DISASSEMBLY AND ASSEMBLY, MAINTENANCE-6...
- Page 144 (4)Heater lamp E. Ozone filter (1)Ozone filter (2)Ozone filter Note: Not subject to maintenance This part is not included in the counter kit. (5)Upper heat roller (6)Thermistor AR-P350 DISASSEMBLY AND ASSEMBLY, MAINTENANCE-7...
- Page 145 (2)Separation roller/torque limiter (3)pick-up roller/ paper feed roller F. Paper feed section (4)Belt (1)Paper guide (5)Upper limit sensor/paper empty sensor AR-P350 DISASSEMBLY AND ASSEMBLY, MAINTENANCE-8...
- Page 146 G. Paper dust removing unit (2) Resist sensor 2) 1) I. Paper exit unit H. Resist roller unit (1) Resist roller AR-P350 DISASSEMBLY AND ASSEMBLY, MAINTENANCE-9...
- Page 147 (1)Paper exit upper paper guide unit (4)Paper exit roller (5)Paper exit motor (2)Paper exit sensor/switch-back sensor (6)Paper exit drive section (3)Paper exit sensor 2 AR-P350 DISASSEMBLY AND ASSEMBLY, MAINTENANCE-10...
- Page 148 J. Main motor/drum motor M. Main drive unit K. PCU PWB Note: When replacing the PCU PWB, remove the EEPROM from the PCU PWB and install it to a new PWB. (1)Drive gear/clutch L. PCU PWB base plate unit AR-P350 DISASSEMBLY AND ASSEMBLY, MAINTENANCE-11...
- Page 149 O. Fuse PWB P. Power unit peripheral (1)Power switch N. High voltage PWB AR-P350 DISASSEMBLY AND ASSEMBLY, MAINTENANCE-12...
- Page 150 (2)Power unit (4) Power PWB Q. Printer operation PWB (3) Filter PWB R. Mother PWB AR-P350 DISASSEMBLY AND ASSEMBLY, MAINTENANCE-13...
- Page 151 S. Laser unit Note: When the LSU is disassembled, the LSU right angle adjustment is required. T. Controller PWB AR-P350 DISASSEMBLY AND ASSEMBLY, MAINTENANCE-14...
- Page 152 [8] MACHINE OPERATION 1. Function of each LED READY DATA ERROR Print job reception enable •When RIP-completed print data are stored in memory. •When a trouble which can be canceled by the user occurred. Flash •When data are processed in the printer board •When a trouble which requires service call occurred.
- Page 153 3. Setting mode on Computer side 5.User setup Mode Outline Remark Set value (Default) Setting by the Changed and set according to the Total print quantity display printer driver print form of each job. LCD contrast adjustment Web menu Used to set the work board functions Only when the NIC List print Setup list...
- Page 154 7. Key operator program Set value (Default) Key operator program Remark Engine section LCD Auditor setup Department counter setup ON / OFF* Print quantity total Print quantity total user display ON / OFF* Print quantity print Total delete Department number setup Dpt. number registration (5 digits) Dept.
- Page 155 8. Canceling a print job and deleting print 6) Press the [ ] key. •If TRAY 1 is selected in step 4), the message shown to the left will data appear in the display. •To cancel a print job in progress and delete the print data: Press the [BACK/CLEAR] key during printing.
- Page 156 10. Specifications of paper trays The specifications for types and sizes of paper for loading paper trays are shown below. Tray No. Tray (tray Applicable paper types Applicable paper sizes Paper weight name) Paper tray 1 Tray 1 Plain paper •8-1/2 x 11, A4, B5 16 to 28 lbs.
- Page 157 8-1/2 x 11, A4 or smaller paper in the portrait orientation. Transparency film, labels, •Use SHARP recommended paper. Do not use labels other than SHARP recommended labels. and tracing paper Doing so may leave adhesive residue in the printer, causing paper misfeeds, smudges on prints or other machine trouble.
- Page 158 [9] ADJUSTMENTS Contents of adjustment Process A Doctor gap adjustment section B MG roller main pole position adjustment C High voltage output check and adjustment Engine A LSU right-angle adjustment B Print magnification ratio adjustment C Print off-center adjustment D Self print lead edge adjustment E Void area adjustment F Resist quantity adjustment G Option paper feed tray paper guide adjustment...
- Page 159 9) Move the adjustment plate in the arrow direction and adjust. C. High voltage output check and adjustment 1) While pressing the MENU key and the OK key, turn on the power switch. 2) The operation panel displays "PCU DIAG MODE." After releasing your fingers from the keys, do not touch any key for about 8 sec.
- Page 160 1) Hold and push the [MENU] key and the [OK] key, and turn on the B. Print off-center adjustment power. ("PCU DIAG MODE ***" is displayed.) This adjustment is performed in the following cases: Do not touch the keys for about 8sec after releasing fingers from •When the center of print is misaligned.
- Page 161 When the print line is shifted toward a from the paper center, decrease D. Void area adjustment the value. This adjustment is performed in the following cases: When the print line is shifted toward b from the paper center, increase •When the print start position is improper.
- Page 162 E. Resist quantity adjustment G. Manual feed section paper guide position adjustment This adjustment is performed in the following cases: •When the void quantity is changed by the paper feed tray. This adjustment is performed in the following cases: •When paper feed skew occurs. •When the duplex unit with the manual feed unit is installed.
- Page 163 [10] DIAG 1.Diag mode D. Diag mode list When the scanner unit is not installed, the machine can be checked and tested with the following diag mode. Menu LCD display Diag mode initial display PCU DIAG MODE # Note: If the scanner unit is installed, this mode does not work. Sensor check mode SENSOR CHECK XX LSU test...
- Page 164 E. Diag mode menu transition PCU DIAG MODE The Normal Diagnostic Test Mode is released. #.## #.##: ROM version MENU Data (LED) is blinking *PPD1, POD1,*POD2 SENSOR CHECK 00 SENSOR CHECK XX POD3,*DSW1, DSW2 BACK/C MENU 00...Machine *PPD1, POD1,*POD2 01...Multi purpose tray MENU POD3,*DSW1, DSW2 02...ADU...
- Page 165 MENU MAXIMUM SIZE SIZE ADJUSTMENT A SIZE ADJUSTMENT X BACK/C If error, ERROR LED will be ON. A:A3 Universal cassette adjustment MINIMUM SIZE B:Bypass tray adjustment value setting C:Bypass ray adjustment MENU Select B If error, ERROR LED will be ON. MAXIMUM SIZE SIZE ADJUSTMENT B Data(LED) is blinking while TEST PRINT execution...
- Page 166 Data (LED) is blinking while warming up WARM UP TIME WARM UP TIME DISPLAY 1:00 BACK/C MENU MENU RIGHT OUTPUT TOTAL COUNTER DISPLAY XXXXX COUNTER DISP 00,000,000 00,000,000 BACK/C MENU XXXXX: MENU TOTAL OUTPUT •COUNTER DISPLAY: DRUM (TOTAL/DRUM/TONER/DEVE/MAINTE/COPIES) 00,000,000 00,000,000 •STAPLE COUNTER DISP: MENU (STAPLE/PUNCH)
- Page 167 MENU TRAY DETECT TYPE T2 TRAY DETECT TYPE T2 TRAY DETECT TYPE T2 TRAY DETECT TYPE XXX INCH XXX: MENU M:MFT Value memorized T2:TRAY2 T3:TESK1 CE MARK SETTING CE MARK SETTING CE MARK SETTING T4:DESK2 MENU Value memorized A3 COUNTUP MODE A A3 COUNTUP MODE A COUNTUP MODE SETUP A COUNTUP MODE SETUP X...
- Page 168 MENU FIRMWARE SYSTEM INFORMATION A SYSTEM INFORMATION X ******** MENU BACK/C PUNCH UNIT MENU ******** A:ROM version BOOT B:machine speed ******** MENU C:process type CONSOLE FINISHER MENU ******** ******** MENU BUILT IN FINISHER MENU ******** MENU DESK MENU ******** MENU DRUM ADJ.(VG) PROCESS DATA DISP A PROCESS DATA DISP X...
- Page 169 F. Diag mode Initial Menu Content Set range value PCU DIAG MODE # Initial screen of the diag mode PCU DIAG MODE #.## *To terminate the diag mode, turn off and on the power. *PCU ROM number is displayed in the #. SENSOR CHECK XX SENSOR Check mode.
- Page 170 Initial Menu Content Set range value SENSOR CHECK XX SENSOR Check mode. Used to check the sensors of the machine and the options. (Selectable sensor group) 04: 3-tray paper feed unit Left side door SW SPD2 Multi-stage desk lower tray remaining quantity sensor SPD1 Multi-stage desk upper tray remaining...
- Page 171 Initial Menu Content Set range value LED/LCD TEST LED/LCD display test. Used to check the lighting test of the operation panel LED and LCD. LED/LCD TEST *Pressing [OK] key lights up the all LEDs. *Test is terminated 30 seconds after, or can be terminated by pressing [BACK/C] key. (LCD display) *All LCD dots will be "on"...
- Page 172 Initial Menu Content Set range value LOAD TEST XX Load test mode. Used to perform the operation test of the motors and clutches of the machine and the options. (LCD display) LOAD TEST XX *Pressing [ ] or [ ] key selects the LOAD group for the Load Test mode. *Press [OK] key to determine the load operation group.
- Page 173 Initial Menu Content Set range value LOAD TEST XX Load test mode. Used to perform the operation test of the motors and clutches of the machine and the options. (Selectable Loads Grope) 06: Finisher Offset tray solenoid STUM Staple shift motor T2OM Offset tray paper exit motor Main motor...
- Page 174 Initial Menu Content Set range value FUSER control Fuser control Temperature setting. temperature setting X Used to set the fusing temperature. (LCD display) FUSER TEMP.SETTING X *Using [ ] or [ ] key select the thermistor. *Pressing [OK] key starts the setting. *Using [ ] or [ ] key changes the value.
- Page 175 Initial Menu Content Set range value SIZE adjstment X SIZE adjustment . Used to perform the size detection adjustment of the optional universal tray and the manual feed tray. (LCD display) SIZE ADJUSTMENT X *Using [ ] or [ ] key select the tray. Pressing [OK] key enter the adjustment mode.
- Page 176 Initial Menu Content Set range value TEST PRINT XX Printing Test Used to perform self-printing under the set conditions, and to adjust and check the engine set value. TEST PRINT 00 *Pressing [ ] or [ ] key selects the mode. XX(select the number changed to decimal.) 1 : No Jam detection 1 : No Fuser Control...
- Page 177 Initial Menu Content Set range value TEST PRINT XX Printing Test Used to perform self-printing under the set conditions, and to adjust and check the engine set value. Selection Menu: LCD display Content Set value MULTI SETTING Continuous print 001 - 999 quantity setup PRINT PATTERN Test print pattern...
- Page 178 Initial Menu Content Set range value WARM UP TIME Warm up time display mode. DISPLAY Used to display the warm-up time. (LCD display) WARM UP TIME DISPLAY *Pressing [OK] key enter the Warm up time display mode. *Pressing [BACK/C] key terminates the Warm up time display mode. COUNTER DATA Counter data display.
- Page 179 Initial Menu Content Set range value COUNTER DATA Counter data clear. CLEAR Used to clear each counter value. (LCD display) XXXXX COUNTER CLEAR *Pressing the [ ] or [ ] key selects the counter group for the counter clear mode. *Pressing [OK] key displays the counter clear group.
- Page 180 Initial Menu Content Set range value DESTINATION SETUP Destination setup. Used to perform the destination setup. (LCD display) DESTINATION SETUP *Pressing the [ ] or [ ] key select the destination. *Pressing [OK] key displays the destination. *Using [ ] and [ ] keys changes the destination.
- Page 181 Initial Menu Content Set range value MNT CYCLE SETUP Maintenance cycle setup. Used to set the maintenance cycle. (LCD display) value MNT CYCLE SETUP DEFAU *Pressing [OK] key displays the maintenance cycle. *Using [ ] and [ ] keys changes the maintenance cycle. 100K *Pressing [OK] key set the change of the maintenance cycle.
- Page 182 Initial Menu Content Set range value CONSOLE FIN. SET X Console finisher setting. Used to perform the adjustments of the console finisher (AR-FN7). For details, refer to the Service Manual of the AR-FN7. saddle binding position saddle fold position console finisher adjustment (front) console finisher adjustment (rear) staple position (rear) staple position (front)
- Page 183 Initial Menu Content Set range value PROCESS DATA Process control data display. DISPLAY (LCD display) DRUM ADJ. (VG) *Pressing the [ ] or [ ] key selects the group. *Pressing [OK] key displays the process control data. *Using [MENU] moves to the next item *Pressing [BACK/C] key terminates the process control data display mode.
- Page 184 [11] TROUBLE CODES Trouble Contents Remark Trouble codes detection F1 36 Console finisher punch timing With Console 1.Trouble codes list sensor trouble Finisher Trouble Contents Remark Trouble installed codes detection 37 Console finisher backup RAM With Console C1 00 MC trouble trouble Finisher installed...
- Page 185 Trouble Contents Remark Trouble MAIN SUB codes detection Content HDD trouble U2 12 Adjustment value check sum Controller Detail HDD does not operate properly in the error (Controller EEPROM) machine with HDD installed. 90 PCU section EEPROM read/ Cause HDD is not installed properly to the Controller write error PWB.
- Page 186 MAIN SUB MAIN SUB Content Finisher power abnormality Content Console finisher paddle motor trouble Detail The 24V power is not supplied to the finisher Detail Paddle motor operation abnormality PWB. Cause Motor lock Cause Improper connection or disconnection of Motor rpm abnormality connector and harness Overcurrent to the motor Finisher control PWB trouble...
- Page 187 MAIN SUB MAIN SUB Content Console finisher communication trouble Content Console finisher punch timing sensor trouble Detail Communication cable test error after turning Detail Sensor input value abnormality on the power or exiting from DIAG. Cause Sensor breakage Communication error with the console Harness disconnection finisher Console finisher control PWB trouble...
- Page 188 MAIN SUB MAIN SUB Content Process thermistor trouble 00··· Content Fusing section low temperature trouble 1HL1 Detail Process thermistor open Detail •The set temperature is not reached within the specified time (normally 3 min) when Cause Process thermistor trouble Process thermistor harness disconnection warming up or resetting from pre-heating.
- Page 189 MAIN SUB MAIN SUB Content Polygon motor lock detection Content Desk No. 2 tray/LCC1 lift-up trouble Detail It is judged that the polygon motor lock signal Detail Desk No. 2 tray/LCC lift-up trouble is not outputted. Cause Sensor trouble Lock signal is checked in the interval of Desk control PWB trouble 10sec after starting the polygon motor, and it Gear breakage...
- Page 190 MAIN SUB MAIN SUB Content Battery abnormality Content RIC communication trouble Detail Backup SRAM battery voltage fall Detail RIC communication trouble Communication cable test error after turning Cause Battery life on the power or exiting DIAG. Battery circuit abnormality Cause Disconnection of connector and harness Check and Check that the battery voltage is about 2.5V...
- Page 191 3.Halt of operation in trouble A. Troubles where the machine can be operated depending on the conditions (Include Multi Function) Operation-possible mode Judgment Trouble Trouble Copy read FAX send Email send FAX print Print List print block code (interruption, etc.) (SPF trouble) SCANNER Scanner section troubles...
- Page 193 COPYRIGHT COPYRIGHT COPYRIGHT 2001 BY SHARP CORPORATION 2001 BY SHARP CORPORATION 2001 BY SHARP CORPORATION All rights reserved. All rights reserved. All rights reserved. Printed in Japan. Printed in Japan. Printed in Japan. No part of this publication may be reproduced,...
-
Page 194: Table Of Contents
The AR-M350 / AR-M450 Parts Guide describes only the parts change from AR-P350 / AR-P450 Parts Guide. for the common parts,please refer to the AR-P350 / AR-P450(CODE : 00ZAR350LPP1/) Parts Guide. This document has been published to be SHARP CORPORATION used for after sales service only. The contents are subject to change without... - Page 195 DEFINITION The definition of each Rank is as follows and also noted in the list A : Parts necessary to be stocked as High usage parts. B : Parts necessary to be stocked as Standard usage parts. C : Low usage parts. D : Parts necessary for refurbish.
- Page 196 12 Controller BOX unit 17 Packing material & Accessories PRICE PART PARTS CODE DESCRIPTION RANK MARK RANK S P A K C 6 1 2 2 D S 1 8 Packing case [ARM350][STCL,SRS,SRSSC] S P A K C 6 1 2 2 D S 1 9 Packing case [ARM350][China] S P A K C 6 1 2 2 D S 1 7...
- Page 197 26 MFP Control PWB (ARM350/M450/350M/450M/ARM11) PRICE PART PARTS CODE DESCRIPTION RANK MARK RANK 1 P C A P H 0 0 1 0 G C Z Z Jumper (JM-2W-96) [JP2,3,4,5,6,7] 2 P C O V P 1 4 6 8 F C Z Z FAX battery cover 3 Q C N C M 0 0 4 1 Q S Z Z Connector (TX25-100P12)
- Page 198 26 MFP Control PWB (ARM350/M450/350M/450M/ARM11) PRICE PART PARTS CODE DESCRIPTION RANK MARK RANK 63 V H I N 2 3 9 1 D 2 5 - 1 IC (N2391D25) [IC35,33] 64 V H I N J M 3 1 7 D L - 1 IC (NJM317DL) [IC2] 65 V H I N J U 6 3 5 6 E - 1...
-
Page 199: Exteriers[Ar-Ef1]
27 Exteriers[AR-EF1] PRICE PART PARTS CODE DESCRIPTION RANK MARK RANK 1 G C A B - 0 9 4 3 F C Z Z Rear lower cabinet 2 X H B S E 4 0 P 0 8 0 0 0 Screw (4×8) 3 P C O V P 1 5 6 6 F C Z Z Upper cabinet rear cover... -
Page 200: Original Detect Unit[Ar-Ef1]
28 Original detect unit[AR-EF1] PRICE PART PARTS CODE DESCRIPTION RANK MARK RANK 1 M A R M P 0 1 4 8 F C Z 2 Original detect arm lower 2 X B P S D 3 0 P 0 6 K S 0 Screw (3×6KS) 3 L B S H Z 1 1 0 2 C C Z Z Rubber roller bushing 1... -
Page 201: Operation Panel Unit[Ar-Ef1]
29 Operation panel unit[AR-EF1] PRICE PART PARTS CODE DESCRIPTION RANK MARK RANK 1 C P W B N 1 4 7 1 F C E 1 LVDS PWB 2 M S P R P 3 0 0 9 F C Z Z LCD earth plate spring 3 X E P S D 3 0 P 0 8 0 0 0 Screw (3×8) -
Page 202: Optical Unit 1[Ar-Ef1]
30 Optical unit 1[AR-EF1] PRICE PART PARTS CODE DESCRIPTION RANK MARK RANK 1 P C O V P 1 5 9 9 F C Z Z Harness cover B 2 X H B S D 3 0 P 0 4 0 0 0 Screw (3×4) 3 L H L D W 1 1 1 5 F C Z Z Edge bushing... -
Page 203: Optical Unit 2[Ar-Ef1]
31 Optical unit 2[AR-EF1] PRICE PART PARTS CODE DESCRIPTION RANK MARK RANK C D A I U 0 6 1 9 D S 5 1 Lamp unit 2 L H L D Z 1 5 0 5 F C Z Z Wire holder 3 X B B S D 4 0 P 0 6 0 0 0 Screw (4×6) - Page 204 31 Optical unit 2[AR-EF1] 10 9 0 0 0 – 10 –...
-
Page 205: Lamp Unit[Ar-Ef1]
32 Lamp unit[AR-EF1] PRICE PART PARTS CODE DESCRIPTION RANK MARK RANK R L M P D 0 6 5 8 F C Z Z Lamp 2 X E B S D 3 0 P 0 8 0 0 0 Screw (3×8) 3 P R E F L 0 1 7 2 F C Z Z Reflector 4 X B B S D 3 0 P 1 2 0 0 0... - Page 206 33 DSPF Assembly section[AR-EF1] PRICE PART PARTS CODE DESCRIPTION RANK MARK RANK 27 D H A I - 3 1 6 6 F C Z Z DSPF body interface harness 28 X E S S E 3 0 P 0 8 0 0 0 Screw (3×8) 29 D H A I - 3 1 6 1 F C Z Z SPF size detect harness...
-
Page 207: Dspf Paper Feed Unit[Ar-Ef1]
34 DSPF Paper feed unit[AR-EF1] PRICE PART PARTS CODE DESCRIPTION RANK MARK RANK 1 P C O V P 1 5 9 4 F C Z Z Roller cover 2 X H B S E 3 0 P 0 6 0 0 0 Screw (3×6) 3 P M L T - 1 2 7 2 F C Z Z Damper cushion 3... - Page 208 34 DSPF Paper feed unit[AR-EF1] – 14 –...
-
Page 209: Dspf Upper Transfer Unit[Ar-Ef1]
35 DSPF Upper transfer unit[AR-EF1] PRICE PART PARTS CODE DESCRIPTION RANK MARK RANK 1 L P L T M 5 8 9 1 F C Z Z Upper delivery rainforce plate 2 P M L T - 1 2 7 2 F C Z Z Damper cushion 3 3 L S T P P 0 3 5 3 F C Z Z Original stopper... -
Page 210: Dspf Cis Unit[Ar-Ef1]
36 DSPF CIS unit[AR-EF1] PRICE PART PARTS CODE DESCRIPTION RANK MARK RANK 1 C P W B N 1 4 5 8 F C E 1 CIS control PWB 2 X B B S D 3 0 P 0 6 0 0 0 Screw (3×6) 3 P C O V P 1 5 9 3 F C Z Z CIS PWB cover N... -
Page 211: Packing Material & Accessories[Ar-Ef1]
37 Packing Material & Accessories[AR-EF1] PRICE PART PARTS CODE DESCRIPTION RANK MARK RANK 1 S P A K A 6 0 7 5 D S Z Z RSPF protect sheet 1 L S O U - 0 1 7 7 F C G Z Delivery tray T L S O U - 0 1 7 9 F C Z Z Delivery tray 1... -
Page 212: Mfp Ope Pwb[Ar-Ef1]
38 MFP OPE PWB[AR-EF1] PRICE PART PARTS CODE DESCRIPTION RANK MARK RANK 1 Q C N C M 1 1 7 1 F C Z Z Connector (6pin) [CN2] 2 Q C N C W 1 1 3 4 F C Z Z Connector (24pin) [CN1] Q S W - P 0 0 0 5 Q S Z Z... -
Page 213: Cis Control Pwb[Ar-Ef1]
39 Scanner control PWB[AR-EF1] PRICE PART PARTS CODE DESCRIPTION RANK MARK RANK V H D D A P 2 0 2 K / - 1 Diode (DAP202K) [D5,D16,D17,D24,D25,D26] V H D D A P 2 0 2 K / - 1 Diode (DAP202K) [D13,D12] 36 V H D D S M 1 D 1 / / - 1... -
Page 214: Mfp Controler Pwb[Ar-M11]
40 CIS Control PWB[AR-EF1] PRICE PART PARTS CODE DESCRIPTION RANK MARK RANK 17 V H I F S 7 8 1 B Z B - 1 IC (FS781BZB) [IC6] 18 V H I M 3 0 6 4 A T C - 1 IC (M3064ATC) [IC7] 19 V H I V H C 2 4 4 S J - 1... -
Page 215: Packing Material & Accessories[Arm11]
42 Packing material & Accessories[ARM11] PRICE PART PARTS CODE DESCRIPTION RANK MARK RANK 2 S P A K P 2 7 9 2 R C Z Z Vinyl bag (460×500mm) 4 S P A K A 6 1 4 4 F C Z Z Packing add B 5 S P A K A 6 1 4 3 F C Z Z Packing add A... -
Page 216: Packing Material & Accessories[Ar-Rk1]
43 Packing Material & Accessories[AR-RK1] PRICE PART PARTS CODE DESCRIPTION RANK MARK RANK 1 S P A K A 6 1 3 6 F C Z Z Protect add S P A K C 6 1 3 4 D S Z Z Packing case (Japan) S P A K C 6 1 3 4 D S 1 1... -
Page 217: Index
Index PRICE PART PARTS CODE RANK MARK RANK LDAIU0610FCZZ 30- 30 PRICE PART PARTS CODE RANK MARK RANK LDAIU0619FCZZ LDAIU0627FCZZ 27- 27 CARMP0147DS51 28-501 LFIX-0284FCZZ 31- 12 CBTN-0250FC01 29- 18 LFIX-0537FCZZ 30- 39 CBTN-0251FC01 LFIX-0543FCZZ 29- 15 27- 12 CBTN-0252FC01 LFIX-0544FCZZ 29- 13 CBTN-0253FC01... - Page 218 PRICE PART PRICE PART PARTS CODE PARTS CODE RANK MARK RANK RANK MARK RANK MARMP0243FCZZ PCOVP1599FCZZ 33- 41 MARMP0248FCZZ PCOVP1600FCZZ 35- 15 MARMP0284FCZZ PCOVP1615FCZZ 34- 26 MHNG-0208FCZZ PCOVP1624FCZZ 27- 23 MHNG-0209FCZZ PCOVP1644FCZZ 34- 34 33- 14 MLEVP0794FCZZ 33- 34 PCOVP1645FCZZ 33- 24 MLEVP0796FCZZ PCUSF0334FCZZ...
- Page 219 PRICE PART PRICE PART PARTS CODE PARTS CODE RANK MARK RANK RANK MARK RANK QCNCM1171FCZZ SPAKC6122DS22 QCNCM7014SC1C SPAKC6131DS11 QCNCM7022SC0C SPAKC6131DSZZ QCNCM7022SC0E SPAKC6134DS11 QCNCM7022SC0F SPAKC6134DS12 QCNCW0885FCZZ SPAKC6134DS13 QCNCW0946FCZZ SPAKC6134DSZZ QCNCW1134FCZZ SPAKC6142FC11 QCNCW1147FCZZ SPAKC6142FC12 QCNCW1149FCZZ SPAKC6142FC13 QCNCW1160FCZZ SPAKC6142FCZZ QCNCW7040XC8J SPAKP2792RCZZ 39- 10 QCNW-0165FCZZ 30- 15 SSAKZ0003QSZZ...
- Page 220 PRICE PART PRICE PART PARTS CODE PARTS CODE RANK MARK RANK RANK MARK RANK VCKYCZ1HF103Z VHP1LHEE-002A 26- 38 26- 75 " VHP1LHLE-002A 39- 32 38- 13 " VHPGP1A22LC-1 40- 11 31- 38 VCKYPU1EB223Z VHPGP1A73A+-1 33- 33 VCKYPU1HB101K 38- 10 " 34- 68 VCQYNA1HM103K "...
- Page 221 PRICE PART PRICE PART PARTS CODE PARTS CODE RANK MARK RANK RANK MARK RANK XBBSE30P06000 XBPSD26P06000 12- 26 " XBPSD30P05K00 31- 28 XBPSD30P06000 12- 47 " XBPSD30P06KS0 XBPSD40P06KS0 31- 10 XBPSD40P16KS0 31- 29 XBTSC50P16000 27- 11 XBTSE40P06000 27- 15 XEBSD30P08000 "...
- Page 222 CAUTION FOR BATTERY REPLACEMENT (Danish) ADVARSEL ! Lithiumbatteri - Eksplosionsfare ved fejlagtig håndtering. Udskiftning må kun ske med batteri af samme fabrikat og type. Levér det brugte batteri tilbage til leverandoren. (English) Caution ! Danger of explosion if battery is incorrectly replaced. Replace only with the same or equivalent type recommended by the manufacturer.
- Page 223 COPYRIGHT C 2001 BY SHARP CORPORATION All rights reserved. Printed in Japan. No part of this publication may be reproduced, stored in a retrieval system, or transmitted, in any form or by any means, electronic, mechanical, photocopying, recording, or otherwise, without prior written permission of the publisher.
-
Page 224: Sharp Corporation
” are important for maintaining the safety of the set. Be sure to replace these parts with specified ones for maintaining the safety and performance of the set. This document has been published to be used SHARP CORPORATION for after sales service only. The contents are subject to change without notice. -
Page 225: General
1MByte scale network where two or more network protocols are intermingled. Network interface 10BASE-T/100BASE-TX 1 port (10/100BASE auto recognition) [2] ENVIRONMENT Printer interface Sharp's unique interface Other LED lamp Status 10Base LINK, 1. Items required for connection to a 100Base LINK network (3 pcs.) -
Page 226: Installation
2. Jumper switches 2. Parts included Print server card: 1 Screws (silver) Spacers (unused): 2 M3 x 8: 2 10BASE-T/ CD-ROM: 1 Operation manual: 1 Installation manual: 1 100BASE-TX connector 3. Installation procedure The AR-NC5J installing procedures in the AR-235/275 series are Jumper switch described. -
Page 227: Ar-Nc5J Status Check
[6] AR-NC5J STATUS CHECK 3) Attach the print server card. Align the connector positions, connect the print server card, and then secure the card to the option mounting plate in the main unit 1. Printing the status page using supplied two silver screws (M3 x 8). The AR-NC5J status is checked by printing the status page. - Page 228 Telnet Web page NIC Manager Change root Change Admin Admin Sharp The administrator password of the AR-NC5J is set with ASCII Password password Password character codes. This password is used for identification when changing setup by Telnet, a Web page, or a setup utility.
- Page 229 Comment Comment Comment "Sharp AR-NC5J" Used to set the comment on the AR-NC5J. The set contents are displayed as the comment on the AR-NC5J by Window's Explorer. AR-NC5J/NC5JG/NC5JW - 5...
-
Page 230: Troubleshooting
(NetBEUI) used to connect the AR-NC5J with LocalTalk, check that "Printer port" or "MODEM port" is selected. A. Work Group of "Sharp Printer" is not found in the *2: In the case of Network entire network. Check that "Ethernet" is selected. When an AppleTalk router is Check that the network group is properly connected. - Page 231 If the IPX/SPX protocol is available and there is a NetWare server in B. Main menu the environment, a network number may be obtained from the Net- When retrieval is completed, the main menu of the tool is displayed, Ware server to allow communication (retrieval and upload) with a print and the list of retrieval results is displayed.
- Page 232 1) Single selection E. Test print When only one printer is selected from the list on the main menu: After selecting a desired printer from the list, select COMMUNICATION First the upload start confirmation display is shown. Selecting YES a TEST PRINT on the menu or press the TEST PRINT button, and the in this menu deletes the firmware and starts uploading.
- Page 233 5. Error message list 6. Check for defectiveness of the AR-NC5J The table below shows the error messages list of the version up tool. TEST PRINT Refer to [8] Error message Occurring conditions Invalid firmware file. Select a The Bin file of the selected firmware correct file.
- Page 234 CAUTION FOR BATTERY REPLACEMENT (Danish) ADVARSEL ! Lithiumbatteri – Eksplosionsfare ved fejlagtig håndtering. Udskiftning må kun ske med batteri af samme fabrikat og type. Levér det brugte batteri tilbage til leverandoren. (English) Caution ! Danger of explosion if battery is incorrectly replaced. Replace only with the same or equivalent type recommended by the manufacturer.
- Page 235 All rights reserved. Printed No part of this publication may be reproduced, stored in a retrieval system, or transmitted, in any form or by any means, electronic; mechanical; photocopying; recording or otherwise without prior written permission of the publisher. Trademark Acknowledgments Microsoft Windows, MS-DOS, Windows NT, Windows 2000 are trademarks of Microsoft Corporation in the U.
Need help?
Do you have a question about the AR-M350N and is the answer not in the manual?
Questions and answers