Table of Contents
Advertisement
INSTALLATION & COMMISSIONING GUIDE
Please Read This Guide
Congratulations on your purchase of an
ActronAir air conditioning system. This unit
has been designed and manufactured with the
highest quality standard in mind.
Please read this guide thoroughly and keep it
near the unit for future reference.
This manual is a controlled document which contains confidential and proprietary information.
Distribution, modification, copying and/or reproduction are prohibited without written consent from ActronAir.
PKY470T-6Q2
PKY540T-6Q2
Copyright © 2017 Actron Engineering Pty. Ltd. All rights reserved.
PKY470T - PKY700T TRI-CAPACITY
WITH COMMERCIAL CONTROL
PKY620T-6Q2
PKY700T-6Q2
Advertisement
Table of Contents

Related Manuals for ActronAir PKY470T-6Q2


Summary of Contents for ActronAir PKY470T-6Q2
- Page 1 Copyright © 2017 Actron Engineering Pty. Ltd. All rights reserved. This manual is a controlled document which contains confidential and proprietary information. Distribution, modification, copying and/or reproduction are prohibited without written consent from ActronAir.
-
Page 2: Table Of Contents
• Check for loosened screws. propeller and blower fan. 1800 119 229 If there is any damage to the unit contact ActronAir immediately on toll free number: Installation & Commissioning Guide PKY470-700 Tri-Capacity Package with CM100 Control Doc. No.0525-032 Ver. 9 180921... -
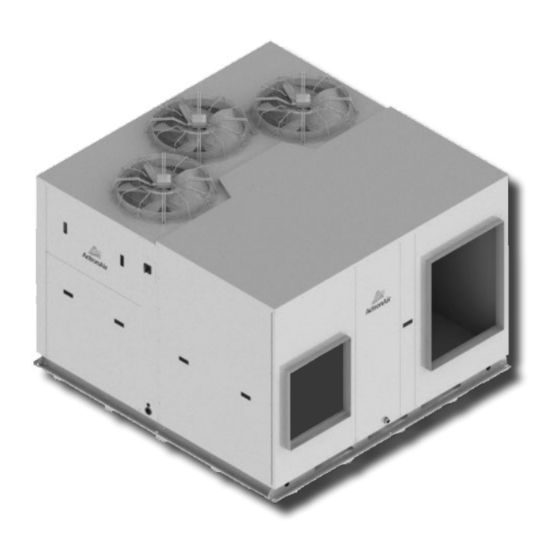
Page 3: Components Overview
8. Ensure that the spaces around the unit are free from any obstructions for optimum unit performance. ActronAir is constantly seeking ways to improve the design of it’s products, therefore specifications are subject to change without notice. Copyright © 2017 Actron Engineering Pty. Ltd. -
Page 4: Unit Dimensions
UNIT DIMENSIONS PKY470T-6Q2 DIMENSION (H x W x L) = 1465 x 2305 x 2365 SUPPLY DUCT (H x W) = 650 x 580 RETURN DUCT (H x W) = 900 x 700 USE M12 BOLT FOR FEET MOUNTING 2365 O/A... - Page 5 3. LH / RH refers to Left Hand or Right Hand location of supply air 4. Above drawings shows left side handing. ActronAir is constantly seeking ways to improve the design of it’s products, therefore specifications are subject to change without notice. Copyright © 2017 Actron Engineering Pty. Ltd.
- Page 6 UNIT DIMENSIONS PKY620T-6Q2 DIMENSION (H x W x L) = 1695 x 2305 x 2365 SUPPLY DUCT (H x W) = 650 x 580 RETURN DUCT (H x W) = 900 x 700 USE M12 BOLT FOR FEET MOUNTING 2365 O/A MTG C-C MTG C-C DISTANCE...
- Page 7 3. LH / RH refers to Left Hand or Right Hand location of supply air 4. Above drawings shows left side handing. ActronAir is constantly seeking ways to improve the design of it’s products, therefore specifications are subject to change without notice. Copyright © 2017 Actron Engineering Pty. Ltd.
-
Page 8: Service Access / Airflow Clearances And Unit Base Dimensions
UNIT DIMENSIONS MODELS: SERVICE ACCESS AREAS AND AIRFLOW CLEARANCES PKY470T-6Q2 PKY540T-6Q2 PKY620T-6Q2 500 mm PKY700T-6Q2 AIRFLOW ALLOWANCE OUTDOOR COIL OUTDOOR COIL 1000 mm KEEP ALL CLEARANCES FREE SERVICE OF ANY OBSTRUCTIONS CLEARANCE (COMPRESSOR & ELECTRICALS) 300 mm OUTSIDE AIR SECTION... -
Page 9: Unit Lifting Procedures
OPTION 1 534 TYP UNIT HOLE DIMENSIONS PALLET HOLE DIMENSIONS All dimensions in mm. ActronAir is constantly seeking ways to improve the design of it’s products, therefore specifications are subject to change without notice. Copyright © 2017 Actron Engineering Pty. Ltd. -
Page 10: Condensate & Safety Tray Drainage Instructions
CONDENSATE AND SAFETY TRAY DRAINAGE INSTRUCTIONS SUGGESTED MINIMUM SLOPE TO ENSURE CORRECT DRAINAGE Condensate Drain Connection Ø 31.8mm (1-1/4”) BSP Socket OUTDOOR COIL Condenser Drain RETURN must be run separately from the Evaporator Drain Condensate Drain Connection Ø 31.8mm (1-1/4”) BSP Female Thread INDOOR COIL Evaporator Drain must be... -
Page 11: Banking Of Units
3. Do not scale drawing. ActronAir is constantly seeking ways to improve the design of it’s products, therefore specifications are subject to change without notice. Copyright © 2017 Actron Engineering Pty. Ltd. - Page 12 RECIRCULATE BACK ONTO CONDENSER COIL. 2. Minimum service access areas and spaces for airflow are responsibilities of the installer, ActronAir will not be held responsible for any extra charges incurred due to lack of access and space for airflow. ®...
-
Page 13: Parts Layout
Relays Terminal Strips Controller OPTIONAL 3 Phase Sequence Protection Relay W - Option ActronAir is constantly seeking ways to improve the design of it’s products, therefore specifications are subject to change without notice. Copyright © 2017 Actron Engineering Pty. Ltd. - Page 14 3 Phase Relays Terminal Strips Controller Soft Starter C1 Z - Option NOTE: PKY470T-6Q2 & PKY540T-6Q2 with optional soft starter has no compressor contactors in the main electrical control gears. PKY620T-6Q2 & PKY700T-6Q2 Condenser Fan Condenser Fan Control Controller Main Electrical...
- Page 15 Relays Terminal Strips Controller OPTIONAL 3 Phase Sequence Protection Relay W - Option ActronAir is constantly seeking ways to improve the design of it’s products, therefore specifications are subject to change without notice. Copyright © 2017 Actron Engineering Pty. Ltd.
- Page 16 Control Interface Relays Terminal Strips Controller Soft Starter C1 Z - Option NOTE: PKY470T-6Q2 & PKY540T-6Q2 with optional soft starter has no compressor contactors in the main electrical control gears. PKY620T-6Q2 & PKY700T-6Q2 Condenser Fan Control Controller Main Electrical Main Isolator...
-
Page 17: Supply & Return Angle Plate Installation
(a) supply air side, (b) supply air front, (c) return air side and (d) return air front. 4) Tools required (not supplied): rivet gun and phillips screw driver. ActronAir is constantly seeking ways to improve the design of it’s products, therefore specifications are subject to change without notice. Copyright © 2017 Actron Engineering Pty. Ltd. -
Page 18: Supply & Return Angle Plate Assembly / Installation
UNIT PREPARATION SUPPLY AND RETURN ANGLE PLATE ASSEMBLY / INSTALLATION SUPPLY AIR ANGLE AND RETURN AIR ANGLE SUB-ASSEMBLY Assemble supply air and return air angle plates using SA / RA - Angle the provided rivet as shown in illustration on left. Short Plate Materials: 2 Pcs - Supply Angle Short Plate... -
Page 19: Electrical Mains & Isolator Installation
• Assemble shaft and knob in order as shown. connections. ActronAir is constantly seeking ways to improve the design of it’s products, therefore specifications are subject to change without notice. Copyright © 2017 Actron Engineering Pty. Ltd. ActronAir is constantly seeking ways to improve the design of it’s products, therefore specifi cations are subject to change without notice. -
Page 20: Compressor Shipping Blocks Removal
UNIT PREPARATION COMPRESSOR SHIPPING BLOCKS REMOVAL Remove First the Small Access Panel - Electrical Compressor Large Compressor Loosen Screws (4-pcs / Comp.) Shipping Remove the Blocks Access Panel - Compressor 1. Remove Access Panel - Compressor 2. Loosen the Screws - Compressor Mounting •... -
Page 21: Air Filter Installation
• Replace Access Panel - Air Filter as shown above. • Replace mounting screws, clean and tidy up the air conditioning unit. ActronAir is constantly seeking ways to improve the design of it’s products, therefore specifications are subject to change without notice. Copyright © 2017 Actron Engineering Pty. Ltd. - Page 22 UNIT 7/0.12 (AWG28) Telephone Cable (Installer to Provide) CIRCUIT BREAKER SIZE & CABLE SIZE Circuit Breaker Cable Size Size Model MAIN Amps (4 Core + E) PKY470T-6Q2 50.0 10.0 PKY540T-6Q2 50.0 10.0 PKY620T-6Q2 63.0 16.0 PKY700T-6Q2 80.0 25.0 * Suggested Minimum Cable Size should be used as a guide only, refer to AS/NZS 3000 “Australian / New Zealand Wiring Rules”...
-
Page 23: Maximum Cable Lengths
Do not extend the factory supplied data cable when re-locating the Control Interface. Replace the cable with a single length of either of the data cables specified above. ActronAir is constantly seeking ways to improve the design of it’s products, therefore specifications are subject to change without notice. Copyright © 2017 Actron Engineering Pty. Ltd. - Page 24 ELECTRICAL CONTROL INTERFACE INSTALLATION PROCEDURES - REMOTE LOCATION CONTROL INTERFACE (CP05) MOUNTING DETAILS: Dimensions: Control Interface Mounting Cut-Out Details: 71mm 76mm 34.4mm 38.4mm CONTROL INTERFACE (CP05) DE-MOUNTING PROCEDURE: Pull-out the Lateral Sliding Plastic Brackets from the Control Interface Panel Thickness T = 1.2 - 6.0mm Press-on the Lateral Sliding Plastic Brackets’...
-
Page 25: Data Cable & Rj12 Plug Preparations
• Terminal 5:- Connect to GND on the connector block. Twisted Pair • Terminal 6:- Connect to +Vdc on the connector block. ActronAir is constantly seeking ways to improve the design of it’s products, therefore specifications are subject to change without notice. Copyright © 2017 Actron Engineering Pty. Ltd. - Page 26 ELECTRICAL Option 2 - Data Cable with RJ12 plug at one end: Prepare the Data Cable with RJ12 plug at one end and other end terminals open to be connected to Control Interface and CM100 receptacles. (Keep the length of this cable no longer than the specified maximum cable length).
-
Page 27: Dual Control Interface Connection Procedures
• Refer mounting Cut-out & Mounting holes details to Control Interface Insert Part No. 0525-035. ActronAir is constantly seeking ways to improve the design of it’s products, therefore specifications are subject to change without notice. Copyright © 2017 Actron Engineering Pty. Ltd. -
Page 28: Bms Control Installation Procedure
24V +10% -15% 50-60Hz / 28-36V max power: 28W/20W BMS PART NUMBERS BMS Connection Type Kit Part Number * Note: ActronAir Control Interface can be left connected MODBUS 485 ICMOD-485 or can be dis-connected from the control board. BACNET 485... -
Page 29: Return Air - Outside Air - Spill Air Control Wiring Procedures
AND FITTED RETURN AIR - OUTSIDE AIR - SPILL AIR CONTROL CONNECTION DIAGRAM ActronAir is constantly seeking ways to improve the design of it’s products, therefore specifications are subject to change without notice. Copyright © 2017 Actron Engineering Pty. Ltd. -
Page 30: Demand Response Management
ELECTRICAL DEMAND RESPONSE MANAGEMENT Control Inputs 7 8 9 TERMINALS Secure the cables firmly using the cable ties and clamp provided in the panels. To Outdoor Controller Refer to diagram below for details of DRM connections. 1. Thread & Route the DRM input cables into the Unit •... -
Page 31: 3Rd Party Control Connection Diagrams
ELECTRICAL - 3RD PARTY CONTROL CONNECTION DIAGRAMS ActronAir is constantly seeking ways to improve the design of it’s products, therefore specifications are subject to change without notice. Copyright © 2017 Actron Engineering Pty. Ltd. - Page 32 ELECTRICAL - 3RD PARTY CONTROL CONNECTION DIAGRAMS Installation & Commissioning Guide PKY470-700 Tri-Capacity Package with CM100 Control Doc. No.0525-032 Ver. 9 180921...
- Page 33 ELECTRICAL - 3RD PARTY CONTROL CONNECTION DIAGRAMS ActronAir is constantly seeking ways to improve the design of it’s products, therefore specifications are subject to change without notice. Copyright © 2017 Actron Engineering Pty. Ltd.
- Page 34 ELECTRICAL - 3RD PARTY CONTROL CONNECTION DIAGRAMS Installation & Commissioning Guide PKY470-700 Tri-Capacity Package with CM100 Control Doc. No.0525-032 Ver. 9 180921...
-
Page 35: Compressors And Indoor Fans Modes Of Operation
BMS interface card, if these are installed (refer to wiring diagram). • that the Room Air Temperature Sensor is connected to the unit. ActronAir is constantly seeking ways to improve the design of it’s products, therefore specifications are subject to change without notice. Copyright © 2017 Actron Engineering Pty. Ltd. - Page 36 Thermoregulation H. Manufacturer NOTE: The Compressors are now configured/ready to be controlled through ActronAir Internal Control. 3.2 Compressors 0-10VDC External Control Mode In this mode, the Compressors can be controlled through 0-10VDC input from the external controller and all the logic will be run by the external controller.
- Page 37 3.1.3 Make sure the Multi Input assigned to the Compressors via S.Configuration screen Gfc8 is disabled. ActronAir is constantly seeking ways to improve the design of it’s products, therefore specifications are subject to change without notice. Copyright © 2017 Actron Engineering Pty. Ltd.
- Page 38 Gfc. Thermoregulation Gfc13. S. Configuration NOTE: The Indoor Fans are now configured/ready to be controlled through ActronAir Internal Control. 4.2 Indoor Fans 0-10VDC External Control Mode In this mode, the Indoor Fans are configured to be controlled via a 0-10VDC external input.
- Page 39 590 = 5.9V or 59% Spd E. Status E2. Input / Output ActronAir is constantly seeking ways to improve the design of it’s products, therefore specifications are subject to change without notice. Copyright © 2017 Actron Engineering Pty. Ltd.
- Page 40 COMPRESSORS AND INDOOR FANS MODES OF OPERATION 4.3 Indoor Fans 24VAC External Control Mode In this mode, the Indoor Fans are configured for request through 24VAC input from the external controller. Configuration Procedure: 4.3.1 Ensure that the mode of operation is set to “External Input” via Service menu. (Please see Step 3.2.1 above).
- Page 41 Turn the unit “ON” via Set Fan mode to Control Interface. “Continuous”. Control Interface. “Auto cycle”. ActronAir is constantly seeking ways to improve the design of it’s products, therefore specifications are subject to change without notice. Copyright © 2017 Actron Engineering Pty. Ltd.
- Page 42 SYSTEM COMPONENTS CONTROL MATRIX Modes of Operation System Components Control Internal Sensors Mode External Input Mode Remote Demand Mode Unit On / Off Through CP05 / CP10 Through CP05 / CP10 Through CP05 / CP10 Through 24VAC External Inputs Compressors Internally controlled Through MODBUS / BACnet or 0-10VDC Input...
- Page 43 On / Off G. Service Ge. Comm config Ge2 BMS Config. ActronAir is constantly seeking ways to improve the design of it’s products, therefore specifications are subject to change without notice. Copyright © 2017 Actron Engineering Pty. Ltd.
-
Page 44: Menu Tree
MENU TREE CONSUMER / END USER MENU Note: To toggle (scroll) "Up" or "Down" from Main Menu existing menu, press “ ” “ ” Button. A. On / Off Unit E5. Demand Management 1 Demand Management 2 A1. Turn Unit - ON / OFF / FAN ONLY Demand Management 3 A/Hours Input Status A2. - Page 45 Gfc31. CO Control Start / End Alarm Output: enable/Disable Sensor Fault (PASSWORD PROTECTED) ActronAir is constantly seeking ways to improve the design of it’s products, therefore specifications are subject to change without notice. Copyright © 2017 Actron Engineering Pty. Ltd.
- Page 46 MENU TREE Note: To toggle (scroll) "Up" or "Down" from Service Menu (cont...) existing menu, press “ ” “ ” Button. (PASSWORD PROTECTED) Main Menu G. Service Gf. Service Setting (cont...) Gfd. Economy Settings Gfd1. Min Outside Air Enable CO Yes/No Level Damper Pos.
- Page 47 By Digital input Supply Fan Temp. By Supervisor Min. / Max Temp (PASSWORD PROTECTED) ActronAir is constantly seeking ways to improve the design of it’s products, therefore specifications are subject to change without notice. Copyright © 2017 Actron Engineering Pty. Ltd.
-
Page 48: Setting Economy Air Via Control Interface
SETTING ECONOMY AIR OPERATION VIA CONTROL INTERFACE SETTING ECONOMY AIR OPERATION VIA CONTROL INTERFACE NOTE: ∆t The Economy Air of this air conditioning system is based on Dry Bulb logic only and operates when cooling is required. The economy air operation can be set to operate via the Control Interface by the following procedures: 1. - Page 49 Gf19 Damper Scaling Command Start: Command End: 100% Output Start: Output End: 100% ActronAir is constantly seeking ways to improve the design of it’s products, therefore specifications are subject to change without notice. Copyright © 2017 Actron Engineering Pty. Ltd.
-
Page 50: Service Password
Therefore, Service Password some of the menu required during commissioning were locked and password protected (PIN format). The following procedures explain Insert service how to enter the password via ActronAir control interface: 7378 password (PW1) : Display Progression Main Menu... - Page 51 The extension wire MUST comply to the specifications on page 51 and the installer is required to adjust the sensor to get proper reading. ActronAir is constantly seeking ways to improve the design of it’s products, therefore specifications are subject to change without notice. Copyright © 2017 Actron Engineering Pty. Ltd.
- Page 52 Use only the provided ActronAir duct bead sensor or the optional wall sensor. Use of 3rd party sensors are not allowed as they are not tested with ActronAir air conditioning unit. Installation & Commissioning Guide PKY470-700 Tri-Capacity Package with CM100 Control...
-
Page 53: Various Room Temperature Sensor Connections
PKY units, the user has the option to disable the alarm from the OUTDOOR Room Temp. Sensor connection via Service Menu “Alarm disable Gfc17” screen. ActronAir is constantly seeking ways to improve the design of it’s products, therefore specifications are subject to change without notice. Copyright © 2017 Actron Engineering Pty. Ltd. - Page 54 ASSIGNING SENSORS IMPORTANT NOTES FOR RETURN AIR TEMPERATURE SENSOR: • PACKAGE UNITS (PKY) You must connect the factory supplied return air temperature sensor. If not connected, a fault will be registered and displayed in the screen. Please refer to wiring diagram provided with your unit. •...
-
Page 55: After Hours Logic With Timeclock (Scheduler)
Interface CL01 (menu 05) and the Timeclock (scheduler) is “ON” with no active event, pressing the Control Interface ActronAir is constantly seeking ways to improve the design of it’s products, therefore specifications are subject to change without notice. Copyright © 2017 Actron Engineering Pty. Ltd. -
Page 56: Enable / Disable Air Filter Alarm
ENABLE / DISABLE AIR FILTER ALARM IMPORTANT NOTE Instructions describe below are applicable to Tri-Capacity models with controller software Version 2021-136-2003 and onwards. The new Tri-Capacity controller software gives the user option to Enable / Disable the Air Filter Alarm. Shown below are the procedure and CP05 / CP10 display progressions which will guide the user to enable or disable the air filter alarm. -
Page 57: Indoor Fan Speed Setting Procedure
• Medium fan speed is the nominal operating fan speed which can be adjusted between the min and max speed. ActronAir is constantly seeking ways to improve the design of it’s products, therefore specifications are subject to change without notice. - Page 58 EC INDOOR FAN COMMISSIONING PKY470T- 6Q2 FAN PERFORMANCE DATA EXTERNAL STATIC PRESSURE (Pa) AIRFLOW (l/s) Spd. Spd. Spd. Spd. Spd. Spd. Spd. Spd. Spd. Spd. 1900 55.0 58.8 62.7 66.4 1092 69.8 1278 73.2 1466 76.5 1655 80.7 1910 83.2 2078 86.5 2298 2000 57.2 61.2...
- Page 59 Consider ext. static pressure drop specific to your design requirements. ActronAir is constantly seeking ways to improve the design of it’s products, therefore specifications are subject to change without notice. Copyright © 2017 Actron Engineering Pty. Ltd.
- Page 60 EC INDOOR FAN COMMISSIONING PKY620T- 6Q2 FAN PERFORMANCE DATA EXTERNAL STATIC PRESSURE (Pa) AIRFLOW Spd. Spd. Spd. Spd. Spd. Spd. Spd. Spd. Spd. Spd. (l/s) 53.7 57.5 61.2 1151 65.0 1330 68.3 71.5 1745 74.3 1956 78.0 2173 81.9 2426 85.0 2660 2500 55.5 59.2 1035 62.9 1221 66.6 1423 70.0 1632 72.9 1851 76.1 2071 80.0 2285 83.5 2555 88.0 2823...
- Page 61 Consider ext. static pressure drop specific to your design requirements. ActronAir is constantly seeking ways to improve the design of it’s products, therefore specifications are subject to change without notice. Copyright © 2017 Actron Engineering Pty. Ltd.
-
Page 62: Refrigerant Charging
Then make the necessary refrigerant charge or Thermal Expansion Valve (TXV) adjustment when required. If only ONE compressor is running, the subcool and superheat results will be different when compared with TWO compressors running. REFRIGERANT CHARGE DETAILS MODEL PKY470T-6Q2 PKY540T-6Q2 PKY620T-6Q2 PKY700T-6Q2 Refrigerant Type... - Page 63 Allow the system to stabilize for next 20 minutes before recording. ActronAir is constantly seeking ways to improve the design of it’s products, therefore specifications are subject to change without notice. Copyright © 2017 Actron Engineering Pty. Ltd.
- Page 64 REFRIGERANT CHARGING Record the discharge pressure, suction pressure, liquid line temperature and suction line temperature for both of the systems. Circuit 1 System (Small Compressor) Circuit 2 System (Large Compressor) Discharge Pressure = ________________ kPa Discharge Pressure = ________________ kPa Suction Pressure = __________________ kPa Suction Pressure = __________________ kPa Liquid Line Temperature (LLT) = ________...
- Page 65 4052.8 161.1 724.9 1932.3 4140.9 171.9 751.3 1984.1 4230.6 183.3 778.3 2036.9 4321.5 ActronAir is constantly seeking ways to improve the design of it’s products, therefore specifications are subject to change without notice. Copyright © 2017 Actron Engineering Pty. Ltd.
- Page 66 REFRIGERANT CHARGING CHARGING METHOD 2: COOLING CHARGING CURVE 1. Start and run the unit in cool mode, ensuring that both circuit 1 and 2 system compressors are in 100% operation and systems stabilized for 20 minutes, record discharge pressure and liquid line temperature. 2.
- Page 67 Superheat Adjustment +7.25 R410A +9.5 Detail “A” ActronAir is constantly seeking ways to improve the design of it’s products, therefore specifications are subject to change without notice. Copyright © 2017 Actron Engineering Pty. Ltd. DKRCC.PI.AN0.A4.02 / 520H2448 © Danfoss A/S (AC...
-
Page 68: Fault Display Codes
FAULT DISPLAY CODES CONTROLLER FAULT CODE DISPLAYS CONTROL INTERFACE FUNCTION / FAULT (CP05 / CP10) Temperature out of Range Discharge Temperature 1 / High Pressure Comp 1 Fault Compressor 1 High Pressure Temperature out of Range Discharge Temperature 2 / High Pressure Comp 2 Fault Compressor 2 High Pressure Compressor 1 LP Fault... -
Page 69: Alarm Matrix
Reset Timer Indoor Coil Normal Operating Anti-Freeze Protection Warning Temperature Too Low Temperature ActronAir is constantly seeking ways to improve the design of it’s products, therefore specifications are subject to change without notice. Copyright © 2017 Actron Engineering Pty. Ltd. -
Page 70: Troubleshooting Guide
TROUBLESHOOTING GUIDE Description Check Points Check the Outdoor Fan operation. Check the coils are clean. Check for excess refrigerant charge. Compressor HP Fault Check for non-condensible. (Standing pressure with reference to Press. Temp. Chart) Check the HP switch for continuity. (There is no continuity in FAULT condition) Check for less refrigerant charge. -
Page 71: Maintenance
ActronAir is constantly seeking ways to improve the design of it’s products, therefore specifications are subject to change without notice. Copyright © 2017 Actron Engineering Pty. Ltd. - Page 72 MAINTENANCE FREQUENCY CHECKLIST Electrical Service Period Parts Detail of Service Check Service Methods Isolators / Printed Tighten Terminals as necessary on Visual Inspection Circuit Boards isolators & printed circuit boards Check all electrical Electrical terminals, mains, Re-tighten if loose. Connections communications, etc Magnetic...
- Page 73 Investigate any causes for previous Faults fault history on unit. faults, reset fault history. ActronAir is constantly seeking ways to improve the design of it’s products, therefore specifications are subject to change without notice. Copyright © 2017 Actron Engineering Pty. Ltd.
-
Page 74: Sensors Detail
SENSORS DETAIL TEMPERATURE SENSORS ACTRONAIR DESCRIPTION LOCATION TYPE PART NUMBER Compressor 1 Compressor 1 2060-018 Discharge Temp. Sensor Discharge line Compressor 2 Compressor 2 2060-018 Discharge Temp. Sensor Discharge line Outdoor Coil 1 Last return bend of 2060-006 Temperature Sensor... -
Page 75: Key Parts List
Thermostatic Expansion Valve #1 4570-126 Thermostatic Expansion Valve #2 4570-126 Thermostatic Expansion Valve #2 4570-128 ActronAir is constantly seeking ways to improve the design of it’s products, therefore specifications are subject to change without notice. Copyright © 2017 Actron Engineering Pty. Ltd. -
Page 76: Start Up & Commissioning Report
START-UP & COMMISSIONING REPORT COMPLETING SETTINGS LOG PROCEDURE: 1. Switch-Off all motor start circuit breakers (MSCB), leaving circuit breakers CB1, CB2 and CB3 Switched-On. 2. Fill-in all current settings and information in “SETTINGS LOG” below: SETTINGS LOG: NOTES: Please log all required information below, before any software changes are to be made. Failure to do so will cause difficulties in re-starting the unit operation back to original settings. - Page 77 34. Type of outdoor fans fitted 35. Econ. Cycle Fitted 36. Econ. Type Modulate ON/OFF ActronAir is constantly seeking ways to improve the design of it’s products, therefore specifications are subject to change without notice. Copyright © 2017 Actron Engineering Pty. Ltd.
- Page 78 THIS PAGE WAS INTENTIONALLY LEFT BLANK...
- Page 79 THIS PAGE WAS INTENTIONALLY LEFT BLANK...
- Page 80 1800 119 229 www.actronair.com.au Refrigerant Trading Authorisation No.: AU06394 Actron Engineering Pty Ltd ABN 34 002 767 240 Printed in Australia HEAD OFFICE SYDNEY AUSTRALIA Part No. 0525-032 Copyright © 2017 Actron Engineering Pty. Ltd. Ver. 9 180921...
Need help?
Do you have a question about the PKY470T-6Q2 and is the answer not in the manual?
Questions and answers