Table of Contents
Advertisement
User Manual
Programmable Thermostats
This manual covers the following thermostat models:
4030
4235
Read all instructions before proceeding.
Up to 2 Heat / 1 Cool Heat Pump
1 Heat / 1 Cool Conventional
Up to 3 Heat / 2 Cool Heat Pump
Up to 2 Heat / 2 Cool Conventional
with Humidity Control
Store this manual for future reference
®
P
REMIER
S
ERIES
4030-110-03
Advertisement
Table of Contents

Related Manuals for Braeburn 4030


Summary of Contents for Braeburn 4030
- Page 1 User Manual REMIER ERIES Programmable Thermostats This manual covers the following thermostat models: 4030 Up to 2 Heat / 1 Cool Heat Pump 1 Heat / 1 Cool Conventional 4235 Up to 3 Heat / 2 Cool Heat Pump Up to 2 Heat / 2 Cool Conventional with Humidity Control Read all instructions before proceeding.
-
Page 2: Table Of Contents
Contents 5 Additional Operation Features 1 About Your Thermostat Auto Changeover Mode ........28 Quick Reference - Thermostat and Display ....4 Adaptive Recovery Mode ........28 2 User Settings Circulating Fan Mode ...........29 Accessing User Settings ........... 8 Programmable Fan Mode ........29 Table of User Settings ..........9 Compressor Protection .........29 Resetting Service Reminders ........9... - Page 3 Congratulations! You are in control of one of the easiest-to-use thermostats on the market today. This thermostat has been designed to provide you with years of reliable performance and comfort control. Features • Stylish new design with large display and bright blue backlight •...
-
Page 4: About Your Thermostat
1 About Your Thermostat User Manual... - Page 5 Thermostat SYSTEM Button ....Selects the system you want to control PROG Button ......Enters programming mode or hold for 3 seconds to enter SpeedSet mode ® BACK Button* ......Secondary function of the PROG button - Moves to previous setting HOLD Button ......
- Page 6 1 About Your Thermostat User Manual...
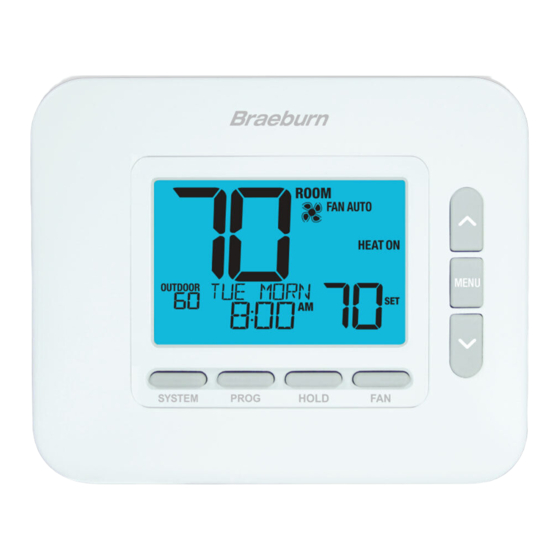
- Page 7 Thermostat Display Room Temperature ......Displays the current room temperature Set Temperature ......... Displays the current setpoint temperature Outdoor Temperature ......If a Braeburn outdoor sensor is connected, the ® outdoor temperature will be displayed Room Humidity (4235 only) ....Displays the current room Relative Humidity level Humidity Call Indicator (4235 only) ..
-
Page 8: User Settings
2 User Settings User Settings allow you set the current time of day as well as customize various thermostat features. To access the User Settings, press and release the MENU button to display the first User Setting. Press the buttons to change the value for the displayed User Setting. -
Page 9: Table Of User Settings
Table of User Settings NOTE: Some user settings may not be available, depending on how the thermostat was configured during installation. No. User Setting Displayed Default Available Description of Setting Settings Available Settings N0 Select to keep message displayed RESET Reset SERVICE FILTER YES... -
Page 10: Setting The Time And Day
No. User Setting Displayed Default Available Description of Setting Settings Available Settings SET TIME 12:00 1-12 Select the current hour of day Current Time of Day (Hour) Set the current hour of the day. If thermostat was configured for a 24-hour clock, the settings 0-24 will be available. SET TIME 12:00 00-60 Select the current minute of the hour... -
Page 11: Backlight Control
No. User Setting Displayed Default Available Description of Setting Settings Available Settings AUTO Backlight only turns on with button press BACKLITE AUTO Constant Backlight Backlight is always on [Only available if thermostat is hardwired with a 24 VAC common (C) wire] Select AUTO (default) for backlight to turn on only with the press of a button. -
Page 12: Service Reminders
No. User Setting Displayed Default Available Description of Setting Settings Available Settings OFF Service filter timer is disabled FILTER Service Filter Timer 30, 60, 90, Select number of days for service filter timer 120, 180, 365 [Not available on heat-only hydronic systems] Select the number of days before receiving a reminder to change your system filter (if equipped). -
Page 13: Temperature & Lock Code
No. User Setting Displayed Default Available Description of Setting Settings Available Settings LONG Select for long (permanent) HOLD mode HOLD LONG Temperature Hold Time 24HR (HOLD Button) Select for 24 hour (temporary) HOLD mode [Only available if programming is enabled] Temperature Hold Time lets you select the time that your thermostat will hold the temperature when the HOLD button has been pressed. -
Page 14: Resetting Thermostat
No. User Setting Displayed Default Available Description of Setting Settings Available Settings NO Reset disabled - no changes made RESET User Reset YES Reset enabled - resets thermostat Selecting YES will reset all user settings, program and current time. Thermostat lock code and Installer Settings will not be affected. User Manual... -
Page 15: Setting Your Program Schedule
3 Setting Your Program Schedule Tips Before Setting Your Program Schedule • Make sure your current time and day of the week are set correctly. • Make sure the AM and PM indicators are correct. • Various installer settings such as auto changeover mode and temperature adjustment limits may affect your programming flexibility. - Page 16 Energy Saving Programs This thermostat comes pre-programmed with a default energy saving program. The following tables outline the pre-programmed times and temperatures for heating and cooling in each of your 4 daily events (2 events if configured for commercial mode). If you wish to use these settings, then no further programming is necessary: Commercial 2 Event Programming Residential 7 Day Programming 5-2 Day Programming...
-
Page 17: Programming A 7 Day Schedule
Setting a 7-Day program – All 7 Days at Once (SpeedSet ® (7-day residential or commercial programming mode only) NOTE: Setting all 7 days at once will copy over any previously programmed individual days. Available Daily Events Residential mode: MORN, DAY, EVE, NITE Commercial mode: OCC, UNOC 1. - Page 18 Setting a 7-Day program – Individual Days (7-day residential or commercial programming mode only) Available Daily Events Residential mode: MORN, DAY, EVE, NITE Commercial mode: OCC, UNOC 1. Press and release the PROG button. 2. Press SYSTEM to select HEAT or COOL. 3.
-
Page 19: Programming A 5-2 Day Schedule
Setting a 5-2 Day Weekday/Weekend Program (5-2 day residential programming mode only) Available Daily Events: MORN, DAY, EVE, NITE 1. Press and release the PROG button. 2. Press SYSTEM to select HEAT or COOL. 3. Press or to select WEEKDAYS or WEEKEND. Press NEXT. 4. -
Page 20: Operating Your Thermostat
4 Operating Your Thermostat Setting the SYSTEM Control Mode The System Control has 5 modes of operation – COOL, OFF, HEAT, AUTO and EMER. The mode can be selected by pressing the SYSTEM button to scroll through the different system modes. NOTE: Depending on how your thermostat was configured, some system modes may not be available. -
Page 21: Setting The Fan Control Mode
Setting the FAN Control Mode The Fan Control has 4 modes of operation – AUTO, ON, CIRC and PROG. The mode can be selected by pressing the FAN button to scroll through the different fan modes. NOTE: Depending on how your thermostat was configured, some fan modes may not be available. AUTO The system fan will run only when your heating or cooling system is running. -
Page 22: Temperature Adjustment
Temperature Adjustment Temporary Adjustment (OVERRIDE) – Press to adjust the current set temperature. The set temperature will change back to your programmed temperature a few hours later or at the start of the next scheduled program event. OVERRIDE will appear in the display during the entire override period. Extended Adjustment (HOLD) –... -
Page 23: Program Event Indicators
Program Event Indicators Program event indicators appear in the display to let you know what part of your current program is active. • Residential Program Mode: MORN, DAY, EVE or NITE • Commercial Program Mode: OCC (occupied) or UNOC (unoccupied) When OVERRIDE appears, your program has been temporarily overridden and will resume in 1-4 hours depending on the selection for User Setting 16 in section 2. -
Page 24: System Status And Maintenance Indicators
System Status and Maintenance Indicators Status indicators are messages or symbols that appear in the display to let you know what function your system is currently performing. They are also used to inform you of various service and maintenance functions. HEAT ON The heating system is running. - Page 25 System Status and Maintenance Indicators (continued) LOCKED Thermostat has been fully or partially locked. See Locking and Unlocking thermostat, section 5. SERVICE A user selectable service reminder for changing the filter, UV bulb or humidifier pad has been triggered. To set or reset these reminders, see User Options, section 2.
- Page 26 System Status and Maintenance Indicators (continued) HIGH LIM Setpoint temperature has reached its upper limit maximum. LOW LIM Setpoint temperature has reached its lower limit maximum. HI TEMP Room temperature has risen above the display range. Cooling will still operate to help lower temperature.
- Page 27 System Status and Maintenance Indicators (continued) CHANGE If batteries are installed and they become BATTERY low, the battery symbol appears in the display. When the batteries become critically low, the battery symbol will flash, and CHANGE / BATTERY will alternate in the display (see “Changing the Batteries”...
-
Page 28: Additional Operation Features
5 Additional Operating Features Auto Changeover Mode When Auto Changeover mode is enabled and selected, the system automatically switches between heating and cooling when the room temperature meets the current heating or cooling set points. To operate properly, the thermostat maintains a forced separation between the heating and cooling setpoints to prevent these systems from working against each other. -
Page 29: Circulating Fan Mode
Circulating Fan Mode Circulating Fan Mode is selected by touching the FAN button until CIRC appears in the display. When in CIRC mode the fan operates as required by the heating and cooling system (just like AUTO mode). When heating or cooling is not active, fan will run as needed to ensure a 35% minimum run time. -
Page 30: Locking And Unlocking The Thermostat
Locking and Unlocking the Thermostat Your 3-digit Lock Code is set in the User Settings portion of this manual (section 2). Once the code is set, the thermostat can be locked or unlocked at any time by entering that code. To lock or unlock the thermostat, press and hold the PROG and HOLD buttons together for 5 seconds. -
Page 31: Indoor Remote Sensing
Indoor remote sensing is achieved by installing a Braeburn remote indoor sensor (model 5390). If a Braeburn indoor remote sensor was installed and properly configured, the thermostat will sense temperature at a remote location or an average of a remote location and the thermostat location. -
Page 32: Humidification / Dehumidification (4235 Only)
Humidification and Dehumidification (4235 only) This thermostat can be used to control the level of humidity when connected to an external humidifier and/or dehumidifier. The cooling system can also be used to help reduce humidity. The current level of relative humidity (%RH) is always displayed on the left side of the display screen, even if humidity control is not enabled (Figure 1). -
Page 33: Pre-Occupancy Purge
Humidification and Dehumidification (4235 only) cont. If the Auto Humidity Setpoint Limit was enabled, the humidification set point may be limited based on the current outdoor temperature. This helps prevent over humidification in extremely cold weather. When there is a call for humidification or dehumidification, the thermostat will indicate HUMIDIFY or DEHUMIDIFY in the lower left side of the display screen (Figure 4). -
Page 34: Condensate Overflow
Condensate Overflow If a condensate overflow monitor is installed, the thermostat can be configured to immediately disable the cooling compressor(s) when this monitor is triggered. Once triggered, the message OVERFLOW will appear in the display. After the monitor is inactive for 1 minute, the compressor(s) will resume operation and the thermostat display will return to normal. -
Page 35: Thermostat Maintenance
6 Thermostat Maintenance Changing the Batteries Depending on your installation, this thermostat may be equipped with two (2) “AA” type alkaline batteries. If batteries are installed and they become low, the battery symbol appears in the display. When the batteries become critically low, the battery symbol will flash, and CHANGE / BATTERY will alternate in the display. - Page 36 When installed by a professional contractor, this product is backed by a 5 year limited warranty. Limitations apply. For limitations, terms and conditions, you may obtain a full copy of this warranty. Visit us online: www.braeburnonline.com/warranty, phone us: 866.268.5599 or write us: Braeburn Systems LLC, 2215 Cornell Avenue, Montgomery, IL 60538. YEAR...
Need help?
Do you have a question about the 4030 and is the answer not in the manual?
Questions and answers